
Related Manuals for Toshiba TDP ET20/U


Summary of Contents for Toshiba TDP ET20/U
- Page 1 672-011-0006A-E IIIIIIIIIII IIIIII IIIIIIIIIIIIIIII Printed in Taiwan on recycled paper...
- Page 2 OWNER’S MANUAL PROJECTOR TDP-ET10 TDP-ET20 (with built-in DVD player) In the spaces provided below, record the Model and Serial Number located at the bottom of your projector. Retain this information for future reference. Model No. Serial No.
-
Page 3: Safety Precautions
SAFETY PRECAUTIONS The lightning flash with arrowhead symbol, within an equilateral triangle, is intended to alert the user to the presence of uninsulated “dangerous voltage” within the product’s enclosure that may be of sufficient magnitude to constitute a risk of electric shock to persons. The exclamation point within an equilateral triangle is intended to alert the user to the presence of important operation and maintenance (servicing) instructions in the literature accompanying the appliance. - Page 4 9740 Irvine Blvd., Irvine, CA 92618-1697, USA Phone: (949) 583-3000 WARNING: Changes or modifications made to this equipment not expressly approved by Toshiba, or parties authorized by Toshiba, could void the USA only user’s authority to operate the equipment. Notice This Class B digital apparatus complies with Canadian ICES-003.
-
Page 5: Important Safety Instructions
IMPORTANT SAFETY INSTRUCTIONS CAUTION: PLEASE READ AND OBSERVE ALL WARNINGS AND INSTRUCTIONS GIVEN IN THIS OWNER’S MANUAL AND THOSE MARKED ON THE UNIT. RETAIN THIS BOOKLET FOR FUTURE REFERENCE. This set has been designed and manufactured to assure personal safety. Improper use can result in electric shock or fire hazard. - Page 6 5. Heat 8. Power-Cord Protection The product should be situated away from Power-supply cords should be routed so heat sources such as radiators, heat reg- that they are not likely to be walked on or isters, stoves, or other products (including pinched by items placed upon or against amplifiers) that produce heat.
- Page 7 IMPORTANT SAFETY INSTRUCTIONS (Continued) 10. Lightning storms 12. Do not place the product For added protection for this product, vertically during a storm or when it is left unat- Do not use the product in the upright tended and unused for long periods of position to project the pictures at the time, unplug it from the wall outlet.
- Page 8 15. Accessories e) If the product has been dropped or dam- aged in any way. Do not place this product on an unstable f) When the product exhibits a distinct cart, stand, tripod, bracket, or table. The change in performance - this indicates a product may fall, causing serious injury need for service.
- Page 9 IMPORTANT SAFETY INSTRUCTIONS (Continued) 19. Replacement Parts 22. Do not use the product in a closed installation state. The user may perform replacement of the lamp but a service technician should Do not place the product in a box or in make all other repairs.
-
Page 10: Power Supply Cord Selection
POWER SUPPLY CORD SELECTION If your line voltage is 220 to 240V, use one of the following types of cable. Plug Line Plug Line configuration Plug type voltage configuration Plug type voltage EURO 220 - 240V Australian 220 - 240V 240V 220 - 240V Switzerland... -
Page 11: Exemption Clauses
EXEMPTION CLAUSES • Toshiba Corporation bears no responsibility in the case of damages arising from natural disaster such as earthquakes, lightning, etc., fire not liable to Toshiba Corporation, acts by third parties, other accidents, or use under abnormal conditions including erroneous or improper operation and other problems. -
Page 12: Remote Control Batteries
OTHER CAUTIONS AND INFORMATION (Continued) Trademarks • VGA, SVGA, XGA, SXGA, UXGA are registered trademarks of International Business Machines Corporation. • Digital Light Processing (DLP), Digital Micromirror Device and DMD are registered trade- marks of Texas Instruments. • HDMI, the HDMI logo and High-Definition Muiltimedia Interface are registered trademarks of HDMI licensing LCC. -
Page 13: Notes On Discs
NOTES ON DISCS On handling discs Notes on copyright • Do not touch the playback side of the disc. The unauthorized recording, use, distribu- tion, or revision of television programs, videotapes, DVDs, and other materials is prohibited under the Copyright Laws. Structure of disc contents Playback side Normally, DVD video discs are divided into... - Page 14 (Menu Playback). Some of the As one of the creators of DVD technology, functions described in this owner’s manual Toshiba DVD players are manufactured to may not work with some discs. the highest standards of quality and, as a...
-
Page 15: Table Of Contents
CONTENTS Before Using SAFETY PRECAUTIONS ....................2 IMPORTANT SAFETY INSTRUCTIONS ................4 POWER SUPPLY CORD SELECTION ................9 IMPORTANT PRECAUTIONS ..................9 EXEMPTION CLAUSES ....................10 OTHER CAUTIONS AND INFORMATION ..............10 REMOTE CONTROL BATTERIES ...................11 NOTES ON DISCS ......................12 CONTENTS ........................ - Page 16 4. Locating a chapter or track ................... 36 5. Repeat playback ....................37 6. Random playback ....................37 7. Changing angles ....................37 8. Title selection ....................... 37 9. Changing soundtrack language ................38 10. Subtitles ......................38 11. Display status ..................... 38 12.
-
Page 17: Checking The Package Contents
Checking the package contents Check that the following items are included in the box, along with the main unit. If any item is missing, please contact the store where you purchased the product. (1) Remote control (2) R03 (size AAA) batteries for remote control ... -
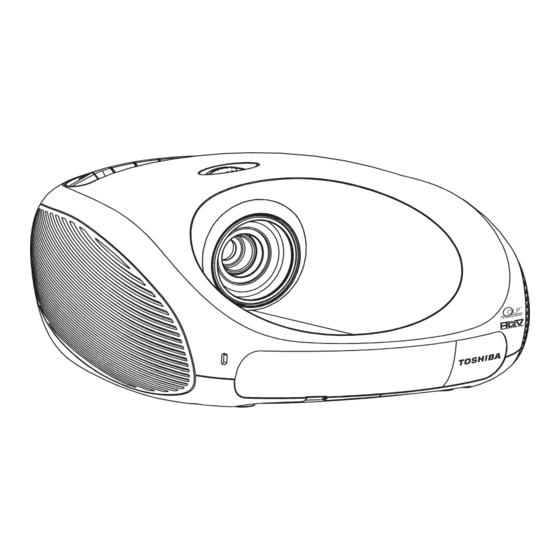
Page 18: Names Of Each Part On The Main Unit
Built-in speaker for subwoofer sound. (11) Disc slot (for TDP-ET20) Insert DVD or CD disc. p.31 (12) Antitheft lock hole TOSHIBA recommend to use Kensington’s MicroSaver or ComboSaver for antitheft lock. For detail, please see the internet web site: www.kensington.com... -
Page 19: Control Panel And Remote Control Parts For Tdp-Et10
Control panel and remote control parts for TDP-ET10 [TDP-ET10 control panel] [TDP-ET10 Remote] For more information, see the pages in parentheses. (1) ON/STANDBY: Switch projector between ON and STANDBY. (2) MENU (INPUT) p.24 p.41 Access the main programming menu or select input source. (3) ENTER : Activate highlighted item in the on screen menu. -
Page 20: Control Panel And Remote Control Parts For Tdp-Et20
Control panel and remote control parts for TDP-ET20 [TDP-ET20 control panel] [TDP-ET20 Remote] ON/STANDBY: Switch the projector between ON and STANDBY. MENU (INPUT) p.24 p.41 Access the main programming menu or select input source. ENTER : Activate highlighted items in the on screen menu. DOWN: Move down and highlights the item. -
Page 21: Terminal Panel
Terminal panel For more information, see the pages in parentheses. Name Function (1) YP B P R /YC B C R (Component) : Input component video signal from video equipment. p.24 p.24 (2) VIDEO terminal : Input video signal from video equipment. p.24 (3) S-Video terminal : Input S-Video signals from video equipment. -
Page 22: Preparing And Using The Remote Control
Preparing and using the remote control ■ Loading dry-cell batteries ■ Point the remote control into the remote control toward the projector’s infrared remote sensor and (1) Remove the battery cover. press a button. • Operating the projector from the front (2) Insert the dry-cell batteries. -
Page 23: Placement
Placement Placement Styles This device can be placed in some different placement styles. The factory setting is “floor- mounted front projection” although you can modify the setting according to your needs. Set the Projection mode in accordance with your needs through remote control or control panel, enter SETUP menu. - Page 24 Projection Distance and Size Use the figures, tables, and formulas below to determine the projection size and projection distance. (Projection sizes are approximate values for full-size picture with no keystone adjustment.) Screen As seen from above Lens center As seen from side Lens center a (cm) = projection size (inches) x 1.433 –...
-
Page 25: Connection
Connection Before connection • Some types of computers cannot be used or connected to this projector. • Turn off the power of both devices before connecting. • The figure below is a sample connection. This does not mean that all of these devices can or must be connected simultaneously. - Page 26 Connecting with HDMI DVD player From HDMI Output Terminal (Digital Audio/Video) Connecting with Computer Computer From RGB Output Terminal From Audio Output Terminal Notes ■ • To select audio input, use On Screen menu, see p.28 • Signals which resolution exceeds the native resolution (854 x 480 pixels) will be compressed. For this reason, some information may be lost, or image quality may be affected.
-
Page 27: Turning The Power On And Off
Turning the power on and off ■ Connecting the power cord Insert the power cord connector into the AC IN socket of the projector. Insert the power cord plug into a wall Power cord or other power outlet. connector ■ Turning the power on Turn on the main power switch. - Page 28 ■ Using standby mode to save power and turning the power off Put the Projector into standby mode to save power. Pressing the ON/STANDBY button once, a power off indication message will appear. Press the ON/STANDBY button to put the projector into standby mode. The power off message has to be displayed for the second press of the power button to be valid.
-
Page 29: Basic Operations
Basic operations Turn on the power. Turn on the power by following the instruction in “Turning the power on” in p.26 Activate the connected device. Turn on and start the connected device. Select MENU language. This projector can display the on screen language in English, French, German, Spanish, Deutsch, Italian, Portuguese, Japanese, Traditional Chinese, Simplified Chinese and Korean. - Page 30 Projector placement angle adjustments (1) There are 4 adjustable feet on bottom of the projector. Each foot height can be adjusted by screwing and the placement angle and the height of the projected image can be changed. (2) To adjust the projection size, it is needed to change placement closer/farther to the projection screen.
- Page 31 Basic operations (Continued) Adjusting the volume The speaker volume can be adjusted by pressing [-] [+] key on control panel or remote control. Turning off the power Turn off the power by following the instruction in “Turning the power off” in p.27 ■...
-
Page 32: Tdp-Et20 Dvd Playback
TDP-ET20 DVD playback About icons on the heading bar show the playable discs for the function described under that heading. You can use this function with DVD video discs. You can use this function with Video CDs. You can use this function with Audio CDs and CD-R/RW discs. Setup the DVD player. -
Page 33: Parental
TDP-ET20 DVD Playback (Continued) PARENTAL DVD discs equipped with the password function are rated according to their content. The contents allowed by a parental lock level and the way a DVD disc can be controlled may vary from disc to disc. Notes ■... -
Page 34: Pbc Setting
PBC setting This DVD supports Video CDs equipped with the PBC (Version 2.0) function. (PBC is the abbreviation of Playback Control.) You can enjoy two playback variations depending on types of discs. • Video CD not equipped with PBC function (Version 1.1) Sound and movie can be played on this DVD in the same way as an audio CD. -
Page 35: Menu Language
TDP-ET20 DVD Playback (Continued) MENU LANGUAGE DVD menu language can be selected in this menu. (1) Select MENU LANG in LANGUAGE SETUP page and press key. (2) Press key to select DVD menu language and press key. Notes ■ Some DVD video discs may not include your pre-selected language. In this case, the DVD video player automatically displays disc menus consistent with the disc’s initial language setting. - Page 36 CAUTION Never insert your finger into the disc hole when load the disc to the disc slot. Keep your fingers well clear of the disc slot when disc is loading or unloading. Neglecting to do so may cause personal injury. Notes ■...
-
Page 37: Playing In Fast Reverse Or Fast Forward Directions
TDP-ET20 DVD Playback (Continued) • If the disc is not loaded even if the disc is inserted into the DVD disc slot, remove the disc once and try to load the disc again. • Do not put any objects other than discs in the disc slot. Doing so may cause the projector to malfunction. -
Page 38: Repeat Playback
5. Repeat playback Repeat playback allows you to repeat Chapter/Title/All (DVD) or Track/All (CD/VCD). (1) Press [REPEAT] on the remote control during playback or stop mode. Repeat mode will change repeatedly as following. DVD: Chapter Title All Off CD/VCD: Track ... -
Page 39: Changing Soundtrack Language
TDP-ET20 DVD Playback (Continued) • Depending on the DVD, the title menu may be displayed automatically when the disc is loaded. • Depending on the DVD, a chapter menu may be displayed after you select a title. 9. Changing soundtrack language You can select the language when you play a multilingual disc. -
Page 40: Multimedia Files On Dvd/Cd Playback
• Press [Display] again • Press [Display] again to erase this OSD. (2) When CD/VCD is playing. • Press [Display] again to erase this OSD. 12. Multimedia files on DVD/CD playback (1) Load a disc on which Multimedia files have been recorded in the disc slot. (2) A file menu screen will appear on the screen. - Page 41 • You must obtain any required permission from copyright owners to download to download or use copyrighted content. Toshiba cannot and does not grant such permission.
-
Page 42: Using Menus
Using menus You can call up on-screen menus, and conduct a number of adjustments and settings using the operation buttons on the control panel (main unit side) and remote control. p.18 p.19 ■ How to use the menus The menu shown below is for operation instructions purposes and might differ from the actual display. -
Page 43: Input Menu
Using menus (Continued) ■ Input MENU Video input source and audio input source can be selected separately in this projector. Video input Video input source can be selected in this menu from DVD, Component, HDMI, Video, S-video and Computer. Press . - Page 44 Sharpness Adjust the sharpness of the image. Press . Adjust with / [ - ] (Softer) or / [ + ] (Sharper) key. Detail Enhancement Set the function to enhance detail of the image. Press . Adjust with / [ - ] (Lower) or / [ + ] (Higher) key.
- Page 45 Using menus (Continued) Advanced MENU Overscan Adjust overscan ratio of the image. Press . Adjust with / [ - ] (Lower) or / [ + ] (Higher) key. No overscan when set to 100% NTSC mode Set the black level for video/s-video input. Press .
-
Page 46: Audio Setting Menu
■ Audio setting MENU Volume Adjust the volume of sound. Press . Adjust with / [ - ] (Lower) or / [ + ] (Higher) key. Bass Adjust the bass level of sound. Press . Adjust with / [ - ] (Lower) or / [ + ] (Higher) key. -
Page 47: Setup Menu
Using menus (Continued) ■ Setup MENU Language Select a language used in menu system.The following ten languages are available. - English - French (Français) - Germany (Deutsch) - Italian (Italiano) - Spanish (Español) - Portuguese (Português) - Japanese (日本語) - Simplified Chinese (简体中文) - Traditional Chinese ( 繁體中文... -
Page 48: Status Display Menu
Setting fan mode to high increases the cooling fan speed. Set this option to use the pro- jector at high altitude (over xxxx meter / yyyy feet above sea level) Press . Select from Standard/High with / [UP] [DOWN] key. Projection mode Sets projection mode in accordance with placement style. - Page 49 Using menus (Continued) Notes ■ • If a lamp is used for extended periods, images will appear dark, and the lamp could burn out. This is characteristic of a lamp, and is not malfunction. (The lifetime may vary much due to conditions of use.) Total Time Display the total time that this projector is used.
-
Page 50: About Lamp
If this happens, replace it with a new one. WARNING • If the projector is mounted on the ceiling, it is recommended to use your Toshiba dealership when the lamp has to be exchanged. - Page 51 Lamp replacement (Continued) CAUTION • If you have been using the projector, the lamp will be very hot, and may cause burn injuries. Wait for the lamp to cool (for longer than 1 hour) before replacing it. • If the lamp should break, please handle with care to avoid injury due to broken pieces and contact your dealer for repair service.
- Page 52 Install the new lamp. Insert the new lamp into position and lock it into place with the three lamp locking screws. Replace the lamp cover. Align the cover, and press it in, then tighten the screws loosened in step 4 until the lamp cover is no longer loose.
-
Page 53: Lens And Main Unit Cleaning
Lens and main unit cleaning WARNING Request cleaning and maintenance of a ceiling-mounted unit from your projector dealership. Attempting to clean/replace the lamp at a high site by yourself may cause you to drop down, thus resulting in injury. ■ Lens cleaning •... -
Page 54: Trouble Indications
Trouble indications The indicator lights inform you of internal abnormalities. LED indicators State/Problems No power ⇒ Problem with projector No LED lit • Unplug the power cord, and contact your dealer. ⇒ The lamp cover is not properly attached. • Unplug the power cord, and reattach the lamp cover. Power went out during use ⇒... -
Page 55: Before Calling Service Personnel
Before calling service personnel If you think something is wrong, check the followings before contacting customer service. Please see “Trouble indications” as well. p.53 If This Happens Check No Power • Is the power cord plugged in? Is it connected to the projector? •... - Page 56 For TDP-ET20 If This Happens Check Playback does • Is the disc inserted? not start • Is the disc inserted upside down? • Is an unplayable disc inserted? • Is the disc dirty? • Is the parental lock function set? The playback •...
-
Page 57: Specification
Specification ■ List of general specifications Item Specification Consumption Power 340 W Input Rating 100~240V AC, 50~60 Hz, 4.0A Weight 4.8 kg (TDP-ET10) 5.0 kg (TDP-ET20) External Dimensions 344 x 322 x 155 mm (W × H × D) Cabinet material PC+ABS resin Conditions for usage environ- Temp: 5°C to 35°C;... -
Page 58: List Of Supported Signals (Y/Pb/Pr Signals)
■ List of supported signals (Y/Pb/Pr signals) Signal format fh (kHz) fv (Hz) 480i(525i)@60Hz 15.73 59.94 480p(525p)@60Hz 31.47 59.94 576i(625i)@50Hz 15.63 50.00 576p(625p)@50Hz 31.25 50.00 720p(750p)@60Hz 45.00 60.00 720p(750p)@50Hz 37.50 50.00 1080i(1125i)@60Hz 33.75 60.00 1080i(1125i)@50Hz 28.13 50.00 ■ List of supported signals (Video, S-Video signals) Video mode fh (kHz) fv (Hz) -
Page 59: Control Terminal
Specification (Continued) ■ CONTROL terminal Conditioning of the projection unit Pin No. Signal Name Description can be also done by a computer via No connection the RS-232C. Receiving data ● Pin assignment Sending data Data terminal ready Signal ground Data set ready Request to send Consent to send No connection...
Need help?
Do you have a question about the TDP ET20/U and is the answer not in the manual?
Questions and answers