Advertisement
Quick Links
Advertisement

Related Manuals for Mercia Garden Products 04DTPROMA0806FBS-V2


Summary of Contents for Mercia Garden Products 04DTPROMA0806FBS-V2
- Page 1 2mm Drill bit...
-
Page 2: Any Questions
PLEASE SCAN HERE: ANY QUESTIONS? Scan code contact us via our customer portal. - Page 3 ACCESSING VIDEO GUIDES... ACCESSING VIDEO GUIDES... 3. Scan QR code... Some steps within this set of instructions come with an added video guide for your convenience. These can be accessed via the QR code and used to aid you in constructing that step.
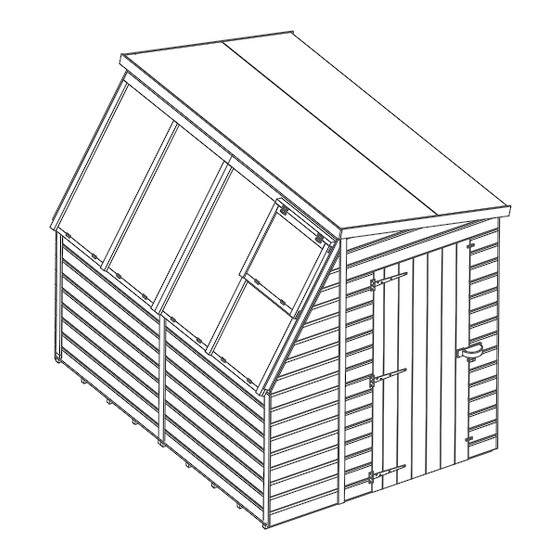
- Page 4 Overall Dimensions: Width = 1881 mm Depth = 2552 mm Blue Label Green Label Height = 2126 mm Base Dimensions: Width = 1753 mm Depth = 2446 mm Bench QTY 2 Opening Window QTY 1 Top Left Gable QTY 1 Top Right Gable QTY 1 AI-04S21SS1180X558-V1 AI-SW634X533-V1...
-
Page 5: Pre-Assembly
Step 1 IMPORTANT: Pre-drill before xing screws. Nail Bag Parts Needed - No.1 QTY 1 PLEASE SCAN HERE: - No.10 QTY 1 There may be extra screws present in the nail bag - No.35 QTY 3 80mm Screw x 12 40mm Screw x 28 Choose on which side you want the door to open. - Page 6 Step 3 Step 5 IMPORTANT: Pre-drill before xing screws. IMPORTANT: Pre-drill before xing screws. Parts Needed- No.2 QTY 2 (or 1 QTY 1) Parts Needed- No.4 QTY 1 - No.5 QTY 1 **Please note: These side panels are interchangeable. Decide which layout Locate the Left &...
- Page 7 Step 7 Step 9 IMPORTANT: Pre-drill before xing screws. IMPORTANT: Pre-drill before xing screws. Parts Needed - No.12 QTY 1 - No.13 QTY 1 **Please note: Decide which position of the Glazed Roofs works Locate the Top Left & Right Gables best for you before assembly.
- Page 8 Step 13 Step 11 IMPORTANT: Pre-drill before xing screws. IMPORTANT: Pre-drill before xing screws. Parts Needed - No.7 QTY 1 Parts Needed - No.9 QTY 2 - No.20 QTY 2 - No.8 QTY 1 Position Glazed Roofs (No.7 & No.8) Fix roof strip (No.20) to back of the Roof on top of Side Gables and up against Panel (No.9) against the end as shown...
- Page 9 Step 15 Step 16 IMPORTANT: Pre-drill before xing screws. IMPORTANT: Pre-drill before xing screws. Parts Needed- No.29 QTY 1 Once the roof is xed, attach the building to the Floor with 50mm screws. Cut two strips of felt (No.29) to 2650mm lengths and place onto the roof.
- Page 10 Step 17 IMPORTANT: Pre-drill before xing screws. Step 19 IMPORTANT: Pre-drill before xing screws. Parts Needed - No.16 QTY 2 Parts Needed - No.23 QTY 2 - No.25 QTY 2 - No.30 QTY 1 - No.26 QTY 2 Fix casement stay (No.30) to glazed roof in Fix the Glacia Roof Fascias (No.16) to the the centre of the opening using 4 x 16mm side of the Glazed Roof using 3x40mm...
- Page 11 Step 22 Step 21 IMPORTANT: Pre-drill before xing screws. IMPORTANT: Pre-drill before xing screws. Parts Needed - No.28 QTY 2 Parts Needed - No.19 QTY 1 - No.31 QTY 2 - No.21 QTY 1 - No.32 QTY 1 Locate the assembled Bench (No.11) on top of Bench Support Frames (No.23).
- Page 12 PLEASE SCAN HERE: ANY QUESTIONS? Scan code contact us via our customer portal.
Need help?
Do you have a question about the 04DTPROMA0806FBS-V2 and is the answer not in the manual?
Questions and answers