Table of Contents
Advertisement
Quick Links
Advertisement
Table of Contents

Related Manuals for Teac AG-15D


Summary of Contents for Teac AG-15D
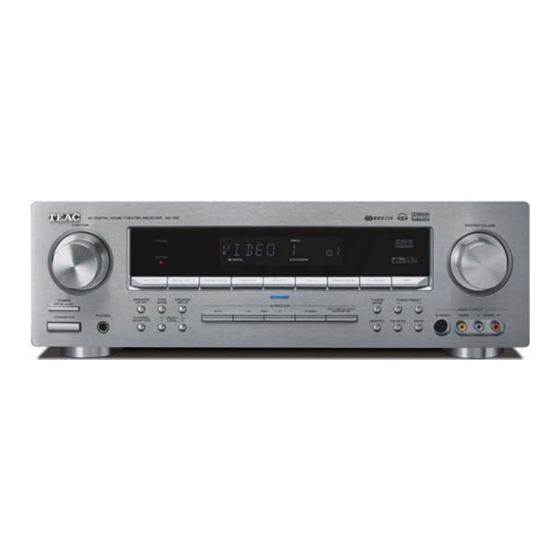
- Page 1 9A10229100 AG - 15D AV Digital Home Theater Receiver OWNER’S MANUAL...
-
Page 2: Table Of Contents
Contents How to Reset the Settings to the FACTORY DEFAULTS Thank you for choosing TEAC. Read this manual carefully Memory Backup to get the best performance from this unit. If the power supply is interrupted for 14 days or longer, the settings kept in memory (such as preset stations and speaker Contents . -
Page 3: Before Use
Before Use Read this before operation CAUTION Regarding Placement < As the unit may become warm during operation, always leave To maintain proper ventilation, be sure to leave a space sufficient space around the unit for ventilation. around the unit (from the largest outer dimensions including The ventilation holes should not be covered. -
Page 4: Connection (Fm Antenna)
Connection (FM antenna) CAUTION: FM Outdoor Antenna < Switch off the power to all equipment before making In an area where FM signals are weak, it will be necessary to connections. use an 75-ohm unbalanced-type outdoor FM antenna. < Read the instructions of each component you intend to use Generally, a 3-element antenna will be sufficient;... -
Page 5: Connection (Am Antenna)
Connection (AM antenna) AM Indoor Loop Antenna < If the AM loop antenna provided does not deliver sufficient reception (often due to being too far from the transmitter or The high-performance AM loop antenna provided with this in a concrete building, etc.), it may be necessary to use an unit is sufficient for good reception in most areas. -
Page 6: Connections
Connections DIGITAL IN CAUTION: < Switch off the power to all equipment before making CD-R, MD, etc. connections. < Read the instructions of each component you intend to use DIGITAL OUT with this unit. < Be sure to insert each plug securely. To prevent hum and DVD, CD, etc. - Page 7 AC Power Cord S-VIDEO or VIDEO jacks Insert the supplied AC power cord in the AG-15D’s socket. After all other connections are complete, connect the plug S-VIDEO connection is your second choice and is superior to to the AC wall socket.
-
Page 8: Example: Connection To A Dvd Player
Connections (Example: Connection to a DVD player) DIGITAL VIDEO IN SCART, COMPONENT, etc. DIGITAL OUT VIDEO OUT TV (MONITOR) -
Page 9: Example: Connection To Video Cassette Recorders
Connections (Example: Connection to Video Cassette Recorders) VCR (VIDEO1) S-VIDEO S-VIDEO LINE LINE VIDEO AUDIO LINE S-VIDEO S-VIDEO VCR (VIDEO2) TV (MONITOR) -
Page 10: Speaker Connections
Speaker Connections FRONT FRONT SPEAKER SPEAKER CENTER SPEAKER WOOFER SURROUND SURROUND SPEAKER SPEAKER SURROUND SURROUND SUBWOOFER BACK BACK SPEAKER SPEAKER Caution: Caution: To avoid damaging the speakers with a sudden high-level The metal portions of the two separate wires should not signal, be sure to switch the power off before connecting the touch or an electrical short can occur. -
Page 11: Positioning Of The Speakers
Positioning of the Speakers CENTER FRONT FRONT (LEFT) (RIGHT) SUBWOOFER SURROUND SURROUND (LEFT) (RIGHT) SURROUND BACK SURROUND BACK (LEFT) (RIGHT) The positioning of speakers differs according to the size and acoustics of the listening room. While actually listening to a program source, try various speaker positions to determine which layout provides the best surround effect. -
Page 12: Names Of Each Control 1
Names of Each Control 1 Front Panel Remote Control Unit... - Page 13 STANDBY/ON TUNING/PRESET When the POWER switch of the main unit is depressed, use In the manual tuning mode, use these buttons to tune in a this button to turn the unit on or standby. station. In the preset tuning mode, use these buttons to select a preset channel.
- Page 14 Names of Each Control 2 Note: < To simplify explanations, instructions refer to names of buttons and controls on the front panel, making no mention of the use of remote control unit. < Names colored in blue are mainly used for the receiver. Remote Control Unit Remote Select buttons (RECEIVER, CD, TAPE/MD, TV, VCR, DVD, CABLE, SAT)
- Page 15 Numeric buttons Front Panel Display When controlling a device other than receiver, these buttons can be used to select track numbers, TV channel, etc. MACRO (M1, M2, M3) ST. TUNED MEMORY Use these buttons to execute the programmed macro functions. ES 96/24 NEO:6 MPEG D EX...
-
Page 16: Battery Installation
2. Insert two “AAA” (R03, UM-4) dry batteries. Make sure that the batteries are inserted with their positive “+” and negative “_” poles positioned correctly. When you want to control the TEAC AG-15D receiver, press the RECEIVER button. Point the remote control unit towards the remote sensor on the front panel of the component you want to control, and press the buttons to operate. - Page 17 The factory default setup code of CD and DVD is “000”. You will be able to control certain TEAC’s CD player and DVD player with this code. If the code doesn’t work, try other codes.
- Page 18 Remote Control Unit 2 Using a Punch-through Function TV channel punch-through: To program “TV channel punch-through”, press and hold This remote control unit may be programmed to operate down both the TV button and the CH/LEVEL (+) button for either “RECEIVER volume punch-through” or “TV volume more than 1 second.
- Page 19 Macro Function Press the ENTER button to store the macro. This function enables you to program up to 10 sequential operations into a single button. You can store up to three sequences (macros) into the M1, M2 and M3 buttons. Press and hold down both the ENTER button and one of three numeric buttons (1, 2 or 3) corresponding to the number of MACRO button (M1, M2 or M3) for more...
-
Page 20: Speaker Configuration 1
Speaker Configuration 1 It is important to perform speaker configuration prior to using Speaker Setup the unit. To enjoy multi-channel surround sound, such as 5.1, you need 5 speakers (Front Left, Center, Front Right, Surround Right, Surround Left) and a powered sub-woofer. In addition to above, you will need surround back speakers for 7.1 channel surround sound. - Page 21 Press the SPEAKER SETUP button. Press the SELECT buttons to change the setting. For details of each setting, see page 22 to 25. “SUB-W Y” or “SUB-W N” appears on the display. Repeat step to set other configurations. Each time the SPEAKER SETUP button is pressed, the mode is changed as follows: sub-woofer setting When all the configurations has been finished, press the...
- Page 22 Speaker Configuration 2 Subwoofer Setting Surround Back Speaker Setting SUB W-Y (Subwoofer-Yes): < When the surround left and right speakers are set to “SURR N Select this when a powered sub-woofer is connected. (none)”, the surround back speaker is also set to “SURR-B N (none)”...
- Page 23 Balancing relative volume between Adjust the volume of each speaker so that the test tone from each speakers sounds the same. speakers using Test Tone The test tone function is useful to adjust the relative volume between speakers. Once the balance is set, you don’t have to change the balance as long as the speakers aren’t moved.
- Page 24 Speaker Configuration 3 Balancing relative volume between Within 5 seconds, press the LEVEL buttons to change the level. speakers during playback of DVD (During playback of DVD,) press the CH SEL (CHANNEL SELECTOR) button. < The level of speakers can be adjusted in 1 dB steps from –15 dB to +15 dB.
- Page 25 How to store your channel level setting How to call the stored setting CHANNEL SELECTOR CHANNEL SELECTOR LEVEL MEMORY LEVEL When all the settings have been finished in step Press the CHANNEL SELECTOR (CH SEL) button to page 24, press the MEMORY button of the main unit. display USER, REF.1 or REF2.
-
Page 26: Basic Operation 1
Basic Operation 1 When you selected VIDEO(1, 2 or 3) or CD in step press the DIGITAL INPUTS button repeatedly to select the terminal. o1: Select this when the source is connected to DIGITAL IN (OPTICAL 1) terminal. o2: Select this when the source is connected to DIGITAL IN (OPTICAL 2) terminal. - Page 27 Recording a Source Dolby Headphone Dolby Headphone technology allows you to listen to music, 1. Select a source to be recorded by turning the FUNCTION watch movies, or play video games with the dramatic knob (or pressing one of the FUNCTION buttons of the surround effects of a 5.1-channel soundtrack through any remote control unit).
- Page 28 Basic Operation 2 EXTERNAL IN (8 channel direct input) Muting To mute the sound temporarily, press the MUTING button. Press the MUTING button again to restore the sound. If you If the source is connected to EXTERNAL IN jacks, press the change the volume during the muting, the muting will be EXTERNAL IN button.
- Page 29 Tone Control Sleep Timer The power can be switched off after a specified amount of time. Press the SLEEP button repeatedly until desired time appears on the display. SLEEP 10 (20 ... 90): The power will be switched off 10 (20 ... or 90) minutes later.
-
Page 30: Dubbing The Audio And Video Signals Separately
Dubbing from VIDEO 2 or 3 to VIDEO 1 Dubbing the audio and video signals separately While dubbing the video signal of VIDEO 2 or 3, you can Select VIDEO 2 or 3 by turning the FUNCTION knob. replace the sound from VCR with the sound from an audio source such as CD. -
Page 31: Surround Mode 1
Surround Mode 1 When Dolby Digital signals are input and IN-AUTO is selected, < When EXTERNAL IN is selected, the DSP and the AUTO button the surround mode is set to DOLBY DIGITAL automatically. do not work. If you press the DSP button, you can select one of the following surround modes: If a digital device is connected to DIGITAL IN terminals, select desired decoding mode by pressing the AUTO... - Page 32 Surround Mode 2 STEREO There are two formats for DTS-ES: DTS-ES Discrete 6.1 Because the signals for 6.1 channels (including the surround back channel) are fully independent, it is possible to achieve a sense that the acoustic image are moving about freely among the background sounds surrounding the listener from 360 degrees.
- Page 33 Dolby Digital Surround EX Dolby Pro Logic This mode creates the back (sometimes also referred to as Dolby Pro Logic is a matrix decoder that decodes the four “surround center”) signals from the surround left and right channels of surround sound (front left, center, front right and signals in Dolby Digital 5.1 channel source using a matrix surround) that have been encoded onto the stereo decoder and provides 6.1 channel surround playback.
-
Page 34: Dolby Pro Logic Iix Music Parameters
DOLBY PRO LOGIC IIx MUSIC parameters Within 8 seconds, press the SELECT button to change the value. PANO (panorama): This mode extends the front stereo image to include the surround speakers for an exciting wraparound effect with You can adjust the parameters for DOLBY PRO LOGIC IIx MUSIC. side wall imaging. -
Page 35: Speaker Layouts For Dolby Virtual Speaker
Speaker Layouts for Dolby Virtual Speaker Dolby Virtual Speaker technology virtualizes the missing speakers; in Wide mode, it virtualizes the necessary speakers and enhances the surround experience. There are four speaker layouts for Dolby Virtual Speaker. Select DOLBY VS REF or DOLBY VS WIDE mode by pressing the DSP button. -
Page 36: Dynamic Range Compression
Dynamic Range Compression Tuner Select TUNER by turning the FUNCTION knob (or press the TUNER button of the remote control unit). In many listening situations, you may find loud passages Make sure the antennas have been connected (see page 4-5). objectionable. - Page 37 Press the TUNING/PRESET button to tune in a station. FM MODE Button In the Automatic tuning mode, the unit starts searching for a station. When a station is tuned in, the tuning process will stop automatically. If you want to stop the tuning process, press the TUNING MODE button.
-
Page 38: Preset Tuning
Preset Tuning How to select preset stations TUNING MODE If “PRESET” indicator isn’t lit, press the TUNING MODE button to select the preset tuning mode. MEMORY TUNINIG/ PRESET < When using the remote control unit, you can skip this step. Press the TUNING/PRESET buttons (or the PRESET You can store up to 30 stations. -
Page 39: Osd (On-Screen Display) 1
OSD (On-Screen Display) 1 If a TV is connected to this unit, you can use the OSD (on- Press the ENTER button. screen display) to set up the unit. Make sure your TV is connected to the receiver and turned <... - Page 40 OSD (On-Screen Display) 2 Speaker Setup (Auto) Function Select See page 42 for details. FUNCTION SELECT DIGITAL INPUT VIDEO SELECT TONE CONTROL Speaker Setup (Manual) :MOVE OSD:BACK ENTER:SEL MANUAL SETUP SUBWOOFER - YES Select an item you want to change using the up/down FRONT - LARGE CENTER -...
- Page 41 Surround Mode Auto OSD SURROUND MODE MAIN MENU DOLBY PLIIx MOVIE SPEAKER SETUP DOLBY PLIIx MUSIC FUNCTION SELECT DOLBY PRO LOGIC SURROUND MODE DOLBY VS REF CH LEVEL SETUP DOLBY VS WIDE AUTO OSD : ON :MOVE OSD:BACK :SELECT OSD:END ENTER:SEL.
-
Page 42: Speaker Setup (Auto)
Speaker Setup (Auto) The test tone for the automatic speaker setup is very loud. Check the options. Keep away from the speakers to protect your ears. Number of available speakers If a TV is connected to this unit, you can use the OSD (on-screen Press the 5 or b button (or the SPEAKER SETUP button of display) to set up the unit. - Page 43 Press the ENTER button (or the MEMORY button of the Press the ENTER (or the MEMORY button) to save the main unit) to start the automatic speaker setup. setting and exit the Speaker setup mode. The microphone perceives the test tone emitted from each “COMPLETE”...
-
Page 44: Troubleshooting
The color system of the receiver does not match your TV. problem yourself before you call your dealer or a TEAC service Connect a PAL TV. -
Page 45: Specifications
Specifications Amplifier Section AM Tuner Section Output Power Tuning Range ..522 kHz to 1,611 kHz (9 kHz steps) 100 W + 100 W (Stereo, 0.2 % THD, 20 Hz to 20 kHz, 6 Ω) Usable Sensitivity. -
Page 46: Code List 1
Code List 1 ADMIRAL 050 134 EMERSON 158 098 050 AKAI 093 049 123 ERRES 049 142 ALBA EUROPHON 098 046 097 099 051 115 132 ALBIRAL FERGUSON 146 040 041 150 057 061 116 149 ALCATEL FIDELITY 099 149 AMSTRAD 158 021 FINLUX... - Page 47 KARCHER PERDIO KENDO PHILCO 016 030 101 050 109 124 079 132 KENNEDY 144 019 109 KORTING 050 059 111 PHILIPS 009 010 013 018 024 099 049 050 KRIESLER 099 049 050 019 142 149 078 019 142 148 149 078 088 LENOIR PHOENIX 099 053 109 111 125...
- Page 48 Code List 2 SIERA 099 049 050 019 142 149 078 AIWA 011 042 AKAI 042 022 052 032 033 SILVER ALBA 008 020 SINGER 016 046 050 109 AMSTRAD SINUDYNE 158 046 050 059 109 127 ANITSCH SONOKO 049 090 ARC EN CIEL 042 056 052 SONY...
- Page 49 003 005 041 042 056 050 052 033 SYMPHONIC 011 017 TASHIKO NORDMENDE 039 042 056 052 053 035 TATUNG 011 042 OPTONICA 045 046 TEAC 011 042 ORION 002 010 025 027 TEKNIKA OSAKI TELEAVIA 042 056 052 OTTO VERAND TELEFUNKEN 042 056 052 P.
- Page 50 ONKYO ZENDER PANASONIC PHILIPS ZOPPAS 042 056 PIONEER 002 023 PROSCAN 003 004 003 004 SAMSUNG 016 008 SHERWOOD 024 010 011 012 013 014 020 021 SONY TEAC 000 025 THOMSON 003 004 TOSHIBA VIETA YAMAHA ZENITH 011 010...
- Page 51 CABLE 002 003 009 030 006 008 Starquest Allegro 018 021 TV86 Archer 018 026 Teleview Bell&Howell Tocom 007 008 Century Toshiba Citizen 018 021 Tusa Comtronics Unika Contec Universal 018 019 Easten Viewstar Emerson Zenith 000 024 Everquest 010 014 Zentek Focus Garrard...
- Page 52 Code List 4 ALBA PHILIPS 003 011 012 029 AMSTRAD 008 019 027 PHONOLA ARCON PROSAT ARISTONA ASTRA QUADRAL BLAUPUNKT QUELLE BUSH RADIOLA CH.MASTER REDIFFUSION CITY COM SABA SALORA DYNASAT SAMSUNG 003 022 ECHOSTAR 002 009 032 020 SAT PARTNER EMME ESSE SATPORTNER FAIT...
- Page 53 015 014 REALISTIC MONDIAL SAMSUNG 001 005 048 002 042 SHARP 003 011 NAKAMICHI SHERWOOD 015 016 017 NIKKO TEAC (TAPE) 000 018 ONKYI 013 037 011 021 038 TEAC (MD) 019 020 PANASONIC 051 052 TECHINCS PHILPS TOSHIBA PIONEER...
-
Page 54: Function Table
Function Table REMOTE SELECT TAPE/MD CABLE POWER POWER POWER POWER POWER STANDBY STANDBY STANDBY STANDBY STANDBY STANDBY STANDBY (POWER OFF) (POWER OFF) (POWER OFF) (POWER OFF) (POWER OFF) (POWER OFF) (POWER OFF) CHANNEL CHANNEL CHANNEL CHANNEL INPUT INPUT INPUT INPUT SELECTOR SELECTOR SELECTOR... - Page 55 REMOTE SELECT TAPE/MD CABLE STOP STOP STOP STOP RECORD RECORD TITLE SEARCH SEARCH SEARCH SKIP SKIP PAL/NTSC REPEAT REPEAT 0-9, +10 0-9, +10 0-9, +10 0-9, +10 0-9, +10 0-9, +10 The functions of the buttons differ in accordance with the component selected by the REMOTE SELECT buttons. <...
- Page 56 7733 Telegraph Road, Montebello, California 90640 Phone: (323) 726-0303 TEAC CANADA LTD. 5939 Wallace Street, Mississauga, Ontario L4Z 1Z8, Canada Phone: (905) 890-8008 TEAC MEXICO, S.A. De C.V Campesinos N°184, Colonia Granjas Esmeralda, Delegacion Iztapalapa, CP 09810, México DF Phone: (525) 581-5500 TEAC UK LIMITED 5 Marlin House, Croxley Business Park, Watford, Hertfordshire, WD18 8TE, U.K.
Need help?
Do you have a question about the AG-15D and is the answer not in the manual?
Questions and answers