
Subscribe to Our Youtube Channel
Related Manuals for Sulzer ABS XFP-PE4


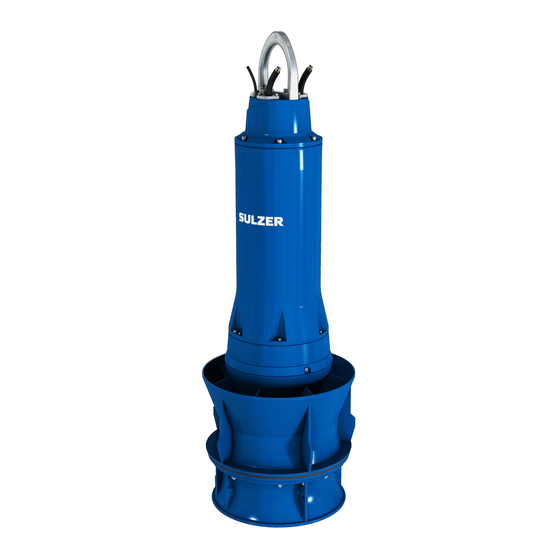
Summary of Contents for Sulzer ABS XFP-PE4
- Page 1 Submersible Sewage Pump Type ABS XFP-PE4 [NG2] Submersible Mixed Flow Column Pump Type ABS AFLX-PE4 [NG2] Submersible Propeller Pump Type ABS VUPX-PE4 [NG2] Workshop Manual www.sulzer.com...
-
Page 2: Table Of Contents
Hydraulics XFP - PE4 ...................................18 CB impeller .....................................18 CH impeller .....................................20 Hydraulics VUPX - PE4 ................................23 10.1 Hydraulic ......................................23 10.2 Diffuser ......................................24 Hydraulics AFLX - PE4 .................................25 11.1 Hydraulic ......................................25 11.2 Diffuser ......................................26 Sulzer reserves the right to alter specifications due to technical developments. - Page 3 Mechanical seals - removal and fitting ............................27 10.1 Primary seal - hydraulic side (cooled and non-cooled versions) ....................27 10.2 Secondary seal and lipseal - motor side (cooled and non-cooled versions) ..................28 Bearings - removal and fitting ..............................30 Cooling jacket - removal and fitting ............................34 Stator - removal and fitting ................................36 Oil and coolant changing ................................38 Cable - removal and fitting ................................41 13.1 Standard and ATEX cable inlet ...............................41 13.2 US cable inlet ....................................42...
-
Page 4: Health And Safety Instructions
The Sulzer units are prepared for transportation by placing them on an adequately strong horizontal surface. Care should be taken that they cannot fall over. The hoist must be adequately dimensioned for the total weight of the Sulzer units, the lifting chain and shackle, and all accessories which may be fitted, and must comply with local valid safety regulations. Do not stay or work in the swivel area of a suspended load. The lifting hook height must take into consideration the height of the Sulzer units as well as the length of the lifting chain. -
Page 5: Tightening Torques
• Shaft sleeve tools - to aid fitting of mechanical seals and bearings on shaft. • Stator extraction tool. • Stator pullers - fits to extraction tool. • Stator press tool. • Pressure test tools. • Hose clamp pliers The above tools, with exception of bearing pullers and hose clamp pliers, are specific to Sulzer pump maintenance and repair, and must be manufactured locally. Dimension drawings for that purpose can be found at the end of this booklet. -
Page 6: Explosion Approved Motor
Explosion approved motor Explosion approved motors may only be repaired or maintained by authorized Sulzer personnel or other personnel authorized by Sulzer. The personnel and /or your workshop may also require authorisation by your local government. EN 60079-19:2019 and EU ATEX Directive 2014/34/EU are valid for all maintenance and repair work carried out on products used in hazardous locations. -
Page 7: Dimensional Checks Drawing For Explosion Approved Motors Pe4
Dimensional checks drawing for explosion approved motors PE4 Cable seal Connection chamber Surface finish Ra 3.2 Gap 4 Gap 2 Ø54 mm Gap 5 Ø34 mm Connection chamber Surface finish Ra 3.2 Flame Path Length (mm) Diameter (mm) Gap 6 + 0.060 Ø80.3 + 0.045... -
Page 8: Motor Unit Xfp - Pe4 With Cooling Jacket
Motor Unit XFP - PE4 with cooling jacket Standard and ATEX... - Page 9 Position Description Plug screw M20x1.5 DIN908 A4 Seal ring A20x26x2 VF DIN7737 Connection chamber Plug screw M12 DIN908 1.4401 Screw cyl. M16x50 DIN912 1.4401 Seal ring A12x16x2 VF DIN7737 Screw ex. M20x60 DIN933 1.4401 Mechanical seal 55 mm Lifting bracket Mechanical seal support ring Plug screw M12 DIN908 1.4401 Grub screw M5x6 DIN916 1.4401...
-
Page 10: Motor Unit Xfp - Pe4 Without Cooling Jacket
Motor Unit XFP - PE4 without cooling jacket Standard and ATEX... - Page 11 Position Description Grub screw M5x6 DIN916 1.4401 Mechanical seal support ring Connection chamber Grub screw M6x20 DIN916 1.4401 Screw cyl. M16x50 DIN912 1.4401 Hex. screw M20x30-ISO4017-A4-70 Screw ex. M20x60 DIN933 1.4401 Zinc anode Lifting bracket Cap screw Plug screw M12 DIN908 1.4401 Sensor Seal ring A12x16x2 VF DIN7737 Stator...
-
Page 12: Motor Unit Vupx - Pe4
Motor Unit VUPX - PE4 US version (VUPX 500 & 600 only) (VUPX 500 & 600 only) - Page 13 Position Description Grub screw M5x6 DIN916 1.4401 Support washer Connection chamber Cylinder screw Screw cyl. M16x50 DIN912 1.4401 Washer Screw ex. M20x60 DIN933 1.4401 Mechanical seal support ring Lifting bracket Grub screw M6x20 DIN916 1.4401 Plug screw M12 DIN908 1.4401 Hex.
-
Page 14: Motor Unit Aflx 0600 - Pe4
Motor Unit AFLX 0600 - PE4 US version... - Page 15 Position Description Mechanical seal support ring Grub screw M5x6 DIN916 1.4401 Connection chamber Washer Screw cyl. M16x50 DIN912 1.4401 Mechanical seal support ring Screw ex. M20x60 DIN933 1.4401 Grub screw M6x20 DIN916 1.4401 Lifting bracket Hex. screw M20x30-ISO4017-A4-70 Plug screw M12 DIN908 1.4401 Zinc anode Seal ring A12x16x2 VF DIN7737 Cap screw...
-
Page 16: Motor Unit Aflx 0700 - Pe4
Motor Unit AFLX 0700 - PE4 US version... - Page 17 Position Description Grub screw M5x6 DIN916 1.4401 Washer Connection chamber Mechanical seal support ring Screw cyl. M16x50 DIN912 1.4401 Grub screw M6x20 DIN916 1.4401 Screw ex. M20x60 DIN933 1.4401 Hex. screw M20x30-ISO4017-A4-70 Lifting bracket Zinc anode Plug screw M12 DIN908 1.4401 Cap screw Seal ring A12x16x2 VF DIN7737 Sensor...
-
Page 18: Hydraulics Xfp - Pe4
Hydraulics XFP - PE4 CB impeller Position Description Impeller key Impeller Collar washer Lock washer Cylinder screw (impeller bolt) Impeller cap Hex nut Spring ring Cylinder screw (stud with M-hydraulic type) O-ring Plug screw Seal ring Flat gasket (only J-hydraulic) Cylinder screw Spring washer Hex nut... - Page 19 Dismantling and assembly of the hydraulic • With hoist, suspend motor unit above impeller. • Bring shaft end and key into line with impeller bore and lower NOTE: For professional and safe dismantling or assembly we motor unit with care until shaft is fully home. recommend to change the asymmetric lifting hoop of the XFP to In horizontal position: M12 attachment swivel part no. 14990096, or to the symmetric •...
-
Page 20: Impeller
CH impeller Position Description Impeller key Impeller Wear ring Spring pin Grooved pin Collar washer Lock washer Cylinder screw (impeller bolt) Wear ring Hex nut Cylinder screw (stud with (147) M-hydraulic type) O-ring (148) Plug screw Seal ring Flat gasket Cylinder screw Spring washer Hex nut... - Page 21 Dismantling and assembly of the hydraulic • With a hoist, suspend motor unit above impeller. • Bring shaft end and key into line with impeller bore and lower NOTE: For professional and safe dismantling or assembly we motor unit with care until shaft is fully home. recommend to change the asymmetric lifting hoop of the XFP to In horizontal position: M12 attachment swivel part no. 14990096, or to the symmetric •...
- Page 22 • Allow the adhesive at least 12 hours to set. Changing of the impeller wear ring (option) The wear ring (147) for the impeller (option) is shrink-fitted and secured by heavy duty dowel pins. The wear ring can be exchanged if necessary. Please contact your Sulzer Service Organisation.
-
Page 23: Hydraulics Vupx - Pe4
Hydraulics VUPX - PE4 10.1 Hydraulic Position Description Hydraulics: 241 Diffuser Support washer O-ring Impeller key 244/245 Propeller Propeller nut Nord-Lock securing washers ® Locknut screw O-ring Propeller cap Seal washer Socket head screw Wearl ring Socket head screw Bellmouth Hex. -
Page 24: Diffuser
The propeller with blades may only be exchanged as a complete unit. If individual propeller blades have to be exchanged then it is necessary for a Sulzer authorized workshop to turn the outside of (199) the propeller with the new blades fitted ,and re-balance. Assembly of the hydraulic... -
Page 25: Hydraulics Aflx - Pe4
Hydraulics AFLX - PE4 11.1 Hydraulic Position Description Hydraulics: 241 Diffuser Support washer Impeller key Impeller Impeller cap Nord-Lock securing washers ® Impeller screw O-ring Bellmouth Adjusting screws (142) Hex head screw Hex nut Hex head screw Diffuser: Socket head screw Socket head screw 198 Adapter flange... -
Page 26: Diffuser
Dismantling and refitting of the impeller 11.2 Diffuser Dismantling and refitting of the diffuser Dismantling of the impeller • Dismantle bellmouth (242). Dismantling of the diffuser NOTE: hang the pump above a suitable solid mounting pedestal • Dismantle bellmouth and remove impeller as described in and lower the pump carefully, so far that the impeller will be section 11.1. supported by the mounting pedestal. •... -
Page 27: Mechanical Seals - Removal And Fitting
Mechanical seals - removal and fitting 10.1 Primary seal - hydraulic side (cooled and non-cooled versions) Position Description Impeller key Grub screw Mechanical seal support ring Mechanical seal Socket head cap screw Seal holding plate O-ring Lower bearing flange Removal • Remove impeller key (66) • Remove volute, bottom plate and impeller (see pages 18 - 22). -
Page 28: Secondary Seal And Lipseal - Motor Side (Cooled And Non-Cooled Versions)
10.2 Secondary seal and lipseal - motor side (cooled and non-cooled versions) Position Description • Fit intermediate cover to lower bearing flange (67) and secure with screws (660). Socket head screws Note: to fit correctly the arrow embossed on the intermediate Cover plate (pump with cooling cover must be lined up with the arrow embossed on the bearing jacket only) flange. -
Page 30: Bearings - Removal And Fitting
Bearings - removal and fitting Position Description Connection chamber Alignment slot O-ring Terminal block and mounting rail Bearing cap Bearing Cable glands (power cables) Cable glands (control cables) Rivet 32 Bearing flange O-ring Motor housing Upper bearing Fitting Removal IMPORTANT: BEARINGS MUST BE COLD PRESSED INTO •... - Page 32 Position Description Bearing flange O-ring (cooling jacket version only) O-ring O-ring Circlip Roller bearing Ball bearings Bearing lid Hex nuts Rotor shaft Motor housing Cylinder screws Alignment slot in connection chamber Rivet Lower bearings Fitting IMPORTANT: BEARINGS MUST BE COLD PRESSED INTO Removal PLACE.
-
Page 34: Cooling Jacket - Removal And Fitting
Cooling jacket - removal and fitting Position Description Screw cyl. Cooling jacket clamp Connection chamber O-ring O-ring Lifting nut Cooling jacket O-ring O-ring Motor housing Lower bearing housing Removal Fitting • Drain coolant (see page 39). • Check o-rings for damage and replace if necessary. •... -
Page 36: Stator - Removal And Fitting
Stator - removal and fitting Position Description Screw cyl. Cooling jacket clamp Connection chamber O-ring 40/41 Cable glands - power and control leads O-ring Motor housing Screw cyl. Lower bearing housing Stator O-ring O-ring Removal Fitting Note: the stator is held in by a compression fit only, so therefore it Note: refitting of stator can only be done by means of a heavy can only be removed by pulling it out by force. hydraulic press and insertion tool. - Page 37 40/41...
-
Page 38: Oil And Coolant Changing
Oil and coolant changing ATTENTION Only use products that are approved by the manufacturer! Before loosening, place a cloth over plug screws to contain any possible spray of oil or glycol as the pump de-pressurises. Symbols: Legend Fill with or drain oil. Fill with or drain coolant. Visual inspection Oil filling without cooling jacket 1 Oil draining/filling inspection chamber. Pump should be in a horizontal position. Inspection port for motor housing. Oil draining seal chamber. 4 Oil filling seal chamber. Pump should be in a horizontal position (quantities see Table 1, page 39). - Page 39 Initial filling ex-factory: Fill or drain coolant at position 6. Glycol: Caflon HTF-PG, part number 11030056. Alternative coolant released by Sulzer: Propylenglykol Code 27; (Houghton Deutschland GmbH); DOWCAL 20-G HEAT TRANSFER FLUID (Dow Deutschland GmbH & Co. OHG); DOWCAL brand of - The Dow Chemical Companyy Data is only valid for coolant used ex-factory (additional product information and safety data sheet are available on request).
- Page 40 Reference values for antifreeze behaviour Concentration (vol.%) Antifreeze in °C Caflon HTF-PG Water to -3 to -8 to -13 to -23 to -35 to -52 to -16* * default Coolant filling quantities PE4 XFP 105J, 155J, 206J, XFP 100J, 150J, 200J, Motor PE4 250J, 255J, 305J 300J 50 Hz 60 Hz...
-
Page 41: Cable - Removal And Fitting
Cable - removal and fitting 13.1 Standard and ATEX cable inlet Position Description Cylinder screw Cable cap Cable clamp Cylinder screw Cable gland Washer Strain relief (hose clamp) Connection chamber Cylinder screw Cooling jacket clamp O-ring Terminal block 32 Upper bearing flange Replace cable Removal • Remove screws (2), and where fitted cooling jacket clamps (60), and using hoist, slowly remove connection chamber (1) from motor housing, far enough to have access to upper... -
Page 42: Us Cable Inlet
13.2 US cable inlet Position Description Cylinder screw Cable cap Washer Cable gland Washer Cable gland Washer Strain relief (shrink hose) Connection chamber Cylinder screw Cooling jacket clamp O-ring Terminal block 32 Upper bearing flange Replace cable Removal • Remove screws (2), and where fitted cooling jacket clamps (60), and using hoist, slowly remove connection chamber (1) from motor housing, far enough to have access to upper bearing flange (32). -
Page 43: Test Procedures
Test procedures High voltage test A high voltage test is recommended, if the pump has been repaired or reassembled, to detect any breakdown of insulation. Link all power leads together and apply a voltage between earth and power leads of 1500 V, with trip level at 10 mA, for one second. Earth check An earth check is recommended if the pump has been repaired or reassembled. This involves checking the continuity between earth lead and the motorhousing (where earth lead is connected). This can be done with a resistance meter. -
Page 44: Tool Drawings
Tool drawings 15.1 Wear ring removal tool Material: STEEL Dimensions in mm All unspecified chamfers 1 mm Untoleranced machined dimensions to DIN 7168 m Nominal Over 30 Over 120 Over 400 Over 1000 Over 2000 0 to 6 Over 6 to 30 size to 120 to 400 to 1000 to 2000... -
Page 45: Mechanical Seal Press Tool - Primary Static Seal
15.2 Mechanical seal press tool - primary static seal Material: Body: NYLON; Handle/Screw:SS Dimensions in mm All unspecified chamfers 1 mm Washer 17mm DIN433 M16 Locking Nut DIN985 55.1 71.6 Untoleranced machined dimensions to DIN 7168 m Nominal Over 30 Over 120 Over 400 Over 1000 Over 2000 0 to 6... -
Page 46: Mechanical Seal Press Tool - Primary Dynamic Seal
15.3 Mechanical seal press tool - primary dynamic seal Material: Body: NYLON; Handle/Screw:SS Dimensions in mm All unspecified chamfers 1 mm Washer 17mm DIN433 M16 Locking Nut DIN985 +0,1 42.1 Untoleranced machined dimensions to DIN 7168 m Nominal Over 30 Over 120 Over 400 Over 1000 Over 2000 0 to 6... -
Page 47: Shaft Sleeve Too - Secondary Seals
15.4 Shaft sleeve too - secondary seals Material: STEEL Dimensions in mm Untoleranced machined dimensions to DIN 7168 m Nominal Over 30 Over 120 Over 400 Over 1000 Over 2000 0 to 6 Over 6 to 30 size to 120 to 400 to 1000 to 2000... -
Page 48: Lipseal Press Tool
15.5 Lipseal press tool Material: NYLON Dimensions in mm 79.5 SECTION A-A Untoleranced machined dimensions to DIN 7168 m Nominal Over 30 Over 120 Over 400 Over 1000 Over 2000 0 to 6 Over 6 to 30 size to 120 to 400 to 1000 to 2000... -
Page 49: Press Tool - Compression Fitting
15.6 Press tool - compression fitting Material: STEEL Dimensions in mm M20 Nut Untoleranced machined dimensions to DIN 7168 m Nominal Over 30 Over 120 Over 400 Over 1000 Over 2000 0 to 6 Over 6 to 30 size to 120 to 400 to 1000 to 2000 to 4000 Deviation... -
Page 50: Mechanical Seal Press Tool - Secondary Static Seal
15.7 Mechanical seal press tool - secondary static seal Material: NYLON Dimensions in mm 81.5 SECTION A-A Untoleranced machined dimensions to DIN 7168 m Nominal Over 30 Over 120 Over 400 Over 1000 Over 2000 0 to 6 Over 6 to 30 size to 120 to 400... -
Page 51: Mechanical Seal Press Tool - Secondary Dynamic Seal
15.8 Mechanical seal press tool - secondary dynamic seal Material: NYLON Dimensions in mm + 1 . Untoleranced machined dimensions to DIN 7168 m Nominal Over 30 Over 120 Over 400 Over 1000 Over 2000 0 to 6 Over 6 to 30 size to 120 to 400... -
Page 52: Air Pressure Test Piece
15.9 Air pressure test piece Material: STEEL Dimensions in mm All unspecified chamfers 1 mm Untoleranced machined dimensions to DIN 7168 m Nominal Over 30 Over 120 Over 400 Over 1000 Over 2000 0 to 6 Over 6 to 30 size to 120 to 400 to 1000 to 2000 to 4000... -
Page 53: Upper Bearing Press Tool
15.10 Upper bearing press tool Material: NYLON Dimensions in mm Untoleranced machined dimensions to DIN 7168 m Nominal Over 30 Over 120 Over 400 Over 1000 Over 2000 0 to 6 Over 6 to 30 size to 120 to 400 to 1000 to 2000 to 4000... -
Page 54: Bearing Alignment Sleeve
15.11 Bearing alignment sleeve Material: STEEL Dimensions in mm R 0.5 R 0.5 Ø65.2 +0.20 -0.00 80.000 Ø69.8 +0.00 -0.20 Untoleranced machined dimensions to DIN 7168 m Nominal Over 30 Over 120 Over 400 Over 1000 Over 2000 0 to 6 Over 6 to 30 size to 120... -
Page 55: Bottom Bearings Press Tool
15.12 Bottom bearings press tool Material: STEEL Dimensions in mm Ø82.0 Ø70.5 Chamfer 0.5 mm Untoleranced machined dimensions to DIN 7168 m Nominal Over 30 Over 120 Over 400 Over 1000 Over 2000 0 to 6 Over 6 to 30 size to 120 to 400... -
Page 56: Upper Bearing Lid Alignment Tool
15.13 Upper bearing lid alignment tool Material: STEEL Dimensions in mm Three parts pressed into plate and glued in position with Loctite 215.68 18.5 Standard 12 mm x 8 mm drill bushing 0.01 Untoleranced machined dimensions to DIN 7168 m Nominal Over 30 Over 120... -
Page 57: Stator Press Tool
15.14 Stator press tool Material: TOOL STEEL 1.2312 Dimensions in mm M12 (2x180°) +0.5 314.8 -0.2 12.5 X (1:4) Untoleranced machined dimensions to DIN 7168 m Nominal Over 30 Over 120 Over 400 Over 1000 Over 2000 0 to 6 Over 6 to 30 size to 120... -
Page 58: Pressure Test Tool
15.15 Pressure test tool Material: MILD STEEL Dimensions in mm ½" BSP Ø6 Knurl outside surface O-ring 10 x 2 mm M12 x 1.5 Ø18 ALL CHAMFERS 1 x 45º SECTION A-A Untoleranced machined dimensions to DIN 7168 m Nominal Over 30 Over 120 Over 400... -
Page 59: Stator Extraction Tool
15.16 Stator extraction tool Material: MILD STEEL Dimensions in mm Notes: Part no. 2 is a single-acting, hollow cylinder, with a minimum cylinder stroke of 290 mm (connects to a hydraulic hand pump). Before applying hydraulic pressure, engage the disc tool into position against the stator core by tightening the adjusting nut (1). The puller rod (6) is extended to adapt to varying stator stack heights by using a second adjusting nut to join it to an M16... -
Page 60: Stator Puller Disc Tool
15.17 Stator puller disc tool Material: MILD STEEL Dimensions in mm undercut °5 corner XFP motor 50 Hz XFP motor 60 Hz 220/4, 300/4, 370/4, 450/4 250/4, 350/4, 430/4, 520/4 Ø207.5 Ø206 185/6, 220/6, 300/6, 370/6 210/6, 250/6, 350/6, 430/6 Ø221.5 Ø220 150/8, 185/8, 220/8, 300/8 170/8, 210/8, 250/8, 350/8... -
Page 61: 15.18 Cooling Jacket Fitting Tool
15.18 Cooling jacket fitting tool Material: MILD STEEL Dimensions in mm M16 X 75 (Qty 4) 40 X 17.5 x 6 (Qty 4) Qty 2 Untoleranced machined dimensions to DIN 7168 m Nominal Over 30 Over 120 Over 400 Over 1000 Over 2000 0 to 6 Over 6 to 30 size... -
Page 62: Terminal Block Wiring
Terminal block wiring 16.1 230/3/50 YΔ, 400/3/50 YΔ, 500/3/50 YΔ, 460/3/60 DOL, 600/3/60 DOL 50 Hz Stator leads Stator leads 230/3/50 YΔ 400/3/50 YΔ 500/3/50 YΔ U1 V1 F0 F1 Power leads Power leads U1(1) V1(2) W1(3) U2(6) V2(4) W2(5) 60 Hz Stator leads Stator leads 460/3/60 DOL 600/3/60 DOL... -
Page 63: 380/3/60 Yδ, 220/3/60 Yδ, 208/3/60 Dol, 220/3/60 Dol, 230/3/60 Dol
16.2 380/3/60 YΔ, 220/3/60 YΔ, 208/3/60 DOL, 220/3/60 DOL, 230/3/60 DOL 60 Hz 60 Hz 380/3/60 YΔ 220/3/60 YΔ U3 V2 Stator leads Stator leads Power leads Power leads U1(1) V1(2) W1(3) U2(6) V2(4) W2(5) EUROPE U1(1) V1(2) W1(3) U2(6) V2(4) W2(5) EUROPE T1(1) T2(2) T3(3) - Page 64 SERVICE LOG Pump Type: Serial No: Date Hours of Comments Sign Operation...
- Page 65 SERVICE LOG Pump Type: Serial No: Date Hours of Comments Sign Operation...
- Page 66 SERVICE LOG Pump Type: Serial No: Date Hours of Comments Sign Operation...
- Page 67 SERVICE LOG Pump Type: Serial No: Date Hours of Comments Sign Operation...
- Page 68 Sulzer Pump Solutions Ireland Ltd. Clonard Road, Wexford, Ireland Tel. +353 53 91 63 200. www.sulzer.com...
Need help?
Do you have a question about the ABS XFP-PE4 and is the answer not in the manual?
Questions and answers