
Related Manuals for Moxa Technologies UPort 1600-8-G2 Series


Summary of Contents for Moxa Technologies UPort 1600-8-G2 Series
- Page 1 UPort™ 1600-8-G2 Series Quick Installation Guide Version 1.1, October 2024 Technical Support Contact Information www.moxa.com/support 2024 Moxa Inc. All rights reserved. P/N: 1802016000111 *1802016000111*...
-
Page 2: Package Checklist
Overview Moxa’s USB-to-serial products provide a wide range of easy-to-use solutions for adding Windows COM ports, macOS, and Linux tty ports through the USB port of a computer. The UPort 1600-8-G2 Series comprises the following models: 8-port Models UPort 1610-8-G2 RS-232 USB-to-serial converter 0 to 60°C... - Page 3 Accessories Power Adapters • PWR-12050-USJP-S1 (for all models except UPort 1650-8-G2-Hub) • PWR-12300-WP-S2 (for UPort 1650-8-G2-Hub) • PWR-12150-*-SA-T (for all -T models; *: EU/USJP/CN/UK/AU) WARNING This product is intended to be supplied by an approved external power source (UL listed/IEC 60950-1/IEC 62368-1) which output complies with ES1/SELV, PS2/LPS, output rating 12 to 48 VDC, 0.34 A minimum (by DC jack) or 5 VDC, 0.61 A minimum (by USB port), ambient temperature 75°C minimum.
-
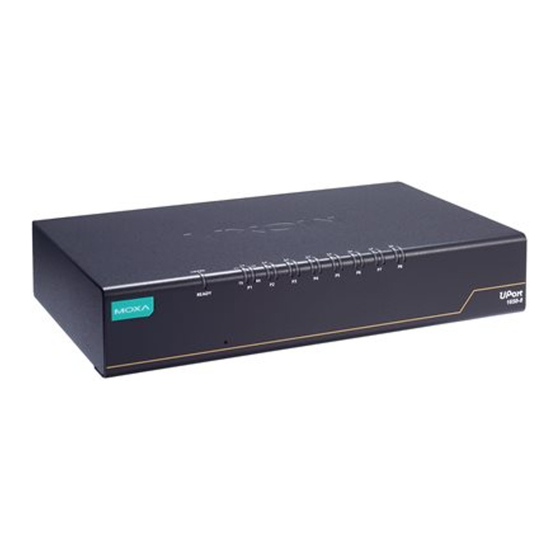
Page 4: Hardware Introduction
Hardware Introduction An example of the UPort 1650-8-G2-Hub front and back panel: Front View Back View USB Cable Usage Guide The new Moxa latch USB cable comes with a latch on each side of the Type-A connector and a screw on the Type-B connector. - Page 5 Plugging in the USB Cable Using Type A Connector To plug in the USB cable to the host computer and secure it, do the following: Step 1: Press both latches on the Step 2: Plug the connector into the connector. USB slot.
-
Page 6: Led Indicators
NOTE The latch cable is designed to lock to most of the computer USB sockets; however, there may be some sockets that are designed with a slight marginal difference, which may cause the latch not to lock to your computer USB sockets perfectly. Plugging in a USB Cable to the Host Computer Using Type B Connector The screw on the side of type B connector is for fixing the cable firmly... -
Page 7: Serial Port Pin Assignments
Serial Port Pin Assignments The serial ports on the UPort 1600-8-G2 have DB9 male connectors. Refer to the following table below for the RS-232 and RS-422/485 pin assignments. Serial Port RS-422/ RS-232 RS-485-2W (Male DB9) RS-485-4W TxD-(A) – TxD+(B) – RxD+(B) Data+(B) RxD-(A) -
Page 8: Software Installation
UPort 1600-8-G2 DIP Switches Location Software Installation To install the UPort driver, please follow the installation procedure described in the Mounting the UPort 1600-8-G2 section. UPort converters can be connected to any upstream type A USB port that is on the PC host or an upstream hub. UPort converters are hot- pluggable, and therefore there is no need to power down your computer prior to installation. - Page 9 2. After the driver is successfully installed, connect the UPort to your computer. Then, click Scan to review the installation results and confirm that the UPort is connected to your computer. 3. Check Launch Windows Driver Manager to configure the UPort after the setup is completed.
-
Page 10: Installing The Linux Driver
The right-click context menu has the shortcut to Windows Device Manager and Auto Startup utilities if needed. For configuration details, check COM Port Configuration section in the User Manual. Installing the Linux Driver Run the following commands from the Linux prompt: # CD /moxa # tar xvfz moxa-uport-1200-1400-1600-series-linux-kernel- [kernel version]-driver-v[driver version].tgz... -
Page 11: Communication Testing
Communication Testing There are Moxa companion utilities for serial communication testing. For this purpose, you may use PComm Terminal. For other useful utilities, please refer to the UPort’s User Manual for an introduction. Mounting the UPort 1600-8-G2 Dimensions Unit: mm (inches) Wall Mounting The mounting kit is 2 mm in height, and the two centers of the mounting kit... -
Page 12: Din Rail Mounting
DIN-rail Mounting The UPort 1600-8-G2 models have a DIN-rail kit option to allow installation on a DIN rail. DIN-rail attachments can be purchased separately to attach the product to a DIN rail. The DIN rail attachments should be oriented with the metal springs on top. First, attach the DIN-rail attachments to the rear of the UPort 1600-8- G2 with screws, showed by the circles. -
Page 13: Product Specifications
To remove the UPort 1600-8-G2 from the DIN rail, do the following: STEP 1: Pull down the latch on the DIN-rail kit with a screwdriver. STEP 2 & 3: Slightly pull the UPort 1600-8-G2 forward and lift it up to remove it from the mounting rail. -
Page 14: Warranty
Regulatory Approvals EN IEC 61000-4-4, EN IEC 61000-4-5, EN IEC 61000-4-6, EN IEC 61000-4-8, EN IEC 61000-4-11, EN IEC 61000-6-2, EN IEC 61000-6-4 FCC Part 15B Class A, U62368-1, LVD Warranty Warranty Period 5 years Details See www.moxa.com/warranty The latest specifications for Moxa's products can be found at https://www.moxa.com. - Page 15 KC Certification 사용자안내문 (User Guide) 이 기기는 업무용 환경에서 사용할 목적으로 적합성평가를 받은 기기로서가정용 환경에서 사용하는 경우 전파간섭의 우려가 있습니다. (This equipment has KC approval for use in industrial environments and could possibly interfere with household equipment.) 기 종별 사용자안내문 Type of Equipment User Guide A 급...
Need help?
Do you have a question about the UPort 1600-8-G2 Series and is the answer not in the manual?
Questions and answers