Moxa Technologies UPort 1100 Series User Manual
Usb-to-serial converter
Hide thumbs
Also See for UPort 1100 Series:
- User manual (45 pages) ,
- User manual (26 pages) ,
- Quick installation manual (2 pages)

Related Manuals for Moxa Technologies UPort 1100 Series


Summary of Contents for Moxa Technologies UPort 1100 Series
- Page 1 UPort 1100 Series User Manual Version 10.0, June 2024 www.moxa.com/products © 2024 Moxa Inc. All rights reserved.
- Page 2 UPort 1100 Series User Manual The software described in this manual is furnished under a license agreement and may be used only in accordance with the terms of that agreement. Copyright Notice © 2024 Moxa Inc. All rights reserved. Trademarks The MOXA logo is a registered trademark of Moxa Inc.
-
Page 3: Table Of Contents
Table of Contents Introduction ............................4 Overview .............................. 4 ARDC (Automatic Recovery Data Communication) ................4 Package Checklist ..........................5 Product Features ........................... 5 Product Specifications ..........................5 LED Indicators ............................6 Adjustable Pull High/Low, Terminator Resistors for the RS-485 Port ............7 Installation and Configuration ...................... -
Page 4: Introduction
• Overview The UPort 1100 Series is part of Moxa’s UPort line of USB-to-serial converters. The UPort line provides a range of easy-to-use solutions for adding COM ports through a PC’s USB port. Simply install the drivers, connect the UPort to your computer, plug in your serial devices, and you’re ready to go. Programming is not required, and you do not need to worry about IRQs, configuring a board, power requirements, or connection schemes. -
Page 5: Package Checklist
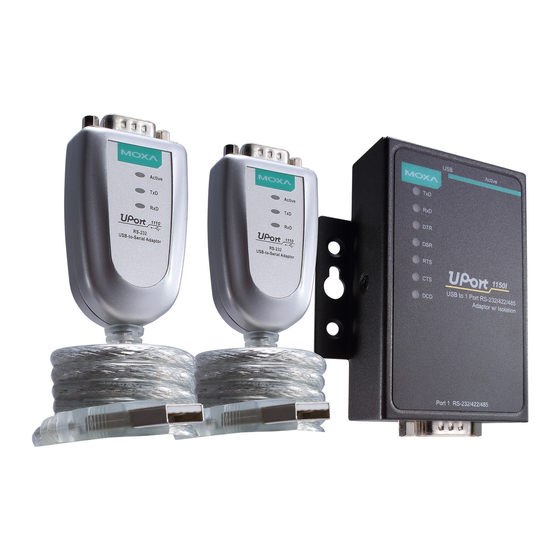
Package Checklist The following items are included in your UPort 1110/1130/1130I/1150 package: UPort 1100 Series USB-to-serial converter • Quick installation guide (printed) • • Warranty card The UPort 1130/1130I/1150 also come with the following item: 1 serial adapter: Mini DB9F-to-TB •... -
Page 6: Led Indicators
PC configuration. Green Blinking: Serial device is transmitting data. Yellow Blinking: Serial device is receiving data. DTR, DSR, RTS, Steady: Require these signals to operate. CTS, DCD Off: Disable these signals to operate. UPort 1100 Series User Manual... -
Page 7: Adjustable Pull High/Low, Terminator Resistors For The Rs-485 Port
To set the pull high/low resistors to 1 kΩ, make sure both assigned DIP switches are in the ON position. This is the default setting. Pull High Pull Low Terminator 1 kΩ 1 kΩ 120 Ω 150 kΩ 150 kΩ Disable UPort 1100 Series User Manual... -
Page 8: Installation And Configuration
Install file. The Setup Wizard will open. Click Next to begin installing the driver. Click Next to install the driver in the indicated folder or use the drop-down folder list to locate a different folder. UPort 1100 Series User Manual... -
Page 9: Hardware Installation
COM port and will then install another driver for the new COM port. ATTENTION For the best results, we recommend you install the driver before plugging the converter into the USB port. Please refer to the previous section on Initial Driver Installation for instructions. UPort 1100 Series User Manual... -
Page 10: Windows 98/Me And Windows 2000
USB port will activate the UPort installation program. The first part of the installation procedure installs the software for the UPort itself; the second part of the procedure installs the serial ports. The following instructions are for Windows XP, Windows 2003/Vista, Windows 2008, and Windows 2012 systems. UPort 1100 Series User Manual... - Page 11 After a moment, the Found New Hardware Wizard will open. If you see the following screen, select No, not this time, then click Next. On the next window that appears, select Install the software automatically (Recommended); then click Next. UPort 1100 Series User Manual...
- Page 12 The next window indicates Windows has completed the installation. Click Finish to continue with installation procedure. After Windows has completed installing the converter, it will automatically detect the new COM port. The Found New Hardware speech balloon will appear in the bottom right corner of the Windows desktop. UPort 1100 Series User Manual...
- Page 13 The Found New Hardware Wizard will open. If you see the following screen, select No, not this time, then click Next. After a moment, the Found New Hardware Wizard will open. Select Install the software automatically (Recommended), then click Next. UPort 1100 Series User Manual...
- Page 14 Windows logo testing. This is a standard warning, and Moxa has thoroughly tested the driver for safe Windows operation. Please click Continue Anyway to proceed. 11. Windows will take a few moments to install the driver. UPort 1100 Series User Manual...
-
Page 15: Configuring The Com Port
You may also go to Device Manager and right-click the MOXA USB Serial Port, which will be listed under Ports along with your PC’s built-in COM ports. In the context menu that pops up, you may select Properties in order to modify the COM port settings. UPort 1100 Series User Manual... -
Page 16: Configuring The Converter
Multi-port serial adapters. In the context menu that pops up, you may select Properties in order to modify the COM port settings. In the Port Configuration tab, you will see the new COM port listed. Click Port Setting to change the COM number and other parameters. UPort 1100 Series User Manual... - Page 17 PurgeComm() command. When Fast Flush is disabled, the driver will repeatedly query the converter until it verifies that there is no more data in the buffer. Disabling this function can cause significantly lower throughput for applications that use PurgeComm() extensively. UPort 1100 Series User Manual...
-
Page 18: Removing The Converter
USB port. The converter can also be uninstalled through the Device Manager, the same as other Windows devices. Right-click the converter, which will be found under Multi-port serial adapters; then, select Uninstall from the context menu. UPort 1100 Series User Manual... -
Page 19: Uninstalling The Driver
Uninstalling the Driver The UPort driver may be removed through Add/Remove Programs in the Windows Control Panel. Click Remove next to MOXA UPort 1110/1130/1150 Windows Driver Verx.x. UPort 1100 Series User Manual... -
Page 20: Advanced Uport 1100 Driver Functions
Advanced UPort 1100 Driver Functions The utilities of Moxa’s UPort 1100 Series give users a convenient tool for configuring and maintaining the UPort Series products. In this section, we introduce the “Fixed-base COM Mode” function that enables users to set COM names on the host PC. -
Page 21: Install Linux Driver
But you still re-compile the source code if you modify the source code. Find "Makefile" in /moxa/mxu11x0/driver, then run # make clean; make install The driver files "mxu11x0.ko" will be properly compiled and copied to system directories respectively. UPort 1100 Series User Manual... - Page 22 <-- Add the lines. tristate "USB Moxa UPort 11x0 Driver" <-- depends on USB_SERIAL <-- Modify the kernel Makefile Add the following line to the last line of Makefile. /usr/src/<kernel-source directory>/drviers/usb/serial/Makefile obj-$(CONFIG_MOXA_UPORT_11X0) += mxu11x0.o <-- Add the line. UPort 1100 Series User Manual...
- Page 23 1-2.2: MOXA UPort 1150 converter now attached to ttyUSB0 mxu11x0: Ver6.0: MOXA UPort 11x0 USB to Serial Hub Driver Above message indicates /dev/ttyUSB0 are installed successfully. 6. Uninstall # cd /moxa/mxu11x0 # make remove UPort 1100 Series User Manual...
-
Page 24: For Linux Kernel 4.X
You can use the following commands to show the git tag list and check out the tag of the specific UC device and firmware version. Show the tag list: $ git tag Check out the specific tag: $ git checkout UC-2100_V1.7 Replace the tag name, UC-2100_V1.7, with the UC Series that is being used. UPort 1100 Series User Manual... - Page 25 ****************************************** ************************************************************************ MOXA UPort 1100 Series driver cross-compile finished. If cross compile is success, driver is outputted to the output folder. ************************************************************************ The binaries will now be generated and placed in the output directory under the /moxa/mxu11x0 folder.
- Page 26 Manually build the UPort driver with a cross-compiler For the UPort 1100 Series To cross-compile the UPort 1100 Series driver, you can find "Makefile" in the driver folder, and then run it. # make ARCH=<ARCH> CROSS_COMPILE=<CROSS_COMPILE> KDIR=<KERNEL_SOURCE> KVER_MAJOR=<KERNEL_MAJOR> KVER_MINOR=<KERNEL_MINOR> <ARCH>: The target ARM environment device's CPU architecture. For example, arm, arm64.
- Page 27 Please refer to Yocto's manual for complete information. An example is also available in the examples folder in the UPort Series driver. You may follow the subsequent procedures to create the same meta-moxa layer. UPort 1100 Series User Manual...
- Page 28 ├── hello.c │ └── Makefile │ └── hello-mod_0.1.bb Delete the unnecessary files in hello-mod and rename the hello-mod. For the UPort 1100 Series $ cd ./meta-moxa/recipes-kernel $ rm ./hello-mod/files/COPYING $ rm ./hello-mod/files/hello.c $ mv ./hello-mod/hello-mod_0.1.bb ./hello-mod/uport1100_0.1.bb $ mv ./hello-mod uport1100...
- Page 29 Extract the UPort driver source code. Copy the following files into uport1100: For the UPort 1100 Series $ cp /moxa/ mxu11x0/COPYING-GPLV2.TXT ./uport1100/files/ $ cp /moxa/ mxu11x0/driver/mxu11x0.c ./uport1100/files/ $ cp /moxa/ mxu11x0/driver/mxu11x0.h ./uport1100/files/ $ cp /moxa/ mxu11x0/driver/mxu1110_fw.h ./uport1100/files/ $ cp /moxa/ mxu11x0/driver/mxu1130_fw.h ./uport1100/files/ $ cp /moxa/ mxu11x0/driver/mxu1131_fw.h ./uport1100/files/...
- Page 30 Modify the content of the file '*_0.1.bb' as follows: For the UPort 1100 Series We have to modify the content of the file 'uport1100_0.1.bb': ##### uport1100_0.1.bb start ##### DESCRIPTION = "Linux kernel module for Moxa UPort 11x0 Series" LICENSE = "GPLv2"...
-
Page 31: For Linux Kernel 5.X
Start the UPort driver in Raspberry Pi After logging into the system, start the UPort driver For the UPort 1100 Series root@raspberrypi2:~# modprobe mxu11x0 Troubleshooting If the following error is encountered during the building of the image, ERROR: Task (/home/user/poky/meta/recipes-devtools/binutils/binutils_2.34.bb:do_compile) failed with... - Page 32 If you find the build script troublesome, or you prefer to build these binaries manually, please refer to Section 2.4 “Manually build the UPort driver with a cross-compiler.” If you have generated the necessary binaries, please refer to section 2.5 to deploy to the target platform. UPort 1100 Series User Manual...
- Page 33 The binaries will now be generated and placed in the output directory under the /moxa/mxu11x0 folder. Manually build the UPort driver with a cross-compiler For the UPort 1100 Series To cross-compile the UPort 1100 Series driver, you can find "Makefile" in the driver folder, and then run it. # make ARCH=<ARCH> CROSS_COMPILE=<CROSS_COMPILE> KDIR=<KERNEL_SOURCE> KVER_MAJOR=<KERNEL_MAJOR> KVER_MINOR=<KERNEL_MINOR>...
- Page 34 Deploy cross-compiled binary to target For the UPort 1100 Series You should find the kernel module, mxu11x0.ko, under the output or driver source code directory. Follow the steps below to deploy to the target Arm platform. Copy the mxu11x0.ko to the path /lib/modules/`uname -r`/kernel/drivers/char on the ARM platform.
- Page 35 The meta-moxa directory will be created in /home/user/poky. $ tree meta-moxa meta-moxa ├── conf └── layer.conf │ ├── COPYING.MIT ├── README └── recipes-example └── example └── example_0.1.bb The “recipes-example” folder is not necessary; it may be deleted at any time. UPort 1100 Series User Manual...
- Page 36 ├── hello.c │ └── Makefile │ └── hello-mod_0.1.bb Delete the unnecessary files in hello-mod and rename the hello-mod. For the UPort 1100 Series $ cd ./meta-moxa/recipes-kernel $ rm ./hello-mod/files/COPYING $ rm ./hello-mod/files/hello.c $ mv ./hello-mod/hello-mod_0.1.bb ./hello-mod/uport1100_0.1.bb $ mv ./hello-mod uport1100 Extract the UPort driver source code.
- Page 37 The content of the recipes-kernel is listed below: For the UPort 1100 Series: $ tree ./ └── uport1100 ├── files ├── COPYING-GPLV2.TXT │ ├── Makefile │ ├── mxu1110_fw.h │ ├── mxu1130_fw.h │ ├── mxu1131_fw.h │ ├── mxu1150_fw.h │ ├── mxu1151_fw.h │...
- Page 38 /home/user/poky/meta-raspberrypi \ /home/user/poky/meta-moxa \ " Use a text editor to add the following content to the configuration file: './conf/local.conf'. For the UPort 1100 Series IMAGE_INSTALL_append += " uport1100" Deploy the Yocto image in Raspberry Pi Build the image with UPort driver.
-
Page 39: Installing The Macos Driver
For macOS 10.1x Follow the steps below to install driver Download the driver “Driver for UPort 1100 Series (macOS 10.1x to 11)” from Moxa product website. Enter Recovery Mode. Disable System Integrity Protection (SIP) by typing ‘csrutil disable’ in the terminal. - Page 40 Since the driver is loaded as system software, it asks for permission every time. Click Open System Settings. In Privacy & Security, click Allow. UPort 1100 Series User Manual...
-
Page 41: Disabling The Driver
Disabling this function can cause lower throughput for applications that use purge command extensively. Disabling the Driver When disabling the driver is unloading software from the system, the system will ask for permission again for the action. UPort 1100 Series User Manual... -
Page 42: Troubleshooting
• UPort 1150I: 1-port RS-232/422/485 USB-to-Serial Converter with isolation protection. • UPort 1130I: 1-port RS-422/485 USB-to-serial converter with isolation protection. • Follow “Installing Visual Studio 2005” to install the UPort 1100 Series WinCE 6.0 driver. UPort 1100 Series User Manual... -
Page 43: Installation With An Installation Package For Win Ce 6.0
Launch Visual Studio 2005 with Platform Builder WinCE6.0. Open the OSDesign that you want to install. In Visual Studio 2005, click File > New > Project and select “Platform Builder for CE 6.0”. Select “OS Design” for the template then click OK. UPort 1100 Series User Manual... - Page 44 The WinCE 6.0 OS Design Wizard will start, click “Next” to continue. In the “Board Support Packages” page, select the “CEPC: x86.” Click “Next.” UPort 1100 Series User Manual...
- Page 45 Under Design Templates and Design Template Variants, select your environment, such as PDA Device or Mobile Handheld, and then click Next. In Application & Media and Networking & Communication, also select your environment, such as .NET Compact Framework 2.0, ActiveSync, Quarter VGA Resources- Portrait Mode, or TCP/IPv6 Support. UPort 1100 Series User Manual...
- Page 46 UPort 1100 Series User Manual...
- Page 47 When the OS Design Project Wizard Complete screen appears, click Finish. A notification will pop up. Click “Acknowledge” to finish the project. UPort 1100 Series User Manual...
- Page 48 Subproject. Switch the folder to “C:\ MOXAUP1100\wince600\U1100” and add subprojects into your OS Design. Assign the pbpxml file to a different folder (i.e. mxu11x0.pbpxml). After the subproject is added, you may configure the “mxupce6.reg” registry file with the location [HKEY_LOCAL_MACHINE\Drivers\USB\ClientDrivers\MXU_11x0]. UPort 1100 Series User Manual...
- Page 49 After building sysgen, select “Build” and “Make Run-Time Image” to create the WinCE OS image. Finally, copy your image file to the target host. Configure the interface on the target device, using the configuration tool found in “Start > Programs > MOXA UP Configuration Panel\UPort Configuration Utility”. UPort 1100 Series User Manual...
-
Page 50: Installation With An Installation Package For Win Ce 5.0
Right-click on the driver “USB to Serial Adapters (Prefix COM)” or “USB to Serial Adapters (Prefix MXU)” and then choose “Add to OS Design.” After adding the driver, you should be able to find it in your workspace. You can start building your operating system and download it to a target. UPort 1100 Series User Manual... - Page 51 UPort 1100 Series User Manual...
-
Page 52: Removing The Moxa Wince 5.0/Ce 6.0 Driver
Switch the folder to C:\MOXAUP1100\ and double-click “unins000.exe” to remove installation folder. For WinCE 5.0 Driver: In the “OSDesign_View”, delete “USB to Serial Adapters (Prefix XXX)”. Remove driver from control panel. Check “clean before building” UPort 1100 Series User Manual... -
Page 53: Installation With A Cab File
Installation With a CAB File Install the UPort 1100 series WinCE driver to target host. First, install Microsoft ActiveSync on the source PC. Before running ActiveSync on the source PC, use an RS-232 null modem cable to connect the WinCE device (CEPC) to the PC. - Page 54 Double-click on the CAB file to start installing the UPort 1100 series WinCE driver. After installing the driver, plug the UPort 1100 series device into the USB port of the WinCE Device. The driver will be loaded automatically. At this point, the UPort 1100 series is ready to use.
-
Page 55: Pin Assignment
3. Pin Assignment UPort DB9 Pin Assignments The UPort 1100 series uses male DB9 connectors. Pin assignments are shown in the following diagram: DB9 (male) RS-232 RS-422 4-wire RS-485 2-wire RS-485 DCD (in) TxD-(A) – RxD (in) TxD+(B) – TxD (out)
Need help?
Do you have a question about the UPort 1100 Series and is the answer not in the manual?
Questions and answers