Table of Contents
Advertisement
Quick Links
Advertisement
Table of Contents

Subscribe to Our Youtube Channel
Related Manuals for AmScope B620-TS-5MP Series


Summary of Contents for AmScope B620-TS-5MP Series
- Page 1 B620-TS-5MP Series User’s Manual...
-
Page 2: Table Of Contents
Adjusting The Diaphragm ....................17 Attaching a Camera / Changing Eyepieces ...............18 Maintenance/Precautions ....................19 Changing the Bulb ......................19 Specifications ....................20 B620-TS-5MP Series Specifications (x = included) .............20 Optional Accessories ......................21 Objectives .........................21 Eyepieces ..........................21 Technical Parameters ..................22 Electrical System .......................22 Technical Terms &... -
Page 3: Before Use
This document, the information in this document and all rights thereto are the sole and exclusive prop- erty of AmScope and are not to be copied, used or disclosed to anyone, in whole or in part, without the express written permission of AmScope. -
Page 4: Safety Precautions
Before Use Safety Precautions 1. As the microscope is a precision instrument, always handle it with care, avoiding impact or abrupt movement during transporation. Do not shake the package. 2. Do not place the microscope in direct sunlight or in high heat. Keap it indoors in a dry and clean place with temperateures between 32-100 degrees F (0-40 degrees C), and in maximum relative humidity of 85%. -
Page 5: Parts
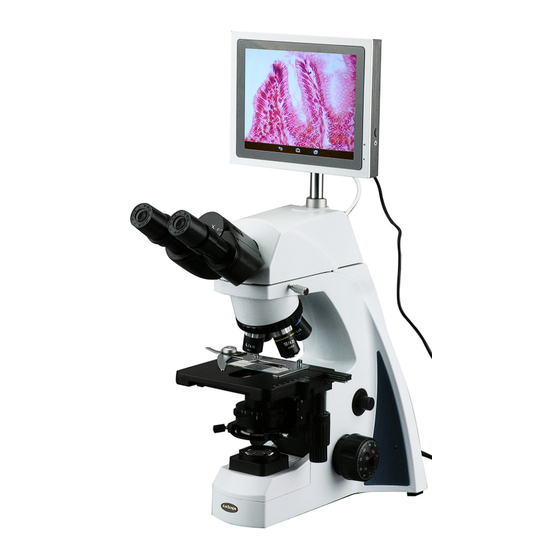
Parts B620-TS 5MP Touchpad Siedentopf Head Eyepieces Head Lock Screw Nosepiece Turret Objectives Stage Clips Fine Focusing Knob Mechanical Stage Base Illuminator Coarse Focusing Knob User’s Manual B620-TS Series... -
Page 6: Definition Of Parts
Parts Definition of Parts Base Illuminator Lens (Transmitted Illuminator Lens) Lens underneath the stage of the microscope that directs the light source up towards the slide Base Illuminator Focusing Knob (Coarse & Fine) Knobs used to move the stage of the microscope up and down to focus on the slide. Two types exist: coarse, which moves the stage in large increments, and fine, which moves the stage in small increments for precision. -
Page 7: Definition Of Parts (Continued)
Parts Definition of Parts (Continued) Abbe Condenser (w/ Iris) Focuses and controls the amount of light that hits the slide from the base illuminator Abbe Condenser Ocular Tube / Eyepieces The tube which extends from the microscope head and accepts the eyepieces, which enlarge the image from the objective to a plan near the user’s eye for ease of viewing. -
Page 8: Definition Of Parts (Continued)
Parts Definition of Parts (Continued) Nosepiece / Objective Turret Rotating component that Houses the objective lenses and allows ease of changing between lenses. Nosepiece Objective Lens The cylindrical lens housings that provide magnification to the microscope and attach to the nosepiece. Objective User’s Manual B620-TS Series... -
Page 9: Definition Of Parts (Continued)
Parts Definition of Parts (Continued) Stage (Mechanical) The flat, horizontal surface that slides or other glass media used for holding samples is placed on, which is controlled in the X and Y dimensions using the drop down knobs on the right hand side. Stage Stage Clips Metal, spring loaded clips that hold the slide in place when viewing. -
Page 10: Getting Started
Remove the tape and open the container carefully so as to avoid dropping and dam- aging the optical items. Check carefully to ensure that all parts and accessories are intact. 2. Check the packing list on www.amscope.com or included in your package to ensure that you’re received all items that are to be included: - One Binocular B620-TS-5MP Microscope Body &... -
Page 11: Operation
Operation Setting Up 1. Place the specimen to be studied on a glass slide (or use a prepared slide). Place it on the stage, holding it snugly in place with the metal slide holders (clips) of the stage. If you do not have a prepared slide and have not prepared your own yet, you may skip to the next page for instructions, then return here to proceed. -
Page 12: Using The Touchpad
Operation Using the Touchpad 1. The touchpad is based on Android OS architecture, and behaves like an Android tablet. To use the software for image capture, please press the software button (Touchview) from the home page. If for any reason it is not on your home page, you may tap the “Applications”... -
Page 13: Touchpad Language Options
Operation Touchpad Language Options Although not common, the touchpads are indeed made overseas, which includes quality control testing. As such, once in a while, the touchpad itself can come set in languages other than English. To aid in changing the language to English (or any other language, if desired), this section will provide picture and locational informa- tion regarding what to press. -
Page 14: Preparing A Slide
Preparing a Slide Note: Not all packages sold by AmScope include blank slides, cover slips, or a preparation kit. If you do not have any and did not purchase a package that lists those items as included, please visit www.amscope.com to purchase those items. -
Page 15: Preparing A Slide (Continued)
Operation Preparing a Slide (Continued) 3. Place the cover slip at an approximately 45 degree angle to the slide with one edge touching the water drop. Gently let the cover slip go, which will cause it to fall onto the specimen and settle flat. If too much water or too large of a sample is used, you may use a soft, lint free optical cloth or kimwipe to cover your finger and gently press it flat, or start over with a new, thinner sample, or less water. -
Page 16: Staining A Slide
Operation Staining a Slide 1. Place one drop of Methylene Blue (or other stain, sold separately) on one edge of the cover slip, and place the flat edge of a paper towel on the other edge. 2. As the paper towel draws the water out from under the coverslip on one side, the flow of liquid will draw the stain in under the coverslip from the other side. -
Page 17: Adjusting The Diaphragm
Operation Adjusting The Diaphragm By changing the aperture (hole size) of the iris diaphragm, you can adjust the background brightness. Adjust the aperture of the iris diaphragm by sliding the iris dial left or right until the desired aperture is achieved (where the numerical marking corresponds to the magnification of the objective in use). -
Page 18: Attaching A Camera / Changing Eyepieces
Attaching a Camera / Changing Eyepieces Eyepieces: The B620-TS-5MP series microscopes have easy to insert and remove eyepieces and camera port (B620-TS-5MP model only). To change eyepieces out, one simply pulls on the eyepiece to slide it out of the ocular tube, and inserts the new eyepiece. -
Page 19: Maintenance/Precautions
- After use, cover the microscope with a dust cover or bag to prevent dust from settling on the microscope. This unit does not come with a dust cover, so one must be purchased separately if desired. - Keep your AmScope microscope in a dry, clean location in order to prevent rust or other damage. Changing the Bulb The B620 is lit by an LED bulb, which is on a board of its own, and is not easily replaced. -
Page 20: Specifications
Specifications B620-TS-5MP Series Specifications (x = included) Parts Specifications B620-TS-5MP WF Eyepiece WF10X/18mm WF10X/18mm w/ Pointer Sold Separately WF10X/18mm w/ Reticle Sold Separately WF16X/18mm Sold Separately WF20X/18mm Sold Separately WF25X18mm Sold Separately Plan Eyepiece Not Available P10X Not Available P16X... -
Page 21: Optional Accessories
Specifications Optional Accessories Parts Description Model # Purpose Eyepiece EP5X23 For obtaining lower magnification powers EP20X23 For obtaining higher magnification powers EP25X23 For obtaining higher magnification powers 10x w/ Pointer EP10X23P For easier identifying of objects when passing from one viewer to another 10x w/ Reticle EP10X23R For measuring objects within the field of view... -
Page 22: Technical Parameters
Technical Parameters Electrical System There is one type of eletrical system for this series of microscope. The light source is via LED. 1. 90V~240V power supply: 90V~240V ±10%, 50Hz This electrical system is CE, GS, and UL certified This unit is not capable of operating on batteries. User’s Manual B620-TS Series... -
Page 23: Technical Terms & Concepts
Technical Parameters Technical Terms & Concepts Total Magnification Total magnification of a microscope is calculated by the magnification of the objective multiplied by the magnification of the eyepieces. -Ex: (10x Eyepieces) x (4x Objective) = 40x Total Magnification Field of View Linear field of view of the eyepiece divided by the magnification of the objective Numerical Aperture (N.A) Calculated by n Sin α... -
Page 24: Common Issues
Troubleshooting Common Issues Symptom Cause Remedy OPTICAL ISSUES One side of the field The nosepiece is misaligned Turn the nosepiece until it clicks into place of view is darker Stains or dust has accumulated on the objective, Clean all lenses with lens cleaner or a lint free non- eyepieces, or base lens abraisive cloth The substage Abbe condenser is not seated level... -
Page 25: Common Issues (Continued)
Troubleshooting Common Issues (Continued) Symptom Cause Remedy OPTICAL ISSUES The color of the image The brightness adjustment dial is not in the right Adjust the brightness dial to a higher or lower set- is not accurate position ting for color clarity (too bright will wash the image out, too dark will color it with a dark yellow hue) No filter is used when needed, or filter is in use Remove color filter if natural light is desired, or in-...
Need help?
Do you have a question about the B620-TS-5MP Series and is the answer not in the manual?
Questions and answers