Table of Contents
Advertisement
Quick Links
Advertisement
Table of Contents

Subscribe to Our Youtube Channel
Related Manuals for Chauvet Professional Rogue R1E Spot


Summary of Contents for Chauvet Professional Rogue R1E Spot
- Page 1 User Manual Model ID: ROGUER1ESPOT...
- Page 2 Edition Notes The Rogue R1E Spot User Manual includes a description, safety precautions, installation, programming, operation, and maintenance instructions for the Rogue R1E Spot as of the release date of this edition. Trademarks Chauvet, Chauvet Professional, the Chauvet logo, Rogue, Outcast, and Rogue Outcast are registered trademarks or trademarks of Chauvet &...
-
Page 3: Table Of Contents
Starting Address....................12 Control Channel Assignments and Values............ Test Mode ..................... Auto Test......................17 Manual Test ....................... 17 Setup Configuration ..................Pan Reverse ...................... 17 Tilt Reverse ......................17 Screen Reverse ....................17 Rogue R1E Spot User Manual Rev. 2... - Page 4 Reset Function ....................18 Factory Reset..................... 18 System Information ..................Offset Mode....................5. Maintenance................Product Maintenance ..................Gobo Maintenance..................Transporting on Truss or Racks..............6. Technical Specifications ............Contact Us ..................Warranty & Returns..................Rogue R1E Spot User Manual Rev. 2...
-
Page 5: Before You Begin
Important installation or configuration information. The product may not function correctly if this information is not used. Useful information. The term “DMX” used throughout this manual refers to the USITT DMX512-A digital data transmission protocol. Rogue R1E Spot User Manual Rev. 2... -
Page 6: Safety Notes
• In the event of a serious operating problem, stop using immediately. If a Chauvet product requires service, contact Chauvet Technical Support. Rogue R1E Spot User Manual Rev. 2... -
Page 7: Fcc Statement Of Compliance
LEDs, contributing to shorter lifespans if always used at full intensity. The average LED lifespan is 40,000 to 50,000 hours. To extend LED lifespan, maintain proper ventilation around the product, and limit the overall intensity. Rogue R1E Spot User Manual Rev. 2... -
Page 8: Introduction
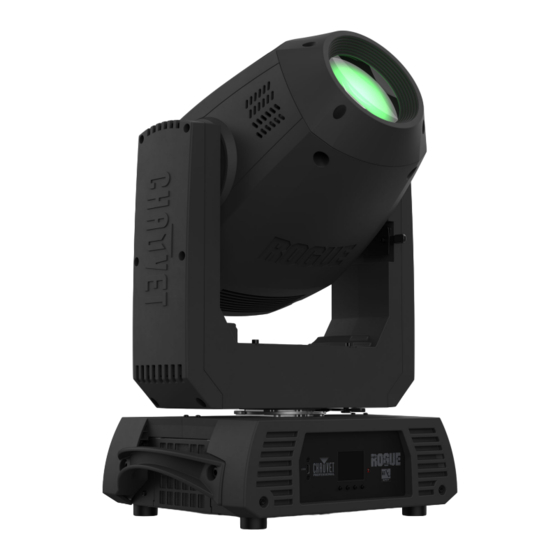
2. Introduction Description Rogue R1E Spot houses an intensely bright optical system and feature-packed effects wheelhouse in a rugged lightweight body. Dual gobo wheels combine perfectly to create complex gobo morphing. A single color wheel offers split colors and continuous variable speed scrolling. Iris, prism, and frost provide stunning effects and full beam control. -
Page 9: Product Dimensions
8.7 in 204 mm 221 mm 13.0 in 330 mm 20.6 in 523 mm 11.3 in 288 mm 4.1 in 104 mm 14.0 in 356 mm 9.2 in 234 mm 14.0 in 356 mm Rogue R1E Spot User Manual Rev. 2... -
Page 10: Setup
Power Linking This product comes with a power input cord. Power-linking cables are available from Chauvet for purchase. It is possible to power link Rogue R1E Spot products. See the table below for the current draw at each voltage and frequency:... -
Page 11: Usb Update
Setup USB Update The Rogue R1E Spot allows for software update through USB using the built-in USB port. To update the software using a USB type C flash drive, do the following: 1. Power on the fixture and plug the flash drive into the USB port. -
Page 12: Mounting
When rigging the product onto a truss, use a mounting clamp of appropriate weight capacity. Procedure The Rogue R1E Spot comes with 2 Omega brackets to which the user can directly attach the mounting clamps (sold separately). Make sure the clamps are capable of supporting the weight of this product. Use at least two mounting points per product. -
Page 13: Color Wheel
Setup Color Wheel Purple Orange Magenta Green CTO 3200 Yellow Blue Gobo Wheels Gobo Wheel 1 Gobo Wheel 2 (Rotating gobo wheel) (Static gobo wheel) Rotating Gobo Dimensions 20 mm 16 mm IMAGE Rogue R1E Spot User Manual Rev. 2... -
Page 14: Gobo Replacement
This provides a layer of protection against the high temperature from the lamp. • All custom gobos in the Rogue R1E Spot gobo wheel 1 must be aluminum or glass. Procedure Follow the recommended procedure below to remove or replace the gobos: 1. -
Page 15: Operation
360° pan range 180° pan range 260° tilt range Tilt Angle 180° tilt range 90° tilt range Do not blackout while pan/tilt is moving BL. O. P/T Move Blackout while pan/tilt is moving Rogue R1E Spot User Manual Rev. 2... -
Page 16: Dmx Configuration
1. Go to the Address main level. 2. Select the starting address (001–496). • The highest recommended starting address for 17CH is 496. • The highest recommended starting address for 20CH is 493. Rogue R1E Spot User Manual Rev. 2... -
Page 17: Control Channel Assignments And Values
042 048 CTO 3200 049 055 Magenta 056 063 Purple 064 127 Split colors 128 191 Clockwise color scroll, slow to fast 192 255 Counterclockwise color scroll, slow to fast Rogue R1E Spot User Manual Rev. 2... - Page 18 128 191 Clockwise gobo scroll, slow to fast 192 255 Counterclockwise gobo scroll, slow to fast Focus 000 255 Far to near 000 004 No function Prism 005 255 Prism Rogue R1E Spot User Manual Rev. 2...
- Page 19 224 231 Movement macro 28 232 239 Movement macro 29 240 247 Movement macro 30 248 255 Movement macro 31 – Movement macro speed 248 255 Fast to slow Rogue R1E Spot User Manual Rev. 2...
- Page 20 152 159 All reset 160 167 Iris reset 168 191 No function 192 199 Fan ECO 200 207 Fan Full 208 215 Fan Auto 216 255 No function Rogue R1E Spot User Manual Rev. 2...
-
Page 21: Test Mode
Operation Test Mode Auto Test To have the Rogue R1E Spot automatically test all functions one after the other: 1. Go to the Run Mode main level. 2. Select the Auto Test option. The Auto Test will end after one full cycle. Press <MENU> at any time to stop. -
Page 22: Color Movement Blackout
To reset the product to original factory settings: 1. Go to the Setup main level. 2. Select the Factory Reset option. 3. Select NO (to cancel) or YES (to reset the product configuration). Rogue R1E Spot User Manual Rev. 2... -
Page 23: System Information
3. Select the “zero” position to adjust, from PAN, TILT, GOBO, GOBO ROT, GOBO2, COLOR1, COLOR2, PRISM, FOCUS, FOCUS-IRIS, IRIS, FROST, DIMMER, MAC4, MAC5, or MAC6. 4. Adjust the “zero” position for the selected function from 000–255. Rogue R1E Spot User Manual Rev. 2... -
Page 24: Maintenance
(needle tip applier recommended). Make sure the gobo holder is rotating freely and is not making any abnormal noise. 8. Reinstall the gobos in the gobo holder. Make sure the gobos are in the correct positions. 9. Reinstall the gobo holder in the unit. Rogue R1E Spot User Manual Rev. 2... -
Page 25: Transporting On Truss Or Racks
This is to prevent undue stress on the tilt locks and limit the amount of off-axis bounce on internal components. Rogue R1E Spot User Manual Rev. 2... -
Page 26: Technical Specifications
I/O Connector Channel Range 3-pin & 5-pin XLR 17 or 20 Ordering Product Name Item Name Item Code UPC Number Rogue R1E Spot ROGUER1ESPOT 08012214 781462225629 UL 1573 CSA C22.2 No. 166 E113093 Rogue R1E Spot User Manual Rev. 2... -
Page 27: Contact Us
For warranty terms and conditions and return information, please visit our website. For customers in the United States and Mexico: www.chauvetlighting.com/warranty-registration. For customers in the United Kingdom, Republic of Ireland, Belgium, the Netherlands, Luxembourg, France, and Germany: www.chauvetlighting.eu/warranty-registration. Rogue R1E Spot User Manual Rev. 2...
Need help?
Do you have a question about the Rogue R1E Spot and is the answer not in the manual?
Questions and answers