Table of Contents
Advertisement
Quick Links
Advertisement
Table of Contents

Related Manuals for Chauvet Professional MAVERICK FORCE S SPOT


Summary of Contents for Chauvet Professional MAVERICK FORCE S SPOT
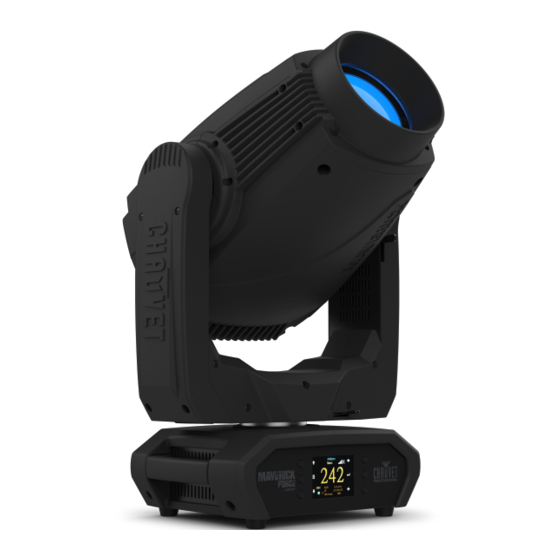
- Page 1 USER MANUAL SPOT Model ID: MAVERICKFORCESSPOT...
- Page 2 Edition Notes The Maverick Force s Spot User Manual includes a description, safety precautions, installation, programming, operation, and maintenance instructions for the Maverick Force s Spot as of the release date of this edition. Trademarks CHAUVET, the Chauvet logo, and Maverick Force s Spot are registered trademarks or trademarks of Chauvet &...
-
Page 3: Table Of Contents
Dmx Mode 29 CH......................13 Dmx Mode 22 CH......................16 Color Wheel ......................Gobo Designs ......................Rotating Gobo Dimensions .................... 19 Configuration (DMX, Art-Net™, sACN) ..............Control Mode........................20 Control Personalities ...................... 20 Starting Address......................20 Maverick Force s Spot User Manual Rev. 1... - Page 4 Manual Test ........................23 System Information ....................Offset Mode (Zero Adjust)..................Web Server ......................Gobo Replacement ....................Procedure ........................Diagram .......................... 5. Maintenance....................Product Maintenance ....................6. Technical Specifications................Returns ......................Contact Us......................Maverick Force s Spot User Manual Rev. 1...
-
Page 5: Before You Begin
This equipment should be installed and operated with a minimum distance of 20 cm between the radiator and your body. This transmitter must not be co-located or operating in conjunction with any other antenna or transmitter. Maverick Force s Spot User Manual Rev. 1 Page 1 of 29... -
Page 6: Safety Notes
LEDs, contributing to shorter lifespans if always used at full intensity. The average LED lifespan is 40,000 to 50,000 hours. To extend LED lifespan, maintain proper ventilation around the product, and limit the overall intensity. Page 2 of 29 Maverick Force s Spot User Manual Rev. 1... -
Page 7: Introduction
Battery backup display with auto-rotate depending on fixture orientation Product Overview WDMX antenna 3-pin in/out Power in/out 5-pin Fuse Menu Power in/out holder buttons display switch Ethernet ports Maverick Force s Spot User Manual Rev. 1 Page 3 of 29... -
Page 8: Product Dimensions
13.4 in 340 mm 4.4 in 113 mm 12.2 in 310 mm 9.2 in 234 mm 17.5 in 443 mm 20.4 in 518 mm 8.9 in 225 mm Page 4 of 29 Maverick Force s Spot User Manual Rev. 1... -
Page 9: Setup
Power Linking It is possible to link up to 2 Maverick Force s Spot products at 100 V, 2 products at 120 V, 5 products at 208 V, 5 products at 230 V, or 5 products at 240 V. Never exceed this number. Power-linking cords can be purchased separately. -
Page 10: Mounting
When rigging the product onto a truss, use a mounting clamp of appropriate weight capacity. Procedure The Maverick Force s Spot comes with two Omega brackets to which you can attach a mounting clamp directly. Mounting clamps are sold separately. Make sure the clamps are capable of supporting the weight of this product. -
Page 11: Signal Connections
DMX controller, download the DMX Primer from the Chauvet website: www.chauvetprofessional.com. DMX Linking You can link the Maverick Force s Spot to a DMX controller using a 3 or 5-pin DMX connection or a WDMX connection. For more information about DMX, read the DMX primer at: https://www.chauvetprofessional.com/wp-content/uploads/2016/06/DMX_Primer.pdf. -
Page 12: Operation
The technician mode disables the pan and tilt motors, allowing the output of the product to be aimed by hand. To enable the technician mode of the Maverick Force s Spot, hold <UP> and <LEFT> while the product is powering on. When the product is turned off and back on, the pan and tilt will return to normal function. -
Page 13: Menu Map
Operation Menu Map Refer to the Maverick Force s Spot product page on www.chauvetprofessional.com for the latest menu map. Main Level Programming Levels Description Address 001–512 Sets the starting address Manual Manually set IP address IP Mode DHCP Network sets IP address... - Page 14 Preset Select PRESET B options PRESET C Allows recorded preset menu options to be transferred to Preset Sync other Maverick Force s Spot fixtures in the DMX daisy chain Page 10 of 29 Maverick Force s Spot User Manual Rev. 1...
- Page 15 Gobo Index Gobo2 Focus Focus Fine Focus Auto Zoom Zoom Fine Prism Prism Rotate Iris Frost CMY Macro CMY Macro Speed Special Function Maverick Force s Spot User Manual Rev. 1 Page 11 of 29...
- Page 16 Gobo Rotate 000–255 Information input signals Gobo Index Gobo2 Focus Focus Fine Focus Auto Zoom Zoom Fine Prism Prism Rotate Iris Frost CMY Macro CMY Macro Speed Special Function Page 12 of 29 Maverick Force s Spot User Manual Rev. 1...
-
Page 17: Control Channel Assignments And Values
104 111 Gobo 2 shaking 112 119 Gobo 1 shaking 120 127 Open 128 191 Gobo scroll, slow to fast 192 255 Reverse gobo scroll, slow to fast Maverick Force s Spot User Manual Rev. 1 Page 13 of 29... - Page 18 064 127 Auto change, slow to fast Iris 128 191 Slow expand, fast shrink (slow to fast) 192 255 Slow shrink, fast expand (slow to fast) Page 14 of 29 Maverick Force s Spot User Manual Rev. 1...
- Page 19 221 225 Iris fast mode 226 230 Iris smooth mode 231 235 Pan tilt swap on 236 240 Pan tilt swap off 241 245 Min Zoom Focus on Maverick Force s Spot User Manual Rev. 1 Page 15 of 29...
-
Page 20: Dmx Mode 22 Ch
104 111 Gobo 2 shaking 112 119 Gobo 1 shaking 120 127 Open 128 191 Gobo scroll, slow to fast 192 255 Reverse gobo scroll, slow to fast Page 16 of 29 Maverick Force s Spot User Manual Rev. 1... - Page 21 064 127 Auto change, slow to fast Iris 128 191 Slow expand, fast shrink (slow to fast) 192 255 Slow shrink, fast expand (slow to fast) Frost 000 255 0–100% Maverick Force s Spot User Manual Rev. 1 Page 17 of 29...
-
Page 22: Color Wheel
226 230 Iris smooth mode 231 235 Pan tilt swap on 236 240 Pan tilt swap off 241 245 Min Zoom Focus on Color Wheel Page 18 of 29 Maverick Force s Spot User Manual Rev. 1... -
Page 23: Gobo Designs
Sail boats Beam Radial dot Bars Circles Bolts Breakup Shower glass Dots Ballistic clouds Circuits Four eyes Triangles Forest Rainbows Rotating Gobo Dimensions 25.5 mm 17 mm IMAGE Maverick Force s Spot User Manual Rev. 1 Page 19 of 29... -
Page 24: Configuration (Dmx, Art-Net™, Sacn)
Use control configurations to operate the product with a DMX, Art-Net™, or sACN controller. Control Mode The Maverick Force s Spot works with wired DMX, WDMX, Art-Net™, and sACN control signals. To select which protocol to use: 1. Go to the Settings main level. -
Page 25: Configuration (Settings)
3. Select from 270 (270°), 180 (180°), or 90 (90°). Blackout on Movement To set the Maverick Force s Spot to black out on pan or tilt movement, color wheel movement, or gobo wheel movement: 1. Go to the Settings main level. -
Page 26: Wdmx Reset
Operation WDMX Reset To reset the WDMX connection and allow the Maverick Force s Spot to connect to a WDMX transmitter: 1. Go to the Settings main level. 2. Select the WDMX Reset option. 3. Select from NO (do not reset) or YES (reset the WDMX connection). -
Page 27: Preset Synchronization
1. Connect the Maverick Force s Spot products to receive the preset options by a DMX daisy chain. 2. Make the Maverick Force s Spot with the preset options to transfer be the first fixture in the DMX daisy chain. -
Page 28: System Information
4. Adjust the “zero” position for the selected function from 000–255. Web Server The Maverick Force s Spot Web Server can be accessed by any computer on the same network as the product. It allows network access to system information and settings, such as control setup, manual testing of all functions, firmware updates, and the ability to change the Web Server password. -
Page 29: Gobo Replacement
8. Push the gobo holder inwards. DO NOT force the gobo holder into the gobo wheel slot. If correctly installed, the gobo holder should easily slide into the gobo wheel slot. Diagram Locate Pull back Remove Gobo holder Gobo Retaining ring Maverick Force s Spot User Manual Rev. 1 Page 25 of 29... -
Page 30: Maintenance
7. Gently polish the transparent surfaces until they are free of haze and lint. Always dry the transparent surfaces carefully after cleaning them. Do not spin the cooling fans with compressed air. Damage may result. Page 26 of 29 Maverick Force s Spot User Manual Rev. 1... -
Page 31: Technical Specifications
Amphenol XLR Net RJ45 in/out 22 or 29 Ordering Product Name Item Name Item Code UPC Number Maverick Force s Spot MAVERICKFORCESSPOT 08011813 781462221614 UL 1573 CSA C22.2 No. 166 E113093 Maverick Force s Spot User Manual Rev. 1 Page 27 of 29... -
Page 32: Returns
Be sure to pack the product properly. Any shipping damage resulting from inadequate packaging will be your responsibility. FedEx packing or double-boxing are recommended. Chauvet reserves the right to use its own discretion to repair or replace returned product(s). Page 28 of 29 Maverick Force s Spot User Manual Rev. 1... -
Page 33: Contact Us
Visit the applicable website above to verify our contact information and instructions to request support. Outside the U.S., U.K., Ireland, Benelux, France, Germany, or Mexico, contact the dealer of record. Maverick Force s Spot User Manual Rev. 1 Page 29 of 29...
Need help?
Do you have a question about the MAVERICK FORCE S SPOT and is the answer not in the manual?
Questions and answers
How do I program my maverick force s spot
To program the Chauvet Professional FORCE S SPOT:
1. Use DMX, sACN, Art-Net, or W-DMX for control.
2. To configure menu settings, go to the Settings main level.
3. Select "Preset Select" to choose PRESET A (default), PRESET B, or PRESET C. Changes save to the selected preset.
4. To transfer presets to another unit:
- Connect units in a DMX daisy chain.
- Place the source unit first in the chain.
- Power on all units.
- Set all to a Control Mode other than WDMX.
- On the source unit, go to Settings and select "Preset Sync."
These steps allow configuration and synchronization of settings across multiple units.
This answer is automatically generated