
Subscribe to Our Youtube Channel
Related Manuals for birddog X1


Summary of Contents for birddog X1
- Page 1 Wi-Fi HD and 4K PTZ Cameras USER MANUAL...
-
Page 3: Table Of Contents
USER MANUAL TABLE OF CONTENTS Product description What’s in the box Technical specifications Remote control button description Camera menu Common operations Installation instructions Web configuration panel Network setup Camera dimensions Warranty NOTICE! Specific frequencies of electromagnetic field may affect the image of the camera! -
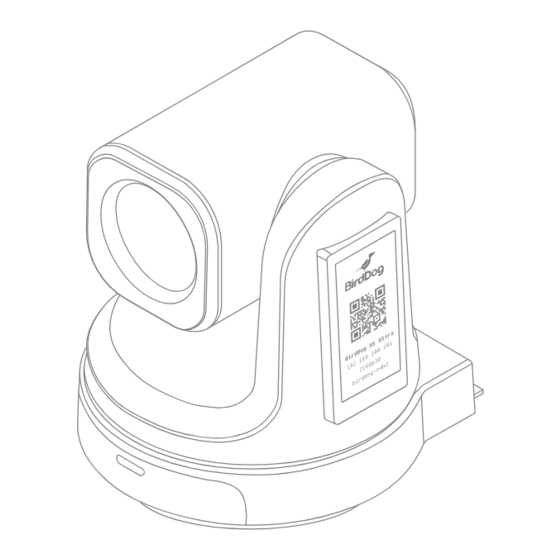
Page 4: Product Description
USER MANUAL PRODUCT DESCRIPTION DC12V RS232 USB3.0 HDMI PoE/LAN Name Name Lens DC 12V Pan & Tilt RS232 Power & Standby indicator USB 3.0 IR Panel HDMI Display (e-ink) PoE/LAN Tally Light Wi-Fi Antenna Rear Tally Silicon Number... -
Page 5: What's In The Box
USER MANUAL WHAT’S IN THE BOX PTZ Camera Remote Controller DC 12V Power Supply Welcome Pack Rear Silicon Numbers USB Cable... -
Page 6: Technical Specifications
USER MANUAL TECHNICAL SPECIFICATIONS Feature X1 Ultra IMAGING Image Sensor Sony 1/2.8” CMOS • FULL HD Sony 1/2.8” CMOS • ULTRA HD Lens f=5.5mm - 110mm f=4.1mm - 49.2mm Optical Zoom Video Format 1080p @ 60/59.94/50/30/29.97/25fps 2160p @ 30/29.97/25fps 720p @ 60/50/30/25fps 1080p @ 30/29.97/25fps... -
Page 7: Remote Control Button Description
USER MANUAL REMOTE CONTROL KEY DESCRIPTION 1. Standby/Power Key: In standby, press to power on; After power on, press to enter standby. 2. CAMERA SELECT Keys Press to control the camera. 3. Position Preset position setup keys, include PRESET and RESET. Set the preset position. -
Page 8: Camera Menu
USER MANUAL CAMERA MENU Press 【 MENU】 on the remote control to enter Exposure main menu of the ptz camera. Mode Manual Iris F1.6 5.1 Level 1 Menu - Main Menu Shutter 1/100000~1/25 Main Menu Gain Exposure Flicker 50Hz/60Hz Color [Return] Image Iris: F No. - Page 9 X1 / X1 ULTRA Brightness Version 1.1.1.1 Contrast 2024-01-01 [Return] Saturation Sharpness Model: X1 / X1 ULTRA WB Mode Version: 1.1.1.1 Color Temp 2500K~9000K Date: 2024-01-01 Rtuning Notice: The version number here is just an Btuning example, the actual parameters shall prevail.
- Page 10 5.6 Level 2 Menu-Information Information Model X1 / X1 ULTRA Version 1.1.1.1 2024-01-01 [Return] Model: X1 / X1 ULTRA Version: 1.1.1.0 Date: 2024-01-01 Notice: The version number here is just an example, the actual parameters shall prevail. Restore Default Restore? No/Yes...
-
Page 11: Common Operations
USER MANUAL COMMON OPERATIONS 6.1 Camera Select 6.5 Preset Setup, Call, Cancel Refer to the dial-up at the bottom of the camera and choose camera address number that you want to control (1-4). Reserve Preset: Press [PRESET], then press one 6.2 Camera Direction Control of the numbers (0- 9) to reserve a preset that correspond to the NUMBER. - Page 12 USER MANUAL 6.6 Using RS-232 (VISCA) HDMI Video Signal You can use the RS-232 port to connect to SDI Video Signal optional controllers, such as a joystick control keyboard, or control PC station, to operate the camera, perform pan, tilt and zoom operations and to use the Preset function using the control buttons.
-
Page 13: Installation Instructions
USER MANUAL INSTALLATION INSTRUCTIONS 7.1 Surface Installation 7.2 Wall Mount Installation Put the camera on the desk flatly, and make Step 1: Mounting the wall mount bracket sure the camera is in a horizontal position. If you want to put the camera on an oblique Wall mount bracket surface, please make sure the angle of inclina- (This side is to the wall.) -
Page 14: Web Configuration Panel
USER MANUAL WEB CONFIGURATION PANEL BirdDog cameras have a web interface (also The dashboard shows important basic camera known as BirdUI) that is displayed by your settings. For now, check that the displayed computer browser and can be used to Status is Active and take note of the frame configure your camera remotely. -
Page 15: Network Setup
You can set the timeout period during which Your computer will need to have ‘Bonjour’ the X1 will look for a DHCP IP address. After services loaded in order to access the unit via this period, the camera will default to the it’s user defined name. - Page 16 USER MANUAL 9.2 Wi-Fi Network Configuration BirdDog PTZ Device Mode: Encode Source Status: Streaming NDI X1 Ultra Wi-Fi Network Ethernet Network Wi-Fi Configuration Method STATIC DHCP SSID: IP Address 192.168.100.5 Custom Subnet Mask 255.255.255.0 BirdDog Office 2.4GHz Gateway Address 192.168.100.1...
-
Page 17: Camera Dimensions
USER MANUAL CAMERA DIMENSIONS R22.39 144.02 117.88... -
Page 18: Warranty
WARRANTY 5 Year Warranty BirdDog P-series and X-series cameras fea- ture a 5 year, global warranty. BirdDog prides itself on delivering the best possible products to customers, but if something was to go wrong, you can rest assured knowing that no matter where in the world you are, BirdDog has your back. - Page 20 BirdDog.tv...
Need help?
Do you have a question about the X1 and is the answer not in the manual?
Questions and answers