Table of Contents
Advertisement
Quick Links
Advertisement
Table of Contents

Subscribe to Our Youtube Channel
Related Manuals for birddog BDP100B


Summary of Contents for birddog BDP100B
- Page 1 EYES P100 FULL NDI . NO COMPROMISES. ® USER MANUAL...
-
Page 2: Table Of Contents
Contents IMPORTANT INFORMATION ................................4 WHAT’S IN THE BOX ..................................5 Overview ......................................5 Features ......................................5 Camera Diagrams ....................................6 Remote Controller ....................................7 System Configuration ..................................8 Obtain Video Signal ...................................8 Audio IN / OUT ....................................10 Camera Control Methods and System Configurations ........................10 Use the Infrared Remote Controller ..............................10 Use RS-232 (VISCA) ..................................10 Use RS-422(VISCA) / RS485 (PELCO P/D) ............................ - Page 3 Before operating the unit, please read this manual thoroughly and retain it for future reference. Copyright Copyright 2019 BirdDog Australia all rights reserved. No part of this manual may be copied, reproduced, translated, or distrib- uted in any form or by any means without prior consent in writing from our company.
-
Page 4: Important Information
IMPORTANT INFORMATION • Do not aim the camera lens at the strong light such as sun or incandescent lamp. The strong light can cause fatal Legal Notice damage to the camera. Attention: Maintenance Precautions: To ensure account security, please change the password af- ter your first login. -
Page 5: What's In The Box
This user guide is suitable for the following models: Note: The camera color may be in white or black per the item that is purchased. BirdDog Eyes P100 1x BirdDog Eyes P100 Features • Resolution: Up to 1080P60, 1080i59.94 1x IR Remote Controller • NDI... -
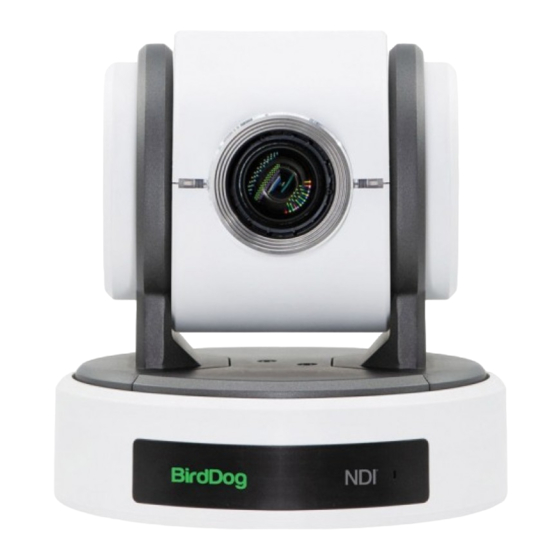
Page 6: Camera Diagrams
Camera Diagrams 12V DC Power Port Lens Connect the supplied DC power adaptor and cord. This is a 10X magnification optical zoom lens Ethernet Port 10. Communication LED Indicator ® Flashes orange when the camera receives commands HDMI Port (HDMI 1.4) from the infrared remote controller. -
Page 7: Remote Controller
Remote Controller Power MENU POWER • Power ON the camera to turn the camera in operation status. • Power OFF the camera to turn the camera in standby CAMERA SELECT status. • When the camera is powered OFF, the camera turns to the back and would be on standby mode. -
Page 8: System Configuration
System Configuration Connection Power When the camera is connected to a computer and joystick • Use only the DC power adaptor (JEITA type4) supplied keyboard with a VISCA cable (cross type, RS-232), you can with the unit. Do not use any other DC power adaptor. operate the camera with the computer and the joystick key- board. - Page 9 System Requirements for your PC • When the camera setting HDMI video format at 1080P60/1080P30/720P60, USB2.0 resolution with frame Operating System: Microsoft Windows 10/Windows 8/ rate are available as following list. Windows 7, Linux Ubuntu 16.04LTS, macOS Sierra, Mic- rosoft Windows 7 (32-bit) or above is recommended. •...
-
Page 10: Audio In / Out
Camera Control Methods and Camera Initial setting status Information Information of the camera initial setting status will display for System Configurations 5 seconds. Camera PELCO ID for RS-485 control This unit has multiple ways of controlling the camera and various system configuration capabilities using optional Camera ID for IR Remote Controller products. -
Page 11: Use Rs422(Visca) / Rs485 (Pelco P/D)
10. Use RS422(VISCA) / RS485 (PELCO P/D) RS232 Connection Set RS232 control method on Bottom Dip Switch. You can use RS422/485 port connect to optional controllers, Set Baud Rate on Bottom Dip Switch to the same as Baud such as joystick control keyboard, control PC station, to op- Rate setting on the keyboard you are using. - Page 12 How to make RS422 connection and RS422 Daisy Chain 12. Or you can use CAT5/6 T-568B Standard Ethernet cable multiple cameras connection with SONY controller as direct connect between the camera and the controller to below: make RS422 connection by following the pin definition below: SONY Keyboard RS422 Connection SONY Keyboard...
-
Page 13: Pelco P/D Keyboard Rs485 Connection
PELCO P/D Keyboard RS485 Connection Or you can use CAT5/6 T-568B Standard Ethernet cable • direct connect between the camera and the controller to make RS485 connection by following the pin definition NOTE: Use RS422 ports for RS485 connection. Only use below: TX+ and TX- for RS485 connection. -
Page 14: Operating Multiple Cameras
VISCA over IP Network Configuration between the camera and the joystick controller. You cannot use the RS-232 connections while you are us- Re-assign the camera • ing the RS422/485 connection. The default information of the IP camera is following: Static IP: 192.168.0.13 •... - Page 15 From the above list, No.1 Camera ID address and NO.2 Video RS-232 / RS-422 Baud Rate Setting resolution settings can be set in camera OSD menu as well. The camera takes either the way of OSD menu setting or the Baud Rate Setting 2400 bps way of bottom DIP switch setting.
-
Page 16: Adjusting And Setting With Menus
Adjusting and Setting with Menus NOTE: In some product models, only use “←” button on the infrared remote controller to change the value. To confirm About On-Screen Menus the value, you can use either “→” button or HOME button. You can change various settings, such as shooting conditions Control Button and system setup of the camera, while observing menus dis- played on a connected computer screen. -
Page 17: White Balance Menu
EXPOSURE MENU: IRIS PRI available only when the AE mode is set to “Full Auto.” The initial setting is “Auto Slow Shutter Off.” EXPOSURE MODE IRIS PRI WHITE BALANCE IRIS F1.6 S. SHUTTER LIMIT: When the subject becomes dark, the PICTURE 1 GAIN LIMIT 21.4dB... -
Page 18: Picture1 Menu
PICTURE1 Menu Push Trigger), assuming that a white subject, in correct light- ing conditions, and occupying more than 1/2 of the image, is submitted to the camera. One Push White Balance data is PICTURE 1 MENU lost when the power is turned off. If the power is turned off, EXPOSURE SHARPNESS reset One Push White Balance. -
Page 19: Picture2 Menu
PICTURE2 Menu PAN TILT ZOOM Menu PICTURE 2 MENU PAN TILT ZOOM MENU EXPOSURE DIGITAL ZOOM EXPOSURE CHROMA WHITE BALANCE ZOOM RATIO OSD WHITE BALANCE HLC MODE PICTURE 1 BACKLIGHT COM. PICTURE 1 AF SEN PICTURE 2 MF SPEED PICTURE 2 STABILIZER PAN TILT ZOOM NEAR LIMIT... -
Page 20: System Menu
SYSTEM Menu The video formats that you can select from are: 10 8 0 P : 6 0/ 59.94 / 5 0/ 3 0/ 2 9.9 7/ 2 5,10 8 0 I : 6 0/ 59.94 / 5 0, SYSTEM MENU 720P:60/59.94/50/30/25 EXPOSURE PELCO ID... -
Page 21: Operating Multiple Cameras With The Infrared Remote Controller
Operating Multiple Cameras with you change the direction of the camera while checking the picture on the screen. In such a case, press the 2 (REV) button the Infrared Remote Controller while holding down the L/R DIRECTION SET button. Arrow Button Movement of the Camera Setting MENU... -
Page 22: Storing The Camera Settings In Memory - The Presetting Feature
Storing the Camera Settings in Recalling the stored settings: Press any of the POSITION buttons, 1] to [6], in which you have stored the settings. Memory — the Presetting Feature CAMERA SELECT Memory (Preset) Using the preset function, 6 sets of camera shooting condi- Press a POSITION button tions can be stored and recalled. -
Page 23: Dimensions
Dimensions Unit: mm 154.5 97.2 154.5... - Page 24 WELCOME TO THE FUTURE. bird-dog.tv hello@bi rd-dog.tv...
Need help?
Do you have a question about the BDP100B and is the answer not in the manual?
Questions and answers