
Subscribe to Our Youtube Channel
Related Manuals for NANO OGX 110


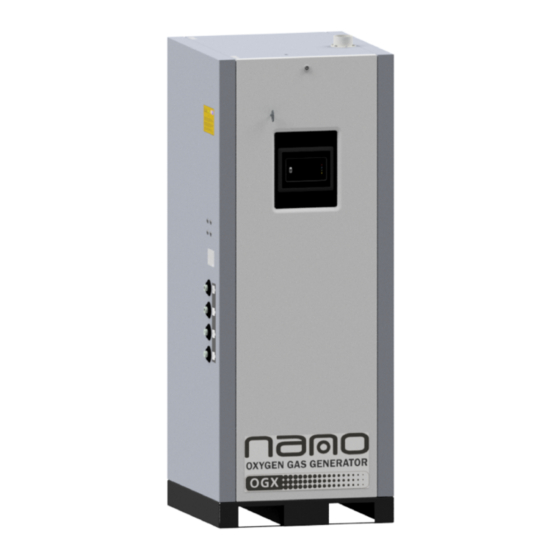
Summary of Contents for NANO OGX 110
- Page 1 NANO Oxygen generators OGX 110, OGX 220, OGX 330, OGX 440, OGX 550, OGX 640, OGX 850, OGX 1070 Instruction book...
- Page 3 NANO Oxygen generators OGX 110, OGX 220, OGX 330, OGX 440, OGX 550, OGX 640, OGX 850, OGX 1070 Instruction book Original instructions Copyright notice Any unauthorized use or copying of the contents or any part thereof is prohibited. This applies in particular to trademarks, model denominations, part numbers and drawings.
-
Page 4: Table Of Contents
Instruction book Table of contents Safety precautions......................5 Safety icons..........................5 General safety precautions....................5 Safety precautions during installation................5 Safety precautions during operation..................6 Specific safety precautions..................... 6 Safety labeling...........................8 Dismantling and disposal......................9 Description........................11 General description........................ 11 Detailed description........................12 Flow diagram.......................... - Page 5 Instruction book Graphic screen.........................33 Menu screen..........................34 Data menu..........................35 Service menu..........................37 4.10 Week timer menu........................39 4.11 Event history menu........................40 4.12 Machine settings menu......................40 4.13 Controller settings menu..................... 44 4.14 Access level..........................47 4.15 Web server..........................48 Operating instructions....................52 Starting.............................52 During operation........................
- Page 6 Instruction book Troubleshooting......................59 Low purity warning........................59 High dryer pressure dew point..................... 59 Failed to pressurize........................ 60 Failed to blow off vessel A (or vessel B)................60 High working pressure......................60 Low working pressure......................60 High inlet temperature......................60 Low inlet temperature......................60 No outlet pressure.........................
-
Page 7: Safety Precautions
Instruction book Safety precautions Safety icons Danger: Indicates an imminently hazardous situation which, if not avoided, will result in death or serious injury. Warning: Indicates a potentially hazardous situation which, if not avoided, could result in death or serious injury. Notice: Indicates a potential situation which, if not avoided, might result in property damage or in an undesirable result or state. -
Page 8: Safety Precautions During Operation
Instruction book controlled machines shall take adequate precautions to ensure that there is no one checking or working on the machine. To this end, a suitable notice shall be affixed to the start equipment. 3. Install the equipment in an area free of flammable fumes, vapours and particles, e.g. paint solvents, that can lead to internal fire or explosion. - Page 9 Instruction book Hoses, pipes and connections used must be of the correct size and must be suitable for the working pressure. Never use frayed, damaged or worn hoses. Connections made to the equipment must be free of strain. For oxygen pipe lines, consult the appropriate installation proposal and guidelines.
-
Page 10: Safety Labeling
Instruction book In normally ventilated areas the nitrogen concentration decreases quickly to the normal concentration in air at short distance from the vent pipe. However, it is highly recommended to vent the blow-off from the muffler to the outdoors. More details about the characteristics of nitrogen or oxygen can be found in the safety datasheet for nitrogen and oxygen, which are available as a separate publication. -
Page 11: Dismantling And Disposal
Instruction book ISO 7000 - symbol 0434b General safety alert symbol ISO 7010 - symbol W028 Warning: Oxidizing substance Fire hazard: • No open flame near the ISO 7010 - symbol P003 generator. • Fire, open ignition source and smoking prohibited. Warning: Risk of asphyxiation Warning: •... - Page 12 Instruction book 2. Check all safety precautions mentioned in the previous chapters to secure safe handling (e.g. LOTO, cool-down, depressurize, discharge, etc.). 3. Have trained personnel dismantle the installation. 4. Separate the harmful from the safe components (e.g. drain oil from parts containing oil). 5.
-
Page 13: Description
Instruction book Description General description OGX 110 up to OGX 1070 oxygen generators are intended to produce oxygen (O ) for industrial purposes. They use Pressure Swing Adsorption (PSA) technology to produce oxygen by passing compressed air through an adsorber containing adsorbent material. -
Page 14: Detailed Description
Instruction book Detailed description Figure 3: General view 2920 7215 90... - Page 15 Instruction book Figure 4: Front view Reference Description Controller PI01 Inlet pressure gauge PI02 Adsorber A pressure gauge PI03 Adsorber B pressure gauge PI04 Product tank pressure gauge PI05 Outlet pressure gauge OR04 Startup nozzle PDP01 Inlet PDP transmitter PDP02 Outlet PDP transmitter (optional) TT01 Inlet temperature sensor...
- Page 16 Instruction book Reference Description Inlet PDP solenoid Outlet PDP solenoid (optional) Minimum pressure valve Consumer valve Outlet flushing valve BA01 Pilot air ball valve BA02 Inlet PDP- and pressure transmitter ball valve BA03 Adsorber oxygen level sample ball valve BA04 Oxygen sensor ball valve BA05 Outlet PDP sensor ball valve...
- Page 17 Instruction book Figure 5: Side view Reference Description PT01 Inlet pressure transmitter PT02 Adsorber A pressure transmitter PT03 Adsorber B pressure transmitter PT04 Product tank pressure transmitter OR01 Regeneration purge nozzle OR02 Bottom equalization nozzle OR03 Top equalization nozzle OR05 Inlet flushing nozzle OR06 Outlet flushing nozzle...
-
Page 18: Flow Diagram
Instruction book Reference Description Bottom equalization valve Outlet transfer valve, adsorber A Outlet transfer valve, adsorber B SIL1 Blow off silencer Adsorber A Adsorber B Flow diagram Reference Description Adsorber A Adsorber B SIL1 Blow off silencer Inlet transfer valve, adsorber A Inlet transfer valve, adsorber B Top equalization valve Blow off valve, adsorber A... - Page 19 Instruction book Reference Description Bottom equalization valve Outlet transfer valve, adsorber A Outlet transfer valve, adsorber B Minimum pressure valve Consumer valve Outlet flushing valve Y1 - Y9 Pilot valves Consumer valve pilot valve Inlet flushing valve Outlet flushing pilot valve Oxygen sensor solenoid Inlet PDP solenoid Outlet PDP solenoid (optional)
-
Page 20: Installation
Instruction book Installation Dimensions The dimension drawing can be found on the USB, supplied with the unit. Model Drawing number OGX 110 9828 5300 47 OGX 220 9828 5300 48 OGX 330 9828 5300 49 OGX 440 9828 5300 50... - Page 21 Instruction book Reference Description Filtration Air tank Safety valve Oxygen generator Product tank Oxygen safety valve Oxygen tank label Oxygen filter Oxygen filter, anti-bacterial (optional) Room oxygen sensor (optional) Waste exhaust Oxygen outlet to customer or storage tank Oxygen safety valve exhaust pipe Installation area requirements •...
- Page 22 Instruction book Inlet air quality Note: The properties of the compressed air at the inlet of the oxygen generator, as well as the minimum pressure and flow rate requirements, play an important role with regard to its performance and lifetime. The compressed air used should be of a quality that meets ISO 8573-1;...
- Page 23 Instruction book • All pipes should be installed stress-free and should be adequately supported. • The installation must be entirely leak-free in order to produce oxygen at the requested level and avoid uncontrolled oxygen leaks. • When the exhaust is connected to the outdoors, rigid metal air ducting pipes must be used. •...
- Page 24 Instruction book Reference Description Air inlet 2920 7215 90...
- Page 25 Instruction book Reference Description To product tank From product tank Gas outlet Exhaust Ventilation The ventilation requirements in the machine room depend on if the waste gas is routed outdoors or not. • Natural ventilation can be sufficient for one air change per hour •...
-
Page 26: Electrical Connections
Instruction book Electrical connections Electric power supply Danger: For safety reasons, the following instructions must be observed strictly. The electrical installation must comply with current standards, in particular regarding the earthing line. Recommendations: • Always connect the earthing line. • The main socket must be located in an easily accessible position. -
Page 27: Controller
Instruction book Controller Controller functions Figure 6: Vision Touch controller Introduction The controller has the following functions: • Controlling the unit • Protecting the unit • Monitoring components subject to service • Automatic restart after voltage failure (ARAVF) Automatic control of the unit The controller maintains the automatic operation of the unit based on the required purity settings. - Page 28 Instruction book Shutdown warning A shutdown warning level is a programmable level below the shutdown level. If one of the measurements exceeds the programmed shutdown warning level, a message will appear on the display and the general alarm LED will light up to warn the operator before the shutdown level is reached.
-
Page 29: Control Panel
Instruction book Control panel Figure 7: Control panel Reference Designation Function Shows the unit operating condition and several icons to Touch screen navigate through the menu. The screen can be operated by touch. Flashes in case of a shut-down, Warning sign is lit in case of a warning condition. - Page 30 Instruction book Menu Icon Menu Icon Menu Icon Inputs Outputs Counters Auxiliary Equipment Converters Parameters Service Service Overview Service Plan Service History Service Functions Clean Screen Week Timer Week Remaining Running Time Event History Saved Data Machine Alarms Settings Regulation Control Parameters Auxiliary...
- Page 31 Instruction book Menu Icon Menu Icon Menu Icon Controller Network Ethernet Settings Settings Settings CAN Settings Localisation Language Date/Time Units User Password Help Information Status icons Icon Description Motor Stopped Motor Stopped Wait Running Unloaded Manual Unload Running Unloaded Wait Running Loaded Failed to Load Running Loaded Wait...
- Page 32 Instruction book Icon Description Machine Control Mode, Local Machine Control Mode, Remote Machine Control Mode, LAN Automatic Restart After Voltage Failure Week Timer Active System icons Icon Description Basic User Advanced User Service User Antenna 25% Antenna 50% Antenna 75% Antenna 100% Change between screens (indication) Energy recovery...
-
Page 33: Main Screen
Instruction book Icon Description Reset Auto Restart Filter(s) Valve(s) Power Meter Input icons Icon Description Pressure Temperature Special Protection Open Closed Note: This chapter gives a general survey of available icons. Not all icons mentioned in this chapter are applicable to every machine. Main screen Function The main screen is the screen that is shown automatically when the voltage is switched on. -
Page 34: Quick Access Screen
Instruction book Description Reference Designation Function The home button is always shown and can be Home button tapped to return to the main screen. On the main screen, the screen information bar shows the serial number of the machine. When Screen information scrolling through menus, the name of the current menu is shown. -
Page 35: Graphic Screen
Instruction book Procedure The quick access screen can be viewed by swiping left, starting from the main screen. Description Through this screen, several important settings can be viewed and modified. Reference Function Description Several setpoints can be modified by tapping Setpoints this icon. -
Page 36: Menu Screen
Instruction book Procedure The graphic screen can be viewed by swiping left twice, starting from the main screen. Description Menu screen Function This screen is used to display the different menus where settings can be viewed or changed. Procedure The menu screen can be viewed by tapping the menu button or by swiping right, starting from the main screen. -
Page 37: Data Menu
Instruction book Reference Designation Function Alarms settings, regulation settings and control parameters can be changed through this menu. Auxiliary equipment parameters can also be Machine settings changed. The automatic restart function can be set through this menu. This function is password- protected. - Page 38 Instruction book • Status • Inputs • Outputs • Counters These submenus can be entered by tapping the icons. Procedure To enter the Data menu screen: 1. Tap the Menu button. 2. Tap the Data icon. Description Reference Designation Status menu Inputs menu Outputs menu Counters menu...
-
Page 39: Service Menu
Instruction book This menu shows information about all the inputs. Outputs menu Tap the Outputs icon to enter the Outputs menu. This menu shows information about all the outputs. Danger: Voltage-free outputs may only be used to control or monitor functional systems. They should NOT be used to control, switch or interrupt safety related circuits. - Page 40 Instruction book • Clean Screen These submenus can be entered by tapping the icons. Procedure To enter the Service menu screen: 1. Tap the Menu button. 2. Tap the Service icon. Description Reference Designation Service Service Functions (only visible as advanced user) Clean Screen Service menu Tap the Service icon to enter the Service menu.
-
Page 41: Week Timer Menu
Instruction book Clean screen Tap the Clean Screen icon to start the 15 seconds countdown to perform cleaning of the touch screen. The touch screen and the start and stop button become inactive for 15 seconds. 4.10 Week timer menu Function This screen is used to set up to 4 different timers with each up to 8 settings per day. -
Page 42: Event History Menu
Instruction book Reference Designation Function A selection screen pops up. The user can Add setting change the setting by swiping up or down and confirm by tapping ‘V’ or decline by tapping ‘X’. 4.11 Event history menu Function This screen is used to display the saved data in case of an alarm. These submenus can be entered by tapping the icons. - Page 43 Instruction book • Digital • Flow • Pressure • Regulation • Purity • Regulation • Capacity control • Control Parameters • Auto Restart These submenus can be entered by tapping the icons. Procedure To enter the Machine Settings menu screen: 1.
- Page 44 Instruction book Regulation menu Tap the Regulation icon to enter the Regulation menu. Setpoints can be modified and capacity control can be consulted through this menu. Modify a setting When tapping a list item, a selection screen pops up. The user can modify the setting by tapping ‘–’ or ‘+’...
- Page 45 Instruction book Capacity control Tap the Capacity control icon to enter the Capacity control menu. In this menu, you can view the operation of the Variable Cycle Saver. In this menu, you can view the operation of the Variable Flow Saver. Generator capacity The generator capacity shows the amount of flow the generator is able to produce at the current temperature, pressure and purity setpoint.
-
Page 46: Controller Settings Menu
Instruction book Through this menu, the automatic restart can be activated. The activation is password protected. The automatic restart settings can also be changed. Enter a password When tapping a password protected item, a selection screen pops up. The user can enter the password by swiping up or down to select the desired number. - Page 47 Instruction book Reference Designation User Password menu Help menu Information menu Network settings menu Tap the Network Settings icon to enter the Network Settings menu. Ethernet Settings The list of Ethernet Settings is shown. When ethernet is turned off, the settings can be modified. CAN Settings The list of CAN Settings is shown.
- Page 48 Instruction book When tapping a list item, a selection screen pops up. The user can modify the setting by tapping ‘–’ or ‘+’ and can confirm by tapping ‘V’ or decline by tapping ‘X’. Change a selection When tapping a list item, a selection screen pops up. The user can change the selection by swiping up or down and confirm by tapping ‘V’...
-
Page 49: Access Level
Instruction book 4.14 Access level Function Through this pop-up screen, the access level settings can be viewed or changed. Procedure The Access Level screen can be viewed or changed by tapping the Access Level button at the upper right corner of the screen. Description Reference Designation... -
Page 50: Web Server
Instruction book 4.15 Web server All controllers have a built-in web server that allows direct connection to the company network or to a dedicated PC via a local area network (LAN). This allows to consult certain data and settings via a PC instead of the display of the controller. - Page 51 Instruction book • Click with the right button and select Properties (1). • Use the check box Internet Protocol version +4 (TCP/IPv4) (1) (see picture). To avoid conflicts, uncheck other properties if they are checked. After selecting TCP/IPv4, click on the Properties button (2) to change the settings.
- Page 52 Instruction book • Connect the controller to the company's network (LAN) by using a UTP cable (min. CAT 5e). • Adapt the network settings in the controller. • Put the controller in advanced mode by navigating to Menu > Controller settings > Network settings >...
- Page 53 Instruction book • Open your browser and type the IP address of the controller you want to view in your browser (in this example http://192.168.100.100). The interface opens. Navigation and options • • The banner shows the unit type and the language selector. In this example, three languages are available on the controller.
-
Page 54: Operating Instructions
Instruction book Operating instructions Starting Note: The initial start-up after installation should always be done by trained personnel of the manufacturer or authorized distributor. For the designation of the components, see section Flow diagram. 1. Make sure all ball valves between the generator and the tanks are opened and the ball valve after the compressor is closed. -
Page 55: During Operation
Instruction book 13. Make sure the outlet flow measured by FT01 does not exceed the nominal flow of the oxygen generator. Regulate the flow by controlling FR01. Exceeding the nominal flow will cause the purity to drop. If the purity drops below the minimum purity setting, the outlet flow is cut off to enable flushing of the product tank. - Page 56 Instruction book started. The inlet flushing valve (Y11) allows a small flow of air through OR05 to the silencer, which will reduce the load of the dessicant dryer and allows the air tank to be dried until the required dewpoint is achieved. Variable Cycle Saver The oxygen generators are equipped with the Variable Cycle Saver (VCS) feature.
-
Page 57: Stopping
Instruction book changed. Based on this setting, the generator will only allow oxygen with a better purity than the Minimum purity setting to be sent to the installation. Standby mode When the oxygen consumption stops, the generator will enter standby mode automatically. All sensors remain powered to sense any changes to the output flow, oxygen purity and pressure levels. -
Page 58: Maintenance
Instruction book Maintenance General User maintenance is restricted to visual inspections. Do not attempt to modify or repair the apparatus. All maintenance and repairs shall be carried out by authorized trained personnel. The manufacturer offers serveral types of service contracts. Consult your supplier for more information. Maintenance schedule General To maintain the generator efficiency and to reduce the risks of faults, strictly observe the... - Page 59 Instruction book After maintenance activities, the service counter will be reset by the service technician. Note: Proper and timely maintenance is extremely important to safeguard the lifetime of the adsorbent. The manufacturer cannot take any responsibility for improper functioning of the generator if maintenance is not done as prescribed.
-
Page 60: Optional Equipment
Instruction book Optional equipment Outlet pressure dew point An outlet pressure dew point sensor (PDP02) is available as an extra measure to monitor the dew point of the consumed oxygen. This feature is especially useful if the oxygen dew point is a critical parameter in the process. -
Page 61: Troubleshooting
Instruction book Troubleshooting Low purity warning When the oxygen concentration in the product tank becomes lower than the Minimum purity setting, the generator will start flushing the product tank and show a low purity alarm. At this point, no oxygen is available at the outlet of the generator. 1. -
Page 62: Failed To Pressurize
Instruction book reduced by means of choking with a ball valve. This causes the produced compressed air to have enough time to pass the dryer and fill the air tank with the correct quality of inlet air. 2. Make sure that a dedicated external dryer is used if ambient temperatures exceed 30°C. Failed to pressurize This alarm is triggered when adsorber A or B failed to build up pressure. -
Page 63: No Outlet Pressure
Instruction book dryer is installed, the minimum inlet temperature is -10°C (14°F). When a refrigerant dryer is installed, the minimum inlet temperature is +10°C (50°F). Make sure that the inlet temperature does not go below the minimum value. No outlet pressure The oxygen generator features protections against overflow and regulations for guaranteed purity. -
Page 64: Technical Data
Instruction book Technical data Reference conditions Air pressure at generator inlet 6 bar 87 psi Ambient temperature (air inlet 20 °C 68 °F temperature) Air inlet quality Class [1-4-1] acc. ISO 8573-1:2010 Limitations for operation Inlet air quality Class [1-4-1] acc. ISO 8573-1:2010 Maximum compressed air inlet 10 bar 145 psi... - Page 65 Instruction book OGX 110 OGX 220 OGX 330 OGX 440 OGX 550 OGX 640 OGX 850 1070 Purity Oxygen flow (m 10.0 13.3 16.6 19.7 26.3 32.9 12.5 15.7 18.1 24.1 30.2 11.1 13.9 15.2 20.3 25.3 The indicated flow is the Free Oxygen Delivery (FOD), i.e. the oxygen flow referred to 20 °C, 1000 mbar and 0 % relative humidity.
- Page 66 Instruction book OGX 110 OGX 220 OGX 330 OGX 440 OGX 550 OGX 640 OGX 850 1070 G ¼" G ¼" G ½" G ½" G ½" G ½" G ½" G ½" outlet Waste ø80mm ø80mm exhaust ø80mm ø80mm ø80mm...
-
Page 67: Pressure Equipment Directives
Design criteria for pressure equipment: Number of Design Vessel Hazardous Type Medium adsorber pressure diameter volume (l) category vessels (bar) (mm) OGX 110 Oxygen OGX 220 Oxygen OGX 330 Oxygen OGX 440 Oxygen OGX 550 Oxygen OGX 640 Oxygen OGX 850 Oxygen OGX 1070... -
Page 68: Declaration Of Conformity
Instruction book Declaration of conformity Figure 9: Typical example of a Declaration of Conformity document Contact address: C. ARIA C. S.R.L. Via Soastene 34 Brendola (VI) CAP 36040 Italy Applicable directives Standards used On the Declaration of Conformity / Declaration by the Manufacturer, the harmonized and/or other standards that have been used for the design are shown and/or referred to. - Page 70 Experience. Customer. Service. www.n-psi.com...
Need help?
Do you have a question about the OGX 110 and is the answer not in the manual?
Questions and answers