Advertisement
Quick Links
Year of Manufacture:
Assembly, Operating, and Maintenance Instructions
Safety ..................................................... 2
Component Identification ..................... 3-4
Assembly ............................................... 5
Operation ............................................... 6-8
Maintenance .......................................... 9
Troubleshooting.................................... 10-11
Serial Number:
VTX
(Please log your machine's serial number and date of purchase for future reference.)
20____
PTF-100
Date:____
Vastex International, Inc.
7 Emery Street
Bethlehem, Pa. 18015 USA
Pg #
Phone# 610 625-2702 Fax# 610 625-2775
Web Site www.vastex.com
Authorized Representative in Europe:
Certification Experts BV
Nieuwstad 100 1381 CE Weesp,
The Netherlands
Tel : + 31 (0) 294 - 48 33 55
Fax : + 31 (0) 294 - 41 46 87
Vastex E-mail assistance
Purchasing & Product Info:
sales@vastex.com
Electrical Support:
stech@vastex.com
Tech Support, Mechanical Setup, and Operation:
techsupport@vastex.com
/
/
____
______
Screen Printing Issues & Support:
printech@vastex.com
Doc. # 01-18-011-1A March 5, 2024
Original Instructions
Advertisement

Summary of Contents for VASTEX PTF-100
-
Page 1: Table Of Contents
Doc. # 01-18-011-1A March 5, 2024 20____ Year of Manufacture: Original Instructions PTF-100 Assembly, Operating, and Maintenance Instructions Vastex International, Inc. 7 Emery Street Bethlehem, Pa. 18015 USA Pg # Phone# 610 625-2702 Fax# 610 625-2775 Web Site www.vastex.com ... -
Page 2: Safety
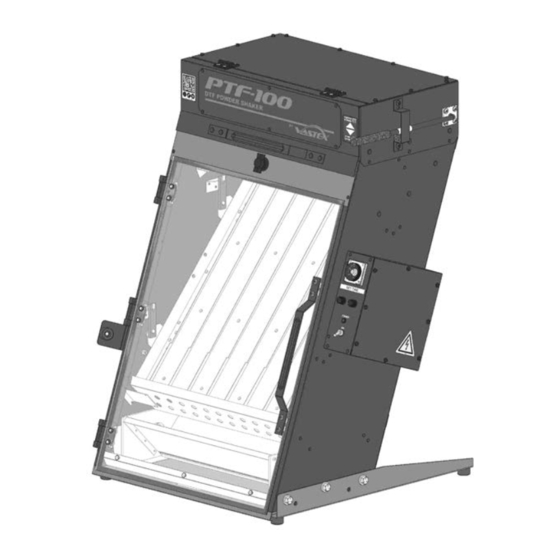
Store instruction manual and safety instructions near equipment for easy access to operators. VASTEX Powder Coater is intended for coating printed film with powder adhesive. Do not use for any other purpose unless authorized by Vastex International, Inc. Use of this equipment for any other purpose can be dangerous and may cause damage to this equipment voiding the warranty. -
Page 3: Component Identification
15) Cord Socket: Socket for main power cord to plug in to. 16) Exhaust: Powered exhaust designed to reduce amount of airborne powder particles. 17) Leg: Removable leg on either side of machine. Pg. 3 Vastex International Inc. | www.vastex.com | techsupport@vastex.com | sales@vastex.com | 610-625-2702... - Page 4 23) Spring: Metal spring used to provide clamping force on the powder seal, (3) used. 24) Bushing: Plastic bushing on powder retainer. One on either side of the hopper. 25) Powder Retainer: Used to clamp the hopper powder in the hopper. Pg. 4 Vastex International Inc. | www.vastex.com | techsupport@vastex.com | sales@vastex.com | 610-625-2702...
-
Page 5: Assembly
Assembly Your PTF-100 dose not come fully assembled from the factory. The Legs will need to be installed. Be careful not to damage the exhaust if laying the machine on its back. Support the machine with wood or foam blocks. -
Page 6: Operation
Operation Your PTF-100 comes standard with (2) Powder Hoppers. The Upper Hopper holds and distributes the powdered adhesive over the film to the bottom of the machine where the Bottom Hopper collects the unused powder. Follow the steps bellow for proper operation of the PTF-100. - Page 7 Powder Divertor to the rear of the machine. For film sizes 16”/A3 and smaller pull the Powder divertor to the front of the machine. Close the door afterwards. Film Powder Divertor Plate Pg. 7 Vastex International Inc. | www.vastex.com | techsupport@vastex.com | sales@vastex.com | 610-625-2702...
- Page 8 Timer Powder Handle After the motor times out, open the Main Door to remove the freshly coated film. Insert a new film and repeat the process. Pg. 8 Vastex International Inc. | www.vastex.com | techsupport@vastex.com | sales@vastex.com | 610-625-2702...
-
Page 9: Maintenance
Locate the Exhaust Fan on the back of the machine. Loosen the (2) upper Knobs on the Exhaust. Lift the Exhaust Fan up to reveal the Blue Exhaust Filter. Clean or replace the Exhaust Filter. Knobs Pg. 9 Vastex International Inc. | www.vastex.com | techsupport@vastex.com | sales@vastex.com | 610-625-2702... -
Page 10: Troubleshooting
Retainer. Loosen the Sheet Metal Screws with a 1/4” nut driver to raise or lower the Limit Switch Bracket. Bolt Sht. Mtl. Screws Pg. 10 Vastex International Inc. | www.vastex.com | techsupport@vastex.com | sales@vastex.com | 610-625-2702... - Page 11 Plate and re-insert the Top Hopper. Test to see if the motor is functioning properly now, re-adjust if necessary. Nuts Striker Plate NOTE: The Striker Plate must be located as shown in the above image. Pg. 11 Vastex International Inc. | www.vastex.com | techsupport@vastex.com | sales@vastex.com | 610-625-2702...


Need help?
Do you have a question about the PTF-100 and is the answer not in the manual?
Questions and answers