
Related Manuals for Flexiheat ThermoMax 120


Summary of Contents for Flexiheat ThermoMax 120
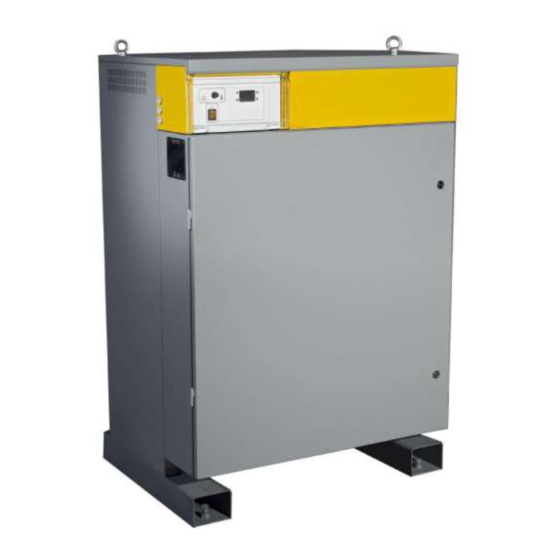
- Page 1 TMS-UT-1216-Z01-7 ELECTRIC BOILERS FOR CENTRAL HEATING T h er moMax INSTRUCTIONS FOR INSTALLATION INSTRUCTIONS FOR INSTALLATION We reserve the right of alternations...
-
Page 2: Safety Information And Warnings
TMS-UT-1216-Z01-7 WE ARE NOT LIABLE FOR DAMAGES RESULTING FROM NON- OBSERVING THESE INSTRUCTIONS Safety information and warnings Read this document carefully before manipulation, any installation, setup, or service, and follow the instructions Keep these instructions in the vicinity of the boiler! •... -
Page 3: Table Of Contents
TMS-UT-1216-Z01-7 Contents Safety information and warnings ................... 2 1. Introduction ........................5 1.1. Applicable documents ....................5 1.2. Retention of documents ....................5 1.3. Introduction ......................... 5 1.4. Heating curves ......................5 1.4.1. Availability of heating curves................. 5 1.4.2. About Heating curves ................... 5 1.4.3. - Page 4 TMS-UT-1216-Z01-7 6.2. Introduction to control panels ..................18 6.2.1. Control panel display ..................19 5.5.1. Entering and navigating user menu ..............19 6.2.2. Example how to change date and time ............20 6.2.3. Temporary override heating curves (Turbo Mode) ...........21 6.2.4. Offsetting Heating curve ..................21 6.2.5.
-
Page 5: Introduction
TMS-UT-1216-Z01-7 1. Introduction Thank you for the confidence you have shown to us by purchasing our central heating boiler. In order to use the boiler to the utmost correctly and safely, and above all economically, read thoroughly these instructions before continuing with installation. The appliances must be installed by a competent person, who is responsible for adhering to the existing regulations, rules and guidelines. -
Page 6: Why Does The Characteristic Heating Curve Have To Be Set
TMS-UT-1216-Z01-7 Factory defined curves If the heating curve is set optimally for heating of your apartment or house, corrections will not be necessary. 1.4.3. Why does the characteristic heating curve have to be set? After the first settings of the heating curve authorized person can adjust, correct that curve if necessary. Every heating room is built up differently. -
Page 7: Limiting The Minimum And Maximum Temperature Of Water In The Boiler
TMS-UT-1216-Z01-7 Inclination of the Offset curve Factory settings Room temperature is too low if the external temperature is Change with the first Add with offset above + 5 lower curve Room temperature is too low if the external temperature is Leave the curve 1,5 Add with offset between + 5... -
Page 8: Boiler Specifications
(otherwise, the circulation pump of central heating would not operate). 2. Boiler specifications 2.1 Hydraulic pressure drop Pressure drop for Thermomax 120 - 300 kW Pressure drop for Thermomax 400 - 500 kW Page 8... -
Page 9: Dimensions
TMS-UT-1216-Z01-7 2.2 Dimensions ThermoMax 120-300kW ThermoMax 120-180 kW ThermoMax 210-300 kW 1033 Page 9... - Page 10 TMS-UT-1216-Z01-7 ThermoMax 400-500kW Page 10...
-
Page 11: Power Stages
TMS-UT-1216-Z01-7 2.2 TECHNICAL DATA FOR ThermoMax BOILERS Model Power 120 kW 150 kW 180 kW 210 kW 255 kW 300 kW 400 kW 500 kW Fuse (A) 3 x 200 3 x 250 3 x 315 3 x 315 3 x 400 2x(3x250) 2x(3x315) 3x(3x250) -
Page 12: Nominal Current Per Phase
TMS-UT-1216-Z01-7 2.4 Nominal current per phase Model kW Power cable* 2x(120) 2x(185) 3x(150) Stage1 [A] 21,7 17,3 21,7 17,3 17,3 21,7 43,4 43,4 Stage2 [A] 43,3 21,7 43,3 33,8 52,0 65,0 86,7 95,4 Stage3 [A] 65,0 39,0 65,0 51,1 69,3 86,6 130,1 138,7... -
Page 13: Filling The Heating System - Water Quality
TMS-UT-1216-Z01-7 The recommended flow produces a Δt of 10 C with the boiler on full power. Recommended Min Flow Max flow Boiler Flow m ThermoMax 120 ThermoMax 150 ThermoMax 180 ThermoMax 210 ThermoMax 255 ThermoMax 300 ThermoMax 400 ThermoMax 500... -
Page 14: Preliminary Remarks
TMS-UT-1216-Z01-7 3.2 Preliminary remarks When connecting the appliance to the fixing wiring, the means for disconnection (circuit breaker) must be incorporated in fixing wiring in accordance with the local wiring regulations . A s afety valve is not mounted on T h ermoMax boilers at the factory. A safety valve with a 6 bar setting must be installed either on the boiler ( see below), or on the system for overpressure protection “Pressure switches or a combined hi / low pressure switch to protect the boiler from low (1 Bar) or high (6 Bar maximum) pressure must be fitted to either the heating system or the boiler –... -
Page 15: Power Supply
3.3.2. Power supply The boiler is rated as a high-power appliance and fixed wiring must be used. Please observe chapter 2.2. about fuse and conductor requirements. When connecting the appliance to the fixing wiring the means for disconnection (circuit breaker) must be incorporated in fixing wiring in accordance with the local wiring rules. Note: In some cases, additional measures must be taken, subject to the requirements of the Local Authorities. -
Page 16: Power Supply Connection
TMS-UT-1216-Z01-7 4.2. Power supply connection Note: Before working with the appliance, turn off the power supply (circuit breaker) and secure against restart. A boiler is rated as a high power appliance and fixed wiring must be used. Please observe chapters 2.2. for fuse and conductor requirements. When connecting the appliance to the fixing wiring, the means for disconnection circuit breaker) must be incorporated in fixing wiring in accordance with the local wiring rules and regulations. -
Page 17: Connecting Boilers In Cascade
TMS-UT-1216-Z01-7 4.5. Connecting boilers in cascade For cascade boiler connection please see electrical diagram 2.71 under the controls section. Note: For cascade connecting it is necessary that live and neutral wires of control power are connected correct on all boilers. If to any of boilers are live and neutral wires replaced, cascade won’t be activated. - Page 18 1. Control panel – option X Ž Mark Description Control panel power switch Cutout thermostat with manual deactivation (1) Cutout thermostat with manual deactivation (2) Touch screen...
-
Page 19: Control Panel Display
1.1. Control panel display Control panel in stand-by mode Operating panel 1.2. Entering and navigating through the user menu Touch icon to enter the user menu. Touch icons for moving through the menu and changing values. Touch the desired option or symbol to select and confirm the value. - Page 20 1.2. User menu options Menu language Language selection for menus and messages Power limit Limiting the maximum number of stages Info Display of information about the device itself and the operation of individual groups of heaters and the energy used Day/night mode Enabling/disabling operation in day and night mode Night temperature...
- Page 21 1.4. Example of changing the date and time Tap on the date and time screen to open the settings. REMARK: The time and date are automatically updated over the network!! Touch the field you want to change the value of, then after the marked field frame, by touching the symbol set the desired value.
-
Page 22: Offsetting Heating Curve
It is also possible to adjust the desired value using the dial. To access the dial, touch the displayed temperature on the screen. Tap to enter the desired value, then tap the symbol on the screen to confirm and save the change or touch for recall. - Page 23 It is also possible to adjust the desired value using the dial. To access the dial, touch the displayed temperature on the screen. Tap to enter the desired value, then tap the symbol on the screen to confirm and save the change or touch for recall.
- Page 24 Control panel connected to the network. To display the network settings, touch the marked icon on the screen. Network settings view. To adjust the network parameters, it is necessary to select the "Network settings" option in the user menu. If DHCP is active, it must be deactivated to adjust the parameters. DHCP activation/deactivation.
-
Page 25: Service Menu Options
1.8. Entering and moving through the service menu To access the service menu, select the "Service menu" option in the user menu Enter the PIN to access the service menu. PIN code: 334112 Touch icons for moving through the menu and changing values. -
Page 26: Control Mode
(displayed only if the outdoor temperature Factory value: sensor is active) Radiator heating: 1.5 Floor heating: 0.6 Stand-by temperature The minimum temperature that will be maintained in the boiler when in standby mode. Factory value: 15 °C Minimum boiler Limitation of the minimum boiler temperature that can be selected. temperature Factory setting value: - Radiator heating: 40 °C... - Page 27 1.10. Signaling and display of errors in operation Error example „Overheating“ If the boiler overheats, the overheating symbol will flash at the top of the screen. Tapping on the error symbol will open a message with a more detailed description of the error. A message with a description of the error.
- Page 28 1.11. Cascade mode Cascade mode must be enabled in the service menu, section: "Cascade mode" Cascade mode must be enabled on all slave boilers that are connected to the cascade!!! Do not turn on Cascade mode on the primary (master) boiler. In cascade mode, the input and output signal symbols of cascade operation are shown on the screen.
-
Page 29: Maintenance
If boilers in cascade operation are controlled by means of an external temperature sensor or by means of analogue input signals 0-10 V, external control is performed only on the primary (master) boiler, all slaves must be set to "Local" control mode, and the external temperature sensor must be switched off. - Page 30 1.12. Remote control 0-10 V Select the desired control mode from the service menu, section: “Control mode“ Remote power control If remote power control is selected as the control mode, the remote control symbol and information about the active number of steps depending on the value of the input signal AI1 will be displayed at the bottom of the screen.
- Page 31 2. Connecting module 2.1. Connecting module layout Picture 3 Connecting module Picture 4 Connecting module – pin layout...
- Page 32 2.2. Outdoor temperature sensor connection The outdoor temperature sensor is connected to the screw terminals marked "TS2" on the connection module. The terminals of the outdoor sensor and the connection method are shown in the picture below: Picture 5 Connecting the external temperature sensor.
- Page 33 2.3. Connecting the sensor for DHW tank *under development* The sensor for DHW tank is connected to the screw terminals marked "TS3" on the connection plate. The sensor terminals for DHW tank and the connection method are shown in the picture below: Picture 6 Connecting the sensor for DHW...
- Page 34 2.4. Connection of signals for remote control via analogue inputs In the case of remote control via analogue signals 0-10 V, the following terminals are connected to the connection module: a) AI1 – analogue input (depending on the settings, it is possible to manage the desired temperature of the boiler or the desired active power) b) AO1 –...
- Page 35 2.5. Contacts connection remote MCB shutdown In case of overheating, when the temperature inside the boiler reaches a value of 110⁰C, the safety thermostats will activate the -K100 relay. In order to prevent the destruction of the boiler, it is necessary to interrupt the main power supply of the boiler in such a way as to turn off the main protective device MCB of the same.
- Page 36 Option 2: NC contacts for automatic shutdown in case of emergency Picture 9 Option 2 – NC...
- Page 37 2.6. Connecting pressure switches or other protective devices On the connection module there is a relay -K300 with 1 C/O contact outputs, to which the user is free to connect a pressure switch or any similar protection/signaling device. The relay is activated by connecting the signal conductor of the device (230 V; 50/60 Hz) to the faston output, which will activate the relay at the moment of action.
- Page 38 2.7. Maximum power signal If the boiler reaches the maximum level of power, a signal will be activated on the connection module and it is used to give an order to start operation to the next boiler with which it is connected in cascade.
- Page 39 2.8. Alarm In case of any boiler malfunction, the control panel will deactivate the alarm relay, which is constantly activated during normal operation. The voltage-free 1 C/0 contacts of the same are available to the user on the connection plate. The alarm relay contacts are shown in the picture below: Picture 12 Alarm relay contacts...
-
Page 40: Periodic Checking
TMS-UT-1216-Z01-7 7. Maintenance 7.1. Periodic checking We recommend the inspection of the device once a year by the authorized service provider (before heating season). This service is not included in the warranty. During the inspection, all electric and water connections should be tightened, the system should be vented and – if necessary – filled up, valves and general functionality of the device should be checked. -
Page 41: Troubleshooting
TMS-UT-1216-Z01-7 8. Troubleshooting Air is present inside boiler’s reservoir and heating is not active. Even if boiler is equipped with automatic venting valve, manual venting is advisable if large amount of air is present inside reservoir. When boiler is properly vented the error will be automatically dismissed and boiler will continue with normal operation. - Page 42 TMS-UT-1216-Z01-7 Temperature sensor If temperature sensor is properly connected but control panel is signaling problem, use following table to compare measured resistance of sensor with actual temperature readings. AMBIENT RESISTANCE TEMPERATURE (Ω) MIN. TYP. MAX. (°C) (°F) 1338 1367 1396 −20 −4 1467...
- Page 43 TMS-UT-1216-Z01-7 Boiler operates incorrectly, moving The flow of water through boiler is too low, please refer to up a couple of stages before chapter 2.5 The boiler flow requirements. immediately moving down again, Pump or valves could be defective and should be checked. etc…...
Need help?
Do you have a question about the ThermoMax 120 and is the answer not in the manual?
Questions and answers