Table of Contents
Advertisement
Quick Links
Advertisement
Table of Contents

Subscribe to Our Youtube Channel
Related Manuals for CanadianSolar EP Cube Lite


Summary of Contents for CanadianSolar EP Cube Lite
- Page 1 EP Cube Lite Installation Manual www.epcube.com Version: V1.2...
-
Page 2: Table Of Contents
2. Disclaimer ....................................3 3. Copyright ....................................3 4. Abbreviated Terms ................................4 5. Customer Services Contact ............................4 THE EP CUBE LITE SYSTEM ................................ 5 1. System Scenarios ................................5 2. Standard Components ..............................6 3. Optional Accessories ................................ 7 EP CUBE LITE INSTALLATION .............................. - Page 3 1. Torque Values ..................................63 A. Torque values for fasteners ............................. 63 B. Torque values for wires .............................. 63 2. EP Cube Lite Recommended Wire Gauges ......................64 3. Troubleshooting ................................64 A. Checklist ................................... 64 B. Power Cycle the System ............................65...
-
Page 4: Introduction
EP Cube Lite Installation Manual INTRODUCTION This manual describes the installation process and provides a set of guidelines for EP Cube system installers. Please thoroughly read this manual before installation and follow the instructions during the entire installation process. If you have any further queries regarding the product, please contact the EP Cube service team. For more... -
Page 5: Abbreviated Terms
EP Cube Lite Installation Manual 4. Abbreviated Terms ABBR Description Ampere Alternating Current Current Transformer COMM Commissioning Direct Current Electric Vehicle Kilowatt L (L1 L2) Phase (1,2) Light-emitting Diode Locked Rotor Amps Neutral Rapid Shutdown Device Part Number Photovoltaic Voltage... -
Page 6: The Ep Cube Lite System
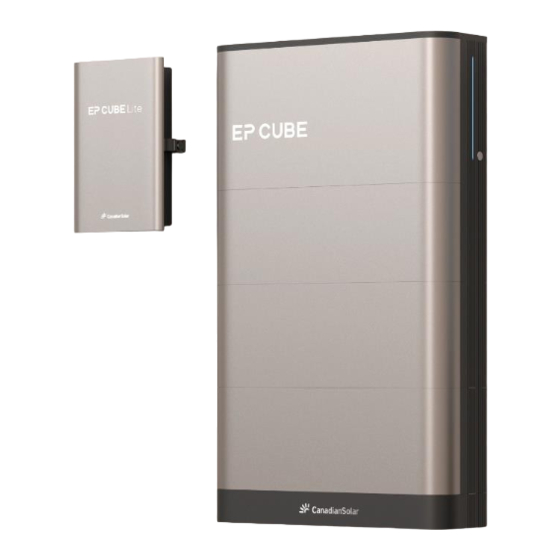
EP Cube Lite Installation Manual THE EP CUBE LITE SYSTEM The EP Cube system consists of two standard components: the Hybrid (also referred to as Hybrid Stack) and ComLite. Additionally, users have a wide range of optional accessories available to choose from based on site and customer-specific needs. -
Page 7: Standard Components
EP Cube Lite Installation Manual Standard Components A. Hybrid Hybrid is an integrated battery storage system that includes both Battery Modules and Hybrid Inverter. (Refer to US Specification for more details) Reference Model: Standard Hybrid + Battery modules*3Pcs B. ComLite... -
Page 8: Optional Accessories
EP Cube Lite Installation Manual Optional Accessories Description Part Number Model Name Note Wall-mount Kit 1005-00023-00 Wall mounted Kit Optional for Hybrid A. Wall-mount Kit Optional for Hybrid, used to install base and Hybrid when mounted on the Wall. -
Page 9: Ep Cube Lite Installation
EP Cube Lite Installation Manual EP CUBE LITE INSTALLATION The EP Cube can be mounted on a floor or wall with floor mounting brackets provided in the shipment. For wall- mounted installation, an optional mounting kit needs to be ordered. -
Page 10: Hybrid
EP Cube Lite Installation Manual WARNING The EP Cube can only be installed, repaired, replaced, and maintained by authorized EP personnel for safety and warranty purposes. Installing any third-party components or devices inside the EP Cube without prior approval from the EP service team is strictly prohibited. - Page 11 EP Cube Lite Installation Manual Table 1. Tools Examine and ensure that the following quantities are correct based on the placed order, and verify that no parts were broken or damaged during transportation. You can use the provided unpacking inspection guide below to...
- Page 12 EP Cube Lite Installation Manual Hybrid Inverter Box 1. Hybrid Inverter 7. Inverter Bracket B2_2pcs 2. Inverter Side Cover A_1pcs 8. Communication Cable_1pcs 3. Inverter Side Cover B_1pcs 9. Resistor_1pcs 4. Hybrid Bracket C_1pcs 10. Hybrid Drill template_1pcs 5. Inverter Side Bracket D_2pcs 11.
- Page 13 EP Cube Lite Installation Manual Battery Modules Box 1. Battery module 5. Battery Bracket B1_2pcs 2. Battery Side Cover B_2pcs 6. Battery Bracket B2_2pcs 3. Hybrid Bracket C_1pcs 7. Battery Side Bracket F_M5_4pcs 4. Bracket Side Bracket F_2pcs 8. Battery Bracket B_M6_8pcs Base Modules Box 1.
- Page 14 EP Cube Lite Installation Manual Optional Wall Mount Lift Kit Box 1. Wall Bracket E1_2pcs 4. Wall Bracket E_M6_4pcs 2. Wall Bracket E2_1pcs 5. Wall Bracket E_M8_4pcs 3. Hybrid Bracket C_1pcs Installation Space The heat sink and cooling fans located on the back of the hybrid inverter protrudes an extra 3.4 inches ⚫...
-
Page 15: Installation Process
EP Cube Lite Installation Manual B. Installation Process Floor Mounted & Wall Mounted Installation Before mounting the template on the wall - cut on the appropriate cut line that associates to type of size hybrid you plan on installing. Refer to diagram below. - Page 16 EP Cube Lite Installation Manual Floor mounted Step-1 Position the mounting holes Place the template on the wall with the lower edge aligned with the floor surface. Remove the adhesive tape from the edges of the template and affix it to the wall.
- Page 17 EP Cube Lite Installation Manual...
- Page 18 EP Cube Lite Installation Manual Floor mounted Step-2 Install the Bracket C on the wall. (3 Battery modules system shown as an example below) Remove the drill template. Position Hybrid Bracket C on the wall, ensuring that the holes align correctly.
- Page 19 EP Cube Lite Installation Manual Floor mounted Step-3 Install the Base with mounting Bracket G: Attach the base and Bracket G using bolts (M6-0.63"). Place the base on the floor with a minimum distance of 4-1/4 inches between the wall and base.
- Page 20 EP Cube Lite Installation Manual Wall mounted Step-1 Before mounting the template on the wall - cut on the appropriate cut line that associates to type of size hybrid you plan on installing. Refer to diagram below. CAUTION: Please ensure a safe distance is maintained between the Hybrid and other objects.
- Page 21 EP Cube Lite Installation Manual...
- Page 22 EP Cube Lite Installation Manual Wall mounted Step-2 Position the mounting holes Use a tape measure, level tool, and pencil to mark a "start line" on the wall. Align the lower edge of the template with the marked start line and place it on the wall.
- Page 23 EP Cube Lite Installation Manual Note: The wall-mounted installation requires one additional bracket C compared to the floor- mounted installation. That additional bracket C is included in the Wall Mount Lift Kit Box.
- Page 24 EP Cube Lite Installation Manual Wall mounted Step-3 Install Bracket C on the wall (3 Battery modules system shown as an example below) Remove the drill template. Position the Hybrid Bracket C to ensure the correct alignment of the holes.
- Page 25 EP Cube Lite Installation Manual Wall mounted Step-4 Install the Base on Bracket E: a. Assemble the Wall-Mount Kit (Bracket E) by aligning and attaching Bracket E2 to the inside holes on the vertical section of the Bracket E1 legs using bolts (M6-0.63"). Use a socket wrench to tighten the bolts securely.
- Page 26 EP Cube Lite Installation Manual d. Attach the Base to the horizontal section of Bracket E using bolts (M6-0.63") through the oval holes of Bracket G. Place the assembled Base on Bracket E and secure it by attaching Bracket G to Bracket E.
- Page 27 EP Cube Lite Installation Manual Tighten all the bolts to the specified torque values. (Refer to Appendix - Torque Values).
- Page 28 EP Cube Lite Installation Manual Wall mounted Step-6 Install the Hybrid Inverter on top of the battery stacks using Inverter brackets B & D. a. Carefully place the Hybrid Inverter on top of the stacked battery modules and ensure that the sockets are properly connected.
- Page 29 EP Cube Lite Installation Manual Connect Inverter Brackets B1 and B2 using bolts (M6-0.63"). ⚫ ⚫ Use a screwdriver or torque wrench to tighten all bolts to the specified torque values. (See Appendix - Torque Values for reference). Use a level tool to ensure that the Hybrid Inverter is properly leveled.
-
Page 30: Comlite
EP Cube Lite Installation Manual 3. ComLite This section introduces the sequential installation process for ComLite. A. Preparation ⚫ Please check if there are any optional accessories that need to be installed. If there are, please install the accessories before proceeding. - Page 31 EP Cube Lite Installation Manual Open the cover. Step-2: Position the mounting holes Use a tape level tool and a pencil to mark the drill positions for the holes on the installation area. Place the ComLite on the wall and locate the drill holes as shown in the picture below.
- Page 32 EP Cube Lite Installation Manual threads and then tighten the screws. Cover the the rest of screw as shown in the figure below. Apply this pro to all 4 screws. NOTE: The silicone sealant should be prepared by the installer before starting the...
-
Page 33: Ep Cube Lite System Wiring
To ensure personal protection and property safety, please read the safety chapter carefully and strictly adhere to all safety guidelines throughout the entire installation process. Preparation According to the EP Cube Lite system configuration and wiring scheme: ⚫ Prepare the necessary quantity of electrical and installation materials, ensuring they are of the appropriate dimensions. -
Page 34: Wiring Connection
EP Cube Lite Installation Manual 2. Wiring Connection CAUTION: Before starting, make sure to turn off all circuit breakers. Ensure you are wearing the appropriate personal protective equipment (PPE) before beginning. A. Wiring From the Solar Panels to the Hybrid... -
Page 35: Wiring From The Hybrid Inverter To Comlite
EP Cube Lite Installation Manual Figure 1. Hybrid to PV Array DC Input Wiring B. Wiring From the Hybrid Inverter to ComLite Step-1: Open the panel latch on the right side of the ComLite. - Page 36 EP Cube Lite Installation Manual Step-2: Connect Hybrid Wires to ComLite Prepare the conduit for Hybrid Wires to the ComLite. Open the ComLite COMS and the Hybrid port to mount conduits: (See Figure 3 for reference) ⚫ Use a hammer and flat head screwdriver to open the "COMS port" and "HYBRID port" at the bottom of the ComLite for cable gland installation.
-
Page 37: Wiring Of Hybrid To Grid Connections
EP Cube Lite Installation Manual NOTE: The knockout for Hybrid and Com at the bottom of the ComLite can accommodate a cable gland with a maximum diameter of 3/4” or less. Route the Hybrid signal wires through the conduit to connect them to the ComLite CAN terminal. -
Page 38: Wiring In Comlite To Grid Connections
EP Cube Lite Installation Manual Strip the wire ends using a wire stripper, then use a flat-head screwdriver to open the breaker ⚫ terminals. Insert the cables and securely tighten the screws. Note: When making connections on the neutral terminal, it is important to terminate the neutral cables on the lower terminals first. -
Page 39: Wiring Of "Ct-Kit
EP Cube Lite Installation Manual and ground between the Main Service Panel (or subpanel) and the ComLite. ⚫ Strip the wire ends using a wire stripper, then use a flat-head screwdriver to open the breaker terminals. Insert the cables and securely tighten the screws. - Page 40 EP Cube Lite Installation Manual Figure 6. Wiring of “CT-Kit” CAUTION: There are two types of CT: 200A CT and 100A CT. In this instance, we are using two 200A CTs that are ⚫ installed at the Main Electric Distributor. The figure below shows the 200A CT.
-
Page 41: Wiring Of Other Components
EP Cube Lite Installation Manual F. Wiring of Other Components CAUTION: Please ensure that all circuit breakers are turned off and PPE is properly worn before getting started. ⚫ ⚫ Please ensure that the main breaker of the property's Grid is turned off and protected with Lockout/Tagout procedures. - Page 42 EP Cube Lite Installation Manual CT terminal. Figure 8. Wiring of CT for 3RD Party Inverter CAUTION: There are two types of CTs: a 200A CT and a 100A CT. Here we use the 100A CT that is installed at the Main Service Panel or Subpanel.
- Page 43 EP Cube Lite Installation Manual circuit.
-
Page 44: Ep Cube Lite System Commissioning
EP Cube Lite Installation Manual EP CUBE LITE SYSTEM COMMISSIONING Each site or EP ComLite system is tied to two accounts, the user account which is typically the homeowner and the installer account which is typically the installer or installation company. The EP Cube App allows both accounts to monitor the system’s performance and status while installer account has more features on the app for... - Page 45 EP Cube Lite Installation Manual Preparation before EP CUBE Lite startup: Please confirm that the Emergency Stop Button is not pressed, as shown in Figure 1 below. Emergency Stop Button...
- Page 46 EP Cube Lite Installation Manual a. Connect the Battery Fuse. Turn on the PV switches on the Hybrid Inverter by rotating switches clockwise. b. Turn on the main breaker. c. Install the dead front cover and ensure that no live electrical wires are exposed during operation.
-
Page 47: Log In To The App With The Installer Account
EP Cube Lite Installation Manual D. Log in to the App with the Installer Account Log in with the installer account on the login page. E. Commissioning via EP CUBE app System commissioning and setup have been made easy with the EP CUBE app. It enables users to commission the system, monitor its performance, and perform basic troubleshooting by providing error and fault lists with the installer account. - Page 48 EP Cube Lite Installation Manual “Add Comlite”: Beginning with the add device step, Scan the QR code to add the SN of ComLite. Note: If the QR code of a certain device cannot be recognized and scanned, manually input the serial number.
- Page 49 EP Cube Lite Installation Manual “Device Location”: Complete the information related to location site and time. Finally, tap on Next to move to Bluetooth configuration. “Bluetooth”: Turn on your phone’s Bluetooth and dedicated breaker to power on the ComLite. Tap on the “Connect”...
- Page 50 EP Cube Lite Installation Manual There is a slight difference between the Wi-Fi page interface of iOS and of Android. Android displays all available Wi-Fi networks, whereas iOS only displays the network your phone is currently connected to.
- Page 51 EP Cube Lite Installation Manual “Device Update”: In this step firmware of the RTU module and EPCUBE are updated to latest available versions automatically. To begin, tap the “Check for updates” button, and than the “Update” button. Be mindful of any tips provided.
- Page 52 EP Cube Lite Installation Manual Tap the update button on the EP CUBE page to start the update. Once the update is successfully completed, tap the “Next” button. * If for any reason the update process fails, an “update failed” message will be displayed. Tap the...
- Page 53 EP Cube Lite Installation Manual “Grid”: Select the applicable grid standard or enter the Puerto Rico Custom information. The dropdown list already includes various applicable standards for the Grid standard. Toggle on or off the DC Solar Export based on customer’s desire or Utility restrictions. Finally, tap on the Next button to proceed to the ComLite configuration step.
- Page 54 EP Cube Lite Installation Manual “Asset”: It allows the addition of Hybrid Inverter, battery modules and base information. Step a. Enter the device name as desired by the customer. A good option is customer’s last name & Street or Town – i.e. – Dornfeld–511 Broadway.
- Page 55 EP Cube Lite Installation Manual “Warranty”: This allows the user to register the warranty. It requires the owner's email, phone number, and the uploading of required pictures.After entering the above information, tap the “Next” button to complete the commissioning process.
-
Page 56: Commissioning Via Ep Cube App
EP Cube Lite Installation Manual Once the commissioning is complete, return to the homepage. Select an appropriate operation mode and reserve SOC value based on energy usage preferences. F. Commissioning via EP CUBE app Finally, turn on the Hybrid by pressing the power button as shown in the picture. Ensure that all inputs and outputs... -
Page 57: End
EP Cube Lite Installation Manual G. End Observe and verify that the EP CUBE is working according to the desired settings. Refer to the following table to understand the different LED indications that the EP Cube Hybrid LED may display during operation. -
Page 58: Important Safety Instructions
EP Cube Lite Installation Manual IMPORTANT SAFETY INSTRUCTIONS For personal protection and property safety, please read this section carefully and strictly implement its contents before installing and using the product. EP company is not liable for any loss caused due to the violation of the instructions in this manual. - Page 59 EP Cube Lite Installation Manual ⚫ Be careful to protect the EP Cube from impact when installing it in a garage or near vehicles. If possible, install the EP Cube on a side wall or above the height of vehicle bumpers.
-
Page 60: Personal Protective Equipment
EP Cube Lite Installation Manual 2. Personal Protective Equipment Properly wear the following safety equipment to perform installations. Installers must comply with the relevant requirements of standards, such as IEC, OSHA, state, and local laws. -
Page 61: Maintenance
EP Cube Lite Installation Manual Maintenance 1. System Overload Each EP CUBE can provide up to 3-7.6 kW of continuous power with peak outputs of 10KVA and 22kVA (without and with sun). You can back up any number of appliances, so long as their combined power usage does not exceed the total continuous power rating of your EP CUBE system. -
Page 62: Frequently Asked Questions
Once EP CUBE Lite is installed what happens during a power outage? During a power outage, the EP CUBE Lite will turn off and any PV production tied to the EP Cube Hybrid Inverter or 3rd Party Solar Inverter will turn off as well. - Page 63 EP Cube Lite Installation Manual 12. Can I update my EP CUBE firmware through the EP CUBE app? How can I determine the installed firmware version? The EP CUBE app enables automatic remote firmware updates using the "Over the Air" (OTA) feature.
-
Page 64: Appendix
EP Cube Lite Installation Manual APPENDIX 1. Torque Values A. Torque values for fasteners Torque Values Table • N/m (lbs/inch) Bolt Dia.(mm) PCB Panel bolts Countersunk bolts Other bolts 0.5 (4.5) - N/A - - N/A - 1.1 (10) 2.2 (20) -
Page 65: Ep Cube Lite Recommended Wire Gauges
Code/AHJ Interconnection Guidelines 3. Troubleshooting If the EP CUBE Lite system is not functioning properly, please follow the steps below to check and operate the system. A. Checklist The table below will help us identify the possible causes of the issue. -
Page 66: Power Cycle The System
EP Cube Lite Installation Manual Check Items Requirements Communication Wiring and Resistor Wiring should be correct. Check The resistor should be installed. Commissioning Check Commissioning should be done correctly. There should be no significant gap between battery Exterior Check modules and hybrid inverter.
Need help?
Do you have a question about the EP Cube Lite and is the answer not in the manual?
Questions and answers