CanadianSolar CSI-75K-T40001-E User Manual
Hide thumbs
Also See for CSI-75K-T40001-E:
- Quick installation manual (20 pages) ,
- User manual (46 pages) ,
- Quick installation manual (20 pages)

Subscribe to Our Youtube Channel
Related Manuals for CanadianSolar CSI-75K-T40001-E


Summary of Contents for CanadianSolar CSI-75K-T40001-E
- Page 1 CSI-75K-T40001-E CSI-100K-T4001A-E CSI-100K-T4001B-E CSI-110K-T4001A-E CSI-110K-T4001B-E CSI-120K-T4001A-E CSI-120K-T4001B-E PV Inverter User Manual (Part No: 91000076; Release Date: February, 2023)
-
Page 2: Table Of Contents
Contents All Rights Reserve _____________________________________________________________________________________ 1 About This Manual ____________________________________________________________________________________ 1 Limitation of Liability ___________________________________________________________________________________ 1 Target Group _____________________________________________________________________________________________ 1 Symbol Conventions _____________________________________________________________________________________ 1 1 Safety __________________________________________________________________________________________________ 2 1.1 Utility Grid ___________________________________________________________________________________________ 2 1.2 Inverter _______________________________________________________________________________________________ 2 1.3 Skills of Qualified Personnel ________________________________________________________________________ 3 2 Product Introduction _______________________________________________________________________________ 3 2.1 Intended Usage _____________________________________________________________________________________ 3 2.2 Product Introduction _______________________________________________________________________________ 4... - Page 3 5 Electrical Connection ______________________________________________________________________________ 14 5.1 Safety _______________________________________________________________________________________________ 14 5.2 Electrical Connection Overview __________________________________________________________________ 14 5.3 Connecting the PE Cable _________________________________________________________________________ 15 5.3.1 Additional Grounding Requirements _______________________________________________________________________________ 15 5.3.2 Connection Procedure ______________________________________________________________________________________________ 15 5.4 Communication Cable Connection _____________________________________________________________ 16 5.4.1 Opening the Wiring Compartment _______________________________________________________________________________ 16 5.4.2 Communications Interface Description ___________________________________________________________________________ 17 5.4.3 RS485 Communication______________________________________________________________________________________________ 17 5.4.4 Dry Contact Connection ____________________________________________________________________________________________ 20...
-
Page 4: All Rights Reserve
Only qualified professionals and service personnel can do the installation and operation (refer to 62109-1). Installers must inform end-users (consumers) about the aforesaid information accordingly. This manual is only valid for the PV inverter types: CSI-75K-T40001-E, CSI-100K-T4001A-E, CSI-100K-T4001B-E, CSI- 110K-T4001A-E, CSI-110K-T4001B-E, CSI-120K-T4001A-E and CSI-120K-T4001B-E produced by CSI Solar Co., Ltd. -
Page 5: Safety
1 Safety 1 Safety The inverter has been designed and tested strictly according to international safety regulations. Read all safety instructions carefully prior to any work and observe them at all times when working on or with the inverter. Incorrect operation or work may cause: ·... -
Page 6: Skills Of Qualified Personnel
The inverter is a transformerless three-phase PV grid-connected inverter, is an integral component in the PV power system. This document involves the following product models: CSI-75K-T40001-E, CSI-100K-T4001A-E, CSI-100K-T4001B-E, CSI-110K-T4001A-E, CSI-110K-T4001B-E, CSI-120K-T4001A-E and CSI-120K-T4001B-E. The inverter is designed to convert the direct current power generated from the PV modules into grid-compatible AC current and feeds the AC current to the utility grid. -
Page 7: Product Introduction
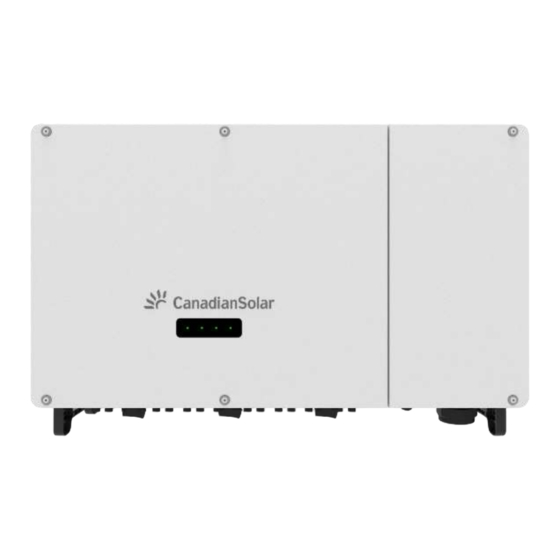
2 Product Introduction 2.2 Product Introduction 2.2.1 Appearance and dimension 1050mm 355mm DC SWITCH-1 DC SWITCH-2 AC OUTPUT COMM. PORT-1 VENT VALVE COMM. PORT-4 COMM. PORT-2 PV-1 PV-2 PV-3 PV-4 PV-5 PV-6 PV-7 PV-8 PV-9 PV-10 PV-11 PV-12 AUX. PORT GROUNDING COMM. -
Page 8: Led Indicator Panel
2 Product Introduction 2.2.2 LED Indicator Panel As an HMI, the LED indicator panel on the front of the inverter can indicate the present working state of the inverter. LED indicator LED state Definition At least one PV string is properly connected, and the Steady green DC input voltage of the corresponding MPPT circuit is at least 200V. -
Page 9: Function Description
3 Unpacking and Storage 2.4 Function Description The inverter is equipped with the following functions: 1) Conversion function The inverter converts the DC current into grid-compatible AC current and feeds the AC current into the grid. 2) Data storage The inverter logs running information, error records, etc. 3) Parameter configuration The inverter provides various settable parameters. -
Page 10: Identifying The Inverter
3 Unpacking and Storage inverter model accordingly. If you discover any damage to the packaging which indicates the inverter may have been damaged, or the inverter model is not the one you requested, do not unpack the product and contact your dealer immediately. -
Page 11: Scope Of Delivery
Documents Bolt M10x40(x4) Bolt M6x30(x2) FIG 3-2 Scope of supply diagram (The actual configuration in order to prevail in kind) Note (PV connector): CSI-75K-T40001-E (x12 pairs) CSI-100K-T4001A-E, CSI-110K-T4001A-E, CSI-120K-T4001A-E (x12 pairs) CSI-100K-T4001B-E, CSI-110K-T4001B-E, CSI-120K-T4001B-E (x18 pairs) 3.4 Storage The following requirements should be met when the inverters need to be stored: Storage temperature: –40°C ~ +70°C. -
Page 12: Mechanical Mounting
4 Mechanical Mounting 4 Mechanical Mounting 4.1 Safety during Mounting Make sure there is no electrical connection before installation. In order to avoid electric shock or other injury, be sure there is no electricity or plumbing DANGER installations before drilling holes. Risk of injury due to improper handling •... -
Page 13: Installation Angle Requirements
4 Mechanical Mounting 4.2.3 Installation Angle Requirements Inverter vertically or at a minimum back tilt of 10°. Forward installation or upside down installation is prohibited. Vertical Backward Forward Upside down ≥ 10 FIG 4-2 Installation angle 4.2.4 Installation Clearance Requirements 1) Reserve enough clearance around the inverter to ensure sufficient space for heat dissipation. -
Page 14: Hoisting Transport
4 Mechanical Mounting FIG 4-6 Transport hole location diagram Step 2 Lift and move the inverter to the destination by using the side and bottom handles as well as the four installed hand shanks. Step 3 Remove the four hand shanks . Inappropriate moving operation may cause personal injury! •... -
Page 15: Assembling The Mounting-Bracket
4 Mechanical Mounting 4.4 Assembling the mounting-bracket Dimensions of the assembled mounting-bracket are as follows. Assemble the mounting-bracket by using the connecting bar. 1060.5 1000.5 1.5N.m FIG 4-8 Assembly mounting bracket 4.5 Standard C or U Steel Installation Mounting Steps: Step 1 Localize the hole positions in C or U-section steel to install mounting bracket. -
Page 16: Wall-Mounted Installation
4 Mechanical Mounting 4.7 Wall-Mounted Installation Mounting Steps Step 1: Level the assembled mounting-bracket by using a level, and mark the positions for drilling holes on the installation site. Step 2: Insert the expansion bolts into the holes and secure them with a rubber hammer. Fasten the nut with a wrench to expand the bolt. -
Page 17: Electrical Connection
5 Electrical Connection 5 Electrical Connection 5.1 Safety Prior to any electrical connections, keep in mind that the inverter has dual power supplies. It is mandatory for the qualified personnel to wear personal protective equipments (PPE) during the electrical work. •... -
Page 18: Connecting The Pe Cable
5 Electrical Connection * A copper to aluminum adapter terminal is required when an aluminum cable is used. For details, refer to "5.9.3 Aluminium Cable Requirements". Table 5-2 PE wire requirements Phase wire cros PE wire cross Outer Diamet Note s section S section The specifications are valid only when the phase wire and PE... -
Page 19: Communication Cable Connection
5 Electrical Connection 8N.m FIG 5-2 Install ground cables The grounding screws have been anchored to the side of the inverter before delivery, and do not need to be prepared. There are two grounding terminals. Use at least one of them to ground the inverter. 5.4 Communication Cable Connection 5.4.1 Opening the Wiring Compartment Step 1 Loosen four screws on the front cover of the wiring compartment with screwdriver T30. -
Page 20: Communications Interface Description
5 Electrical Connection FIG 5-3 Open the Wiring Compartment Close the wiring compartment in reverse order after completing wiring operations. 5.4.2 Communications Interface Description The following figure shows the position of the communication wiring board in the inverter as well as the terminals equipped for the wiring board. - Page 21 5 Electrical Connection 5.4.3.2 Multi-inverter communication system In case of multiple inverters, select either terminal block interface or RJ45 interface to connect. 1) All the inverters are connected via terminal block interface (RS485 cables) in the daisy chain. RS485 RS485 RS485 RS485 RS485...
- Page 22 5 Electrical Connection Inverter 2~(N-1) Inverter N Inverter 1 Plant Monitoring Station Logger FIG 5-8 More than15 pcs inverters communication system The length of the RS485 cable should be no longer than 1,200m. 5.4.3.3 Connection Procedure (Terminal Block) RS485 communication cables should be shielded twisted pair cables or shielded twisted pair Ethernet cables.
-
Page 23: Dry Contact Connection
5 Electrical Connection 5.4.3.4 Connection Procedure (RJ45 network port) Step 1: Loosen the swivel nut of the communication terminal and select an appropriate seal according to cable outer diameter. Lead the cable through the swivel nut and seal successively. Step 2: Strip the insulation layer of the Ethernet cable with a wire stripper, and insert the signal wires to the RJ45 connector. Crimp the RJ45 connector with a crimping tool. - Page 24 5 Electrical Connection Inverter interior COM1 Passive switch FIG 5-12 DI terminal diagram The dry contacts only support passive switch signal input. Dry contacts connection procedure: For connector 0.2N.m For cable gland FIG 5-13 Dry contacts connection Reinstall the protection plate of communication board. 1.5N.m FIG 5-14 Reinstall the protection plate of communication board 21 / 41...
-
Page 25: Data Logger Connection
5 Electrical Connection 5.4.5 Data Logger Connection Connect the Data Logger to the communication accessory port. After successful connection, information such as power generation and running state of the inverter can be viewed via the APP on the phone. FIG 5-15 Data logger connection 5.5 AC Cable Connection 5.5.1 AC Side Requirements Before connecting the inverter to the grid, ensure the grid voltage and frequency comply with requirements, for which,... -
Page 26: Connection Procedure
5 Electrical Connection transformer is connected to to the IT grid, to-groundwithstanding voltage of the LV winding of the transformer, the AC cables, and the secondary equipment (including the relay protection device, detection & measuring device, and other related auxiliary devices) should not be lower than 1,100V. 4) The line-to-line voltage on the HV side of transformer should comply with local power grid voltage. - Page 27 5 Electrical Connection ≤350mm ≤350mm ≤350mm FIG 5-17 Strip the protection layer and insulation layer Step 6: If wiring of tracking system power cable is required, refer to" 5.6 Tracker System Power Supply Connection (Optional)" . Otherwise, skip performing this step. Step 7: Make the cable and crimp terminal.
-
Page 28: Aluminium Cable Requirement
5 Electrical Connection 5.5.3 Aluminium Cable Requirement If an aluminium cable is selected, use a copper to aluminium adapter terminal to avoid direct contact between the copper bar and the aluminium cable. Hexagon nut with flange (Copper) (Aluminum) Aluminum adapter terminal Aluminum cable FIG 5-20 Aluminium Cable Requirement The gap between AC cable and waterproof gland must be blocked with fireproof mud to prevent water or moisture. -
Page 29: Closing The Wiring Compartment
5 Electrical Connection Make the cable and crimp terminal. Position relationship between power cable terminals and AC cable terminals of the inverter. The terminal of tracker system The terminal of AC cable The terminal of tracker system The terminal of AC cable FIG 5-24 Position relationship between power cable terminals and AC cable terminals of the inverter 5.7 Closing the Wiring Compartment Step 1: Reinstall the protection plate and push the four plastic rivets into the holes at the chassis. -
Page 30: Pv Input Configuration
5 Electrical Connection When the solar inverter operates in grid-tied mode, • do not perform maintenance or operations on the DC circuit, such as connecting or disconnecting a PV string or a PV module in the PV string. Failing to do so may cause electric shocks or arcing, which may also cause fire. - Page 31 5 Electrical Connection PV-1 PV-3 PV-5 PV-7 PV-9 PV-11 PV-1 PV-2 PV-3 PV-5 PV-7 PV-9 PV-11 PV-1 PV-2 PV-3 PV-5 PV-7 PV-8 PV-9 PV-11 PV-1 PV-2 PV-3 PV-4 PV-5 PV-7 PV-8 PV-9 PV-11 PV-1 PV-2 PV-3 PV-4 PV-5 PV-7 PV-8 PV-9 PV-10 PV-11...
-
Page 32: Dc Cable Connection
5 Electrical Connection DC SWITCH-1 DC SWITCH-2 DC SWITCH-3 PV-1 PV-2 PV-3 PV-4 PV-5 PV-6 PV-7 PV-8 PV-9 PV-10 PV-11 PV-12 PV-13 PV-14 PV-15 PV-16 PV-17 PV-18 MPPT-1 MPPT-2 MPPT-3 MPPT-4 MPPT-5 MPPT-6 MPPT-7 MPPT-8 MPPT-9 FIG 5-27 DC input terminal of inverter 5.8.3 DC cable connection CSI Solar provides corresponding plug connectors in the scope of delivery for quick connection of PV inputs. -
Page 33: Commissioning Inverter
6 Commissioning Inverter 礎 FIG 5-29 DC switch FIG 5-30 Check the polarity of PV string FIG 5-31 Connect the PV connectors to the inverter If the DC input power cable is reversely connected and DC switches are set to ON, do not immediately turn off the DC switches or reconnect the positive and negative connectors. -
Page 34: Csi Cloudpro App
7 CSI CloudPro APP Step 2: Connect the AC switch (if applicable) between the inverter and the grid. Step 3: Connect the DC switch (if applicable) between the inverter and the PV string. Step 4: Set initial protection parameters via the CSI Cloud App. If the irradiation and grid conditions meet requirements, the inverter will normally operate. - Page 35 7 CSI CloudPro APP Step 1:Open the CSI CloudPro APP. Step 2:Select “Local Mode”, then scan logger SN. The mobile phone will connect to the collector automatically. 32 /41...
- Page 36 7 CSI CloudPro APP Step 3:After the connection succeeds, users can view the real-time operating data of the inverter. Step 4:Select “Params”, enter the password 000000 and login the system. Then, users can view and modify parameters. *APP pictures are for reference only. 33 / 41...
-
Page 37: System Decommissioning
8 System Decommissioning 8 System Decommissioning 8.1 Disconnecting the Inverter For maintenance or other service work, the inverter must be switched off. Proceed as follows to disconnect the inverter from the AC and DC power sources. Lethal voltages or damage to the inverter will follow if otherwise. Step 1: Wear personal protective equipment Step 2: Disconnect the external AC circuit breaker and secure it against reconnection. - Page 38 9 Daily Maintenance Items Methods Period Check the temperature and dust of the inverter. Clean the inverter enclosure. Six months to a year (it Check the humidity and dust of the environment. depends on the dust System clean Meanwhile check whether the filter function of the air inlet is ok. contents in air) Check whether there is fan warning using App.
- Page 39 9 Daily Maintenance FIG 8-2 Pull out the fan module Step 6: Insert the new fan module into the track and secure the screws. Insert the fan connector and the internal cable connector in position (note the correspondence), and secure the fan connector by cable ties.
- Page 40 9 Daily Maintenance Stop the inverter and disconnect it from all power supplies before maintenance. Lethal voltage still exists in the inverter. Please wait for at least 5 minutes and then perform DANGER maintenance work. Only qualified electricians can maintain the fans. 3) External Fan Maintenance Loosen the screws of the fan module cover, and remove it.
-
Page 41: Troubleshooting
10 Troubleshooting Insert the fan connector and the internal cable connector in position (note the correspondence), and secure the fan connector by cable ties. Fan No. Cable No. FIG 8-8 Secure the fan connector 10 Troubleshooting When the inverter does not operate normally, we recommend the following actions for quick troubleshooting. Please review the error list table carefully. - Page 42 10 Troubleshooting solutions if the grid parameter exceeds the set value. 2. Check whether the protection parameters are appropriately set via the App. Grid Freq Low Err 3. If the fault is not caused by the foregoing reasons and still exists, contact CSI Solar. Generally, the inverter will be reconnected to the grid after the grid returns to normal.
-
Page 43: Annex: Specification
ANNEX: Specification ANNEX: Specification Model CSI-75K-T40001-E CSI-110K-T4001A-E CSI-110K-T4001B-E CSI-120K-T4001A-E CSI-120K-T4001B-E INPUT (DC) Max. Input Voltage 1100 V Start-up DC Input Voltage 195 V Rated Input Voltage 600 V MPPT Voltage Range 200-1000 V Max. String Input No. MPPT No. Max. Input Current... - Page 44 ANNEX: Specification Model CSI-100K-T4001A-E CSI-100K-T4001B-E INPUT (DC) Max. Input Voltage 1100 V Start-up DC Input Voltage 195 V Rated Input Voltage 600 V MPPT Voltage Range 200-1000 V Max. String Input No. MPPT No. Max. Input Current 6 x 40 A 9 * 30A Max.
- Page 45 China – Global Headquarters CSI Solar Co., Ltd. 199 Lushan Road, SND, Suzhou, Jiangsu, China, 215129 Sales Inquiries Email: support@csisolar.com This manual is subject to change without prior notification. Copyright is reserved. Duplication of any part of this issue is prohibited without written permission.
Need help?
Do you have a question about the CSI-75K-T40001-E and is the answer not in the manual?
Questions and answers