Table of Contents
Advertisement
Global Headquarters
CSI Solar Co., Ltd.
199 Lushan Road, SND, Suzhou, Jiangsu, China, 215129
P +1 519 837 1881
F +1 519 837 2550
Sales Inquiries Email: info@csisolar.com
Customer Support Email: service.ca@csisolar.com
Mexico
CANADIAN SOLAR MEXICO, S.A. DE C.V.
LAGO ZURICH #219, PISO 15, OFICINA 1501-B,
COLONIA AMPLIACIÓN GRANADA, ALCALDÍA MIGUEL HIDALGO,
C.P. 11529, CIUDAD DE MÉXICO, MÉXICO.
Europe, Middle East & Africa
Canadian Solar EMEA GmbH
LandsbergerStraße 94, 80339 Munich, Germany
P +49 (0) 89 519 968 90
F +49 (0) 89 519 968 911
Sales Inquiries Email: sales.emea@csisolar.com
Customer Support Email: service.emea@csisolar.com
Australia
Canadian Solar MSS (Australia) Pty Ltd
44 Stephenson St, Cremorne VIC 3121, Australia
P +61 ( 3 ) 860 918 44
Sales Inquiries Email: sales.au@csisolar.com
Customer Support Email: service.au@csisolar.com
South East Asia
101 Thompson Road #15-03 United Square, Singapore 307591
P +65 6572 905
F +65 6559 4690
Sales Inquires Email: sales.sg@csisolar.com
Customer Support Email: service.cn@csisolar.com
Latin America
Canadian Solar Brazil
Avenida Roque Petroni Junior, 999, 4º andar Vila Gertrudes,
São Paulo, Brasil,CEP 04707-910
P +55 11 3957 0336
Sales Inquiries Email:sales.br@csisolar.com
Customer Support Email: service.latam@csisolar.com
This manual is subject to change without prior notification. Copyright is reserved.
Duplication of any part of this issue is prohibited without written permission.
Please adhere to the actual products in case of any discrepancies in this user manual.
CSI GRID-TIED PV INVERTER
INSTALLATION AND OPERATION MANUAL
CSI-15K-T220GL02-E | CSI-20K-T220GL02-E
CSI-40K-T480GL02-E | CSI-50K-T480GL02-E
Version 1.0, Release Date: 05,2021
CSI Solar Co., Ltd.
199 Lushan Road, SND, Suzhou, Jiangsu, China, 215129
www.csisolar.com
Advertisement
Table of Contents

Related Manuals for CanadianSolar CSI


Summary of Contents for CanadianSolar CSI
- Page 1 Global Headquarters CSI Solar Co., Ltd. CSI GRID-TIED PV INVERTER 199 Lushan Road, SND, Suzhou, Jiangsu, China, 215129 P +1 519 837 1881 F +1 519 837 2550 INSTALLATION AND OPERATION MANUAL Sales Inquiries Email: info@csisolar.com Customer Support Email: service.ca@csisolar.com...
-
Page 2: Table Of Contents
Contents 1. Introduction …………………………………………………………………………………………………………………………… 1.1 Product Description ………………………………………………………………………………………………………… 1.2 Packaging ………………………………………………………………………………………………………………………… 2. Safety Instructions …………………………………………………………………………………………………………… 2.1 Safety Symbols ………………………………………………………………………………………………………………… 2.2 General Safety Instructions …………………………………………………………………………………………… 2.3 Notice For Use ………………………………………………………………………………………………………………… 3. Overview ……………………………………………………………………………………………………………………………… 3.1 Front Panel Display ……………………………………………………………………………………………………… 3.2 LED Status Indicator Lights ……………………………………………………………………………………………... -
Page 3: Introduction
Canadian Solar three phase inverter is suitable for utility-scale PV projects . When you receive the inverter, please ensure that all the parts listed below are included: This manual covers the three phase inverter model listed below: CSI-15K-T220GL02-E, CSI-20K-T220GL02-E, CSI-40K-T480GL02-E, CSI-50K-T480GL02-E LED lights LCD display... -
Page 4: Safety Instructions
2. Safety Instructions 2. Safety Instructions 2.1 Safety Symbols Safety symbols used in this manual, which highlight potential safety risks and important safety information, are listed as follows: CAUTION: The PV array (Solar panels) supplies a DC voltage when they are exposed to WARNING: sunlight. -
Page 5: Overview
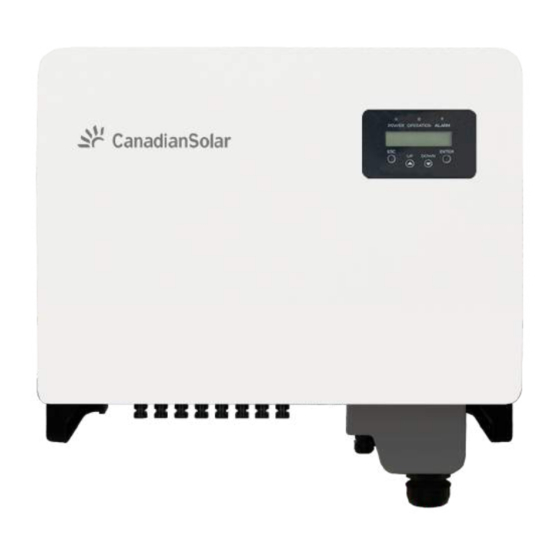
3. Overview 4. Product handing and storage 3.1 Front Panel Display 4.1 Product handling Please review the instruction below for handling the inverter: 1. The red circles below denote cutouts on the product package. Push in the cutouts to form handles for moving the inverter (see Figure 4.1). Figure 3.1 Front Panel Display Figure 4.1 move the inverter 3.2 LED Status Indicator Lights... -
Page 6: Product Storage
4. Product handing and storage 5. Installation 4.2 Product Storage 5.1 Select a Location for the Inverter If the inverter is not to be installed immediately, storage instructions and environmental To select a location for the inverter, the following criteria should be considered: conditions are below: WARNING: Risk of fire Use the original box to repackage the inverter, seal with adhesive tape with the... -
Page 7: Mounting The Inverter
5. Installation 5. Installation 5.2 Mounting the Inverter Vertical Backward Back hanging plate size: ≤15° √ √ Inverted × × Figure 5.3 Inverter wall mounting Refer to figure 5.4 and figure 5.5. Inverter shall be mounted vertically. The steps to mount the inverter are listed below. Install on a vertical surface or structure capable of bearing the weight. -
Page 8: Electrical Connections
5. Installation 5. Installation 5.3 Electrical Connections Inverter designs quick-connect terminal, so top cover needn't open during electrical WARNING: connection. The sign meaning located the bottom of inverter, as shown below in table 3.1. The inverter must be mounted vertically. All electrical connections are suit for the local or national standard. - Page 9 5. Installation 5. Installation 3. Strip the ground cable insulation to a suitable length(see Figure 5.12). 5. Remove the screw from the heat sink ground point. 6. Connect the grounding cable to the grounding point on the heat sink,and tighten the grounding screw, Torque is 3-4Nm(see figure 5.14).
- Page 10 5. Installation 5. Installation 5.3.2 Connect PV side of inverter 5. Measure PV voltage of DC input with multimeter, verify DC input cable polar (see figure 5.17), and ensure each string of PV voltage in range of inverter operation. Before connecting inverter, please make sure the PV array open circuit Connect DC connector with inverter until hearing a slight clicking sound indicates voltage is within the limit of the inverter.
- Page 11 5. Installation 5. Installation 5.3.3 Connect grid side of inverter 4. Remove the 4 screws on the inverter junction box and remove the junction box For the AC connection, 10-35mm² cable is required to be used. cover . Please make sure the resistance of cable is lower than 1.5ohm. 5.
- Page 12 5. Installation 5. Installation 5.3.4 Inverter monitoring connection 5.3.4.1 RS485 Connection The inverter can be monitored via Wi-Fi or GPRS. All Canadian Solar communication devices Install the RS485 communication cables through the terminal block as shown in Figure 5.27. are optional (Figure 5.25). For connection instructions, please refer to the Canadian Solar Recommended cable cross sectional area is 0.2 - 1.5mm², the cable outer diameter is Monitoring Device installation manuals.
- Page 13 Rated output Current for protection 1. Insert the network cable into the communication connection terminal of RJ45. Inverter voltage(V) current (Amps) device (A) (As shown in figure 5.30) CSI-15K-T220GL02-E 39.4 CSI-20K-T220GL02-E 52.5 CSI-40K-T480GL02-E 48.1 CSI-50K-T480GL02-E 60.1 Table 5.3 Rating of grid OCPD Figure 5.30 RJ45 communication connection terminals...
-
Page 14: Start & Stop
6. Start & Stop 7. Operation 6.1 Start the Inverter To start up the Inverter, it is important that the following steps are strictly followed: In normal operation, LCD screen alternatively shows inverter power and operation status (see Figure 7.1). The screen can be scrolled manually by pressing the UP/DOWN keys. 1. - Page 15 7. Operation 7. Operation 7.2.1 Lock screen Display Duration Description Pressing the ESC key returns to the Main Menu. Pressing the ENTER key locks (Figure 7.2(a)) or unlocks (Figure 7.2 (b)) the screen. V_DC01: Shows input DC voltage. V_DC01: 0000.0V 10 sec i_DC01: 0000.0A...
- Page 16 7. Operation 7. Operation 7.4 Advanced Info - Technicians Only Model: 08 NOTE: Software Version: D20001 To access to this area is for fully qualified and accredited technicians only. Enter menu “Advanced Info.” and “Advanced settings” (need password). Figure 7.7 Model Version and Software Version Select “Advanced Info.”...
- Page 17 7. Operation 7. Operation 7.4.6 Yearly Energy 7.5 Advanced Settings - Technicians Only The function is for checking the energy generation for selected year. NOTE: To access to this area is for fully qualified and accredited technicians only. YES=<ENT> NO=<ESC> Please follow 7.4 to enter password to access this menu.
- Page 18 7. Operation 7. Operation 7.5.4 Reset Password Below is the setting range for “User-Def”. Using this function, the limits can be changed This function is used to set the new password for menu “Advanced info.” and “Advanced manually. information” (see Figure 7.19). OV-G-V1: 305---332V for 480V(140---152V for 220V) OV-G-F1: 60.2-63Hz OV-G-V1-T: 0.1---9s...
- Page 19 7. Operation 7. Operation 7.5.7 Special Settings 7.5.11 External EPM Set This function is turned on when the EPM is external. This function is applicable by maintenance personnel only, wrong operation will prevent the inverter from reaching maximum power. YES=<ENT> NO=<ESC> Fail Safe Set:ON Figure 7.22 Set the Fail Safe ON/OFF 7.5.8 STD Mode settings...
-
Page 20: Afci Function
7. Operation 7. Operation 7.5.16 I/V Curve 7.6 AFCI function This function is used to scan the I/V characteristic curves of each PV strings. Canadian Solar inverters have the built-in AFCI function which can detect the arc fault on the DC circuit and shut down the inverter to prevent a fire disaster. -
Page 21: Maintenance
8. Maintenance 9. Troubleshooting Canadian Solar Three Phase Inverter does not require any regular maintenance. However, Alarm Message Failure description Solution cleaning the dust on heat-sink will help the inverter to dissipate the heat and increase its life 1. Check PV input connections. time. -
Page 22: Specifications
9. Troubleshooting 10. Specifications Model CSI-15K-T220GL02-E Alarm Message Failure description Solution Max. DC input voltage (Volts) 1100 ILeak-PRO 1. Check AC and DC connection. Leakage current protection 01/02/03/04 Rated DC voltage (Volts) 2. Check inverter inside cable connection. Start-up voltage (Volts) - Page 23 10. Specifications 10. Specifications Model CSI-20K-T220GL02-E Model CSI-40K-T480GL02-E Max. DC input voltage (Volts) 1100 Max. DC input voltage (Volts) 1100 Rated DC voltage (Volts) Rated DC voltage (Volts) Start-up voltage (Volts) Start-up voltage (Volts) MPPT voltage range (Volts) MPPT voltage range (Volts) 200...1000...
- Page 24 10. Specifications Model CSI-50K-T480GL02-E Max. DC input voltage (Volts) 1100 Rated DC voltage (Volts) Start-up voltage (Volts) MPPT voltage range (Volts) 200...1000 Max. input current (Amps) 4*26 Max short circuit input current (Amps) 4*40 MPPT number/Max input strings number Rated output power (Watts) 50000 Max.
- Page 25 PROJECT NAME LOCATION NUMBER INSTALLATION AND 3 PHASE STRING INVERTERS (KTL SERIES) COMMISSIONING CHECKLIST Warning: This checklist is not a replacement for the user manual. Please read the user manual prior to inverter site selection and installation. Step Content Details Values / Notes Conclusion Ensure installation site meets environmental and physical...
- Page 26 PROJECT NAME LOCATION NUMBER INSTALLATION AND 3 PHASE STRING INVERTERS (KTL SERIES) COMMISSIONING CHECKLIST Warning: This checklist is not a replacement for the user manual. Please read the user manual prior to inverter site selection and installation. Step Content Details Values / Notes Conclusion Communication...
- Page 27 PROJECT NAME LOCATION NUMBER INSTALLATION AND 3 PHASE STRING INVERTERS (KTL SERIES) COMMISSIONING CHECKLIST Warning: This checklist is not a replacement for the user manual. Please read the user manual prior to inverter site selection and installation. Step Content Details Values / Notes Conclusion After 60-300 seconds (depending on local requirement), the...
- Page 28 PROJECT NAME LOCATION NUMBER INSTALLATION AND 3 PHASE STRING INVERTERS (KTL SERIES) COMMISSIONING CHECKLIST Warning: This checklist is not a replacement for the user manual. Please read the user manual prior to inverter site selection and installation. System Owner: Address / Location: Note site typical arrangements and variances Inverter model: Inverter irmware revision: DSP:...
- Page 29 PROJECT NAME LOCATION NUMBER INSTALLATION AND 3 PHASE STRING INVERTERS (KTL SERIES) COMMISSIONING CHECKLIST Warning: This checklist is not a replacement for the user manual. Please read the user manual prior to inverter site selection and installation. Inverter serial numbers: INSTALLER´S NAME COMPANY INSTALLER´S SIGNATURE...
Need help?
Do you have a question about the CSI and is the answer not in the manual?
Questions and answers