Advertisement
- 1 INTRODUCTION
- 2 TECHNICAL SPECIFICATION
- 3 FRONT PANEL
- 4 UNDERSTANDING THE DISPLAY
- 5 STRUCTURE / ASSEMBLY INSTRUCTION
- 6 TARGET INFORMATION
- 7 DETECTING METALLIC OBJECTS
- 8 6-FREQUENCY AUDIO ALARM FUNCTION
- 9 USING THE BACKLIGHT
- 10 CHANGING THE OPERATING CHANNEL OF THE DETECTOR
- 11 USING THE EARPHONE
- 12 TROUBLESHOOTING
- 13 BATTERY REPLACEMENT
- 14 NOTE
- 15 WARNING
- 16 ACCESSORIES
- 17 Documents / Resources
INTRODUCTION
This is the original instruction, please read all manual instructions carefully before operating. VEVOR reserves a clear interpretation of our user manual. The appearance of the product shall be subject to the product you received. Please forgive us that we won't inform you again if there are any technology or software updates on our product.
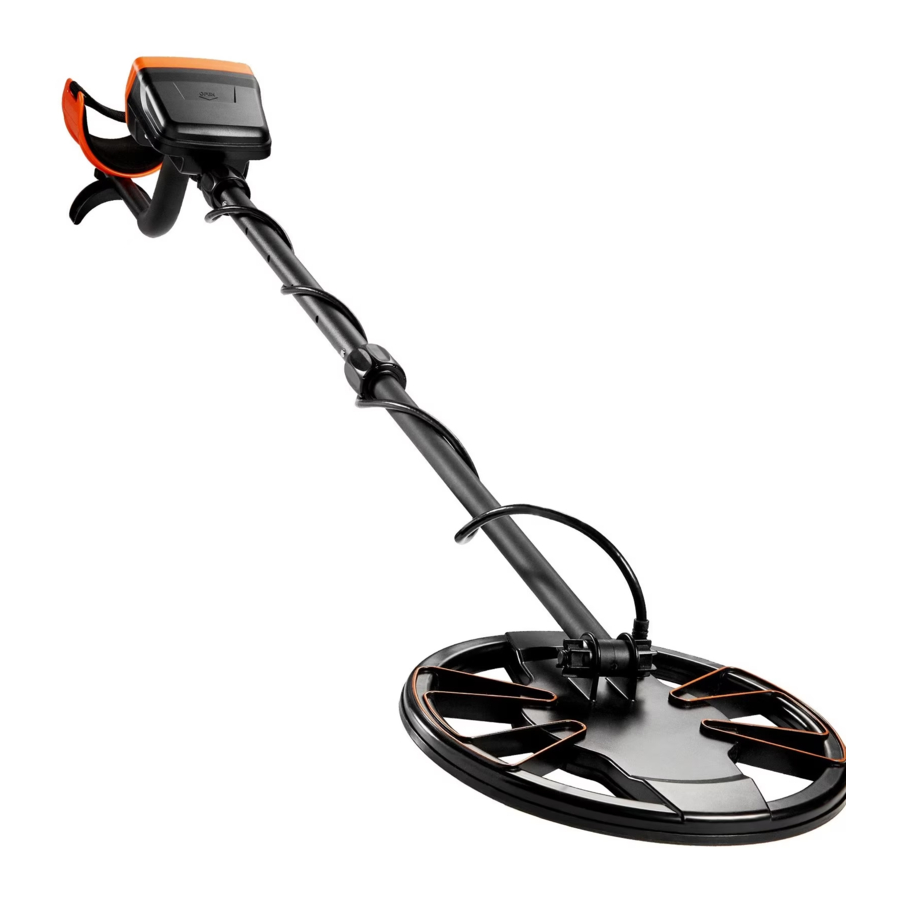
This instrument is a multifunctional, high-sensitivity metal detector designed to detect various kinds of underground metal objects.
Main Features:
- Control panel with easy-to-press buttons
- Two kinds of selectable detection modes - All Metals Mode and Discrimination Mode
- Digital target ID and target ID cursor help operator determine the probable metal type of the target
- Ground balance adjustment with the ground balance setting ( -99 ~ +99 ) displayed
- Adjustable sensitivity with a bar-graph display
- Target depth indication
- Audio alarm. There are 6 kinds of alarm tones in Discrimination Mode.
- 4 preset Discrimination Modes and 1 custom Discrimination Mode
- Target pinpointing
- Battery level indication
- Waterproof search coil
- 3.5mm earphone jack
TECHNICAL SPECIFICATION
Maximum Detection Distance: About 10 inches for a US 25-cent coin
Operating Environment: Temperature: 0°C ~ 50°C Relative Humidity: 85%
Storage Environment: Temperature: -20°C ~ 50°C
Relative Humidity: 85%
Battery: 1.5V alkaline battery, AA or equivalent, 6 pieces Weight: About 1.4kg ( including battery )
FRONT PANEL

- Depth Scale
This depth scale is to be used in conjunction with the displayed target depth indicator bar for target depth prediction. - Target ID Legend
Works with the Target ID Cursor to indicate the probable metal type of the detected metallic object. - Display
- " ON/OFF " Button
Press this " ON/OFF " button to turn on or off the metal detector. - "ALL-METAL/DISC" Button
Press this "ALL-METAL/DISC " button to switch between the All Metals Mode and a Discrimination Mode. - "GROUND BALANCE/CUSTOM SELECTION" Button
In All Metals Mode, this "GROUND BALANCE/CUSTOM SELECTION" button is used in ground balance adjustment.
In CUSTOM mode, which is one of the five Discrimination Modes
( JEWELRY mode, COINS mode, DEBRIS mode, ORNAMENTS mode, CUSTOM mode ), this button is used to move the target ID cursor to a desired position in order to create a desired discrimination pattern.
In CUSTOM mode, you can press the " + " side of this button to move the target ID cursor rightwards, or press the " - " side of this button to move the target ID cursor leftwards. - " PINPOINT " Button
In All Metals Mode, this " PINPOINT " button is used to pinpoint a detected metallic object.
In CUSTOM mode, this button is used to eliminate or activate the pixel located on the horizontal scale, directly below the Target ID Cursor. - "SENSITIVITY/MODE SELECTION" Button
In All Metals Mode, this "SENSITIVITY/MODE SELECTION" button is used to adjust the detector's sensitivity.
In any Discrimination Mode, you can press the " + " side or " - " side of this button to switch among the five Discrimination Modes. - " BACKLIGHT " Button
Briefly press this " BACKLIGHT " button to turn on or off the backlight. Press and hold down this button for about 2 secs to switch the detector between channel 0 and channel 1.
UNDERSTANDING THE DISPLAY

Explanations:
![]() ......Battery level indicator.
......Battery level indicator.![]() ......The metal detector is in JEWELRY mode.
......The metal detector is in JEWELRY mode.![]() ...... The metal detector is in COINS mode.
...... The metal detector is in COINS mode.![]() ......The metal detector is in DEBRIS mode.
......The metal detector is in DEBRIS mode.![]() ......The metal detector is in ORNAMENTS mode.
......The metal detector is in ORNAMENTS mode.![]() ......The metal detector is in CUSTOM mode.
......The metal detector is in CUSTOM mode.![]() ...... The metal detector is in All Metals Mode.
...... The metal detector is in All Metals Mode.![]() ......The metal detector is in sensitivity adjustment mode.
......The metal detector is in sensitivity adjustment mode.![]() ......The metal detector is in PINPOINT mode.
......The metal detector is in PINPOINT mode.![]() ......Sensitivity indicator bars.
......Sensitivity indicator bars.![]() ......Target depth indicator bars
......Target depth indicator bars![]() ......The metal detector is in ground balance adjustment mode.
......The metal detector is in ground balance adjustment mode.![]() ...... Horizontal scale that shows the current discrimination pattern, with lighted pixels indicating accepted targets and blank pixels indicating rejected targets.
...... Horizontal scale that shows the current discrimination pattern, with lighted pixels indicating accepted targets and blank pixels indicating rejected targets.![]() ......Target ID cursor.
......Target ID cursor.![]() ......The metal detector is in a Discrimination Mode.
......The metal detector is in a Discrimination Mode.
 ......Battery level indicator.
 ......The metal detector is in JEWELRY mode.
 ...... The metal detector is in COINS mode.
 ......The metal detector is in DEBRIS mode.
 ......The metal detector is in ORNAMENTS mode.
 ......The metal detector is in CUSTOM mode.
 ...... The metal detector is in All Metals Mode.
 ......The metal detector is in sensitivity adjustment mode.
 ......The metal detector is in PINPOINT mode.
 ......Sensitivity indicator bars.
 ......Target depth indicator bars
 ......The metal detector is in ground balance adjustment mode.
 ...... Horizontal scale that shows the current discrimination pattern, with lighted pixels indicating accepted targets and blank pixels indicating rejected targets.
 ......The metal detector is in a Discrimination Mode.
STRUCTURE / ASSEMBLY INSTRUCTION
Overall Structure

Upper Part Structure

Assembly Drawing

Note:
- The two rubber washers are to be placed in the two circular slots at the two sides of the end of the lower stem before slipping the search coil onto the end of the lower stem.
- Gently turn the relevant stem lock nut on the middle stem in proper direction to fasten the lower stem only after the lower stem is inserted into the middle stem and the two buttons on the lower stem pop into desired holes on the middle stem. Similarly, gently turn the relevant stem lock nut on the middle stem in proper direction to fasten the S-shaped upper stem only after the upper stem is inserted into the middle stem and the two buttons on the upper stem pop into desired holes on the middle stem.
- To avoid damage, do not pull cable with force.
How to adjust the length of the detector:
- Gently and counterclockwise turn the lower stem lock nut until it loosens.
- Depress the two lower buttons on the middle stem, and adjust the lower stem's position until the two buttons pop into the desired holes on the middle stem. ( Tip: To be able to adjust the lower stem's position, it may be necessary to further insert the lower stem into the middle stem a little and then turn the lower stem a little while depressing the two buttons. )
- Turn the stem lock nut clockwise until the lower stem is secured.
TARGET INFORMATION

Target ID Legend
The Target ID Legend functions with the Target ID Cursor to indicate the probable metal type of the target, with ferrous ( iron ) targets at the left, non-ferrous targets which are thin or have low conductivity in the middle, and thick or high conductivity targets at the right.
Horizontal Scale
The horizontal scale shows the present discrimination pattern, with lighted pixels indicating accepted targets and blank pixels indicating rejected targets.
Target ID Cursor
When the detector detects a target, a Target ID Cursor will display for this target if the metal signal is strong enough; but the detector will produce audible signal only for targets accepted on the horizontal scale and will probably not produce audible signal for objects rejected on the horizontal scale.
Digital Target ID
Provides a two-digits number to identify target more precisely than the Target ID Cursor. Target ID can vary widely based on the target's size and thickness because small, thin pieces of metal can not conduct electric current as well as thicker pieces of metal. Moreover, mineralized soils can cause Target ID errors, especially for small targets.
Note:
Soil mineralization reaction can be eliminated most efficiently when the target is centered under the search coil and the search coil is swept flat and at a constant height above the ground. After the detector detects a target, you can perform detection on this target several times and discard wrong Target ID readings obtained and take only correct Target ID readings. The smaller the indicated depth of burial, the stronger the detected metal signal, and the more reliable the Target ID reading.
Category Value

When the detected metal signal is strong enough, a target ID cursor will appear in a certain position to indicate the probable metal type ( or category ) of the detected metallic object. According to the position of the target ID cursor, you can predict the probable metal type ( or category ) of the detected object by referring to Figure 8 and the Target ID Legend ( see Figure 7 ) above the target ID cursor. Figure 8 is essentially similar to the Target ID Legend but the information contained in Figure 8 is expressed using words and is far more detailed than the information contained on the Target ID Legend. You can use Figure 8 in conjunction with the target ID cursor like you use the Target ID Legend.
Coins will most likely have a similar value with each pass with the search coil due to their round shape. Gold and silver can actually be detected in various category values due to their metallic qualities. Smaller gold or silver objects will have a value different from that of a larger gold or silver object. Trash objects can give off a different value each time the search coil passes over it. The angle of the detector can also affect the identification of an object. If you decide to test the detector by passing a coin across the search coil, pass it with its flat side parallel to the search coil; this position is how you will find most buried coins.
Figure 9 shows an example display shown when the metal detector detects a US 25-cent coin buried about 15cm below ground surface.

DETECTING METALLIC OBJECTS
DETECTING METALLIC OBJECTS IN THE ALL METALS MODE
The All Metals Mode allows the detector to achieve the maximum detection depth possible.
Press the ON/OFF button to turn on the metal detector. To select the All Metals Mode, press the "ALL-METAL/DISC" button until the symbol "ALL METALS" appears on the display.
- Adjust the Sensitivity
Hold the detector by its handle. Lift and adjust the search coil so that the search coil is about 50cm above and parallel to the ground. The detector sensitivity is adjusted via the "SENSITIVITY/MODE SELECTION" button, and the number of the displayed sensitivity indicator bars graphically indicates the present sensitivity. Press the " + " or " - " side of the "SENSITIVITY/MODE SELECTION" button until a faint sound from the detector is heard. - Perform Ground Balance Adjustment
To cancel out the minerals in the soil, you must perform ground balance adjustment before you start scanning in the All Metals Mode in a site.
Use the following procedure to perform ground balance adjustment:
- Hold the detector and move it to a place where there is no metallic object in the ground under the search coil.
- Lift and adjust the search coil so that the search coil is about 50cm above and parallel to the ground.
- Press the " + " or " - " side of the "GROUND BALANCE/CUSTOM SELECTION" button once. The symbol "GROUND BALANCE" appears on the display, and the ground balance setting ( which is in the range of -99 to +99 ) is shown on the display.
- Lower the search coil to approximately 5cm to 8cm above ground. If the sound from the detector increases when the search coil is lowered to ground, raise the search coil to about 50cm above ground, and then press the " - " side of the "GROUND BALANCE/CUSTOM SELECTION" button to decrease the ground balance setting. If the sound from the detector decreases when the search coil is lowered to ground, raise the search coil to about 50cm above ground, and then press the " + " side of the "GROUND BALANCE/CUSTOM SELECTION" button to increase the ground balance setting.
Tip: Pressing and holding down the " + " or " - " side of the "GROUND BALANCE/CUSTOM SELECTION" button will increase or decrease the ground balance setting quickly. - Repeat step 4 until the sound from the detector remains approximately unchanged when you lower and lift the search coil. Now the ground balance adjustment is completed.
- Begin Scanning
After you have completed the sensitivity adjustment and then the ground balance adjustment, you can start to scan for metallic object or target. During scanning, keep the search coil height approximately 5cm to 10cm above and parallel to the ground at all times for best detection results, walk slowly as you scan slowly the search coil in a straight line from side to side.
When the detector detects a metallic object, a target ID cursor will appear in a certain position to indicate the probable metal type of the object being detected and a digital target ID, which is a two-digits number, will be shown on the display if the strength of the detected metal signal exceeds the detector's identification threshold, and at the same time, and if the target is accepted by a lighted pixel on the horizontal scale, the sound from the detector will increase.
Because many factors ( degree of oxidation of metallic object, metal impurities in soil, soil moisture content, size and metal content of the object, depth, etc ) can affect the target ID cursor indication and digital target ID, the target ID cursor indication and digital target ID are not accurate and are only for non-critical reference. The target ID cursor indication and digital target ID are not guaranteed to be correct.
When the detected metal signal is strong enough, the display will show a target depth indicator bar, which is to be used in conjunction with the depth scale for you to predict the distance between the detected object and the search coil. Because many factors can affect the indication of target depth indicator bar, the indication of the target depth indicator bar is not accurate and is not guaranteed to be correct. It is only for non-critical reference.
During scanning, the search coil must be in motion. If the search coil is still, the detector can not detect metal normally.

- Pinpoint a Detected Metallic Object
After you detect a metallic object, you can use the Pinpoint function to pinpoint this object. Precisely pinpointing a object allows you to quickly recover the ground because of smallest digging hole possible.

Use the following procedure to pinpoint a target:
- Move the search coil around the detected metallic object to determine the approximate location of this object. Then move the search coil to this location, and then hold the search coil in this location and above the detected object.
- Press and hold down the PINPOINT button. The display shows the symbol "PINPOINT" and all the 8 sensitivity indicator bars.
- Release the PINPOINT button and then immediately ( within 1 sec after the release of the button ) hold down the button gain. The number of the displayed sensitivity indicator bars decreases by 1, and the sound volume of the detector decreases accordingly.
- Move the search coil a little distance toward the metal signal source ( the detected object ) according to the volume of the sound. The sound volume of the detector increases as the search coil approaches the metal signal source ( the detected object ).
- Repeat step 3 and 4 to approach the target progressively. And in the end, the target can be pinpointed.
Note:
The detector exits the PINPOINT mode automatically about 3 secs later after you release the PINPOINT button.
DETECTING METALLIC OBJECTS IN A DISCRIMINATION MODE
If you want to detect a specific type ( or kind ) of metallic objects while largely ignoring other types of metallic objects during scanning, you should select a suitable Discrimination Mode. There are 5 Discrimination Modes in total, they are JEWELRY mode, COINS mode, DEBRIS mode, ORNAMENTS mode, and CUSTOM mode. You can select any of these modes to meet your need.
The detector has 12 pixels or "notches" of discrimination, shown on the horizontal scale ( see Figures 2 and 7 ). In any Discrimination Mode, the detected target which is accepted by a lighted pixel on the horizontal scale will cause an increase in sound, and the targets which are rejected by a blank pixel on the horizontal scale will probably not cause an increase in sound.
Among these modes, the JEWELRY mode, COINS mode, DEBRIS mode, ORNAMENTS mode are preset and can not be modified, but in CUSTOM mode, you can modify the present discrimination pattern freely to create a desired discrimination pattern to better meet your need.
To select a desired Discrimination Mode, first make sure that the detector is in a Discrimination Mode. If the detector is in the All Metals Mode ( "ALL METALS" is display ), press the "ALL-METAL/DISC" button until the symbol "DISCRIMINATE" appears on the display. Then press the " + " or " -" side of the "SENSITIVITY/MODE SELECTION" to select among the 5 Discrimination Modes.
Whenever a mode is selected, the display will show the corresponding mode indicator ( see Figure 2 ) to indicate the presently selected mode.
The five Discrimination Modes are explained as follows:
- JEWELRY Mode
Designed to find jewelry such as rings, watches, bracelets, and necklaces, while ignoring most iron trash. - COINS Mode
The COINS mode is designed to find US coins and similar coins and eliminate common trash items such as iron and foil. Be aware that medium-sized jewelry may be missed with this discrimination pattern and that some junk targets ( such as aluminum cans ) may be detected and cause an increase in sound. - DEBRIS Mode
The DEBRIS mode is designed to detect debris while eliminating ( ignoring ) small iron pieces. - ORNAMENTS Mode
The ORNAMENTS mode is designed to detect most kinds of metallic ornaments. - CUSTOM Mode
The detector has 12 pixels or " notches " of discrimination, shown on the horizontal scale. The CUSTOM mode allows you to modifiy the present discrimination pattern freely and create a desired discrimination pattern. To do it, first make sure that the detector is in the CUSTOM mode and that the search coil is far away from any metallic object and inference source. Then press the " + " or " - " side of the "GROUND BALANCE/CUSTOM SELECTION" button to move the Target ID Cursor to the right or left until it is in the desired position. And then press the " PINPOINT " button to eliminate or activate the pixel located on the horizontal scale, directly below the Target ID Cursor. ( See Figures 11 and 12. )
![]()


After you have selected a desired Discrimination Mode or created a desired discrimination pattern in the CUSTOM mode, you can start to scan for metallic object or target. The scanning method is the same as that in the All Metals Mode.
When the detector detects a metallic object, a target ID cursor will appear in a certain position to indicate the probable metal type of the object being detected and a digital target ID, which is a two-digits number, will be shown on the display if the strength of the detected metal signal exceeds the detector's identification threshold, and at the same time, and if the target is accepted by a lighted pixel on the horizontal scale, the detector will sound beep(s).
Because many factors ( degree of oxidation of metallic object, metal impurities in soil, soil moisture content, size and metal content of the object, depth, etc ) can affect the target ID cursor indication and digital target ID, the target ID cursor indication and digital target ID are not accurate and are only for non-critical reference. The target ID cursor indication and digital target ID are not guaranteed to be correct.
When the detected metal signal is strong enough, the display will show a target depth indicator bar, which is to be used in conjunction with the depth scale for you to predict the distance between the detected object and the search coil. The indication of the target depth indicator bar is not accurate and is not guaranteed to be correct. It is only for non-critical reference.
During scanning, the search coil must be in motion. If the search coil is still, the detector can not detect metal normally.
6-FREQUENCY AUDIO ALARM FUNCTION
In any Discrimination Mode, the detector can produce 6 kinds of alarm tones for different types of metal objects, which is intended to help operator identify the probable metal type of the detected object. For a specific detected object which is accepted by a lighted pixel on the horizontal scale, the detector will produce a specific tone.
USING THE BACKLIGHT
When using the detector in a dim environment, you can turn on the backlight for easy operation. To turn on or off the backlight, briefly press this " BACKLIGHT " button when the detector is on.
CHANGING THE OPERATING CHANNEL OF THE DETECTOR
When there are two same metal detectors operating in the same site, you can set them to two different operating channels to avoid crosstalk ( interference ) between them.
When the detector is turned on, it defaults to channel 0. You can press and hold down the " BACKLIGHT " button for about 2 secs to switch the detector between channel 0 and channel 1; the display will briefly indicate the presently selected channel.
USING THE EARPHONE
The detector can work with the earphone ( optional ). To use the earphone, just insert the plug of the earphone into the earphone jack on the rear of the control box, the loudspeaker in the control box will be disabled automatically.
Note:
For safety, do not use earphone ( or headphone ) near traffic.
To avoid hearing loss, do not use earphone ( or headphone ) if using it makes you feel uncomfortable.
TROUBLESHOOTING
| SYMPTOM | SOLUTION |
The detector can not be turned on |
|
Erratic sounds or target ID cursor movement |
|
Intermittent Signals | Intermittent signals typically mean that the detector have detected a deeply buried metal object or one that is positioned at an angle difficult for the detector to read. Scan from different directions to help define the signal. In the case of multiple targets, switch to the All Metals Mode and use the pinpointing function of the detector to precisely locate all targets. NOTE: Iron objects may cause intermittent signals. You can identify iron objects in the All Metals Mode. |
The detector is incapable of finding specific targets | Ensure that you are using a suitable detection mode. If you want to detect coins, the COINS mode is probably the best choice to eliminate other unwanted metal objects. You can also use the All Metals Mode, which detects all metal targets to ensure that desired targets can be detected. |
Target ID Cursor bounces | If Target ID Cursor bounces erratically, the detector may have detected a junk object or the metal signal is too weak. However, Target ID Cursor may bounce if a good target ( such as a coin ) is not parallel to the search coil or the target is below the edge of the search coil. Target ID Cursor may also bounce if there is one or several junk objects existing beside the good target. Move the search coil from different directions until Target ID Cursor becomes more stable. Note: Large iron plates, depending on their orientation in the soil, can read as a good target or cause Target ID Cursor to move erratically. |
BATTERY REPLACEMENT
The battery level indicator on the display indicates the present level of the batteries. Four bars ( ) indicates that the batteries are high. To avoid performance decrease or abnormal operation, replace the batteries immediately when the battery level indicator becomes "
 " ( there is no bar on the indicator ).
To replace the batteries, turn off the detector first. Then slide down the battery cover, which is on the front of the control box ( refer to Figure 4 ), to remove the battery cover. Replace the old batteries with new ones of the same type, make sure that the polarity connections are correct ( see the polarity indications at the bottom of the battery compartment ). Reinstall the battery cover.
NOTE
- Turn off the detector when not in use.
- If the detector operates abnormally, a possible cause is that the batteries are exhausted. Replace the batteries if necessary.
- Protect the plug of the search coil cable from damp; otherwise the detector may lose its detecting ability. Dry the plug as needed.
- The control box is not waterproof. Protect the control box from water, and do not use the detector in rain.
- Do not place the detector in any high temperature environment.
- Handle the detector carefully. Do not bump, drop or abuse the detector.
- Do not tamper with circuit of the detector.
WARNING
Any metal detector may discover underground power lines, explosives or other items which when struck could cause personal injury. When searching for metal objects, adhere to the following guidelines:
- Do not search in an area where you believe there may be buried underground electric line or pipe.
- Do not strike any line known to be or suspected to be carrying electrical power.
- Do not disturb any pipeline, particularly if it could be carrying flammable gas or liquid.
- Use reasonable caution when digging toward any object, particularly in areas where you are uncertain of underground condition.
- For safety, do not go to mine field or military zone.
- Observe all national, state and local laws while detecting.
ACCESSORIES
Manual: 1 piece
Earphone: 1 piece
Handbag: 1 piece
Digging shovel: 1 piece
Earphone plug: 1 piece
Battery: 6 pieces
Coil protection cover:1 piece
Technical Support and E-Warranty Certificate www.vevor.com/support
NEED HELP? CONTACT US!
Have product questions? Need technical support? Please feel free to contact us: CustomerService@vevor.com
Documents / Resources
References
Download manual
Here you can download full pdf version of manual, it may contain additional safety instructions, warranty information, FCC rules, etc.
Advertisement


Need help?
Do you have a question about the TS181A and is the answer not in the manual?
Questions and answers