
Subscribe to Our Youtube Channel
Related Manuals for Ecler VEO-SWM44


Summary of Contents for Ecler VEO-SWM44
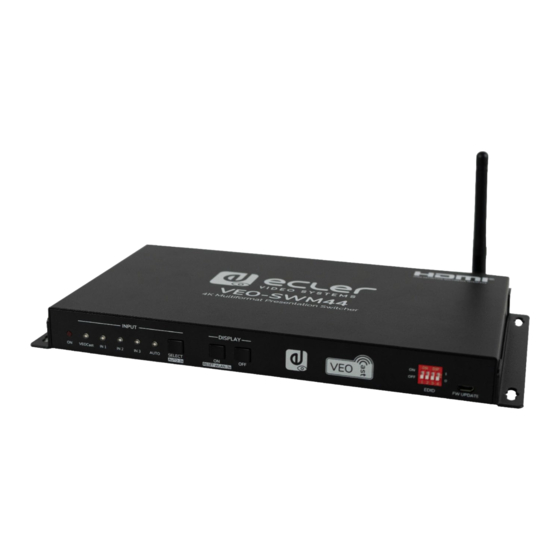
- Page 1 VEO-SWM44 SWITCHER 4K 4x1 presentation switcher with VEOCast USER MANUAL 50-0393-0105 VEO-SWM44...
-
Page 2: Table Of Contents
INDEX IMPORTANT REMARK ......................4 IMPORTANT SAFETY INSTRUCTIONS ................4 IMPORTANT NOTE ........................6 INTRODUCTION ........................6 PACKAGE CONTENTS ......................7 PANEL DESCRIPTION ......................7 6.1. Front Panel ........................... 7 6.2. Rear Panel ............................ 8 VEOCast Connection ........................ 9 7.1. Screen sharing using the switcher internal wireless hot-spot ........9 7.1.1 Screen sharing with Apple devices (Airplay) ............ - Page 3 9.3 Display Control ........................... 17 9.4 EDID Settings ..........................18 RS-232 Control ........................19 10.1 RS-232 Communication protocol ..................19 10.2 List of commands........................19 10.2.1 Source Switching ........................ 20 10.2.2 CEC/RS-232 Function Setting ..................21 10.2.3 Function Setting ........................22 10.2.4 Special Commands ......................
-
Page 4: Important Remark
IMPORTANT REMARK The lightning flash with arrowhead symbol, within an equilateral triangle, is intended to alert the user to the presence of uninsulated “dangerous voltage” within the product’s enclosure that may be of sufficient magnitude to constitute a risk of electric shock to persons. The exclamation point within an equilateral triangle is intended to alert the user to the presence of important operating and maintenance (servicing) instructions in the literature accompanying the appliance. - Page 5 9. Do not defeat the safety purpose of the polarized or grounding type plug. A polarized plug has two blades with one wider than the other. A grounding type plug has two blades and a third grounding prong. The wide blade or the third prong are provided for your safety.
-
Page 6: Important Note
IMPORTANT NOTE Thank you for choosing our VEO-SWM44 switcher. It is very important to carefully read this manual and to fully understand its contents before making any connection in order to maximize your use and get the best performance from this equipment. -
Page 7: Package Contents
PACKAGE CONTENTS 1 x HDMI 4x1 4K Presentation Switcher • 2 x Mounting Ears • 4 x Rubber feet • 1 x 5-pin Euroblock connector • 1 x RS-232 cable (DB9 to 3-pin Euroblock) • 1 x Wireless Antenna • 1 x 24VDC/5A International Power Supply •... -
Page 8: Rear Panel
6.2. Rear Panel PC 1 PC 2 PC 3 AUDIO OUT HOST DEVICES DC 24V PC 1 PC 2 HDMI OUT RS232 1. VEOcast Antenna connection: Connect to the external antenna. 2. PC1 - PC2 Input: Two type-A female HDMI input ports to connect HDMI source devices. -
Page 9: Veocast Connection
A device will be able to share its screen when connected to the internal hot-spot of the switcher. In this scenario, the source will only be able to share its screen wirelessly to VEO-SWM44 but it won't be able to access the internet. -
Page 10: Screen Sharing With Apple Devices (Airplay)
7.1.1 Screen sharing with Apple devices (Airplay) 1. Connect a compatible macOS or iOS device to VEO-SWM44 SSID using WiFi settings macOS 2. Slide the screen to enter Control Center, click on Screen Mirroring and then the VEO- SWM44 SSID to start casting. -
Page 11: Screen Sharing With Android Devices
1. Connect your Android device to VEO-SWM44 SSID using Wi-Fi settings 2. Slide down the Android screen and click on the Android Screen Mirroring options (Smart View for Samsung in this example) and click on VEO-SWM44 to start casting. Note: in case your smartphone doesn’t include a Screen Mirroring app, you can... -
Page 12: Screen Sharing With Windows 10
7.1.3. Screen sharing with Windows 10 1. Press + P and then click “Connect to a wireless display” in the pop-up window. 2. Click on VEO-SWM44 to start casting. -
Page 13: Screen Sharing When Source And Switcher Are Connected To An Existing Network
7.2. Screen sharing when source and switcher are connected to an existing network In this scenario, both the VEO-SWM44 and the source device need to be previously connected to a common wireless network when screen sharing. In order to do that, first its required to enter the network credentials on the settings web page. -
Page 14: Web Settings
WEB SETTINGS Once connected to the VEO-SWM44 SSID, it will be possible to customize the device settings by entering in the web page available at 192.168.203.1 (Default IP). The main menu will appear like follows: Network settings can be consulted at the bottom of the in-built WEB GUI setting’s page. -
Page 15: Resolution
8.2 Resolution This menu allows to choose the output video resolution. 8.3 Display mode With this option it is possible to adapt the image shown choosing between “Fit to screen” and “Zoom to screen” adjustments. 8.4 Language The settings menu is available in many languages selectable through this section. 8.5 Password This section allows changing the password of VEOCast connection. -
Page 16: Broadcast
8.7 Broadcast This allows to hide the VEO-SWM44 internal WiFi hot-spot. When this mode is activated, manual access is required in order to enter the switcher’s WiFi SSID and its WEB GUI page. 8.8 Compatible Mode It optimizes the performance of devices with older HDCP versions that could cause issues while screen sharing. -
Page 17: Front Panel Control
FRONT PANEL CONTROL 9.1 Manual Switching When the switcher is in manual switching mode, pressing the “SELECT AUTO/3s” button repeatedly will navigate between the four video inputs. Each corresponding source LED will lit green immediately. 9.2 Auto Switching Pressing and holding the “SELECT AUTO/3s” button during at least three seconds will enable auto-switching and turn the “AUTO”... - Page 18 9.4 EDID Settings The Extended Display Identification Data (EDID) is used by the source device to match its video resolution with the connected display. The DIP switch on the front panel can be used to set the EDID to a fixed value to ensure the compatibility in video resolution. The switch represents “0”...
- Page 19 RS-232 Control Connect the RS-232 port to control device (e.g. PC, Third party control system) using a cable with DB9 connector. The switcher can be controlled by sending the RS-232 commands listed below 10.1 RS-232 Communication protocol The serial parameters for a correct transmission are: Baud rate: 9600 Data bit: 8 Stop bit: 1...
- Page 20 #SET_RS232_BAUD Set the RS232 baud rate. @RS232_BAUD 9600 PARAM • [PARAM] = 00~06 (Baud Rate) 00 – 115200 01 - 57600 02 - 38400 03 – 19200 04 - 9600 05 - 4800 06 - 2400 10.2.1 Source Switching Command &...
- Page 21 10.2.2 CEC/RS-232 Function Setting The ending mark of command is “<CR><LF>”. Command & Feedback Command Function Example Enable the function of automatically sending CEC commands. When detecting video input signal or not #SET_SYNCACT_CEC 1 detecting any video signal, the switcher @SYNCACT_CEC 1 will automatically...
- Page 22 10.2.3 Function Setting The ending mark of command is “<CR><LF>”. Command & Feedback Command Description Example Set the number of sending DISPLAY #SET_OFF_CNT 1 @OFF_CNT 1 OFF command to 1 time. Set the number of sending DISPLAY #SET_OFF_CNT 2 @OFF_CNT 2 OFF command to 2 times.
- Page 23 10.2.4 Special Commands Note: The below commands don’t need ending mark. Command & Feedback Command Description Example Set the ASCII RS-232 command XXXX to #SET_ON_05_30:1234 be sent to control the third-party device when the DISPLAY ON button is pressed. [PARAM1] = 00~06 (Baud Rate) ...
- Page 24 Command & Feedback Command Description Example Set the HEX RS-232 command XX XX to #SET_H_ON_05_30:31 32 33 34 35 be sent to control the third-party device when the DISPLAY ON button is pressed. [PARAM1] = 00~06 (Baud Rate) 00 - 115200 01 - 57600 02 - 38400 @BAUDRATE: 4800...
- Page 25 Command & Feedback Command Description Example Set the HEX RS-232 command XX XX to #SET_H_OF_05_30:41 42 43 44 45 be sent to control the third-party device when the DISPLAY OFF button is pressed. [PARAM1] = 00~06 (Baud Rate) 00 - 115200 01 - 57600 02 - 38400 @BAUDRATE: 4800...
- Page 26 FIRMWARE UPGRADE When the device is connected to the internet, the firmware update will be done automatically. In case of manual update, the following steps should be followed: 1) Prepare the latest upgrade file (.bin) and rename it as “FW_MERG.bin” on PC. 2) Power off the switcher and connect the FW port of switcher to the PC with USB cable.
- Page 27 TROUBLESHOOTING & MAINTENANCE Problems Potential Causes Solutions Bad quality of the connecting cable Try another high-quality cable. Output image with white Fail or loose connection Make sure the connection is good. noise. HDCP issues Check compatibility Check if there is any signal at the No signal at the input / output end.
- Page 28 2 x Type A female HDMI 1 x Type C USB 3.0 with DP ALT-MODE connector 1 x External Antenna connector Video Output Connectors 1 x Type A female HDMI HDMI Distance up to 10 meters (33 feet) with Ecler VEO cables...
- Page 29 13.2. AUDIO PERFORMANCES Audio Formats Dolby® Atmos, Dolby® TrueHD, Dolby® Digital Plus, Dolby® Digital, DTS-X™, DTS-HD Master Audio™, DTS 5.1™, PCM; Sample Rate up to 24-bit PCM Bit rate 32 KHz, 44.1 KHz, 48 KHz, 88.2 KHz, 96 KHz, 176.4 KHz, 192 KHz Frequency Response 20Hz–20KHz, ±3dB...
- Page 30 13.4. NETWORK WLAN Standards IEEE 802.11ac Wireless Band 2.4 GHz / 5 GHz Max Wireless Coverage ≤5m, environment dependent, reduce disturbance to increase transmission distance up to 15m OS supported Versions iOS 7 or above, MacOS, Android 4.0 or above, Windows 8.1 or above 13.5 ENVIRONMENTAL Operating Temperature...
- Page 31 MECHANICAL DIAGRAM...
- Page 32 NEEC AUDIO BARCELONA S.L. reserves the right to make changes or improvements in the design or manufacturing that may affect these product specifications. For technical queries contact your supplier, distributor or complete the contact form on our website, Support / Technical requests. Motors, 166‐168 08038 Barcelona ‐ Spain ‐ (+34) 932238403 | information@ecler.com www.ecler.com...
Need help?
Do you have a question about the VEO-SWM44 and is the answer not in the manual?
Questions and answers