
Subscribe to Our Youtube Channel
Related Manuals for Ecler VEO-SWC44


Summary of Contents for Ecler VEO-SWC44
- Page 1 VEO-SWC44 & VEO-SWC44TH / VEO-SWC44TU SWITCHERS & MATRIXES Wireless Conferencing and Presentation Switcher USER MANUAL 50-0433-0100 VEO-SWC44 / VEO-SWC44TH / VEO-SWC44TU...
-
Page 2: Table Of Contents
USB Conferencing Devices Connection ................14 START-UP and OPERATION ....................15 Home Screen ..........................15 Pairing VEO-SWC44TH and VEO-SWC44TU with VEO-SWC44 ......17 Wireless Presentation Mode ....................18 5.3.1 Screen Sharing using VEO-SWC44TH and VEO-SWC44TU ..... 18 5.3.2 Screen Sharing using VEOShare Desktop Application ........19 5.3.3 Screen Sharing using Airplay ................. - Page 3 6.8.1 USB Camera......................... 59 6.8.2 USB Audio ........................60 FIRMWARE UPDATE ........................61 Upgrading Firmware version of VEO-SWC44 ............... 61 Upgrading Firmware version of VEO-SWC44TH / VEO-SWC44TU ...... 63 PANEL FUNCTIONS and WIRELESS TRANSMITTERS ............. 64 Front Panel ..........................64...
- Page 4 Rear Panel ..........................65 8.2.1 Factory Reset Using Rear Panel Button ............. 66 Wireless Transmitters ......................68 8.3.1 VEO-SWC44TH ......................68 8.3.2 VEO-SWC44TU ......................68 8.3.3 LED Indicator ....................... 69 TROUBLESHOOTING ......................... 70 10. TECHNICAL DATA ........................75 10.1 Technical Specifications ......................75 10.2 Mechanical Diagram ........................
-
Page 5: Precautions
1. PRECAUTIONS Important Remark The lightning flash with arrowhead symbol, within an equilateral triangle, is intended to alert the user to the presence of uninsulated “dangerous voltage” within the product’s enclosure that may be of sufficient magnitude to constitute a risk of electric shock to persons. The exclamation point within an equilateral triangle is intended to alert the user to the presence of important operating and maintenance (servicing) instructions in the literature accompanying the appliance. -
Page 6: Important Safety Instructions
1.2 Important Safety Instructions Read these instructions. 12. Unplug the device during lightening sorts or when unused for long periods Keep these instructions. of time. Heed all warnings. Refer servicing qualified Follow all instructions. personnel. Servicing is required when Do not use this device near water. the device has been damaged in any Clean only with dry cloth. -
Page 7: Package Contents
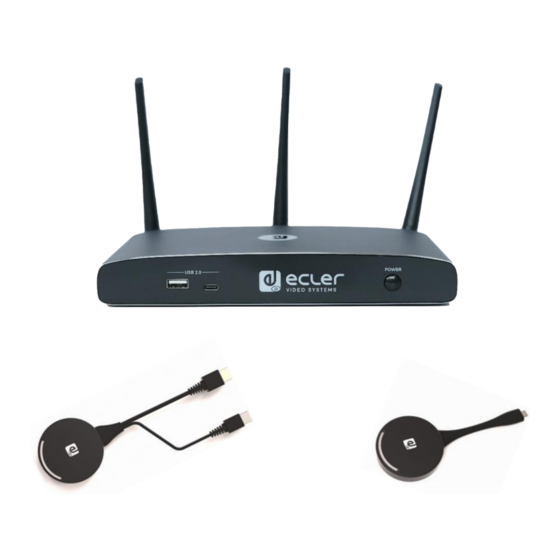
Warranty card. 3. DESCRIPTION and FEATURES VEO-SWC44 is a wireless conferencing and presentation switcher with Full HD video resolution wireless inputs and a 4K / UHD HDMI 2.0 video output. It supports wireless connection for USB devices like webcam and mic via wireless transmitter, Windows &... -
Page 8: Optional Accessories
VEO-SWC44TH is a HDMI wireless transmitter that allows participants to easily share content from a laptop or HDMI device to the VEO-SWC44 base unit. Power is supplied by an auxiliary USB Type A connector. It is designed as a cross platform and plug and play device with no additional driver installation needed. -
Page 9: Install & Connect
Mounting screws are not included in the VEO-SWC44 box. The type of screws depends on the type of wall (stone, wood, plasterboard, ...) you are mounting the Base Unit VEO-SWC44 to. Make sure the head of the screw is not larger than the hole in the bottom of base unit VEO-SWC44. -
Page 10: Connection Diagram
• Power over Ethernet If the LAN Ethernet switcher supports PoE (Power over Ethernet), LAN 2 port can be used to power up the Base-unit VEO-SWC44 instead of using the external power adapter. (LAN2 Port of the unit supports PoE.). -
Page 11: Video Connection
4.4 Video Connection Connect the HDMI Output of VEO-SWC44 to a 4K or Full-HD display by a HDMI cable. After starting up, the system displays the home page, as shown below. 4.5 Audio Connection Connect an audio cable with mini jack socket 3.5mm connector into the audio of the VEO-SWC44. -
Page 12: Lan Connection
Connect a network cable with RJ-45 connector into the LAN 1 or LAN 2 port of Base UnitVEO-SWC44. Connect the other side to LAN. DHCP on the VEO-SWC44 switcher is enabled per default. a) If there’s a DHCP server in the network, IP address will be assigned automatically. -
Page 13: Usb Control Devices Connection
4.7 USB Control Devices Connection If the user connects an USB Mouse or Touchscreen, the following features will be available: • Moderator tab to manage the active users sharing content with the VEO-SWC44. • White board or annotation during a presentation. •... -
Page 14: Usb Conferencing Devices Connection
4.8 USB Conferencing Devices Connection VEO-SWC44 supports USB Camera and USB speakerphone over WiFi sharing to start meetings with conferencing software’s such as Skype, Zoom, Microsoft Teams, etc. chapter Wireless Conferencing Mode for configuration and operation. -
Page 15: Start-Up And Operation
5. START-UP and OPERATION 5.1 Home Screen When a user connects the VEO-SWC44 base unit to a HDMI display, the following Home Screen is displayed: 1. iOS Quick Start: Steps to start sharing content wirelessly using Airplay on iOS and macOS. - Page 16 12. Info: Clicking on this icon will show / hide Network information of the Home screen. 13. WiFi / IP LAN IP: WiFi IP: address of VEO-SWC44 in wireless LAN / Assigned IP: address of VEO-SWC44 in LAN. “N/A” means the VEO-SWC44 base unit is not connected to any WiFi / LAN networks, or it failed to get an available IP address by the assigned DHCP server.
-
Page 17: Pairing Veo-Swc44Th And Veo-Swc44Tu With Veo-Swc44
5.2 Pairing VEO-SWC44TH and VEO-SWC44TU with VEO-SWC44 Connecting VEO-SWC44TH (HDMI wireless transmitter) to USB Type A port or VEO- SWC44TU to USB-Type C port will start pairing process automatically. They should be connected one at a time. A transmitter can only be paired to one base unit and will always re connect to the one that was last paired to. -
Page 18: Wireless Presentation Mode
5.3 Wireless Presentation Mode VEO-SWC44 can be used to wirelessly share the screen of AV sources. VEO-SWC44 can mirror 4 sources onto main display simultaneously, which supports PC/Laptop and mobile devices. 5.3.1 Screen Sharing using VEO-SWC44TH and VEO-SWC44TU Pair VEO-SWC44TH or VEO-SWC44TU to VEO-SWC44 base unit, see chapter Pairing VEO-SWC44TH and VEO-SWC44TU with VEO-SWC44. -
Page 19: Screen Sharing Using Veoshare Desktop Application
5.3.2 Screen Sharing using VEOShare Desktop Application VEOShare app is the launcher that lets the user screen share content with VEO-SWC44 base unit wirelessly from any source device which hosts it (mac, PC…). Just copying the launcher to the internal storage will let the user run VEOShare app. - Page 20 The virtual driver is only for video conferencing, user can normally mirror desktop without it installed. If the VEO-SWC44 is not connected with camera, mic&speaker, it will not pop out message to install driver, user could mirror desktop as well.
- Page 21 “Staff”), or connect to the LAN on the network using a network cable. 3. Double-click the VEOShare app. A list of all available VEO-SWC44 base units in the same network will be displayed. select the device to connect to. The connections are password protected (lock icon 4.
- Page 22 • VEOShare Settings 1. Device List 2. Options • Extended Screen: Transfers extended desktop of active source. The primary screen (1) is displayed on the laptop and the virtually extended screen (2) is displayed on the main screen. If the PC has already connected an extended screen (3), the extended screen (2) will always be displayed on the main screen.
-
Page 23: Screen Sharing Using Airplay
On iOS and macOS devices a user can stream his screen or sound wirelessly to VEO- SWC44 base unit via Airplay protocol. 1. Connect the iOS or macOS device to the same WiFi network that VEO-SWC44 is connected to. 2. Show the control centre. Click the Airplay icon... -
Page 24: Screen Sharing Using Miracast
Under Security Level 1 mode, there is no need to enter password to connect. Under Security level 2 and Security level 3 mode, it will need to enter password on VEO-SWC44 Home Screen to connect and start casting. After entering password, your mobile content will be shown on the display. - Page 25 • 1. WiFi must be enabled and connected to the same network as VEO-SWC44 base unit. Press + P and then click “Connect to a wireless display” in the pop-up window. Under Security Level 1 mode, there is no need to enter password to connect.
-
Page 26: Screen Sharing Using Chromecast
3. Open the VEOShare application in the Android device, and then click the device list refresh button. 4. Select the VEO-SWC44 to connect to and enter password to start screen sharing. 5. Click again the button “Share Screen” to stop mirroring. - Page 27 • 1. Connect the PC and VEO-SWC44 on the same network. 2. Open Chrome browser. 3. Click “cast” to connect Chromecast function. 4. Click VEO-SWC44 SSID to start sharing content. 5. Click VEO-SWC44 SSID again to stop sharing content.
-
Page 28: Wireless Conferencing Mode
5.4 Wireless Conferencing Mode VEO-SWC44 allows to conduct a video conference using the room USB conferencing devices over WiFi. Connect the USB conferencing devices to the VEO-SWC44 USB ports. Camera and microphone icons will appear on VEOShare control bar. o White icons: indicate the USB camera and speaker/mic are connected. -
Page 29: Moderator Preview Window
5.5 Moderator Preview Window VEO-SWC44 includes a moderator preview window that will let the user choose which of the online devices is displayed on the main screen, turn on and off wireless casting on any device or control volume playback. -
Page 30: Whiteboard & Annotation
5.6 Whiteboard & Annotation Whiteboard and Annotation requires an USB HID compatible device, such as interactive white board, touch screen or mouse. There are two different modes: 5.6.1 Whiteboard A white board is brought up that will let the user to write notes, draw content. It allows different figures, colours and background. - Page 31 Pen allows writing/drawing in different colours. Draw basic geometric shapes. Select colour of board, the drawing will be kept. Tool bar 3 will pop up, when “Pen” or Draw shape or Select colour of board is selected, for individual change of size of Pen, Shape or colour.
-
Page 32: Annotation
5.6.2 Annotation Allows the user to draw or write annotations in overlay within the presented content of the active sharing devices. It allows different figures, colours, and background. To start Annotation mode, click on the Home Screen. Use the toolbar to select one of the following functions. Icons Function Tool bar 1... - Page 33 VEO-SWC44, scanning the QR code or entering the given IP address in a browser will allow the user to download the saved files. Data can be copied to a USB disk and after connecting it to the VEO-SWC44, it can be imported into the Whiteboard section with "Import from U disk".
-
Page 34: Webgui Setting Management & Configuration
6. WebGUI SETTING MANAGEMENT & CONFIGURATION To access VEO-SWC44 WEB settings it is necessary to enter the base unit IP address in an internet browser. The first page displayed will let the user download VEOShare app for all platforms. If VEO-SWC44 is on “Wireless direct Mode”, first access VEO-SWC44 SSID and enter current password on Home Screen page. -
Page 35: Network Settings
6.1 Network Settings To take the full benefit of VEO-SWC44 features, it is important to configure and integrate the base unit network settings according to the needs of the application required. VEO-SWC44 includes two independent wired LAN and a WiFi network card. - Page 36 6.1.1.1 Network Modes Configuration Device Name: Enter a device name for the Base-unit VEO-SWC44. Allowed characters are: "a-z", "A-Z", "0-9", "-“, “_" and “space “, then Click “Next step”. Mode Selection: Select the desired network mode and click “Next Step”.
- Page 37 Under this mode, VEO-SWC44 can work without any other wireless network configuration. Just pair VEO-SWC44TH / VEO-SWC44TU with VEO-SWC44 base unit, connect to VEO-SWC44 internal hotspot and open VEOShare app or use Airplay, Miracast or Chromecast wireless casting protocols. 1. Click “Next step” to Set up WiFi access point.
- Page 38 • There are three ways of connecting to Internet through VEO-SWC44 in “Wireless Direct Mode”: a) Allow internet access (bridging) via LAN 1: the source device is able to connect to Internet if LAN1 port is available. b) Allow internet access (bridging) via LAN 2: the source device is able to connect to Internet if LAN2 port is available.
- Page 39 Chromecast). VEO-SWC44TH / VEO-SWC44TU will be connected to the WiFi access point of “Guest” network, which in turn is connected to the internal WiFi access point of VEO-SWC44. (They can also be configured to connect to the enterprise’s access point.) Mobile devices users will stay connected to their current network thus have access to their normal corporate environment as well as Internet access.
- Page 40 5. Choose a LAN network which is used for the company staff users. Usually in this mode, wireless transmitter is paired for internal staff usage. • Select SSID: Choose a wireless network to connect to VEO-SWC44 for guest. • Password: enter password to connect the VEO-SWC44 to the guest network.
- Page 41 In this configuration the built-in WiFi access point of VEO-SWC44 is disabled. VEO-SWC44TH / VEO-SWC44TU and mobile devices can connect to the secured wireless access point of the company network. The VEO-SWC44 base unit will be connected via network cable to the wired of the company network.
- Page 42 2. Click “Next step” to edit or change GUEST and STAFF network SSID. 3. WiFi name of Guest and Staff will be displayed on Home Screen after “Submit settings”. 4. After submitting successfully, please pair wireless transmitters again with VEO-SWC44.
-
Page 43: Ethernet
The password remains unchanged for all participants of the meeting, while at least one wireless transmitter or mobile device is connected to VEO-SWC44 base unit. After the user is disconnected, a configurable timeout will start. User do not need to re-pair the VEO-SWC44TH / VEO-SWC44TU again if the password is changed. -
Page 44: Display & Audio
2. Click to set the configuration: • Never: never change WiFi password. (Even after POWER-OFF condition) • 5 minutes: change WiFi password every 5 minutes. • 30 minutes: change WiFi password every 30 minutes. • 1 hour: change WiFi password every 1 hour. •... - Page 45 When monitor enters standby mode, it sends commands via the HDMI cable to the connected VEO-SWC44 so this one also enters standby mode. On: VEO-SWC44 will be auto turned off also when display is turned off. Off (Default): VEO-SWC44 will not be auto turned off also when display is...
-
Page 46: Audio
6.2.2 Audio Allows the user to choose which sound source is routed to audio output. Audio output: • Jack: output only 3.5mm mini-jack audio. • HDMI: output only HDMI audio. • Jack&HDMI (Default): output Jack & HDMI audio. Audio volume: volume can be selected from 0 to 100. 6.2.3 Airplay Screen Quality Click to select the image quality for the Apple device that is transmitting through... -
Page 47: Start Screen
Show PCs username when mirroring. 6.2.5 Home Screen Background Image When powering VEO-SWC44, the Home Screen will be displayed. User can change background image of Home Screen. Select the image (jpg, bmp, png, gif with resolution 1920x1080 p.) from suitable directory... -
Page 48: Moderator Control
6.3 Moderator Control The user can enable or disable moderator control and preview on moderator side bar. 6.3.1 Moderator Layout This section allows for various fixed window layout presets to show participants in the main screen. Up to four simultaneously. -
Page 49: System Settings
6.4 System Settings 6.4.1 Buttons This section allows to manage VEO-SWC44TH and VEO-SWC44TU. • Connected: Display Device name, MAC Address, Serial Number, Device Version, Device Status, Last Action, Item Operate. • Paired: Displays properties of connected VEO-SWC44TH / VEO-SWC44TU and can be managed from this page. -
Page 50: Date & Time
6.4.2 Date & Time Includes Automatic date & time, Set date, Set time, Select time zone. • Automatic date & time: Check to use a NTP time server to provide time as system time. • Set date: Click in the input filed to fill out the appropriate date. •... -
Page 51: Auto Standby
6.4.3 Auto Standby If the Auto Standby mode is activated, VEO-SWC44 will automatically switch to power saving mode, a selectable time after the last wireless transmitter was plugged out, or WiFi of a mobile unit was disconnected, or there is no operation at the system. Time is selectable from Never, up to 30 minutes. -
Page 52: Reset
6.4.5 Reset This parameter allows the user to perform a Factory reset to restore the unit. 6.4.6 Configuration File Configuration File is a preset which can be downloaded and will save all the configuration parameters set so they can be loaded to additional devices. -
Page 53: Series Port Setting
This parameter allows the user to configure telnet command and RS-232 commands to control VEO-SWC44. 6.4.7.1 Control commands VEO-SWC44 can be remotely controlled over RS-232 or Telnet communications protocol. • For RS-232 serial communication, enter the parameters you have selected the on Series Port Setting screen as mentioned above. - Page 54 Shows how many devices are connected to the VEO-SWC44 WiFi hotspot. mute on Turns on mute on VEO-SWC44 line out. mute off Turns off mute on VEO-SWC44 line out. mute ? Shows the current mute status on the VEO-SWC44 line out.
-
Page 55: Telnet Switch
Hides the status bar on the Home screen. pass refresh Changes the current password key available to connect to VEO-SWC44 shown in the Home Screen. pass ? Shows current password available to connect to VEO-SWC44 shown in the Home Screen. -
Page 56: Security Settings
6.5 Security Settings 6.5.1 Security Level Based on user requirements, three different security levels can be set to satisfy different security requirements. Click on the corresponding entry in the menu to adjust the respective security features. The default setting is level 1. •... -
Page 57: Login Password
6.5.2 Login Password This section allows the user to change password to entering web settings GUI. Default password is “admin”. 6.5.3 Connection Password Two type of password format can be chosen to be displayed on Home Screen. • 4-digits password, beginning with 0000 •... -
Page 58: Firmware Upgrade
6.6 Firmware Upgrade 6.6.1 Firmware Update This section allows the user to upload local updating files to upgrade VEO-SWC44. 6.6.2 Automatic Upgrading This section allows to choose upgrading from OTA via Internet or from local files. 6.7 Other Settings 6.7.1... -
Page 59: Clear History After Meeting
Always: memory is automatically deleted. 6.8 UCC Device Manager This section allows the user to select and monitoring UVC and UAC devices connected to the VEO-SWC44 base unit. 6.8.1 USB Camera This section allows the user to select and see a preview of the current USB video devices. -
Page 60: Usb Audio
6.8.2 USB Audio Allows the user to select and see a preview of the current USB audio devices. -
Page 61: Firmware Update
VEO-SWC44TH o VEO-SWC44TU All software is stored in VEO-SWC44 base unit and later transferred to the rest of the elements. After updating the VEO-SWC44 base unit, it is necessary to check whether the other parts need to be updated as well. - Page 62 1. Browse to “Firmware update” section on Web Settings. 2. Select a “update.img” file. 3. The upgrading progress displays as shown below, and the VEO-SWC44 will reboot automatically after completing the updating. 4. The display device shows the Home Screen after normal boot of the device,...
-
Page 63: Upgrading Firmware Version Of Veo-Swc44Th / Veo-Swc44Tu
7.2 Upgrading Firmware version of VEO-SWC44TH / VEO-SWC44TU Plug the VEO-SWC44TH / VEO-SWC44TU to the according USB front port of VEO-SWC44 to be updated. It will automatically display up a message to indicate if the installed firmware of wireless transmitter is older and needs to be upgraded. -
Page 64: Panel Functions And Wireless Transmitters
1. Front USB 2.0 Type A connector: • To connect USB 2.0 devices • To update the software of the VEO-SWC44. • For pairing VEO-SWC44TH and VEO-SWC44, when the transmitter is plugged-in. 2. Front USB 3.0 Type C connector: VEO-SWC44TU pairing. -
Page 65: Rear Panel
8.2 Rear Panel Line audio output: stereo analogue HDMI output: Connect an HDMI unbalanced audio output. Connect a cable from this port to an HD or 3.5mm mini-jack PC connector from 4K/HDMI2.0 display. this output to the Line in jack of an LAN Ethernet port 1: 100Mbps, audio system. -
Page 66: Factory Reset Using Rear Panel Button
Start up the VEO-SWC44. When the Home Screen is displayed, press the reset button at the rear panel of VEO-SWC44. Press this button with a pointed object, e.g., an unbent paper clip for at least 2 seconds, until the “FactoryReset” page is displayed as below. - Page 67 • Moderator Control o Add a sub-window bar to enable previewing the connected devices: ON. o Real time preview: ON. • System settings o Date & time: Automatic date & time: use network-provided time. o Auto Standby: Never. o Language: English. Security Settings •...
-
Page 68: Wireless Transmitters
1. HDMI connector: Using HDMI connector of the button can be plugged into a PC/Laptop for sharing your screen. 2. USB connector: Supply power or plug into the VEO-SWC44 for pairing the Button to the VEO-SWC44 or upgrade the wireless transmitter. -
Page 69: Led Indicator
SWC44 base unit: When LED indicator is blinking Green: the VEO-SWC44TH / VEO- SWC44TU is pairing with VEO-SWC44 base unit or firmware upgrading. When LED indicator is static red: pairing is done. VEO-SWC44TH / VEO- SWC44TU can be unplugged and ready to use. -
Page 70: Troubleshooting
9. TROUBLESHOOTING Here you can find some fundamental problems and possible causes, which can be happen during the use of VEO-SWC44. Find out the problem in the table below and apply the indicated solution. Problem Cause Solution Using VEO-SWC44 WiFi password of VEO-SWC44... - Page 71 Insert the display cable to the correctly connected. display and the Base-unit. The displays are switched off. Switch on the display. The VEO-SWC44 base-unit is in Power off and on again or standby mode, “Power-LED” is insert a wireless transmitter into flashing at VEO-SWC44 Power- laptop.
- Page 72 VEO-SWC44. The VEO-SWC44 is in standby Briefly push the standby button on mode. the VEO-SWC44 or power off and on again the VEO-SWC44. No LAN connection Wrong IP address. • IP address is not within LAN...
- Page 73 Click with right-mouse button at speaker icon in taskbar and switch The volume level is set too low. Adjust the volume level at Options in menu of VEO-SWC44. Audio is muted in mixer of Right-mouse click at speaker icon in volume in taskbar.
- Page 74 MacBook Mac OS 10.9 iOS 8.0 and later the iOS device to the WiFi of iPhone / iPad. (VEOShare app). VEO-SWC44 and enable the AirPlay feature in the Control Center. • Update the iOS device to a newer operating system.
-
Page 75: Technical Data
Airplay, Chromecast, Miracast, VEOShare app, Wireless Transmitter Wireless Conferencing Other Features Whiteboard annotation tool, Wireless Touchback, Customizable background HDMI Distance 10m with Ecler VEO Cables Audio Performances Audio Output Connectors Jack 3.5mm Audio Formats PCM 2.0 Audio De-Embedding Device Control... - Page 76 Shipping Weight 1.25 Kg / 2.76 lb Chassis Material Metal Finished Colour Black VEO-SWC44TH (optional accessory) Video Performances Video Input Connectors HDMI Type A Female, 1.4, 10.2 Gbps Video Input Resolution 1080p@60Hz Video Output Resolution 1080p@60Hz HDCP Device Control Status Indicators Input LED Multicolour Electrical Power Supply...
-
Page 77: Mechanical Diagram
10.2 Mechanical Diagram VEO-SWC44 Measurements indicated in mm. - Page 78 VEO-SWC44TH Measurements indicated in mm. VEO-SWC44TU Measurements indicated in mm.
- Page 79 NEEC AUDIO BARCELONA S.L. reserves the right to make changes or improvements in the design or manufacturing that may affect these product specifications. For technical queries contact your supplier, distributor or complete the contact form on our website, Support / Technical requests. Motors, 166‐168 -08038 Barcelona ‐ Spain‐(+34) 932238403 information@ecler.com www.ecler.com...
Need help?
Do you have a question about the VEO-SWC44 and is the answer not in the manual?
Questions and answers