Table of Contents
Advertisement
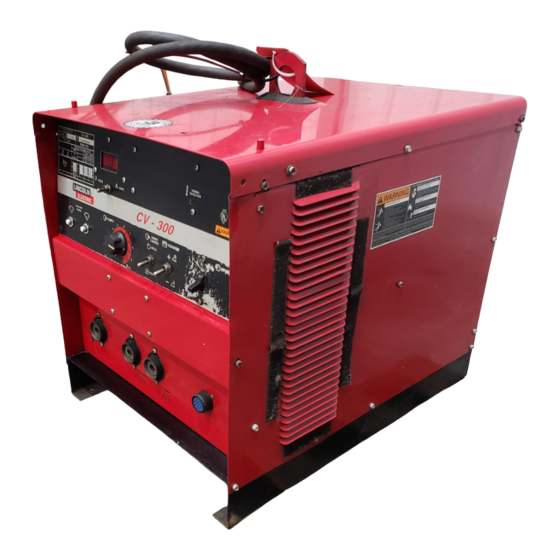
IDEALARC CV-300
For use with machines having Code Numbers:
9456, 9486, 9520 9939, 9940, 10180, 10181
SERVICE MANUAL
SVM116-A
| Issue D ate 99, Mar
© Lincoln Global, Inc. All Rights Reserved.
NOTE: This manual will cover most of the troubleshooting and repair
procedures for the code numbers listed. Some variances may exist when
troubleshooting/repairing later code numbers.
Advertisement
Chapters
Table of Contents
Troubleshooting

Subscribe to Our Youtube Channel
Related Manuals for Lincoln Electric IDEALARC CV-300


Summary of Contents for Lincoln Electric IDEALARC CV-300
- Page 1 NOTE: This manual will cover most of the troubleshooting and repair procedures for the code numbers listed. Some variances may exist when troubleshooting/repairing later code numbers. IDEALARC CV-300 For use with machines having Code Numbers: 9456, 9486, 9520 9939, 9940, 10180, 10181...
-
Page 2: Safety
351040, Miami, Florida 33135 or CSA Standard W117.2-1974. A Free copy of “Arc Welding Safety” booklet E205 is available from the Lincoln Electric Company, 22801 St. Clair Avenue, Cleveland, Ohio 44117-1199. BE SURE THAT ALL INSTALLATION, OPERATION, MAINTENANCE AND REPAIR PROCEDURES ARE PER- FORMED ONLY BY QUALIFIED INDIVIDUALS. - Page 3 This can create fire hazards or overheat lifting chains Electrical Code, all local codes and the manufacturer’s or cables until they fail. recommendations. 4.h. Also see item 7c. 6.c. Ground the equipment in accordance with the U.S. National Electrical Code and the manufacturer’s recommendations. Feb. ’95 IDEALARC CV-300...
- Page 4 ___________________________________________________ 7.h. To avoid scalding, do not remove the radiator pressure cap when the engine is hot. IDEALARC CV-300...
- Page 5 Se protéger avec des vêtements de protection libres de l’huile, tels que les gants en cuir, chemise épaisse, 4. Garder tous les couvercles et dispositifs de sûreté à leur pantalons sans revers, et chaussures montantes. place. Mar. ’93 IDEALARC CV-300...
-
Page 6: Table Of Contents
Parts List ..........Appendix IDEALARC CV-300... -
Page 7: Installation
Select Proper Location ............A-2 Stacking ..............A-2 Tilting................A-2 Input Electrical Connections ..........A-3 Fuse and Wire Sizes ...........A-3 Reconnect Procedure ............A-4 Connect Output Cables ...........A-7 Paralleling..............A-7 Installation of Field Installed Accessories......A-7 Installation of Wire Feeders ..........A-7 Twist-Mate Cable Plug Installation Instructions....A-7 IDEALARC CV-300... -
Page 8: Technical Specifications
INSTALLATION TECHNICAL SPECIFICATIONS - IDEALARC CV-300 INPUT - THREE PHASE/ 50-60 HERTZ ONLY Standard Voltages Input Current at Rated Output 208/230/460/3/60 66/60/30 Amps 230/460/575/3/60 60/30/24 Amps RATED OUTPUT Duty Cycle Amps Volts at Rated Amps CV-300 100% 300A 400A OUTPUT... -
Page 9: Safety Precautions
____________________________________ STACKING PIN SELECT PROPER LOCATION FIGURE A.1 - Stacking IDEALARC CV-300 The IDEALARC CV-300 can be used indoors or out- machines. doors. It has an IP-23 degree of protection. Place the IDEALARC CV-300 where clean, cooling air TILTING can freely circulate in through the side louvers and out through the rear louvers. -
Page 10: Input Electrical Connections
5. The frame of the welder must be grounded. A ground terminal marked with the symbol ( ) is located at the bottom of the input box to ground the welder. See the National Electrical Code for details on proper grounding methods. IDEALARC CV-300... -
Page 11: Reconnect Procedure
INPUT LINES use. 2. Connect L1, L2, & L3 as shown. GROUND 3. Connect terminal marked to ground ter- minal per National Electrical Code. FIGURE A.3 - Reconnect Diagram For Dual Voltage Machines. IDEALARC CV-300... - Page 12 208 VOLTS 60HZ. 2. Connect L1, L2, & L3 as shown. 3. Connect terminal marked to ground terminal per National Electrical Code. INPUT LINES GROUND FIGURE A.4 - Reconnect Diagram For 208/230/440 voltage machines. IDEALARC CV-300...
- Page 13 Secure the links tightly with the hex nuts provided. 2. Connect L1, L2, & L3 as shown. INPUT LINES 3. Connect terminal marked to ground ter- minal per National Electrical Code. GROUND FIGURE A.5 - Reconnect Diagram for 230/460/575 voltage machines. IDEALARC CV-300...
-
Page 14: Connect Output Cables
4. Slide the copper tube into the brass plug. See INSTALLED ACCESSORIES Figure A.6. 5. Insert cable into the copper tube. See Figure A.6. For installation of compatible field installed acces- sories, refer to the instructions included with those IDEALARC CV-300... - Page 15 BOOT WELDING CABLE ABOVE SET SCREW TRIM (70-95 SIZE MAY HAVE 2 SET SCREWS) COPPER TUBE BRASS PLUG FIGURE A.6 - Installing Twist-Mate Cable Plug. IDEALARC CV-300...
- Page 16 NOTES IDEALARC CV-300...
-
Page 17: Operation
High Inductance Negative Output Connection...B-4 Low Inductance Negative Connector ......B-4 Positive Output Connector .........B-4 Operating Steps...............B-5 Starting the Machine...........B-5 Adjusting the Output Voltage using the Digital Meter B-5 Using Local/Remote Switch Operation ......B-5 Using Auxiliary Power ..........B-5 Machine and Circuit Protection ........B-6 IDEALARC CV-300... -
Page 18: General Description
GENERAL DESCRIPTION • Always wear dry insulating gloves. Product Description ____________________________________ The IDEALARC CV-300 is a constant voltage DC FUMES AND GASES power source designed for the GMAW process with can be dangerous. limited FCAW capability. It features an industrial rat- ing of 300 amps, 32 volts, at 100% duty cycle. -
Page 19: Recommended Processes And Equipment
It is capable of welding with the following flux-cored wires: NR-152 NR-211 NS-3M NR-203 Ni 1% Outershields 70 and 71 The CV-300 is recommended for use with the follow- ing wire feeders: LN-7 LN-742 IDEALARC CV-300... -
Page 20: Controls And Settings
(MIG, Outershield and some trolled remotely by a remote output control. Innershield processes) set the switch to "+". 4. VOLTAGE ADJUSTMENT CONTROL When welding electrode negative (most Innershield electrodes), set the switch to "-". KNOB - Controls the CV-300 output voltage. IDEALARC CV-300... -
Page 21: 42-Volt Circuit Breaker
"ON" position will result in the most rapid cooling. 10. WIRE FEEDER RECEPTACLE - This is a 14-pin MS style receptacle. It provides connec- tions for auxiliary power, contactor closure, remote output control, wire feeder voltmeter sense lead, and ground. IDEALARC CV-300... -
Page 22: Operating Steps
"Local" position). To use a remote control, such as the K857, place the Local/Remote switch in the "Remote" position. The remote control now controls the output voltage. This control may be adjusted while welding to change the CV-300 output. IDEALARC CV-300... -
Page 23: Machine And Circuit Protection
CV-300 output. The short circuit protection circuit can be reset by turning the CV-300 Power Switch OFF for at least 10 seconds. Remove the short before turning the Power Switch ON again. IDEALARC CV-300... - Page 24 NOTES IDEALARC CV-300...
-
Page 25: Accessories
Two Cylinder Undercarriage (K874) ......C-1 Wire Feeder Swivel Mount (K178-1) ......C-1 Universal Adapter (K867) ..........C-1 Connecting Wire Feeder to the CV-300 ......C-1 LN-7 to CV-300............C-1 LN-25 to CV-300............C-2 LN-742 to CV-300............C-2 Connecting Remote Control (K857) to CV-300 ....C-2 IDEALARC CV-300... -
Page 26: Field Installed Accessories
(Amphenol) plug with 8-inch (0.2 meter) long flex leads, one for each circuit present in the wire feeder receptacle. This adapter is not required when using a standard Lincoln Electric wire feeder input cable, such as a K480. IDEALARC CV-300... -
Page 27: Connecting Remote Control (K857) To
CONNECTING REMOTE CONTROL (K857) TO CV-300 1. Turn the ON/OFF POWER SWITCH to OFF. NOTE: The K864 Remote Control Adapter is required to install the K857. 2. Plug the K864 Remote Control Adapter into the power source's 14-pin receptacle. IDEALARC CV-300... - Page 28 NOTES IDEALARC CV-300...
-
Page 29: Maintenance
MAINTENANCE TABLE OF CONTENTS - MAINTENANCE SECTION - MAINTENANCE SECTION ........Section D Safety Precautions............D-1 Routine and Periodic Maintenance .........D-1 Component Locations ..........D-2 IDEALARC CV-300... -
Page 30: Safety Precautions
Clean the following parts. Refer to Figure D.1. Main transformer and choke. Electrode and work cable connections. SCR rectifier bridge and heat sink fins. Control board. Fan Motor Assembly. NOTE: The fan motor has sealed bearings which require no maintenance. IDEALARC CV-300... - Page 31 MAINTENANCE MAIN TRANSFORMER COVER CAPACITOR AND AND CHOKE ASSEMBLY ASSEMBLY SCR BRIDGE RECTIFIER ASSEMBLY CASE BACK ASSEMBLY CASE FRONT BASE AND FAN ASSEMBLY MOTOR ASSEMBLY (CONTROL BOARD LOCATED ON BACK) Figure D.1 - Component Locations. IDEALARC CV-300...
- Page 32 NOTES IDEALARC CV-300...
-
Page 33: Theory Of Operation
12VAC CONTROL BOARD MOTOR 115VAC 12VAC INPUT RECONNECT LINE PANEL SWITCH SHUNT OUTPUT TERMINALS CAPACITORS CHOKE OUTPUT MAIN RECTIFIER TRANSFORMER Figure E.1 - Block Logic Diagram. NOTE: Unshaded areas of Block Logic Diagram are the subject of discussion IDEALARC CV-300... -
Page 34: Power Supply Operation
The 115 VAC aux- iliary winding supplies power to operate the cooling fan and offers up to 5 amps to operate wire feeding NOTE: Unshaded areas of Block Logic Diagram are the subject of discussion IDEALARC CV-300... - Page 35 The control board also supplies power and signals to the meter board. NOTE: Unshaded areas of Block Logic Diagram are the subject of discussion IDEALARC CV-300...
-
Page 36: Protection Devices And Circuits
The electronic protection circuit can be reset either by turning the line switch off for ten seconds or by opening the trigger circuit (leads #2 and #4) for five seconds. IDEALARC CV-300... -
Page 37: Scr Operation
SCR out- the off state and the remainder of the time in the on put. state. The amount of time spent in the ON state is con- trolled by the gate. IDEALARC CV-300... - Page 38 NOTES IDEALARC CV-300...
- Page 39 Output Rectifier Bridge Removal and Replacement..F-33 Mounting of Stud Type Diodes to Aluminum Heat Sinks ..............F-35 SCR Removal and Replacement ........F-37 Fan Motor and Fan Removal and Replacement ....F-43 Center Assembly Removal and Replacement ....F-45 Retest After Repair............F-47 IDEALARC CV-300...
-
Page 40: How To Use Troubleshooting Guide
HOW TO USE TROUBLESHOOTING GUIDE WARNING Service and Repair should only be performed by Lincoln Electric Factory Trained Personnel. Unauthorized repairs performed on this equipment may result in danger to the technician and machine operator and will invalidate your factory warranty. For your safety and to avoid Electrical Shock, please observe all safety notes and precautions detailed throughout this manual. -
Page 41: Pc Board Troubleshooting Procedures
“INSTALLED AND SWITCHED PC BOARDS TO VERIFY PROB- - Tools which come in contact with the P.C. LEM,” will help avoid denial of legitimate PC Board must be either conductive, anti-static or board warranty claims. static-dissipative. IDEALARC CV-300... -
Page 42: Troubleshooting Guide
CAUTION If for any reason you do not understand the test procedures or are unable to perform the tests/repairs safely, con- tact the Lincoln Electric Service Department for technical troubleshooting assistance before you proceed call 216-383-2531 or 1-888-935-3877 IDEALARC CV-300... - Page 43 CAUTION If for any reason you do not understand the test procedures or are unable to perform the tests/repairs safely, con- tact the Lincoln Electric Service Department for technical troubleshooting assistance before you proceed call 216-383-2531 or 1-888-935-3877 IDEALARC CV-300...
- Page 44 CAUTION If for any reason you do not understand the test procedures or are unable to perform the tests/repairs safely, con- tact the Lincoln Electric Service Department for technical troubleshooting assistance before you proceed call 216-383-2531 or 1-888-935-3877 IDEALARC CV-300...
- Page 45 CAUTION If for any reason you do not understand the test procedures or are unable to perform the tests/repairs safely, con- tact the Lincoln Electric Service Department for technical troubleshooting assistance before you proceed call 216-383-2531 or 1-888-935-3877 IDEALARC CV-300...
- Page 46 CAUTION If for any reason you do not understand the test procedures or are unable to perform the tests/repairs safely, con- tact the Lincoln Electric Service Department for technical troubleshooting assistance before you proceed call 216-383-2531 or 1-888-935-3877 IDEALARC CV-300...
- Page 47 Field Service Facility. CAUTION If for any reason you do not understand the test procedures or are unable to perform the tests/repairs safely, contact your Local Lincoln Authorized Field Service Facility for technical troubleshooting assistance before you proceed. IDEALARC CV-300...
- Page 48 CAUTION If for any reason you do not understand the test procedures or are unable to perform the tests/repairs safely, con- tact the Lincoln Electric Service Department for technical troubleshooting assistance before you proceed call 216-383-2531 or 1-888-935-3877 IDEALARC CV-300...
-
Page 49: Diagnostic Routines And Error Codes
CAUTION If for any reason you do not understand the test procedures or are unable to perform the tests/repairs safely, con- tact the Lincoln Electric Service Department for technical troubleshooting assistance before you proceed call 216-383-2531 or 1-888-935-3877 IDEALARC CV-300... -
Page 50: Main Transformer Test
MAIN TRANSFORMER TEST WARNING Service and repair should be performed only by Lincoln Electric factory trained per- sonnel. Unauthorized repairs performed on this equipment could result in danger to the technician or the machine operator and will invalidate your factory warranty. For your safety and to avoid electrical shock, please observe all safety notes and pre- cautions detailed throughout this manual. -
Page 51: Test Procedures
If voltage is present, continue FROM LEAD TO LEAD test. #200 #201 #202 #203 a. Insert the meter probes careful- ly into the back of each Molex Plug pin cavity until electrical contact is made to perform the test. IDEALARC CV-300... - Page 52 See wiring dia- gram. 15. If the correct three-phase input volt- age is being applied to the main transformer and some or all of the secondary voltages are incorrect or missing, the transformer may be faulty. Replace. IDEALARC CV-300...
-
Page 53: Static Output Rectifier Bridge Test
STATIC OUTPUT RECTIFIER BRIDGE TEST WARNING Service and repair should be performed only by Lincoln Electric factory trained per- sonnel. Unauthorized repairs performed on this equipment could result in danger to the technician or the machine operator and will invalidate your factory warranty. For your safety and to avoid electrical shock, please observe all safety notes and pre- cautions detailed throughout this manual. - Page 54 #224. See wiring diagram 4. Disconnect the strap from the posi- tive heat sink to the capacitor bank using a 1/2" wrench. See Figure F.5. FIGURE F.6 - Procedure to discon- nect the D5 diode pigtail from the negative capacitor buss. IDEALARC CV-300...
- Page 55 SCR1. See Figure F.9. c. If a low resistance is measured for either test a or b, SCR1 is faulty. Replace the SCR assembly. 9. Test the resistance of SCR2 and Figure F.8. SCR3 using the same procedure IDEALARC CV-300...
- Page 56 Replace. d. If the resistance is high for both test a and b, the diode is open. Replace. 11. Test Diodes D2, D3, and D4 for proper operation using the same procedure described in Step 10. IDEALARC CV-300...
-
Page 57: Active Scr Rectifier Assembly Test
ACTIVE SCR RECTIFIER ASSEMBLY TEST WARNING Service and repair should be performed only by Lincoln Electric factory trained per- sonnel. Unauthorized repairs performed on this equipment could result in danger to the technician or the machine operator and will invalidate your factory warranty. For your safety and to avoid electrical shock, please observe all safety notes and pre- cautions detailed throughout this manual. - Page 58 #224. See wiring diagram. 4. Disconnect the strap from the posi- tive heat sink to the capacitor bank using a 1/2" wrench. See Figure F.12. FIGURE F.13 - Procedure to discon- nect the D5 diode pigtail from the negative capacitor buss. IDEALARC CV-300...
- Page 59 7. Remove the red insulating paint from the heat sink test points. See c. Connect Tester lead (G) to the Figure F.15. gate. ANODE CATHODE FIGURE F.15 - Heat sink test points. FIGURE F.16 - SCR Tester Circuit and SCR connections. IDEALARC CV-300...
- Page 60 Disconnect Test lead (G) from the gate. 16. Close switch SW-1. 17. Read meter for zero voltage. a. If the voltage is zero, the SCR is functioning. b. If the voltage is higher than zero, the SCR is shorted. IDEALARC CV-300...
-
Page 61: Normal Open Circuit Weld Voltage Waveform No Load - Output Control At Maximum
Coupling ..... .DC. Note: Scope probes connected at machine high inductance output terminals. Trigger ....Internal. IDEALARC CV-300... -
Page 62: Typical Dc Weld Output - Machine Loaded
Coupling ..... .DC. grid bank. Trigger ....Internal. Note: Scope probes connected at machine high inductance output terminals. IDEALARC CV-300... - Page 63 Coupling ..... .DC. division represents 5 milliseconds in time. Trigger ....Internal. Note: Scope probes connected at machine high inductance output terminals. IDEALARC CV-300...
-
Page 64: Abnormal Output Weld Voltage Waveform - Machine Loaded Capacitor Bank Not Functioning
5 milliseconds in time. Trigger ....Internal. Note: Scope probes connected at machine high inductance output terminals. IDEALARC CV-300... -
Page 65: Abnormal Open Circuit Weld Voltage Waveform - No Load Capacitor Bank Not Functioning
Coupling ..... .DC. sion represents 5 milliseconds in time. Trigger ....Internal. Note: Scope probes connected at machine high inductance output terminals. IDEALARC CV-300... -
Page 66: Typical Scr Gate Voltage Waveform
Note: Scope probes connected at SCR Trigger ....Internal. gate and cathode: (+) probe to gate, (-) probe to cathode. IDEALARC CV-300... -
Page 67: Control Pc Board Removal And Replacement
CONTROL PC BOARD REMOVAL AND REPLACEMENT WARNING Service and repair should be performed only by Lincoln Electric factory trained per- sonnel. Unauthorized repairs performed on this equipment could result in danger to the technician or the machine operator and will invalidate your factory warranty. For your safety and to avoid electrical shock, please observe all safety notes and pre- cautions detailed throughout this manual. - Page 68 Case Front panel that mount the control board to the front panel. 5. Remove the control board from the mounting studs carefully. 6. Replace all insulating material, mounting screws, and Molex plugs when installing the control board. IDEALARC CV-300...
-
Page 69: Capacitor Bank Removal And Replacement
CAPACITOR BANK REMOVAL AND REPLACEMENT WARNING Service and repair should be performed only by Lincoln Electric factory trained per- sonnel. Unauthorized repairs performed on this equipment could result in danger to the technician or the machine operator and will invalidate your factory warranty. For your safety and to avoid electrical shock, please observe all safety notes and pre- cautions detailed throughout this manual. - Page 70 Positive capacitor output lead Positive capacitor buss 1/2" open end wrench 4. Remove the two screws holding the capacitor mounting strap to the lift bail assembly using 5/16" Nutdriver. a. Note placement of insulation. 5. Carefully remove the capacitor bank assembly. IDEALARC CV-300...
- Page 71 CAPACITOR BANK REMOVAL AND REPLACEMENT (CONTINUED) LEAD #224 LEAD #224B OUTPUT CHOKE LEAD MOUNTING STRAP POSITIVE OUTPUT LEAD POSITIVE BUSS LEAD #224A D1 PIGTAIL D3 PIGTAIL D4 PIGTAIL D2 PIGTAIL NEGATIVE BUSS POSITIVE STRAP D5 PIGTAIL FIGURE F.17 - Capacitor Bank Removal. IDEALARC CV-300...
-
Page 72: Output Rectifier Bridge Removal And Replacement
OUTPUT RECTIFIER BRIDGE REMOVAL & REPLACEMENT WARNING Service and repair should be performed only by Lincoln Electric factory trained per- sonnel. Unauthorized repairs performed on this equipment could result in danger to the technician or the machine operator and will invalidate your factory warranty. For your safety and to avoid electrical shock, please observe all safety notes and pre- cautions detailed throughout this manual. - Page 73 Note the placement of the NOTE: further disassembly arrangement of the insulating required, see SCR Removal and materials on the mounting Replacement Procedure and Diode screws for re-assembly. Mounting Instruction. Figure F.19. IDEALARC CV-300...
-
Page 74: Mounting Of Stud Type Diodes To Aluminum Heat Sinks
MOUNTING OF STUD TYPE DIODES TO ALUMINUM HEAT SINKS WARNING Service and repair should be performed only by Lincoln Electric factory trained per- sonnel. Unauthorized repairs performed on this equipment could result in danger to the technician or the machine operator and will invalidate your factory warranty. For your safety and to avoid electrical shock, please observe all safety notes and pre- cautions detailed throughout this manual. - Page 75 The nuts for diodes with copper studs are to run on all the way by hand then torqued as per the following table. c. Turn a minimum of 1/2 turn more while torquing per the table. IDEALARC CV-300...
-
Page 76: Scr Removal And Replacement
SCR REMOVAL AND REPLACEMENT WARNING Service and repair should be performed only by Lincoln Electric factory trained per- sonnel. Unauthorized repairs performed on this equipment could result in danger to the technician or the machine operator and will invalidate your factory warranty. For your safety and to avoid electrical shock, please observe all safety notes and pre- cautions detailed throughout this manual. - Page 77 SCR. Handle all SCRs with care. __________________________ 1. Alternately loosen nuts 1/2 turn each until heat sinks are loose. Remove nuts and leaf spring. IT IS RECOMMENDED THAT HARDWARE, LEAF SPRING AND HOUSING USED REASSEMBLY. 2. Remove the old SCR. IDEALARC CV-300...
- Page 78 NOT rock it is installed upside Fig. F.22 - Clamp Assembly. down. Remove the spring and turn it over. Check for "rocking" motion. 5. Re-inspect the SCR for proper seat- ing. SPRING CURVATURE 1/2" EXAGGERATED See Figure F.21. IDEALARC CV-300...
- Page 79 SCR. 1. Do not turn the nuts. While holding the nuts stationary, turn the cap screws only with the following pro- cedure. 2. Tighten first cap screw 1/4 turn. IDEALARC CV-300...
- Page 80 Install nuts. Tighten clamp nuts equally on bolts until finger tight. Be sure that the leaf spring is not cocked in the housing. Figure F.24. Heat sinks may not be exactly as pictured. 6. Re-inspect the SCR for proper seat- ing. IDEALARC CV-300...
- Page 81 SCR. 1. Do not turn the nuts. While holding the nuts stationary, turn the cap screws only with the following pro- cedures. 2. Tighten first cap screw 1/4 turn. IDEALARC CV-300...
-
Page 82: Fan Motor And Fan Removal And Replacement
FAN MOTOR AND FAN REMOVAL AND REPLACEMENT WARNING Service and repair should be performed only by Lincoln Electric factory trained per- sonnel. Unauthorized repairs performed on this equipment could result in danger to the technician or the machine operator and will invalidate your factory warranty. For your safety and to avoid electrical shock, please observe all safety notes and pre- cautions detailed throughout this manual. - Page 83 See figure F.25. 8. Remove the fan motor and blade assembly carefully. 9. Remove the fan blade from the motor shaft using a Allen wrench. FIGURE F.25 - Fan Motor removal. IDEALARC CV-300...
-
Page 84: Center Assembly Removal And Replacement
CENTER ASSEMBLY REMOVAL AND REPLACEMENT WARNING Service and repair should be performed only by Lincoln Electric factory trained per- sonnel. Unauthorized repairs performed on this equipment could result in danger to the technician or the machine operator and will invalidate your factory warranty. For your safety and to avoid electrical shock, please observe all safety notes and pre- cautions detailed throughout this manual. - Page 85 Base Assembly using a 5/16" nutdriver. 11. Remove the two screws attaching Fig. F.26 - Removal of Mounting Bolts the reconnect panel to the Case Back Panel. a. The reconnect panel can be removed with Center Assembly. IDEALARC CV-300...
-
Page 86: Retest After Repair
Maximum 55 VDC Normal Range 10-43 VDC Auxiliary Output (#31 - #32) 112/119 VAC Auxiliary Output (#41 - #42 (#32A)) 39/42 VAC OUTPUT LOAD READINGS Volts Output Control Setting Amps Minimum 40-50 1-7 VDC 36 VDC Minimum Maximum IDEALARC CV-300... - Page 87 M15892 METER PC BOARD SCHEMATIC ....G - 12 S19687 SNUBBER PC BOARD SCHEMATIC .....G - 14 L8930 CONTROL PC BOARD LAYOUT......G - 16 L8873 CONTROL PC BOARD LAYOUT......G - 18 M15893 METER PC BOARD LAYOUT......G - 21 M15370 SNUBBER PC BOARD LAYOUT....G - 23 IDEALARC CV-300...
- Page 88 NOTES IDEALARC CV-300...
- Page 89 NOTE: This diagram is for reference only. It may not be accurate for all machines covered by this manual. The specific diagram for a particular code is pasted inside the machine on one of the enclosure panels. IDEALARC CV-300 IDEALARC CV-300...
- Page 90 NOTES IDEALARC CV-300...
- Page 91 NOTE: This diagram is for reference only. It may not be accurate for all machines covered by this manual. The specific diagram for a particular code is pasted inside the machine on one of the enclosure panels. IDEALARC CV-300 IDEALARC CV-300...
- Page 92 NOTES IDEALARC CV-300...
- Page 93 NOTE: This diagram is for reference only. It may not be accurate for all machines covered by this manual. The specific diagram for a particular code is pasted inside the machine on one of the enclosure panels. IDEALARC CV-300 IDEALARC CV-300...
- Page 94 NOTES IDEALARC CV-300...
- Page 95 Lincoln Electric discourages board level troubleshooting and repair since it may compromise the quality of the design and may result in danger to the Machine Operator or Technician. Improper PC board repairs could result in damage to the machine.
- Page 96 NOTES IDEALARC CV-300...
- Page 97 Lincoln Electric discourages board level troubleshooting and repair since it may compromise the quality of the design and may result in danger to the Machine Operator or Technician. Improper PC board repairs could result in damage to the machine.
- Page 98 G-11 G-11 NOTES IDEALARC CV-300...
- Page 99 NOTE: Lincoln Electric assumes no responsibility for liablilities resulting from board level troubleshooting. PC Board repairs will invalidate your factory warranty. Individual Printed Circuit Board Components are not available from Lincoln Electric. This information is provided for reference only. Lincoln Electric discourages board level troubleshooting and repair since it may compromise the quality of the design and may result in danger to the Machine Operator or Technician.
- Page 100 G-13 G-13 NOTES IDEALARC CV-300...
-
Page 101: Electrical Diagrams
NOTE: Lincoln Electric assumes no responsibility for liablilities resulting from board level troubleshooting. PC Board repairs will invalidate your factory warranty. Individual Printed Circuit Board Components are not available from Lincoln Electric. This information is provided for reference only. Lincoln Electric discourages board level troubleshooting and repair since it may compromise the quality of the design and may result in danger to the Machine Operator or Technician. - Page 102 G-15 G-15 NOTES IDEALARC CV-300...
- Page 103 PC Board repairs will invalidate your factory warranty. Individual Printed Circuit Board Components are not available from Lincoln Electric. This information is provided for reference only. Lincoln Electric discourages board level troubleshooting and repair since it may compromise the qual- ity of the design and may result in danger to the Machine Operator or Technician.
- Page 104 12.1K 1/4W R33,R34,R36,R37,R45,R46,R47, 4.7K 1/4W R57,R78,R79 R38,R69 56.2K 1/4W 22.1K 1/4W R40,R70,R73,R74 100K 1/4W 65K 1/4W 39.2K 1/4W 2.7 1W R65,R82 15K 1/4W 47.5K 1/4W VOLT REG 3-T(+), 1A, 5V ROM ASSEMBLY OP AMP 224N CRYSTAL 3.57 MHZ IDEALARC CV-300...
- Page 105 PC Board repairs will invalidate your factory warranty. Individual Printed Circuit Board Components are not available from Lincoln Electric. This information is provided for reference only. Lincoln Electric discourages board level troubleshooting and repair since it may compromise the qual- ity of the design and may result in danger to the Machine Operator or Technician.
- Page 106 RESISTOR-MF,1/4W,2.00K,1% R9,R10,R11,R12, RESISTOR-MF,1/4W,2.21K,1% R16,R20,R30,R39 RESISTOR-MF,1/4W,22.1K,1% R14,R18,R22,R75, RESISTOR-MF,1/4W,30.1,1% R76,R77,R81 * RESISTOR-MF,1/4W,3.92K,1% RESISTOR-MF,1/4W,39.2K,1% R8,R50,R51,R60, RESISTOR-MF,1/4W,475,1% R61,R63,R80 R33,R34,R36,R37, RESISTOR-MF,1/4W,4.75K,1% R45,R46, R47,R57, R78,R79 RESISTOR-MF,1/4W,47.5K,1% RESISTOR-MF,1/4W,511,1% R38,R69 RESISTOR-MF,1/4W,56.2K,1% RESISTOR-MF,1/4W,619,1% RESISTOR-MF,1/4W,8.25K,1% C10,C17,C18 CAPACITOR-CD,.02,600V,+80/-20% D1,D2,D3,D4,D5,D6, DIODE-AXLDS,1A,400V D7,D8,D9,D10,D11, D12,D13,D14,D15 D17,D18,D19,D20, D21,D22, D23,D24, D25,D26,D27,D28 D29,D30,D31,D32, D33,D34,D35,D36, D37,D38 IDEALARC CV-300...
- Page 107 PC Board repairs will invalidate your factory warranty. Individual Printed Circuit Board Components are not available from Lincoln Electric. This information is provided for reference only. Lincoln Electric discourages board level troubleshooting and repair since it may compromise the qual- ity of the design and may result in danger to the Machine Operator or Technician.
- Page 108 G-21 G-21 ELECTRICAL DIAGRAMS M15893 METER PC BOARD COMPONENTS ITEM DESCRIPTION LED1,LED2,LED3 LED-DISPLAY,7-SEGMENT,CA,MAN6660* C1,C2,C3,C4,C7,C8 CAPACITOR-CEMO,.022,50V,20% C5,C6 CAPACITOR-CEMO,330P,100V,5% CONNECTOR,MOLEX,MINI,PCB,4-PIN DIODE-AXLDS,1A,400V DIODE-AXLDS,0.15A,75V,1N914 R3,R4,R5,R6,R7,R8,R9,R10 RESISTOR-MF,1/4W,100,1% R11,R12,R13,R14,R15,R16 R17,R18,R19,R20,R21,R22 R23,R24,R25,R26 RESISTOR-MF,1/4W,3.32K,1% RESISTOR-MF,1/4W,475,1% IC-CMOS,INVERTER,SCHMITT,HEX,HC14A X1,X2,X3 IC-CMOS,REGISTER,SHFT,SI/PO,8-BIT IC-CMOS,FLIP-FLOP,"D",DUAL,HC74 TRANSISTOR-ND,T226,0.5A,30V,MPS-A13 R27,R28 RESISTOR-MF,1/4W,3.01K,1% IDEALARC CV-300...
- Page 109 PC Board repairs will invalidate your factory warranty. Individual Printed Circuit Board Components are not available from Lincoln Electric. This information is provided for reference only. Lincoln Electric discourages board level troubleshooting and repair since it may compromise the qual- ity of the design and may result in danger to the Machine Operator or Technician.
- Page 110 G-23 G-23 ELECTRICAL DIAGRAMS M15370 SNUBBER PC BOARD COMPONENTS ITEM DESCRIPTION CONNECTOR,MOLEX,MINI,PCB,8-PIN C4,C5 CAPACITOR-CD,.05,600V,+80/-20% C1,C2,C3 CAPACITOR-PEF,0.68,400V,10% R1,R2,R3 RESISTOR-CC,2W,10,10% TP1,TP2,TP3 MOV-130VRMS,38J,14MM MOV-150VRMS,80J,20MM TP4,TP5 MOV-320VRMS,160J,20MM IDEALARC CV-300...
- Page 111 NOTES IDEALARC CV-300...
- Page 112 Please include the machine’s code number and how the problem was resolved. Thank You, Technical Services Group Lincoln Electric Co. 22801 ST. Clair Ave. Cleveland, Ohio 44117-1199 FAX 216-481-2309 SVM Number ___________________________...
Need help?
Do you have a question about the IDEALARC CV-300 and is the answer not in the manual?
Questions and answers