Lexmark 7100 Series Quick Start Manual
Hide thumbs
Also See for 7100 Series:
- Service manual (82 pages) ,
- User manual (47 pages) ,
- Install manual (2 pages)
Advertisement
安全信息
安全信息
安全信息
安全信息
请只使用随同此产品提供的电源,或者使用经过厂家认证的电源作为替代。
•
电源线要连接在距离此产品尽量近的电源插座上,以便于使用。
•
如果需要服务或维修,除参考操作说明书以外,也可以向专业的服务人员请教。
•
当心:
当心:请不要在雷雨天气时使用传真功能。请不要在雷雨天气时安装此产品,或者进行
当心:
当心:
任何的电线 / 电缆连接 ( 电源线,电话线等 )。
Safety information
•
Use only the power supply provided with this product or the manufacturer's authorized
replacement power supply.
•
Connect the power cord to a properly grounded electrical outlet that is near the product
and easily accessible.
•
Refer service or repairs, other than those described in the user documentation, to a
professional service person.
CAUTION: Do not use the fax feature during a lightning storm. Do not set up this product or
make any electrical or cabling connections, such as the power supply cord or telephone,
during a lightning storm.
安全資訊
安全資訊
安全資訊
安全資訊
• 僅使用本產品所提供的電源供應器或製造商授權的替換電源供應器。
• 電源線所連接的電源插座與產品的距離不可太遠,且必須方便使用。
• 有關服務或維修的事項,除了參考本使用者說明文件所提供的說明之外,您可以向專業
維修人員尋求協助。
當心
當心 : : : : 請勿在雷雨天氣時使用傳真功能。在雷雨期間,請勿安裝本產品,或進行任何電器或
當心
當心
電纜的接線工作,例如電源線或電話線。
안전 정보
안전 정보
안전 정보
안전 정보
제품과 함께 공급된 전원 공급 장치 또는 제조자가 승인한 교체용 전원 공급 장치만 사용하십
•
시오.
전원 코드는 이 장치에서 가장 가깝고 접근하기 쉬운 콘센트에 연결하십시오.
•
사용 설명서에 설명되지 않은 서비스 또는 수리는 전문 기술자에게 문의하십시오.
•
주의: 천둥 번개가 칠 때는 팩스 기능을 사용하지 마십시오. 또한 천둥 번개가 칠 때 이 제품을 설
주의:
주의:
주의:
치하거나 전원 케이블 또는 전화선 등을 연결하지 마십시오.
2
装入纸张。
1
抬起出纸托盘,并拉开进纸导轨。
Raise the paper exit tray, and then extend the paper
guide.
掀開出紙拖盤,然後將紙張導引夾伸展開來。
용지 출력함을 들어올리고 용지 고정대를 확장합니다 .
3
准备多功能一体机。
1
请确认电源线牢固地连接在多功能一体机和电源插座上。
Make sure the power cord is pushed all the way into
the connector.
確定已將電源線完全推入連接座。
전원 코드가 커넥터에 완전히 꽂혀 있는지 확인합니다 .
2
1
3
安装操作面板。
4
按 "电源
Apply a control panel.
Press Power.
安裝操作面板。
按下電源
제어판을 장착합니다 .
Power( 전원 )
Power
Power
Power
*21H0075*
P/N 21H0075
E.C. 21H003
© 2004 Lexmark International, Inc. All rights reserved.
多功能一体机 / 7100 Series All-In-One / / / /
多功能一体机 /
多功能一体机 /
多功能一体机 /
多功能複合機 / / / /
多功能複合機
多功能複合機
多功能複合機
1
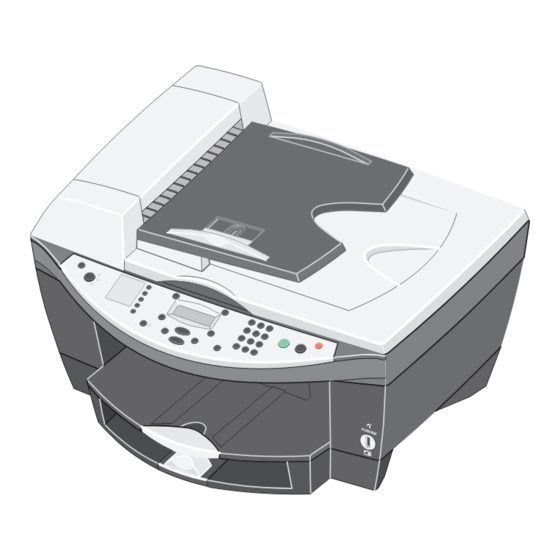
打开打印机的包装。
Load paper.
2
将普通纸装入纸张托盘内。
Load plain paper in the paper tray.
將普通紙載入紙張托架。
용지함에 일반 용지를 넣습니다 .
Prepare the All-In-One.
2
连接电话线。
Connect the telephone line.
連接電話線。
전화선을 연결합니다 .
1
5
按 + 按钮浏览选项,然后按 "选择
电源"按钮。
电源
电源
接着输入您的
Press + to scroll, and then press Select to enter your default
電源
電源按鈕。
電源
language, and then your default country or region.
를 누릅니다 .
按下 + 可以捲動,然後按下選取
再輸入您
를 눌러 스크롤한 후
+
또는 지역을 입력합니다 .
복합기
Unpack your printer.
載入紙張。
3
调节进纸导轨。
Adjust the paper guides.
調整紙張導引夾。
용지 고정대를 조정합니다 .
將 「多功能複合機」準備就緒。
在添加其他的设备之前,请先参阅您的
See the User's Guide before adding additional equipment.
添加額外的設備之前,請先參閱
추가 장비를 장착하기 전에
2
3
6
选择
选择"按钮输入您的
选择
默认
语言,
默认
国家或地区。
選取按鈕,輸入您
預設的
語言,接著
選取
選取
預設的
國家或地區。
를 눌러
기본
언어와
기본
국가
Select( 선택 )
Select
Select
Select
1
2
3
2
1
Continue with Step 4...
Continue with Step 4...
拆開印表機的包裝。
용지를 넣습니다 .
4
放下出纸托盘,并拉开纸张挡板。
Lower the paper exit tray, and then extend the paper
stop.
放下出紙拖盤,然後將擋紙器伸展開來。
용지 출력함을 내리고 용지 고정대를 확장합니다 .
복합기를 준비합니다 .
用户手册
。
用戶手冊
。
사용 설명서
를 참조하십시오 .
2
1
3
按数字符号键区的按钮输入:
Press the keypad to enter the:
按下數字符號按鍵區,輸入下列資料:
키패드를 눌러 다음 항목을 입력합니다 .
日期
日期
日期
日期
按 "选择
选择"按钮。
选择
选择
Date
Press Select.
日期
日期
日期
日期
按下選取
選取按鈕。
選取
選取
날짜
날짜
날짜
날짜
Select( 선택 )
Select
를 누릅니다 .
Select
Select
04/06/04
时间
时间
时间
时间
按 "选择
选择
选择
选择"按钮。
Time
Press Select.
時間
時間
時間
時間
按下選取
選取
選取按鈕。
選取
Time( 시간 )
Time( 시간 )
Time( 시간 )
Time( 시간 )
Select
Select( 선택 )
Select
Select
를 누릅니다 .
01:00
传真号码
传真号码
传真号码
传真号码
按 "选择
选择"按钮。
选择
选择
Fax number
Press Select.
傳 傳 傳 傳 真號碼
真號碼
真號碼
真號碼
按下選取
選取按鈕。
選取
選取
팩스 번호
팩스 번호
팩스 번호
팩스 번호
를 누릅니다 .
Select( 선택 )
Select
Select
Select
12345678987
?
?
?
?
?
?
프린터 포장을 풉니다 .
另外单独销售。
Sold separately.
分開銷售。
별도로 판매될 수 있음 .
2
1
4
Advertisement
Table of Contents

Related Manuals for Lexmark 7100 Series


Summary of Contents for Lexmark 7100 Series
- Page 1 多功能一体机 / 多功能一体机 / 多功能一体机 / 多功能一体机 / 7100 Series All-In-One / / / / 多功能複合機 / / / / 多功能複合機 복합기 多功能複合機 多功能複合機 安全信息 安全信息 安全信息 安全信息 请只使用随同此产品提供的电源,或者使用经过厂家认证的电源作为替代。 • 电源线要连接在距离此产品尽量近的电源插座上,以便于使用。 • 如果需要服务或维修,除参考操作说明书以外,也可以向专业的服务人员请教。 • 打开打印机的包装。 프린터 포장을 풉니다 . Unpack your printer.
- Page 2 安装打印墨盒。 Install the print cartridges. 잉크 카트리지를 설치합니다 . 安裝墨水匣。 打开扫描仪部分。 撕掉打印墨盒上的透明封条。 装入打印墨盒。 关闭扫描仪部分。 Open the scanner unit. Remove the sticker and tape from the Insert the print cartridges. Close the scanner unit. print cartridges. 打開掃描器組件。 插入墨水匣。 關上掃描器組件。 撕下墨水匣上的貼紙和膠帶。 스캐너를 엽니다 . 잉크...
Need help?
Do you have a question about the 7100 Series and is the answer not in the manual?
Questions and answers