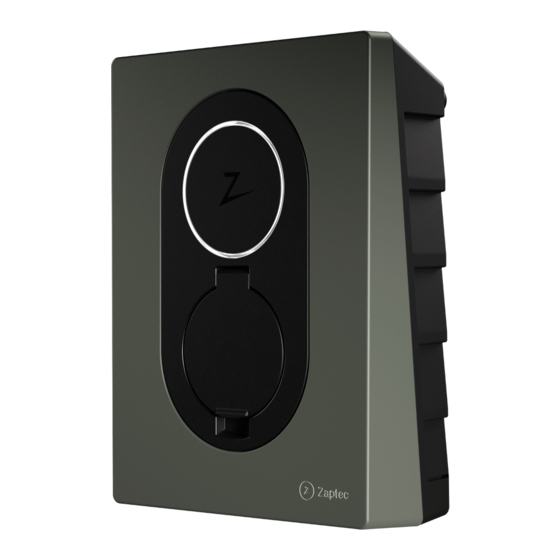
ZAPTEC Go Installation Manual
Hide thumbs
Also See for Go:
- Instruction manual (240 pages) ,
- User manual (188 pages) ,
- Quick manual (75 pages)
Advertisement
Quick Links
Advertisement

Related Manuals for ZAPTEC Go


Summary of Contents for ZAPTEC Go
- Page 1 Zaptec Go → Installer Manual Fully charged for your next adventure...
- Page 2 EVSE Mode 3 230/400 V, 32 A~, 50 Hz 1/3 phase EN IEC 61851-1, IEC 61439-7 Protection Class I IP54, IK08 -30°C ... +40°C ambient Ventilation EN IEC 61851-1 6.3.2.2 not supported Integrated RDC-DD IΔdc = 0.006 A Im = IΔm = 500 A Ip = 2.6 kA I t = 6.5 kA s IEC 62955 External multipole RCD Type A (30mA) required...
- Page 3 Installing Installasjon Status light Statuslys Authentication (RFID) Autentisering (RFID) Type 2 socket and cover Type 2-stikkontakt og deksel QR code for installation (also inside charger) QR-kode for installasjon (også inne i laderen) Installation Installation Statuslampa Statuslys Autentisering (RFID) Autentificering (RFID) Typ 2-uttag och kåpa Type 2-stik og dæksel QR-kod för installation (även inuti laddaren)
- Page 4 Do not install or use the guarantee and cause Zaptec Charger AS and a product which is damaged in any way. Avoid direct partners to waive all liability and claims installing the charger where it can be exposed to for compensation.
- Page 5 être respectées de la garantie. Dans ce cas, Zaptec Charger AS et pour l’installation, la réparation et la maintenance ses partenaires directs déclineront toute respon- du produit.
- Page 6 1 x Zaptec Go 12-18 mm Ø 8-14 mm Ø 4 x T20 2 x T20 2 x T20 900 mm...
- Page 7 Mount the charging station Remove the front cover. Using the built-in spirit level, make sure the charging station is straight and mount on an open surface at the appropriate height, at least 900 mm from the ground. Monter ladestasjonen Fjern frontdekselet. Bruk det innebygde vateret til å kontrollere at ladestasjonen er i vater, og monter den på...
- Page 8 Replace the terminal cover and turn on the circuit breaker. Koble til strømkabelen Zaptec Go krever en oppstrøms sikring (maks. 40 A, C-kurve anbefales) og multipolet RCD Type A (30 mA). Hvis du installerer flere ladere eller kobler til et IT-nett, bør du lese zaptec.com/help.
- Page 9 Collegare il cavo di alimentazione La Zaptec Go necessita di un magnetotermico a monte (40A max, curva C consigliata) e di un RCD di tipo A (30mA). Se si installano più stazioni di ricarica o ci si connette a una rete IT, controllare zaptec.com/help.
- Page 10 Turn on your Bluetooth device and use the camera app to scan the QR code on the charger. Install the Zaptec app if prompted to do so and log in if you have a Zaptec account. Follow the on-screen instructions to set the installation details, then tap Save. Configuration without app? Turn the rotary switch to set the maximum current.
- Page 11 QR sur la borne. Installez l’application Zaptec lorsque l’on vous y invite et connectez-vous à votre compte Zaptec, si vous en avez un. Suivez les instructions qui s’affichent à l’écran pour paramétrer les détails de l’installation, puis appuyez sur « Enregistrer ». Configuration sans application ? Tournez le commutateur rotatif pour définir le courant maximal.
- Page 12 PIN. Check the charger is online, update firmware and test the RCD as required. That’s it! You can now give Zaptec Go User Manual to the customer and explain where to find the PIN. If you installed the charger with your Zaptec account, you will be able to access it in the Zaptec Portal after it is registered by the owner.
- Page 13 È tutto! A questo punto è possibile consegnare al cliente il Manuale utente di Zaptec Go e spiegare dove trovare il PIN. Se il stazione di ricarica è stato installato con il proprio account Zaptec, sarà possibile accedervi nel portale Zaptec dopo la registrazione da parte del proprietario.
- Page 14 Zaptec powers any EV...
- Page 16 Zaptec Charger AS If you need more Vassbotnen 1 information, scan 4313 Sandnes the QR code or visit Norway zaptec.com/help Made in Norway zaptec.com © Zaptec Charger AS 20.11.2023. All rights reserved. MA-00001-D1...
Need help?
Do you have a question about the Go and is the answer not in the manual?
Questions and answers