Table of Contents
Advertisement
Available languages
Available languages
Quick Links
Technical Support and E-Warranty Certificate
www.vevor.com/support
Manual Strapping Tool
MODEL: PP13-1, PP13-2, P19, XW19, GD-5
We continue to be committed to provide you tools with competitive price.
"Save Half", "Half Price" or any other similar expressions used by us only represents an
estimate of savings you might benefit from buying certain tools with us compared to the major
top brands and does not necessarily mean to cover all categories of tools offered by us. You
are kindly reminded to verify carefully when you are placing an order with us if you are
actually saving half in comparison with the top major brands.
Advertisement
Table of Contents

Related Manuals for VEVOR PP13-1


Summary of Contents for VEVOR PP13-1
- Page 1 Technical Support and E-Warranty Certificate www.vevor.com/support Manual Strapping Tool MODEL: PP13-1, PP13-2, P19, XW19, GD-5 We continue to be committed to provide you tools with competitive price. "Save Half", "Half Price" or any other similar expressions used by us only represents an estimate of savings you might benefit from buying certain tools with us compared to the major top brands and does not necessarily mean to cover all categories of tools offered by us.
- Page 3 This is the original instruction, please read all manual instructions carefully before operating. VEVOR reserves a clear interpretation of our user manual. The appearance of the product shall be subject to the product you received. Please forgive us that we won't inform you again if there are any technology or software updates on our product.
-
Page 4: Work Area
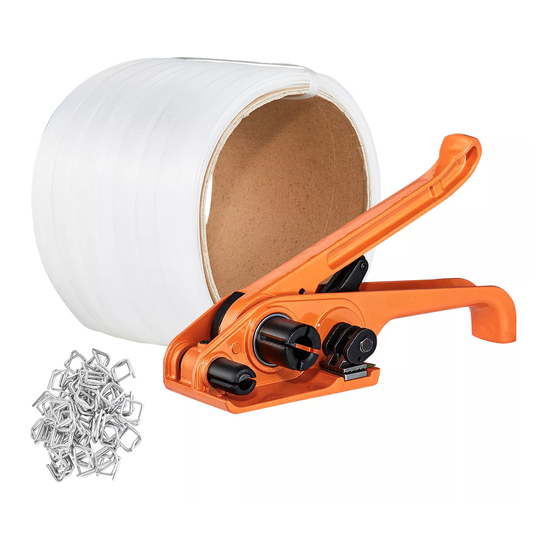
Thank you very much for choosing this Manual Strapping Tool - Please read all of the instructions before using it.The information will help you achieve the best possible results. The products carried in this catalog may be different in color than the actual item. - Page 5 MODEL AND PARAMETERS PP13-1: 1. Strapping Tensioner ×1 PCS 2. Strapping Sealer Tool ×1 PCS 3. PP Plastic Strapping 330Ft(100m) Length×1/2inch(12.7mm) Width ×1 PCS 4. Metal Seals ×100PCS PP13-2: 1.Strapping Tensioner ×1PCS 2. Strapping Sealer Tool ×1PCS 3. PP Plastic Strapping 3300Ft(1000m) Length×1/2inch(12.7mm)Width ×1PCS...
-
Page 6: Assembly And Use
ASSEMBLY AND USE PP13-1\PP13-2\P19 instructions FIG. 1 1. Strapping tensioner see FIG. 1, Press the tension bar and load strapping,L≥3inch(8cm). 2. Put packed the strapping slips into the cutter trough and the capstan trough,see FIG. 2 . 3.Operate this tension bar repeatedly from FIG. 2 to FIG.3,the strapping will be tightened. - Page 7 FIG. 4 3. Clamp the metal Seals with the strapping sealer tool, as shown in Fig 4. 4. Press the tension bar,the strapping will be cut. XW19 instructions FIG. 5 1. As shown in the FIG.5, Preinstall the strapping to use two metal seals, the operation of Strapping Tensioner, refer to the PP13.
- Page 8 GD-5 instructions 1. Stainless steel tape for cutting(length equal to circumference + 5.9-7.8inches / 15-20cm) 2. Put the stainless steel clasp on the stainless steel tape 2 inches(5 cm )from the edge,ears up.Bend the end of the stainless steel tape down and place it under the buckle.
-
Page 9: Maintenance
4. Place the tape in the guide slot of the tensioner ,swing the retracting handle up and down to tighten the tape to the desired tension level.Push the tool pliers for ward to bend the tape to one side of the buckle,and then cut the stainless steel tape with the operation cutting handle. - Page 10 Address: Baoshanqu Shuangchenglu 803long 11hao 1602A-1609shi Shanghai Imported to AUS: SIHAO PTY LTD.1 ROKEVA STREETEASTWOOD NSW 2122 Australia Imported to USA: Sanven Technology Ltd.Suite 250, 9166 Anaheim Place, Rancho Cucamonga, CA 91730 SHUNSHUN GmbH Römeräcker 9 Z2021, 76351 Linkenheim-Hochstetten, Germany Pooledas Group Ltd Unit 5 Albert Edward House, The Pavilions Preston, United Kingdom...
- Page 12 Technical Support and E-Warranty Certificate www.vevor.com/support...
- Page 13 Outil de cerclage manuel MODÈLE: PP13-1 , PP13-2 , P19 , XW19 , GD-5 We continue to be committed to provide you tools with competitive price. "Save Half", "Half Price" or any other similar expressions used by us only represents an estimate of savings you might benefit from buying certain tools with us compared to the major top brands and does not necessarily mean to cover all categories of tools offered by us.
- Page 15 This is the original instruction, please read all manual instructions carefully before operating. VEVOR reserves a clear interpretation of our user manual. The appearance of the product shall be subject to the product you received. Please forgive us that we won't inform you again if there are any technology or software updates on our product.
-
Page 16: Sécurité Personnelle
Merci beaucoup d'avoir choisi cet outil de cerclage manuel - Veuillez lire toutes les instructions avant de l'utiliser. Les informations vous aideront à obtenir les meilleurs résultats possibles. Les produits présentés dans ce catalogue peuvent avoir une couleur différente de celle de l'article réel . INSTRUCTIONS ESPACE DE TRAVAIL 1. - Page 17 susceptibles de pincer ou de couper. 5. N’utilisez jamais la sangle pour tirer ou soulever des charges. Le non-respect de ces avertissements peut entraîner des blessures graves. - 3 -...
- Page 18 MODEL AND PARAMETERS PP13-1 : 1. Tendeur de cerclage × 1 pièce 2. Outil de scellement de cerclage ×1 PC Cerclage en plastique PP de 330 pieds (100 m) de longueur × 1/2 pouce (12,7 mm) de largeur × 1 PIÈCE 4.
- Page 19 pouces (19 mm) de largeur × 1 3.S fermoir en acier inoxydable × 100 pièces - 5 -...
-
Page 20: Assembly And Use
ASSEMBLY AND USE Instructions PP13-1 \PP13-2\P19 FIGUE. 1 2. Tendeur de cerclage voir FIG. 1 , appuyez sur la barre de tension et chargez le piégeage , L≥ 3 pouces (8 cm). 2. Placez les fiches de piégeage emballées dans l'auge du coupeur et l' auge du cabestan , voir FIG. - Page 21 FIGUE. 5. Serrez les joints métalliques avec l' outil de scellement de cerclage , comme indiqué sur la figure 4. 6. Appuyez sur la barre de tension , le piégeage sera coupé . Mode d'emploi XW19 FIGUE. 5 2. Comme le montre la FIG.5, Préinstaller le cerclage pour utiliser deux - 7 -...
- Page 22 joints métalliques, le fonctionnement du tendeur de cerclage, reportez-vous au PP13. Instructions GD-5 5. Ruban en acier inoxydable pour couper (longueur égale à la circonférence + 5,9-7,8 pouces / 15-20 6. Placez le fermoir en acier inoxydable sur le ruban en acier inoxydable à 2 pouces ( 5 cm ) du bord, oreilles vers le haut.
-
Page 23: Maintenance
7. Enroulez le ruban inox autour de la boucle et passez l'extrémité libre du ruban adhésif à travers la boucle. 8. Placez le ruban dans la fente de guidage du tendeur , faites bouger la poignée rétractable de haut en bas pour serrer le ruban à... - Page 24 - 10 -...
- Page 25 Adresse : Baoshanqu Shuangchenglu 803long 11hao 1602A-1609shi Shanghai Importé en Australie : SIHAO PTY LTD . 1 ROKEVA STREETASTWOOD NSW 2122 Australie Importé aux États-Unis : Sanven Technology Ltd. Bureau 250, 9166 Anaheim Place, Rancho Cucamonga, CA 91730 SHUNSHUN GmbH Römeräcker 9 Z2021, 76351 Linkenheim-Hochstetten, Germany Pooledas Group Ltd...
- Page 27 Assistance technique et certificat de garantie électronique www.vevor.com/support...
- Page 28 Manuelles Umreifungsgerät MODELL: PP13-1 , PP13-2 , P19 , XW19 , GD-5 We continue to be committed to provide you tools with competitive price. "Save Half", "Half Price" or any other similar expressions used by us only represents an estimate of savings you might benefit from buying certain tools with us compared to the major top brands and does not necessarily mean to cover all categories of tools offered by us.
- Page 30 This is the original instruction, please read all manual instructions carefully before operating. VEVOR reserves a clear interpretation of our user manual. The appearance of the product shall be subject to the product you received. Please forgive us that we won't inform you again if there are any technology or software updates on our product.
-
Page 31: Persönliche Sicherheit
Vielen Dank, dass Sie sich für dieses manuelle Umreifungsgerät entschieden haben - Bitte lesen Sie vor der Anwendung alle Anweisungen durch. Die Informationen helfen Ihnen dabei, die bestmöglichen Ergebnisse zu erzielen. Die in diesem Katalog aufgeführten Produkte können farblich vom tatsächlichen Artikel abweichen . - Page 32 bedienen 4. Machen Sie sich mit Ihrem Werkzeug vertraut und halten Sie Ihre Finger von Bereichen fern, die einklemmen oder schneiden können. 5. Benutzen Sie den Gurt niemals zum Ziehen oder Heben von Lasten. Die Nichtbeachtung dieser Warnungen kann zu schweren Verletzungen führen. - 3 -...
- Page 33 MODEL AND PARAMETERS PP13-1 : 1. Umreifungsspanner × 1 Stück 2. Umreifungsgerät ×1 Stck 3. PP-Kunststoffband , 100 m Länge x 12,7 mm Breite × 1 STÜCK 4. Metalldichtungen × 100 Stück PP13-2 : 1. Umreifungsspanner × 1 Stück 2. Umreifungsgerät × 1 Stück 3.
-
Page 34: Assembly And Use
ASSEMBLY AND USE PP13 -1\PP13-2\P19 Anweisungen FEIGE. 1 3. Umreifungsspanner siehe ABB. 1. Drücken Sie auf die Spannstange und laden Sie die Last ein , L≥ 3 Zoll (8 cm). 2. Legen Sie die verpackten Fangstreifen in die Schneidmulde und die Windenmulde ein , siehe ABB. - Page 35 FEIGE. 7. Klemmen Sie die Metalldichtungen mit dem Siegelwerkzeug fest , wie in Abb. 4 gezeigt . 8. Drücken Sie die Spannstange , um die Klemme zu aktivieren wird geschnitten . XW19- Anweisungen FEIGE. 5 - 6 -...
- Page 36 3. Wie in Abb. 5 gezeigt , installieren Sie das Umreifungsband vor, um zwei Metallplomben zu verwenden. Informationen zum Betrieb des Umreifungsspanners finden Sie im PP13. GD-5- Anweisungen 9. Edelstahlband zum Schneiden (Länge entspricht Umfang + 15–20 cm ) 10.Setzen Sie den Edelstahlverschluss 5 cm vom Rand entfernt auf das Edelstahlband , mit den Ohren nach oben.
-
Page 37: Maintenance
11.Wickeln Sie das Edelstahlband um die Schnalle und führen Sie das freie Ende durch Klebeband durch die Schnalle. 12.Legen Sie das Band in den Führungsschlitz des Spanners BEWEGEN Sie den Rückzugsgriff nach oben und unten, um das Band auf die gewünschte Spannung zu spannen Spannungsniveau. - Page 38 3. Vermeiden Sie längere Sonneneinstrahlung, um Alterung vorzubeugen. - 9 -...
- Page 39 Adresse: Baoshanqu Shuangchenglu 803long 11hao 1602A-1609shi Shanghai Importiert nach AUS: SIHAO PTY LTD . 1 ROKEVA STREETEASTWOOD NSW 2122 Australien Importiert in die USA: Sanven Technology Ltd. Suite 250, 9166 Anaheim Place, Rancho Cucamonga, CA 91730 SHUNSHUN GmbH Römeräcker 9 Z2021, 76351 Linkenheim-Hochstetten, Germany Pooledas Group Ltd Unit 5 Albert Edward House, The...
- Page 41 Zertifikat für technischen Support und E-Garantie www.vevor.com/support...
- Page 42 Strumento di reggiatura manuale MODELLO: PP13-1 , PP13-2 , P19 , XW19 , GD-5 We continue to be committed to provide you tools with competitive price. "Save Half", "Half Price" or any other similar expressions used by us only represents an estimate of savings you might benefit from buying certain tools with us compared to the major top brands and does not necessarily mean to cover all categories of tools offered by us.
- Page 44 This is the original instruction, please read all manual instructions carefully before operating. VEVOR reserves a clear interpretation of our user manual. The appearance of the product shall be subject to the product you received. Please forgive us that we won't inform you again if there are any technology or software updates on our product.
-
Page 45: Sicurezza Personale
Grazie mille per aver scelto questo strumento di reggiatura manuale - Si prega di leggere tutte le istruzioni prima di utilizzarlo. Le informazioni ti aiuteranno a ottenere i migliori risultati possibili. I prodotti presenti in questo catalogo potrebbero differire nel colore rispetto all'articolo reale . - Page 46 La mancata osservanza di queste avvertenze può provocare gravi lesioni personali. - 3 -...
- Page 47 MODEL AND PARAMETERS PP13-1 : 1. Tenditore per reggia × 1 PZ 2. Strumento per sigillare reggette ×1 PZ Reggetta in plastica PP 330 piedi (100 m) di lunghezza x 1/2 pollice (12,7 mm) di larghezza × 1 PZ 4. Sigilli metallici × 100 pezzi PP13-2 : 1.
- Page 48 (19 mm) Larghezza × 1 Chiusura in acciaio inossidabile 3.S × 100 pezzi - 5 -...
-
Page 49: Assembly And Use
ASSEMBLY AND USE Istruzioni PP13 -1\PP13-2\P19 FICO. 1 4. Tenditore di reggia vedere FIG. 1 , premere la barra di tensione e bloccare il carico , L≥ 3 pollici (8 cm). 2. Mettere imballati i fogli di cattura della reggia nella vasca della taglierina e nella vasca del cabestano , vedere FIG. - Page 50 FICO. 4 9. Bloccare i sigilli metallici con lo strumento sigilla reggia , come mostrato nella Fig. 4 . 10. Premere la barra di tensione , l' intrappolamento verrà tagliato . Istruzioni PER L'XW19 FICO. 5 4. Come mostrato nella FIG.5, preinstallare la reggia per utilizzare due sigilli metallici, - 7 -...
- Page 51 il funzionamento del tenditore, fare riferimento a PP13. Istruzioni GD-5 13.Nastro in acciaio inossidabile per il taglio (lunghezza pari alla circonferenza + 5,9-7,8 pollici / 15-20 cm) 14.Metti la chiusura in acciaio inossidabile sul nastro in acciaio inossidabile a 2 pollici ( 5 cm ) dal bordo, con le orecchie in alto.
-
Page 52: Maintenance
15.Avvolgere il nastro in acciaio inox attorno alla fibbia e far passare l'estremità libera della nastro attraverso la fibbia. 16.Posizionare il nastro nella fessura di guida del tenditore Quindi muovere la maniglia retrattile su e giù per stringere il nastro nella posizione desiderata livello di tensione. - Page 53 - 10 -...
- Page 54 Indirizzo: Baoshanqu Shuangchenglu 803long 11hao 1602A-1609shi Shanghai Importato in AUS: SIHAO PTY LTD . 1 ROKEVA STREETEASTWOOD NSW 2122 Australia Importato negli Stati Uniti: Sanven Technology Ltd. Suite 250, 9166 Anaheim Place, Rancho Cucamonga, CA 91730 SHUNSHUN GmbH Römeräcker 9 Z2021, 76351 Linkenheim-Hochstetten, Germany Pooledas Group Ltd Unit 5 Albert Edward House, The...
- Page 56 Supporto tecnico e certificato di garanzia elettronica www.vevor.com/support...
- Page 57 Herramienta de flejado manual MODELO: PP13-1 , PP13-2 , P19 , XW19 , GD-5 We continue to be committed to provide you tools with competitive price. "Save Half", "Half Price" or any other similar expressions used by us only represents an estimate of savings you might benefit from buying certain tools with us compared to the major top brands and does not necessarily mean to cover all categories of tools offered by us.
- Page 59 This is the original instruction, please read all manual instructions carefully before operating. VEVOR reserves a clear interpretation of our user manual. The appearance of the product shall be subject to the product you received. Please forgive us that we won't inform you again if there are any technology or software updates on our product.
-
Page 60: Área De Trabajo
Muchas gracias por elegir esta herramienta de flejado manual. - Lea todas las instrucciones antes de usarlo. La información le ayudará a lograr los mejores resultados posibles. Los productos incluidos en este catálogo pueden tener un color diferente al del artículo real . INSTRUCTIONS ÁREA DE TRABAJO 1.Operar en un ambiente de trabajo seguro. - Page 61 incumplimiento de estas advertencias puede provocar lesiones personales graves. - 3 -...
- Page 62 MODEL AND PARAMETERS PP13-1 : 1. Tensor de flejado ×1 PCS 2. Herramienta selladora de flejes ×1 piezas Fleje de plástico PP de 330 pies (100 m) de largo × 1/2 pulgada (12,7 mm) de ancho × 1 Uds. 4. Sellos metálicos × 100PCS PP13-2 : 1.
- Page 63 3. Cierre de acero inoxidable × 100 unidades. - 5 -...
-
Page 64: Assembly And Use
ASSEMBLY AND USE Instrucciones PP13 -1\PP13-2\P19 HIGO. 1 5. Tensor de flejado ver FIG. 1. Presione la barra de tensión y cargue el atrapamiento , L≥ 3 pulgadas (8 cm). 2. Coloque las correas de sujeción empaquetadas en la cubeta del cortador y en la cubeta del cabrestante , consulte la FIG. - Page 65 HIGO. 4 11. Sujete los sellos metálicos con la herramienta selladora de flejado , como se muestra en la Fig. 4 . 12. Presione la barra de tensión , la correa será cortado . Instrucciones XW19 HIGO. 5 5. Como se muestra en la FIG.5, preinstale el fleje para usar dos sellos metálicos.
- Page 66 Para conocer el funcionamiento del tensor de flejado, consulte la PP13. Instrucciones GD-5 17.Cinta de acero inoxidable para cortar (longitud igual a la circunferencia + 5,9-7,8 pulgadas/ 15-20 cm) 18.Coloque el cierre de acero inoxidable en la cinta de acero inoxidable a 2 pulgadas ( 5 cm ) del borde, con las orejas hacia arriba.
-
Page 67: Maintenance
19.Envuelva la cinta de acero inoxidable alrededor de la hebilla y pase el extremo libre de la cinta a través de la hebilla. 20.Coloque la cinta en la ranura guía del tensor. , mueva la manija retráctil hacia arriba y hacia abajo para apretar la cinta al nivel deseado. - Page 68 - 10 -...
- Page 69 Dirección: Baoshanqu Shuangchenglu 803long 11hao 1602A-1609shi Shanghai Importado a AUS: SIHAO PTY LTD . 1 ROKEVA STREET ASTWOOD NSW 2122 Australia Importado a EE. UU.: Sanven Technology Ltd. Suite 250, 9166 Anaheim Place, Rancho Cucamonga, CA 91730 SHUNSHUN GmbH Römeräcker 9 Z2021, 76351 Linkenheim-Hochstetten, Germany Pooledas Group Ltd Unit 5 Albert Edward House, The...
- Page 71 Soporte técnico y certificado de garantía electrónica www.vevor.com/support...
- Page 72 Ręczne narzędzie do spinania MODEL: PP13-1 , PP13-2 , P19 , XW19 , GD-5 We continue to be committed to provide you tools with competitive price. "Save Half", "Half Price" or any other similar expressions used by us only represents an estimate of savings you might benefit from buying certain tools with us compared to the major top brands and does not necessarily mean to cover all categories of tools offered by us.
- Page 74 This is the original instruction, please read all manual instructions carefully before operating. VEVOR reserves a clear interpretation of our user manual. The appearance of the product shall be subject to the product you received. Please forgive us that we won't inform you again if there are any technology or software updates on our product.
-
Page 75: Miejsce Pracy
Dziękujemy bardzo za wybranie tego ręcznego narzędzia do spinania - Przed użyciem przeczytaj całą instrukcję. Informacje te pomogą Ci osiągnąć najlepsze możliwe rezultaty. Produkty prezentowane w tym katalogu mogą różnić się kolorem od rzeczywistego . INSTRUCTIONS MIEJSCE PRACY 1. Pracuj w bezpiecznym środowisku pracy. Utrzymuj miejsce pracy w czystości, dobrze oświetlone i wolne od czynników rozpraszających. - Page 76 obrażenia ciała. - 3 -...
- Page 77 MODEL AND PARAMETERS PP13-1 : 1. Napinacz taśmowy × 1 szt 2. Narzędzie do uszczelniania taśm ×1 szt Taśma z tworzywa sztucznego PP o długości 330 stóp (100 m) × szerokość 1/2 cala (12,7 mm) × 1 szt 4. Metalowe uszczelki × 100szt PP13-2 : 1.
- Page 78 Szerokość × 1 3. Zapięcie ze stali nierdzewnej × 100szt - 5 -...
-
Page 79: Assembly And Use
ASSEMBLY AND USE Instrukcje PP13 -1\PP13-2\P19 FIGA. 1 6. Napinacz taśmy patrz RYS. 1 , Naciśnij drążek napinający i załaduj pas , L≥ 3 cale (8 cm). 2. Włóż spakowane paski wychwytujące do rynny obcinarki i koryta przeciągarki, patrz RYS . 2 . 3. - Page 80 FIGA. 4 13. Zaciśnij metalowe uszczelki za pomocą narzędzia do zgrzewania taśm , jak pokazano na rys. 4. 14. Naciśnij drążek napinający , zaczep zostanie wycięty . Instrukcje XW19 FIGA. 5 6. Jak pokazano na RYS. 5, wstępnie zainstaluj taśmę, aby użyć dwóch metalowych uszczelek, - 7 -...
- Page 81 działania napinacza taśmy, patrz PP13. Instrukcje GD-5 21.Taśma ze stali nierdzewnej do cięcia (długość równa obwodowi + 15-20 cm/5,9-7,8 cala ) 22.Załóż klamrę ze stali nierdzewnej na taśmę ze stali nierdzewnej w odległości 2 cali ( 5 cm ) od krawędzi, uszami do góry. Zegnij koniec taśmy ze stali nierdzewnej w dół...
-
Page 82: Maintenance
23.Owiń taśmę ze stali nierdzewnej wokół klamry i przełóż wolny koniec taśmą przez klamrę. 24.Umieść taśmę w szczelinie prowadzącej napinacza , przesuwaj uchwyt zwijający w górę i w dół, aby naciągnąć taśmę do pożądanego poziomu poziom napięcia. Wciśnij szczypce narzędziowe zagnij taśmę po jednej stronie klamry i następnie przetnij taśmę... - Page 83 - 10 -...
- Page 84 Adres: Baoshanqu Shuangchenglu 803long 11hao 1602A-1609shi Szanghaj Import do AUS: SIHAO PTY LTD . 1 ROKEVA STREETEASTWOOD NSW 2122 Australia Import do USA: Sanven Technology Ltd. Apartament 250, 9166 Anaheim Place, Rancho Cucamonga, Kalifornia 91730 SHUNSHUN GmbH Römeräcker 9 Z2021, 76351 Linkenheim-Hochstetten, Germany Pooledas Group Ltd Unit 5 Albert Edward House, The...
- Page 86 Wsparcie techniczne i certyfikat e-gwarancji www.vevor.com/support...
- Page 87 Handmatig omsnoeringsapparaat MODEL: PP13-1 , PP13-2 , P19 , XW19 , GD-5 We continue to be committed to provide you tools with competitive price. "Save Half", "Half Price" or any other similar expressions used by us only represents an estimate of savings you might benefit from buying certain tools with us compared to the major top brands and does not necessarily mean to cover all categories of tools offered by us.
- Page 89 This is the original instruction, please read all manual instructions carefully before operating. VEVOR reserves a clear interpretation of our user manual. The appearance of the product shall be subject to the product you received. Please forgive us that we won't inform you again if there are any technology or software updates on our product.
-
Page 90: Persoonlijke Veiligheid
Hartelijk dank dat u voor dit handmatige omsnoeringsapparaat hebt gekozen - Lees alle instructies voordat u het gebruikt. De informatie zal u helpen de best mogelijke resultaten te bereiken. De producten in deze catalogus kunnen qua kleur afwijken van het daadwerkelijke artikel . - Page 91 de buurt van plekken waar u kunt knellen of snijden. 5. Gebruik nooit een riem om lasten te trekken of op te tillen. Het niet opvolgen van deze waarschuwingen kan leiden tot ernstig persoonlijk letsel. - 3 -...
- Page 92 MODEL AND PARAMETERS PP13-1 : 1. Omsnoeringsspanner × 1 stuks 2. Gereedschap voor omsnoeringsband ×1 STUKS 3. PP-kunststof omsnoeringsband 330Ft (100 m) lengte × 1/2 inch (12,7 mm) breedte × 1 STUKS 4. Metalen afdichtingen × 100 stuks PP13-2 : 1.
- Page 93 × 1 3. roestvrij stalen sluiting × 100 stuks - 5 -...
-
Page 94: Assembly And Use
ASSEMBLY AND USE PP13 -1\PP13-2\P19 instructies AFB. 1 7. Omsnoeringsspanner zie FIG. 1 , druk op de spanstang en laad vast , L≥ 3 inch (8 cm). Plaats opvangslippen verpakt cuttergoot kaapstandergoot , zie FIG . 2 . 3. Bedien deze spanstang herhaaldelijk, zoals blijkt uit FIG. 2 tot AFB. 3, de s trapping zal worden aangescherpt. - Page 95 AFB. 4 15. vast met het klemafdichtingsgereedschap , zoals getoond in Afb. 4 . 16. Druk op de spanstang , de s- sluiting zal worden gesneden . XW19- instructies AFB. 5 7. Zoals getoond in FIG.5, installeer de omsnoering vooraf om twee metalen afdichtingen te gebruiken, Voor de werking van de omsnoeringsspanner raadpleegt u de PP13.
- Page 96 GD-5- instructies 25.Roestvrijstalen tape voor snijden (lengte gelijk aan omtrek + 15-20 cm ) 26.Plaats de roestvrijstalen sluiting op de roestvrijstalen tape , 5 cm van de rand , met de oren naar boven. Buig het uiteinde van de roestvrijstalen tape naar beneden en plaats deze onder de gesp.
-
Page 97: Maintenance
28.Plaats de tape in de geleidesleuf van de spanner Beweeg de terugtrekhendel op en neer om de tape naar wens aan te spannen spanningsniveau. Duw de gereedschaptang naar voren afdeling om de tape naar één kant van de gesp te buigen, en Snijd vervolgens de roestvrijstalen tape door met de snijhendel. - Page 98 Adres: Baoshanqu Shuangchenglu 803long 11hao 1602A-1609shi Shanghai Geïmporteerd naar AUS: SIHAO PTY LTD . 1 ROKEVA STREETEASTWOOD NSW 2122 Australië Geïmporteerd naar de VS: Sanven Technology Ltd. Suite 250, 9166 Anaheim Place, Rancho Cucamonga, CA 91730 SHUNSHUN GmbH Römeräcker 9 Z2021, 76351 Linkenheim-Hochstetten, Germany Pooledas Group Ltd Unit 5 Albert Edward House, The...
- Page 100 Technische ondersteuning en e-garantiecertificaat www.vevor.com/support...
- Page 101 Manuellt bandningsverktyg MODELL: PP13-1 , PP13-2 , P19 , XW19 , GD-5 We continue to be committed to provide you tools with competitive price. "Save Half", "Half Price" or any other similar expressions used by us only represents an estimate of savings you might benefit from buying certain tools with us compared to the major top brands and does not necessarily mean to cover all categories of tools offered by us.
- Page 103 This is the original instruction, please read all manual instructions carefully before operating. VEVOR reserves a clear interpretation of our user manual. The appearance of the product shall be subject to the product you received. Please forgive us that we won't inform you again if there are any technology or software updates on our product.
-
Page 104: Personlig Säkerhet
Tack så mycket för att du valde detta manuella bandningsverktyg - Läs igenom alla instruktioner innan du använder den. Informationen hjälper dig att uppnå bästa möjliga resultat. Produkterna i denna katalog kan ha en annan färg än den faktiska varan . INSTRUCTIONS ARBETSYTA 1. - Page 105 MODEL AND PARAMETERS PP13-1 : 1. Bandspännare × 1 st 2. Bandförseglingsverktyg ×1 PCS 3. PP- plastband 330 ft (100 m) längd×1/2 tum (12,7 mm) bredd × 1 st 4. Metalltätningar × 100 st PP13-2 : 1. Bandspännare × 1 STK 2.
- Page 106 ASSEMBLY AND USE PP13 -1\PP13-2\P19 instruktioner FIKON. 1 8. Bandspännare FIG. Tryck på spännstången belastningsspärr , L≥ 3 tum (8 cm ) . 2. Sätt packade s fångstsedlarna i skärtråget och kapstantråget , se FIG . 3. Manövrera denna spännstång upprepade gånger från FIG. 2 till FIG. 3, s fånga kommer att skärpas.
- Page 107 FIKON. 17. Kläm fast metalltätningarna med s trapping s ealer -verktyget , som visas i Fig 4. 18. Tryck på spänningsstången , spännet kommer att skäras . XW19 instruktioner FIKON. 5 8. Som visas i FIG.5, förinstallera bandet för att använda två - 5 -...
- Page 108 metalltätningar, användningen av Strapping Tensioner, se PP13. GD-5 instruktioner 29.Rostfritt ståltejp för skärning (längd lika med omkrets + 5,9-7,8 tum / 15-20 30.Sätt spännet av rostfritt stål på den rostfria tejpen 5 cm från kanten, öronen uppåt. Böj änden av den rostfria tejpen och placera den under spänne.
- Page 109 31.Linda den rostfria tejpen runt spännet och passera den fria änden av tejpa genom spännet. 32.Placera tejpen i styrspåret på spännaren ,s vrid det indragbara handtaget upp och ner för att dra åt tejpen till önskat spänningsnivå. Tryck verktygstången för avdelning för att böja tejpen till ena sidan av spännet, och klipp sedan av den rostfria tejpen med operationsskärhandtaget.
- Page 110 Adress: Baoshanqu Shuangchenglu 803long 11hao 1602A-1609shi Shanghai Importerad till AUS: SIHAO PTY LTD . 1 ROKEVA STREETEASTWOOD NSW 2122 Australien till USA: Sanven Technology Ltd. Suite 250, 9166 Anaheim Place, Rancho Cucamonga, CA 91730 SHUNSHUN GmbH Römeräcker 9 Z2021, 76351 Linkenheim-Hochstetten, Germany Pooledas Group Ltd Unit 5 Albert Edward House, The...
- Page 112 Teknisk support och e-garanticertifikat www.vevor.com/support...
Need help?
Do you have a question about the PP13-1 and is the answer not in the manual?
Questions and answers