Table of Contents
Advertisement
Quick Links
Advertisement
Table of Contents

Related Manuals for Glorystar NEBULA NEB156


Summary of Contents for Glorystar NEBULA NEB156
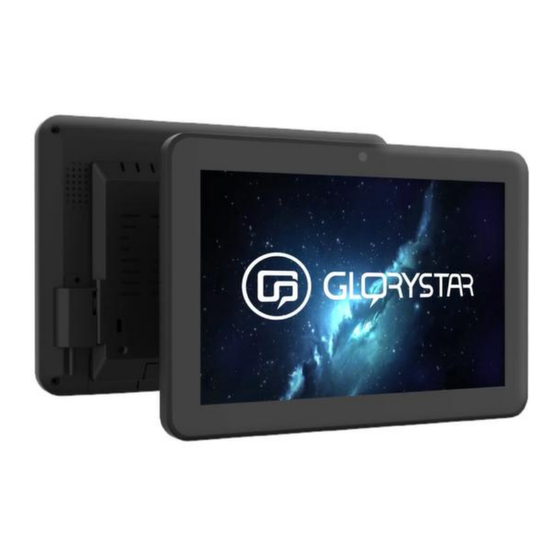
- Page 1 NEBULA KIOSK TABLET User Manual...
- Page 2 Copyright © 2023 Glory Star Group Limited. All Rights Reserved. No part of this publication may be reproduced, transmitted, transcribed, stored in a retrieval system, or translated into any language or computer language, in any form or by any means, including, but not limited to, electronic, magnetic, optical, chemical, manual, or otherwise without prior written permission of Glory Star Group Limited.
-
Page 3: Table Of Contents
CONTENTS SAFETY INSTRUCTIONS ..............................................1 PRODUCT OVERVIEW ..............................................2 Product Specifications ..........................................3 Accessories and Options ........................................4 Features ..............................................5 Input/Output Ports ..........................................6 Dimensions ............................................. 7 15.6" Display ............................................7 21.5" Display ............................................7 15.6" Display with FIX-028 Stand ...................................... 8 15.6"... - Page 4 Connecting to the STAROS Server ...................................... 22 Turning on Star Control ........................................22 Using the STAROS App ........................................23 Media Player Mode ......................................... 23 Full Screen Browser Mode ......................................24 Multiple Apps Mode ........................................24 Screensaver ............................................25 Display Schedules ..........................................25 Reverting to Android Settings ......................................
-
Page 5: Safety Instructions
SAFETY INSTRUCTIONS IMPORTANT! Read the user manual first before installing, using, or maintaining the display. Save the user manual in a safe place for future reference. Install the product properly to avoid dropping and damaging the display. Store or use the display in a safe location. The power supply cord should be connected to a socket-outlet with an earthing connection. -
Page 6: Product Overview
PRODUCT OVERVIEW Nebula Kiosk Tablet is designed as an all-in-one self-service kiosk. The tablet combines commercial grade reliability with a powerful processor and an optional Power over Ethernet (POE). The kiosk tablet offers a wide variety of optional peripherals, such as magnetic card swipe, RFID/NFC, and barcode reader enabling flexibility for rigorous and continuous public use of fitness consoles, system terminals, retail e-catalog, employee access control, corporate check-in, restaurant self-ordering, hotel check-in, and etc. -
Page 7: Product Specifications
Product Specifications Kiosk Tablet NEB156 NEB215 H.265, VP8, RV, WMV, AVS, H.263, MPEG4, Up to Video format 4K x 2K decoding, HTML5, Flash 10 Screen Size 15.6‖ 21.5‖ Video/ Image Audio format MP3/ WMA/ AAC etc. Resolution 1920 x 1080 Image format JPEG, BMP, PNG Brightness... -
Page 8: Accessories And Options
Accessories and Options Accessories and Options Type Remarks WCDMA/HSDPA 2100/1900/850(900)MHzGSM/GPRS/EDGE 850/900/1800/1900MHz 3G/4G Mini-PCI add-on module Always check with your local service provider on compatibility of 3G/4G module. PoE (Compatible with NEB156 only) PCB add-on module IEEE802.3af standard Barcode Reader Micro-USB add-on module 1D barcode/ 2D barcode RFID / NFC Micro-USB add-on module... -
Page 9: Features
Features Durable, built to last Optional POE API third-party integration 4G Capability Easy cable management... -
Page 10: Input/Output Ports
Input/Output Ports Port Description RJ45 Ethernet Connects to the local area network (LAN) Connects to an audio interface, external hard drive, or RJ11 Ethernet (optional) Provides TTL / mechanism connection (RS 232) other computer peripherals Power Button (optional) Turns the display on or off Power Jack Connects to the power source (3.5 mm, 12V/5A) Volume up/down... -
Page 11: Dimensions
Dimensions 15.6" Display 21.5" Display... -
Page 12: 15.6" Display With Fix-028 Stand
15.6" Display with FIX-028 Stand 15.6" Display with FIX-030 Stand... -
Page 13: Label Locations
Label Locations 21.5” Display 15.6” Display... -
Page 14: Installation And Setup
INSTALLATION AND SETUP Select a preferred configuration for the display before installing the product and setting it up for use. Follow the installation instructions properly to avoid dropping and damaging the display. Configurations Unpacking the Box Out of the Box Failure If you experience an out-of-box failure (OBF) during installation in relation to missing, incorrect, or defective unit or item, send an email to support@glorystargroup.com and provide a description of the issue. -
Page 15: Connecting To Power
Connecting to Power To power up the tablet, perform the following steps: 3. Connect the DC power connector to the DC IN port. NOTE: The L-shaped plug should be placed on the left side. 1. Remove the two screws that secure the back cover lid. 4. -
Page 16: Installing Modules
RFID/NFC Installing Modules Before installing the RFID to your kiosk tablet, configure the module first. You can install the following modules to the computer tablet: 1. Connect the RFID/NFC module to a USB Type C port of the tablet. RFID/NFC – automatically identifies persons and conducts access ... - Page 17 Configuring RFID 4. Hover an RFID card on the RFID module, and then select Scan card. The Card type and Card ID are displayed. 1. Launch the Star Tool app. 2. From the Addon Modules category, select Enter. 5. To change the RFID value, type an RFID value, and then select Write value. 3.
-
Page 18: 2D Barcode Scanner
Configuring Barcode Scanner 1D/2D Barcode Scanner 1. Launch the Star Tool app. 1. Connect the 1D/2D barcode scanner module to a USB Type C port of the 2. From the Addon Modules category, select Enter. tablet. 2. Secure the 1D/2D barcode scanner module with two screws. 3. - Page 19 4. Select the installed barcode scanner. 6. Select one of the following: Light modes On – always turns on the barcode scanner light. Light modes Auto – turns on the barcode scanner light when it detects a barcode to scan. Light modes Off –...
-
Page 20: Installing Wall Mount
Installing Wall Mount 5. Perform one of the following: For a concrete wall, drill four 8 mm holes on the concrete wall, and insert You can purchase the Wall Mount accessory to mount the display on a concrete an anchor into each hole. or wooden wall. - Page 21 6. Align the wall plate with the mounting holes. Secure the plate to the wall 7. Align the display with the wall plate, and then carefully slide down the with lag bolts and log bolt washers. display until the bracket is safely secured to the wall plate. Concrete Wall 8.
-
Page 22: Installing The Fix-028 Table Mount
Installing the FIX-028 Table Mount To install the FIX-028 table mount to the display, follow these steps: 4. Mount the VESA plate at the back of the display. Secure the VESA plate with four M4x12 bolts and washers. 1. Disconnect the AC power adaptor from the power source to turn off the display. -
Page 23: Installing The Fix-030 Table Mount
Installing the FIX-030 Table Mount The FIX-030 table mount can be installed using a weighted or grommet base. 3. To install the table mount to a hole in a desk, drill a 10 mm hole and secure the mount with a Support Plate, M10 Washer, Spring Washer, and M10 Bolt To install the FIX-030 table mount to the display, follow these steps: using a wrench. - Page 24 Install the VESA Plate at the back of the display, and then secure it with 7. Fasten the Grub Screw in the monitor arm to fix the tilting angle using an four M4 x 12 thumbscrews. Allen Key. 6. Slide down the display carefully until the plate locks into the head of the monitor arm, and then secure the display with a M4 x 6 bolt.
-
Page 25: Staros Application
STAROS APPLICATION The STAROS application combines a high level of customization with a no-fuss experience for business owners who want to save time and money. The application allows devices to switch between tablet application modes, web pages, and playing media all within one UI. The custom lockdown application protects your information while streamlining all device activities into one simple process and integrates seamlessly to all businesses. -
Page 26: Connecting To The Staros Server
Connecting to the STAROS Server To connect to the STAROS server, perform the following steps: 4. Once done with the onboarding process, select Continue. The STAROS login page is displayed. 1. Select a Wi-Fi or LAN connection. 5. Type ―0000‖ as the default password to unlock the screen. Note: To connect to a Wi-Fi connection, the LAN cable must be Turning on Star Control disconnected from the Ethernet port. -
Page 27: Using The Staros App
Using the STAROS App Media Player Mode To select the photos or videos that display on the device, follow these steps: The STAROS app provides different modes of display and allows user to select their preferred settings for the device. 1. -
Page 28: Full Screen Browser Mode
Full Screen Browser Mode Multiple Apps Mode To select a website to display once the device is lock down, follow these steps: To enable one or multiple apps to run on the device, follow these steps: 1. Do one of the following: 1. -
Page 29: Screensaver
Screensaver Display Schedules To enable a screensaver for the device, follow these steps: To set device startup and shutdown times, follow these steps: 1. From the bottom navigation pane, select Settings. 1. From the bottom navigation pane, select Settings. 2. From the Settings dashboard, select Screensaver settings. 2. -
Page 30: Reverting To Android Settings
Reverting to Android Settings To remove the STAROS app and revert to Android settings, follow these steps: 3. Select Yes, remove Staros to confirm. The Admin Verification pop-up window displays: 1. From the bottom navigation pane, select the About ( ) button. -
Page 31: Technical Support And Maintenance
TECHNICAL SUPPORT AND MAINTENANCE Glory Star provides the following options to help support your devices during installation, configuration, and troubleshooting issues. SUPPORT DESCRIPTION LINK Troubleshooting Provides list of common issues reported while using the device and possible solutions to resolve these issues. Knowledge Base Provides an online library of information, articles, FAQs, and technical documents https://support.glorystartouch.com/portal/en/kb... -
Page 32: Troubleshooting
Troubleshooting If you encounter any issue while using the STAROS app, you can refer to the table below for possible solutions. ISSUE SOLUTION Display is still turned ON 1. Click 5 to 7 times on the lower-right corner of the window to open the STAROS menu. 2. - Page 33 Submit an RMA request through the Glory Star website: Touch Panel malfunctions https://www.glorystartouch.com/rma Damaged hardware caused by human error is not included in warranty and must be returned to GloryStar for repair. Extra Display has cracked lines due to cost may apply.
- Page 34 1. Connect a USB keyboard to the display. 2. Turn off the display. GAD101A does not boot up 3. Disconnect the AC power adaptor from the power source, and then connect again to the display. 4. Using the cursor, select Wipe data/factory reset to reset the system. 1.
-
Page 35: Regulatory Information
REGULATORY INFORMATION Electrical Safety Information Compliance is required with respect to the voltage, frequency, and current requirements indicated on the manufacturer‘s label. Connection to a different power source than those specified herein will likely result in improper operation, damage to the equipment, or pose a fire hazard if the limitations are not followed. There are no operator serviceable parts inside this equipment. -
Page 36: Contact Us
CONTACT US United States Hong Kong ShenZhen 1440 N. Harbor Blvd Suite 900 Fullerton, Flat D, 5/F, Excelsior Building, 364 Nathan Road, Bldg 9, 4/F Zhong Yuntai Technology Industrial Park, Kowloon, Hong Kong Tangtou No.1 Road, Shiyan Street, Baoan, CA 92835, USA ShenZhen, PRC 626 228 5927 852 23762803...
Need help?
Do you have a question about the NEBULA NEB156 and is the answer not in the manual?
Questions and answers