
Subscribe to Our Youtube Channel
Related Manuals for Gaggenau CV2821 1 Series


Summary of Contents for Gaggenau CV2821 1 Series
- Page 1 Gaggenau en Information for Use CV2821.1 FlexInduction hob with integrated ventilation system...
- Page 2 2,200 W 3,700 W 3,300 W 3,700 W IEC 60335-2-6...
-
Page 3: Table Of Contents
Safety en Table of contents 1.1 General information ¡ Read this instruction manual carefully. Safety .............. 3 ¡ Keep the instructions, the appliance and Preventing material damage ...... 6 the product information safe for future refer- ence or for the next owner. Environmental protection and saving en- ergy .............. 6 ¡... -
Page 4: Safety
en Safety 1.3 Restriction on user group WARNING ‒ Risk of poisoning! This appliance may be used by children aged Risk of poisoning from flue gases being 8 or over and by people who have reduced drawn back in. Room-air-dependent heat-pro- physical, sensory or mental abilities or inad- ducing appliances (e.g. - Page 5 Safety en The ventilation grille will quickly become ex- WARNING ‒ Risk of fire! tremely hot if it is placed on the hob. Leaving fat or oil cooking on an unattended ▶ Never place the ventilation grille on the hob can be dangerous and may lead to fires. hob.
-
Page 6: Preventing Material Damage
en Preventing material damage The wireless temperature sensor is equipped WARNING ‒ Danger: Magnetism! with a battery, which may become damaged if The removable control element is magnetic it is exposed to high temperatures. and may affect electronic implants, e.g. heart ▶ Remove the sensor from the cookware and pacemakers or insulin pumps. -
Page 7: Disposal
Disposal en 3.2 Saving energy Cook with only a little water. ¡ The more water that is contained in the cookware, If you follow these instructions, your appliance will use the more energy is required to heat it up. less energy. Turn down to a lower power level early on. Use a suit- Select the cooking zone to match the size of your able ongoing power level. - Page 8 en Induction cooking ¡ Thin-walled normal steel 5.2 Cookware ¡ Glass Only ferromagnetic cookware is suitable for induction ¡ Clay cooking. ¡ Copper For example: ¡ Aluminium ¡ Enamelled steel cookware ¡ Cast iron cookware Composition of the cookware base ¡ Special induction-compatible cookware made from The material(s) from which the base of the cookware is stainless steel made may affect the cooking result.
-
Page 9: Familiarising Yourself With Your Appliance
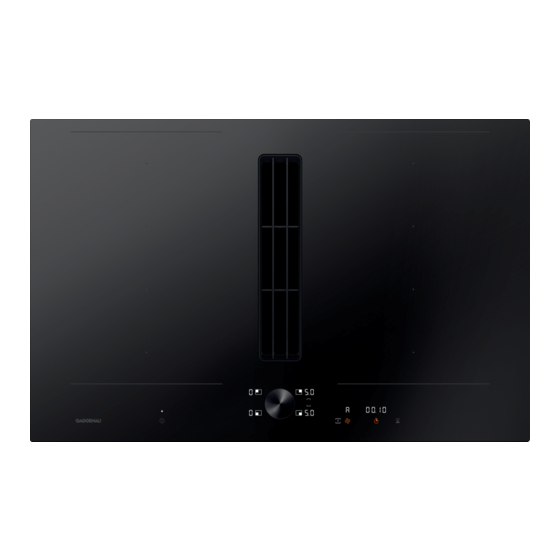
Familiarising yourself with your appliance en Familiarising yourself with your appliance 6 Familiarising yourself with your appliance 6.1 Your new appliance Designation You can find an overview of the parts of your appliance here. Control panel Overflow container 6.2 Optional accessories Depending on the appliance model, various accessor- ies are available and you can obtain these from spe- cialist retailers, from our customer service or from our official website. -
Page 10: Operating Modes
en Operating modes Switching between the settings area for Timer function the hob and the ventilation system/set- . Stopwatch function ting the ventilation level/switching on in- Display cleaning protection tensive mode, automatic start and the Childproof lock intermittent function for the ventilation system Flex function activated Switching on the stopwatch... - Page 11 Before using for the first time en 7.2 Air recirculation The air must not be discharged into a flue that is used for exhausting fumes The air which is drawn in is cleaned by the grease fil- from appliances burning gas or other ters and an odour filter, and conveyed back into the fuels (not applicable to appliances that room.
-
Page 12: Basic Operation
en Basic operation Basic operation 10 Basic operation Within the next 10 seconds, turn the twist knob until 10.1 Hob the required power level appears in the display. Notes ¡ If the appliance has not been connected to your home network or the connection has been broken, the network connection initial set-up will be activated whenever you switch on the hob. - Page 13 Basic operation en Turn the twist knob until the required power level ap- Using tall items of cookware may prevent the extraction pears in the display. system from working at optimum power. You can im- prove the extraction power using a lid placed at an angle.
- Page 14 en Basic operation Switching off intensive mode If the automatic function is activated with sensor-con- trolled run-on in the basic settings, the fan run-on Press . switches on automatically after the appliance is Turn the twist knob until the power level is dis- switched off.
- Page 15 Basic operation en Recommended settings for cooking This is where you can find an overview about which heat settings are suitable for which food. The cooking time may vary depending on the type, weight, thickness and quality of the food. Cooking method Heat setting Cooking time in mins Melting...
- Page 16 en Flex Zone Cooking method Heat setting Cooking time in mins Prawns and scampi 4-10 Sautéing fresh vegetables and mush- 10-20 rooms Stir-fry, vegetables, meat cut in strips 15-20 Asian-style Stir fry, frozen 6-10 Pancakes, cooked one after the 6.5-7.5 other Omelette, cooked one after the other 3.5-4.5 3-10...
-
Page 17: Transfer Settings
Transfer settings en ¡ If there is a cooking timer programmed for one Use just one item of cook- cooking zone, this will also be assigned to the ware on each cooking second cooking zone when the two are linked. zone. Changing the power level Select one of the two cooking zones assigned to the flexible cooking zone. - Page 18 en Professional cooking function The appliance also transfers a set cooking time to the If you move several items of cookware, the function is new cooking zone. The appliance does not transfer the only ready for the item of cookware that was last frying sensor function.
-
Page 19: Timer Function
Timer function en Setting the cooking timer Deleting the cooking timer Select the cooking zone. Select the cooking zone. Set the required heat setting. Press . Press . Use the twist knob to set the cooking time to . 14.2 Short-term timer You can use the short-term timer to set a time of up to ... - Page 20 en Booster function for pots Activating the stopwatch function a The stopwatch displays continue to light up. Press . Press . ▶ a The time in the display continues to count down. . appears in the stopwatch display. a The time counts down.
- Page 21 Keep-warm function en a The function is activated. a The cooking zone switches back to power level . a The function is deactivated. 16.3 Deactivating the booster function for Notes ¡ After 30 seconds, the booster function for pans is pans automatically switched off. Select the cooking zone.
- Page 22 en Frying sensor function ¡ The frying sensor may not be activated on the flex- Level Suitable for ible cooking zone if the frying pan does not match the size of the hotplate or if it is positioned incor- Frying food in extra virgin olive oil, but- rectly.
- Page 23 Frying sensor function en 18.7 Settings for cooking with the frying sensor Vegetables and legumes Garlic 2-10 The table shows which temperature level is suitable for which food. The frying time ( ) may vary de- Onions, braised 2-10 pending on the type, weight, thickness and quality of Onion rings 5-10 the food.
- Page 24 en Cooking sensor function Dried ready meals 5-10 Nuts, roasted 3-15 Almonds, roasted 3-15 Pine nuts, toasted 3-15 Turn frequently. Turn frequently. Add oil and the food after the signal tone. Add oil and the food after the signal tone. Stir regularly. Stir regularly.
-
Page 25: Cooking Sensor Function
Cooking sensor function en 19.4 Cooking sensor function The overview shows the available function settings for the cooking sensor function. Cooking sensor func- Temperature settings Cookware Availability Activation tion Heating, keeping 70º°C All cooking zones warm Poaching in milk 85º°C All cooking zones Poaching in water 90º°C All cooking zones... - Page 26 en Cooking sensor function Note: The 100 °C temperature setting provides effi- 19.8 Resetting the wireless cooking sensor cient cooking even if the water does not bubble very Press and hold for 8-10 seconds. strongly during the heating process. If you are not sat- While you are doing this, the cooking sensor's LED isfied with the cooking result, however, you can change indicator lights up three times.
- Page 27 Cooking sensor function en Set the required temperature using the twist knob. When the signal tone sounds, remove the lid and add the food. Keep the lid on the pan during cooking. Note: Do not cover the pan when using the "Frying with a large amount of oil in the pan"...
- Page 28 en Cooking sensor function Egg dishes Temperature in °C Total cooking time from signal tone (mins) Boiling Boiling eggs 5-10 Add the food right at the beginning. Vegetables and legumes Temperature in °C Total cooking time from signal tone (mins) Boiling Broccoli 10-20 Cauliflower...
- Page 29 Cooking sensor function en Pasta and cereals Temperature in °C Total cooking time from signal tone (mins) Pastry parcels and filled dumplings 6-15 Cooking in a pressure cooker Rice in a pressure cooker Pre-heat and cook with the lid on. Add the food after the signal tone. Stir regularly.
-
Page 30: Childproof Lock
You can purchase the wireless cooking sensor from customer service, in our online shop or in a specialist shop www.gaggenau.com. 23.1 Scope of delivery After unpacking all of the parts, check for any transport damage and for completeness of delivery. - Page 31 Wireless cooking sensor en Template ¡ 23.4 Replacing the battery 23.2 Attaching the silicone patch If the LED on the wireless cooking sensor does not light up when pressed, the battery is flat. Replacing the The silicone patch secures the cooking sensor to the battery: cookware.
-
Page 32: Declaration Of Conformity
en Wireless cooking sensor Insert a new battery, observing the instructions for Press down all over the surface of the silicone the battery poles. Only use premium-quality CR2032 patch, including in the centre. batteries. Leave the adhesive to dry for one hour. Do not use or rinse out the cookware during this time. - Page 33 Basic settings en Basic settings 24 Basic settings You can configure the basic settings for your appliance Display Selection to meet your needs. Set air recirculation mode or air extraction mode 24.1 Overview of the basic settings Air recirculation mode is set. Air extraction mode is set.
- Page 34 en Home Connect Press repeatedly until the required function is dis- Press and hold for at least 4 seconds. played. a The settings are saved. Use the twist knob to select the required setting. → "Exiting the basic settings menu", Page 34 24.3 Exiting the basic settings menu Switch off the hob using the main switch.
- Page 35 Home Connect en Press and hold for at least 4 seconds. → "Exiting the basic settings menu", Page 34 a The settings are saved. 25.4 Overview of the Home Connect settings You can adjust the settings and network settings for Home Connect by going to your hob's basic settings. Setting Selection or display Additional information...
- Page 36 en Cookware test Touch repeatedly until the settings 25.9 Remote diagnostics flash alternately. Customer Service can use Remote Diagnostics to ac- lights up. cess your appliance if you contact them, have your ap- Set the value to using the twist knob. pliance connected to the Home Connect server and if goes out on the control panel.
- Page 37 Power limitation en Display Result Display Result The cookware is taking longer to heat The cookware is heating up correctly up than expected and cooking is not and cooking is progressing well. progressing as well as it ought to. If there is a smaller cooking zone available, try the If there is a smaller cooking zone available, try the cookware again on the smaller cooking zone.
- Page 38 en Cleaning and servicing Dry with a soft cloth. ATTENTION! Falling grease filters may damage the hob below. Grip below the grease filter with one hand. ▶ 28.4 Cleaning the hob Remove the grease filter. Clean the hob after every use to stop cooking residues Fat may accumulate in the bottom of the con- ‒...
- Page 39 Cleaning and servicing en Insert the other odour filters or acoustics filters into Remove the ventilation grille. the left and right of the appliance. ATTENTION! Insert the grease filter. Falling grease filters may damage the hob below. Grip below the grease filter with one hand. ▶...
- Page 40 en Cleaning and servicing Cleaning the grease filters manually Start the dishwasher. Select a temperature setting below 70 °C. Dismantle the grease filter. Leave the grease filter to drain. 28.7 Cleaning the ventilation grille Clean the ventilation grille with a damp dish cloth ▶...
- Page 41 FAQs en FAQs 29 FAQs This is where you can find an overview of the frequently asked questions regarding use, noises, cookware and clean- ing. 29.1 Using the appliance Question Answer Why can I not switch on the hob ¡ The Childproof lock function is switched on. You can find further information and why is the Childproof about this function under lock display lit?
- Page 42 en Troubleshooting 29.3 Cookware Question Answer Which cookware is suitable for ¡ You can find more information on which items of cookware are suitable for the induction hob? induction cooking in → "Induction cooking", Page 7. Why is the cooking zone not ¡ The cookware is on a different cooking zone to the one that has been heating up and why is the heat switched on.
- Page 43 Troubleshooting en 30.1 Malfunctions Fault Cause and troubleshooting The appliance is not The mains plug of the power cord is not plugged in. working. Connect the appliance to the power supply. ▶ There has been a power cut. Check whether the lighting in your room or other appliances are working. ▶...
- Page 44 en Troubleshooting Fault Cause and troubleshooting The FlexPlus cooking zone cannot be activated. Check the fault display by pressing any control. Continue to cook with the remaining cooking zones. Contact the after-sales service. The hob is unable to connect to your home network or the extractor hood. Press any touch field to confirm the fault display.
- Page 45 2014/53/EU. A detailed Declaration of Conformity can be found on- A detailed RED Declaration of Conformity can be found line at www.gaggenau.com/gb among the additional online at www.gaggenau.com among the additional documents on the product page for your appliance.
- Page 46 Product Security and Telecommunications Infrastruc- ture (Security Requirements for Relevant Connectable Products) Regulations 2023 can be found online at www.gaggenau.com/gb/ among the additional docu- ments on the product page for your appliance. Product type This statement of compliance covers the products de- scribed in this information for use whose model identi- fier group is seen on the title page.
- Page 48 BSH Hausgeräte GmbH Carl-Wery-Straße 34 81739 München, GERMANY www.gaggenau.com Valid within Great Britain: Imported to Great Britain by BSH Home Appliances Ltd. Grand Union House Old Wolverton Road Wolverton, Milton Keynes MK12 5PT United Kingdom...
Need help?
Do you have a question about the CV2821 1 Series and is the answer not in the manual?
Questions and answers