
Subscribe to Our Youtube Channel
Related Manuals for Gaggenau CV492100


Summary of Contents for Gaggenau CV492100
- Page 1 Gaggenau en User manual CV492100 FlexInduction hob with integrated ventilation system...
- Page 2 / 2200 W 3700 W 3300 W 3700 W 2600 W 3700 W 3300 W 3700 W IEC 60335-2-6...
-
Page 3: Table Of Contents
Safety en 1.2 Intended use Table of contents Only a licensed professional may connect ap- Safety .............. 3 pliances without plugs. Damage caused by in- correct connection is not covered under the Preventing material damage ....... 5 warranty. Environmental protection and saving en- The appliance can only be used safely if it is ergy ............... -
Page 4: Safety
en Safety ▶ It is only possible to safely operate the ap- been instructed on how to use the appliance pliance if the pressure in the room in which safely and have understood the resulting the heating appliance is installed does not dangers. -
Page 5: Preventing Material Damage
Preventing material damage en ▶ Never work with naked flames close to the ▶ Only use genuine spare parts when repair- appliance (e.g. flambéing). ing the appliance. ▶ Do not install the appliance near a solid ▶ If the power cord of this appliance is dam- fuel heating appliance (e.g. -
Page 6: Environmental Protection And Saving En- Ergy
en Environmental protection and saving energy Non heat-resistant materials will melt on heated hot- Damage Cause Measure plates. Scratch Salt, sugar or Do not use the hob as a Do not use oven protective foil. ▶ sand work surface or storage Do not use aluminium foil or plastic containers. -
Page 7: Induction Cooking
Induction cooking en This appliance is labelled in accord- ance with European Directive 2012/19/EU concerning used elec- trical and electronic appliances (waste electrical and electronic equip- ment - WEEE). The guideline determines the frame- work for the return and recycling of used appliances as applicable throughout the EU. - Page 8 en Induction cooking heats up. As a result, the heat is not distributed evenly. case, do not touch the cookware, and switch off the The temperature of the non-ferromagnetic area may cooking zone. If the cooking zone no longer works therefore be too low for cooking. after cooling down, contact the technical customer ser- vice.
-
Page 9: Familiarising Yourself With Your Appliance
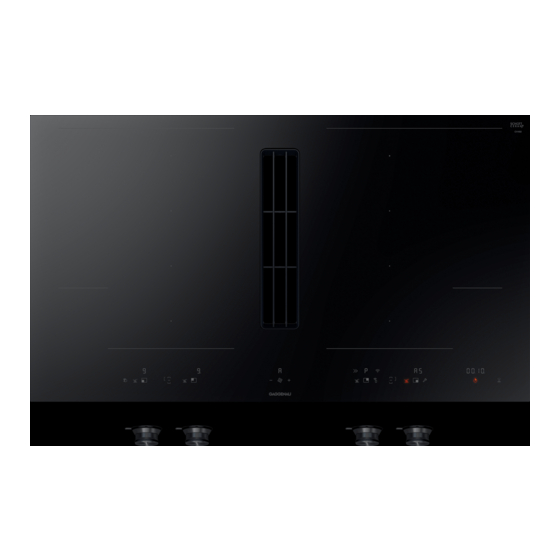
Familiarising yourself with your appliance en 6 Familiarising yourself with your appliance 6.1 Your new appliance Designation You can find an overview of the parts of your appliance here. Control panel Overflow container 6.2 Optional accessories Depending on the appliance model, various accessor- ies are available and you can obtain these from spe- cialist retailers, from our customer service or from our official website. - Page 10 en Familiarising yourself with your appliance PowerBoost function for cooking zones/in- 0–12 Setting the power level tensive mode for ventilation Activating the PowerBoost / Residual heat function Kitchen timer Activating the flex function . Stopwatch function Setting the front left cook- ing zone Control panel lock for cleaning Setting the rear left cook-...
-
Page 11: Operating Modes
Operating modes en Symbol Cooking zone type Switching on Single cooking zone Use cookware of a suitable size. Flexible cooking zone You can find more information in "Flexible cooking zone". → Page 15 FlexPlus cooking The FlexPlus cooking zone always switches on in conjunction with zone one of the flexible cooking zones. -
Page 12: Basic Settings
en Basic operation Turn the control knob anti-clockwise to . Exit the Home Connect settings menu in the same way. 8.2 Setting an operating mode Requirement: On delivery, the appliance is set to circu- lating-air mode. To change the appliance to air extraction mode, ▶... - Page 13 Basic operation en ¡ When cooking with the lid on, reduce the power ¡ To brown the food, fry it in small portions, one after level as soon as you see steam escaping. The the other. cooking result is not affected by the steam escap- ¡...
- Page 14 en Basic operation 9.7 Switching on intensive mode 9.12 Switching off intermittent ventilation If particularly strong odours or vapours develop, you to set the required power level . ▶ can use intensive mode. a The intermittent ventilation is switched off. Press . ▶...
- Page 15 Flexible cooking zone en Exiting the menu and saving the settings a After approx. five seconds, the illuminated ring on the control knob lights up green. Push in the control knob and turn it anti-clockwise to a The colour has changed. position. Leave the control knob pushed in.
- Page 16 en FlexPlus cooking zone Note: If you switch off the cooking zone and switch it 10.4 Using the Flex cooking zone as two back on again, the flexible cooking zone is switched independent cooking zones back to two independent cooking zones. Use the Flex cooking zone as two independent ▶...
- Page 17 Timer function en 11.3 Deactivating the FlexPlus cooking zone a The display in the FlexPlus cooking zone lights up until the residual heat indicator goes out. Remove the cookware from the cooking zone. ▶ a The FlexPlus cooking zone is switched off. lights up.
- Page 18 en PowerBoost function 13 PowerBoost function You can use the powerBoost function to heat up large 13.1 Activating the PowerBoost function volumes of water more quickly than with power Push in the control knob and turn it to . ▶ level . The powerBoost function is available for all cooking zones, provided the other cooking zone in the same group is not in use.
- Page 19 Frying sensor function en ¡ The frying sensor may not be activated on the flex- Suitable for ible cooking zone if the frying pan does not match Low - Frying fish and thick food such as the size of the hotplate or if it is positioned incor- meatballs and sausages.
- Page 20 en Frying sensor function Omelette 3 - 6 Fish fillet, breaded 10 - 20 Pancakes 1,5 - 2,5 Fish fingers 8 - 12 French toast 4 - 8 French fries in the frying pan 4 - 6 Raisin pancake 10 - 15 Stir-fries 6 - 10 Spring rolls...
- Page 21 Automatic safety switch-off en 15 Automatic safety switch-off If you operate a cooking zone for an extended period 15.2 Switch-on time depending on the and do not change any settings, the automatic safety power levels shut-off is activated. Depending on which performance The following overview displays the number of hours level has been selected, the cooking zone switches off after which the hob is switched off, depending on the...
- Page 22 en Basic settings Product information Display Display Selection Setting air recirculation mode or air extrac- Customer Service Index tion mode Production number Air recirculation mode is set. Production number 1 . Air extraction mode is set. Production number 2 Automatic ventilation start Switched off.
- Page 23 Home Connect en Note: If you do not carry out the operating steps, the 17.3 Exiting the basic settings menu appliance does not save the changed settings. Push the control knob in. While the control knob is ▶ pushed in, carry out the following steps without in- terruption: Turn the control knob one notch anti-clockwise to ‒...
- Page 24 en Home Connect In order to implement a setting, turn the control 18.2 Changing Home Connect settings knob to the required position. In the Home Connect settings menu, you can connect → "Overview of the Home Connect settings", your appliance to Home Connect and implement the Page 24 setting for connecting to the Wi-Fi home network. To save the setting, exit the Home Connect settings Push in any control knob.
- Page 25 Home Connect en Knob position Setting Resetting the Home You can delete all of the settings for Home Connect, e.g. if you Connect connection have new access data for your router. 18.4 Switching Wi-Fi on or off 18.6 Software update Open the Home Connect settings menu. Your appliance's software can be updated using the → "Changing Home Connect settings", Page 24 software update function, e.g.
- Page 26 en Cookware test Note: Please note that the Home Connect functions can only be utilised with the Home Connect app. In- formation on data protection can be retrieved in the Home Connect app. 19 Cookware test You can use this function to check the speed and qual- ity of the cooking process depending on the cookware.
- Page 27 Cleaning and servicing en Remove the ventilation grille. 20.2 Components to be cleaned or replaced The following overview shows the components of the appliance that you either replace or clean. Remove the grease filter. Grease may accumulate in the bottom of the ‒...
- Page 28 en Cleaning and servicing heating appliance has a sealed, non-removable Insert the other odour filters or acoustics filters into cover. There must be no flying sparks. the left and right of the appliance. Remove the ventilation grille. Insert the grease filter. ATTENTION! Falling grease filters may damage the hob below.
- Page 29 Cleaning and servicing en Place the ventilation grille on top. Place the grease filters loosely in the dishwasher and do not jam it in. For optimum cleaning results, lay the grease filter on the filter side in the dishwasher. Do not clean heavily soiled grease filters with utensils.
- Page 30 en FAQs 21 FAQs This is where you can find an overview of the frequently asked questions regarding use, noises, cookware and clean- ing. 21.1 Using the appliance Question Answer Why are the illuminated displays ¡ Clean the surface of the control panel of any liquids or food residue. Remove flashing and why is a signal any objects that may cover the control panel.
- Page 31 Troubleshooting en Question Answer Why is it taking so long for the ¡ The cookware is too small for the cooking zone that is switched on or it is cookware to heat up or why is it not suitable for induction cooking. Ensure that the cookware is suitable for in- not heating up sufficiently des- duction cooking and that it is placed on the cooking zone which best corres- pite being on a high power set-...
- Page 32 en Troubleshooting Fault Cause and troubleshooting No display The power supply is interrupted. Use other electrical appliances to check whether a short circuit has occurred ▶ in the power supply. The appliance has not been connected in accordance with the circuit diagram. Ensure that the appliance has been connected in accordance with the circuit ▶...
- Page 33 Troubleshooting en Fault Cause and troubleshooting The cooking zone has overheated and it has been switched off to protect the work surface Wait until the electronics have cooled sufficiently. Switch on the cooking zone again. The cooking zone has been operating continuously for an extended period. The automatic safety cut-out function is activated.
- Page 34 The rating plate is located on the underside of the ap- pliance. 24 Declaration of Conformity Gaggenau Hausgeräte GmbH hereby declares that the appliance with Home Connect functionality meets the essential requirements and other relevant provisions of the Directive 2014/53/EU.
- Page 36 Gaggenau Hausgeräte GmbH Carl-Wery-Straße 34 81739 München GERMANY www.gaggenau.com Valid within Great Britain: Imported to Great Britain by BSH Home Appliances Ltd. Grand Union House Old Wolverton Road Wolverton, Milton Keynes MK12 5PT United Kingdom...
Need help?
Do you have a question about the CV492100 and is the answer not in the manual?
Questions and answers