
Subscribe to Our Youtube Channel
Related Manuals for Gaggenau CV282110


Summary of Contents for Gaggenau CV282110
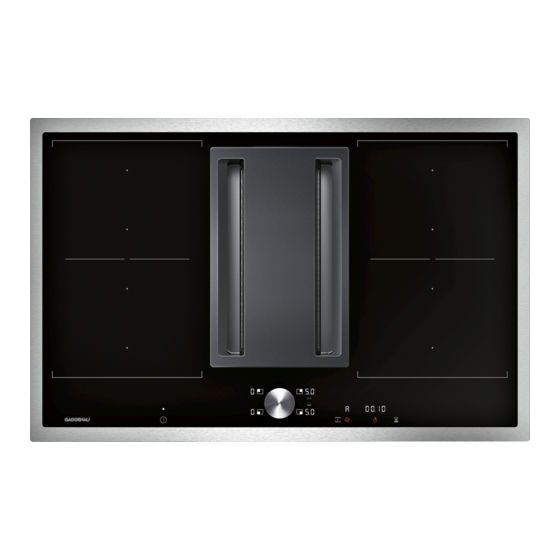
- Page 1 Instruction manual CV 282 Flex induction cooktop with integrated ventilation system...
-
Page 3: Table Of Contents
Table of contents e n I nstruction manual Intended use Timer functions Cooking timer The short-term timer I mportant safety information Stopwatch function Causes of damage Saucepan booster function Activating Environmental protection Deactivating Saving energy Environmentally-friendly disposal Frying pan booster function Recommendations for use I nduction cooking Activating... -
Page 4: Intended Use
Additional information on products, accessories, the age of 8 years old and by persons with replacement parts and services can be found at www.gaggenau.com and in the online shop reduced physical, sensory or mental www.gaggenau.com/zz/store capabilities or by persons with a lack of... -
Page 5: Important Safety Information
Important safety information Important safety Room air-dependent heat-producing appliances (e.g. gas, oil, wood or coal-operated information heaters, continuous flow heaters or water heaters) obtain combustion air from the room T he appliance can only be used safely if it is in which they are installed and discharge the I m p o r t a n t s a f e t y i n f o r m a t i o n correctly installed according to the safety... - Page 6 Important safety information Warning – Risk of fire! Warning – Risk of burns! Hot oil and fat can ignite very quickly. Never The hotplates and surrounding area ▯ ▯ leave hot fat or oil unattended. Never use (particularly the hob surround, if fitted) water to put out burning oil or fat.
- Page 7 Important safety information Warning – Risk of electric shock! Warning – Risk of injury! Incorrect repairs are dangerous. Repairs When cooking in a bain marie, the hob and ▯ ▯ may only be carried out and damaged cooking container could shatter due to power cables replaced by one of our overheating.
-
Page 8: Causes Of Damage
Causes of damage Causes of damage Environmental protection I n this section, you can find information about saving E n v i r o n m e n t a l p r o t e c t i o n energy and disposing of the appliance. -
Page 9: I Nduction Cooking
Induction cooking Some induction cookware does not have a fully I nduction cooking ferromagnetic base: ▯ If the base of the cookware is only partially A dvantages of induction cooking ferromagnetic, only the area that is ferromagnetic I n d u c t i o n c o o k i n g will heat up. - Page 10 Induction cooking Absence of pan or unsuitable size If no pan is placed on the selected hotplate, or if it is made of unsuitable material or is not the correct size, the power level displayed on the hotplate indicator will flash.
-
Page 11: G Etting To Know Your Appliance
Getting to know your appliance G etting to know your appliance Y ou can find information on the dimensions and power G e t t i n g t o k n o w y o u r a p p l i a n c e Page 2 of the hotplates in~ In this section, we will explain the indicators and... -
Page 12: The Control Panel
Getting to know your appliance Suitable cookware Small pan – 15 cm diameter GP 900001 There are pans that are optimally suited for the frying Medium pan – 18 cm diameter GP 900002 sensor function. They can be purchased from specialist Large pan –... -
Page 13: Residual Heat Indicator
Getting to know your appliance Operating modes Touch keys When the hob heats up, the symbols for the touch keys This appliance can be used in exhaust-air mode or available at this time light up. circulating-air mode. Touching a symbol activates the associated function. A confirmation signal sounds. -
Page 14: Before Using The Appliance For The First Time
Before using the appliance for the first time Before using the appliance for the T wist-Pad with Twist knob first time T he twistpad is the control panel where you can use the T w i s t - P a d w i t h T w i s t k n o b twist knob to select the hotplates and heat settings. -
Page 15: O Perating The Appliance
Operating the appliance Setting a hotplate O perating the appliance Set the required hotplate using the twist knob. Heat setting 1 = lowest setting. T his chapter explains how to set a hotplate. The table O p e r a t i n g t h e a p p l i a n c e shows heat settings and cooking times for various Heat setting 9 = highest setting. -
Page 16: Switching The Ventilation System On And Off
Operating the appliance Switching off the hotplate Touch the symbol. symbol will be lit orange. The ventilation ‹ Select the hotplate and turn the twist knob until ƒ system will start at fan setting . The fan setting appears. The hotplate switches itself off and the that is selected will be shown on the display panel. -
Page 17: Automatic Start
Operating the appliance Automatic mode with sensor control Switching on Touch the symbol. Switching on ˜ Turn the rotary knob until appears. Touch the symbol. Intensive mode is now activated. ƒ The ventilation starts with fan setting ‘ Turn button to the right until is displayed. -
Page 18: Interval Ventilation
Operating the appliance Interval ventilation Chef's recommendations Switching on Recommendations With interval ventilation, the ventilation switches on ▯ Stir occasionally when heating up purees, creamy automatically for 6 minutes every hour. soups and thick sauces. ▯ Touch the symbol. For preheating, select a heat setting 8 or 9. »... - Page 19 Operating the appliance Heat set- Cooking ting time (mins) Boiling, steaming, braising Rice (with double the volume of water) 2.5 - 3.5 15 - 30 Rice pudding*** 2 - 3 30 - 40 Unpeeled boiled potatoes 4.5 - 5.5 25 - 35 Boiled potatoes 4.5 - 5.5 15 - 30 Pasta, noodles* 6 - 7...
-
Page 20: Flex Function
Flex function As a single hotplate Flex function Using the entire cooking zone by connecting both hotplates. T he flexible cooking zone can be used as a single F l e x f u n c t i o n hotplate or as two independent hotplates, as required. -
Page 21: Transfer Function
Transfer function Notes Transfer function – Move the cookware to a hotplate that is not switched on, which has not yet been preset and on which no other cookware has yet been placed. Y ou can use this function to transfer the settings of one T r a n s f e r f u n c t i o n –... -
Page 22: Professional Chef Function
Professional chef function Deactivating Professional chef function ¬ To end the function immediately: Touch the symbol. ‹ ¬ Switch all hotplates to heat setting . The symbol Y ou can use the professional chef function to display lights up white. P r o f e s s i o n a l c h e f f u n c t i o n the preset heat settings for each hotplate. -
Page 23: Timer Functions
Timer functions Frying/cooking sensor function Timer functions If a cooking time has been programmed for a hotplate and the frying sensor or cooking sensor function is activated, the cooking time will begin to count down Y our hob has three timer functions: T i m e r f u n c t i o n s immediately, instead of once the selected temperature setting has been reached. -
Page 24: Stopwatch Function
Saucepan booster function Stopwatch function Saucepan booster function The stopwatch shows the cooking time that has elapsed so far in minutes and seconds (mm.ss). The maximum duration is 99 minutes and 59 seconds (99.59). If this T his function allows large volumes of water to be heated S a u c e p a n b o o s t e r f u n c t i o n value is reached, the display starts again at 00.00. -
Page 25: Frying Pan Booster Function
Frying pan booster function Frying pan booster function K eep warm function T his function enables you to heat cookware faster than T his function is suitable for melting chocolate or butter F r y i n g p a n b o o s t e r f u n c t i o n K e e p w a r m f u n c t i o n Š... -
Page 26: Automatic Functions
Automatic functions Food can be added once the selected temperature has Automatic functions been reached. Food will not be overheated and liquids will not boil over. The frying sensor function is available for all hotplates. T he automatic functions make cooking easy and always A u t o m a t i c f u n c t i o n s give you excellent results. -
Page 27: Suitable Cookware
Automatic functions Suitable cookware Sensors and special accessories Select the hotplate with the diameter that most closely The sensors measure the temperature of the saucepan matches that of the base of the cookware and place the or frying pan throughout the cooking process. This cookware in the centre of this hotplate. - Page 28 Automatic functions Temperature settings Temperature level Suitable for very low Preparing and reducing sauces, stewing vegetables and frying food in extra virgin olive oil, butter or mar- garine. Frying food in extra virgin olive oil, butter or margarine, e.g. omelettes. medium - low Frying fish and thick food such as meatballs and sausages.
- Page 29 Automatic functions Temperature ranges Setting the boiling point The point at which water starts to boil depends on the Cooking sensor func- Temperature Suitable for height of your home above sea level. You can change tion range the boiling point if water is boiling too strongly or not Heating, Keepting 60 - 70 °C e.g.
- Page 30 Automatic functions ¨ ▯ The cooking sensor function is made available once Press the symbol on the wireless temperature the temperature sensor has been connected to the sensor on the cookware. Once the wireless control panel correctly. temperature sensor has been detected, the default temperature of 95 °C lights up in the hotplate ▯...
-
Page 31: Recommended Dishes
Automatic functions Recommended dishes The following table shows a selection of dishes and is arranged by food type. The temperature and the cooking time depend on the amount, the condition and the quality of the food. Meat Automatic Function Temperature Total cooking time range from signal (mins) - Page 32 Automatic functions Egg-based dishes Automatic function Temperature Total cooking time range from signal (mins) Frying with a small amount of oil function Pancakes* Frying sensor function Omelette* Frying sensor function 3 - 6 Fried eggs Frying sensor function 2 - 4 2 - 6 Scrambled eggs Frying sensor function 4 - 9...
- Page 33 Automatic functions Potatoes Automatic function Temperature Total cooking time range from signal (mins) Boiling function Potatoes** Cooking sensor function 100 °C 30 - 40 Cooking in a pressure cooker function Potatoes** Cooking sensor function 115 °C 10 - 12 * Total time for each portion. Fry one after the other. ** Add the food right at the beginning.
- Page 34 Automatic functions Desserts Automatic function Temperature Total cooking time range from signal (mins) Simmering function Rice pudding* Cooking sensor function 85 °C 40 - 50 Porridge Cooking sensor function 85 °C 10 - 15 Compote** Cooking sensor function 85 °C 10 - 20 Chocolate pudding*** Cooking sensor function 85 °C 3 - 5 Frying with a large amount of oil function...
-
Page 35: Preparation And Maintenance Of The Wireless Temperature Sensor
Automatic functions Further Automatic function Temperature Total cooking time range from signal (mins) Heating/keep-warm function Food in jars and tins, e.g. goulash soup* Cooking sensor function 70 °C 10 - 15 Mulled wine** Cooking sensor function 70 °C Simmering function Milk** Cooking sensor function 85 °C * Add the food right at the beginning and stir frequently. -
Page 36: Declaration Of Conformity
Directive 2014/53/EU. A detailed RED Declaration of Conformity can be found online at www.gaggenau.com on the product page for your appliance under "Additional documents". Caution! Do not use metal objects to remove the battery. Do The logos and the Bluetooth®... -
Page 37: C Hildproof Lock
Childproof lock C hildproof lock A utomatic safety cut-out Y ou can use the childproof lock to prevent children from I f a hotplate operates for an extended period and no C h i l d p r o o f l o c k A u t o m a t i c s a f e t y c u t - o u t switching on the hob. -
Page 38: B Asic Settings
Basic settings B asic settings B a s i c s e t t i n g s Indicator Function Signal tones ‹¯ All signals are switched on.* ™‚ Œ Most of the signals are switched off. Time for selecting the hotplate †... -
Page 39: To Access The Basic Settings
Basic settings Setting automatic start ‘ Switched on.The ventilation system will start at the fan setting selected by the sensor.* ‚ ƒ „ ‚ ƒ „ Switched on. The ventilation system will start at fan setting ™‘ Œ Switched off. Set the sensor sensitivity for the ventilation system ‚... -
Page 40: Cookware Test
Cookware test Cookware test P ower manager T his function can be used to check the speed and Y ou can use the power manager to set the total power of C o o k w a r e t e s t P o w e r m a n a g e r quality of the cooking process depending on the the hob. -
Page 41: C Leaning
Cleaning Caution! C leaning Beware of causing surface damage Always wash new sponge cloths thoroughly before use. Warning – Risk of burns! C l e a n i n g The appliance becomes hot during operation. Allow the To ensure that the different surfaces are not damaged appliance to cool down before cleaning. -
Page 42: Components To Clean
Cleaning Components to clean Clean the hob each time you use it. This will prevent food remnants from becoming burned on. Do not clean the hob until the residual heat indicator has gone out. Remove boiled-over liquids immediately and do not allow any food remains to dry on. - Page 43 Cleaning ” ” — –– ” ’•‘¯ ®“ Insert the new activated charcoal filter. After power is turned off, lights. Close the drawer in the flat duct and lock all the closing elements. Hold symbol for at least 4 seconds until a beep Note: Make sure that all closing elements have sounds.
- Page 44 Cleaning Cleaning the metal mesh grease filters Press down on the two catches on either side of the container to separate the metal grease filter from Notes the container. – Do not use aggressive, acidic or alkaline cleaning products. – The metal grease filter can be cleaned in the dishwasher or by hand.
-
Page 45: Cleaning The Overflow Container
Cleaning ” ” — –– ” ’•‘¯ ®“ Twist knob After power is turned off, lights. The twist knob is best cleaned using lukewarm soapy Hold symbol for at least 4 seconds until a beep water. Do not use harsh or abrasive cleaning agents. Do sounds. - Page 46 Frequently Asked Questions (FAQ) F requently Asked Questions (FAQ) F r e q u e n t l y A s k e d Q u e s t i o n s ( F A Q ) Using the appliance Why can't I switch on the hob and why is the childproof lock symbol lit? The childproof lock is activated.
- Page 47 Frequently Asked Questions (FAQ) Cleaning How do I clean the hob? Using special glass-ceramic cleaning products will achieve the best results. We advise against using harsh or abrasive cleaning products, dishwater detergent (concentrated) or scouring pads. "Cleaning" You can find more information on cleaning and caring for your hob in the section entitled ~...
- Page 48 Trouble shooting Trouble shooting U sually, faults are small matters that are easy to T r o u b l e s h o o t i n g eliminate. Please read the information in the table before calling the after-sales service. Warning: Risk of electric shock! Incorrect repairs are dangerous.
- Page 49 Trouble shooting Fault/indicator or symbol Possible cause Solution ”‚ ”‡ The hotplate has overheated and has been Wait until the electronics have cooled down suffi- switched off to protect your work surface. ciently before switching the hotplate on again. ”‰ The hotplate has been operating continu- The automatic safety switch-off function has been "Automatic...
- Page 50 Customer service To book an engineer visit and product advice C ustomer service 0344 892 8988 Calls charged at local or mobile rate. O ur after-sales service is there for you if your appliance 01450 2655 C u s t o m e r s e r v i c e needs to be repaired.
Need help?
Do you have a question about the CV282110 and is the answer not in the manual?
Questions and answers