
Subscribe to Our Youtube Channel
Related Manuals for Gaggenau CV 282


Summary of Contents for Gaggenau CV 282
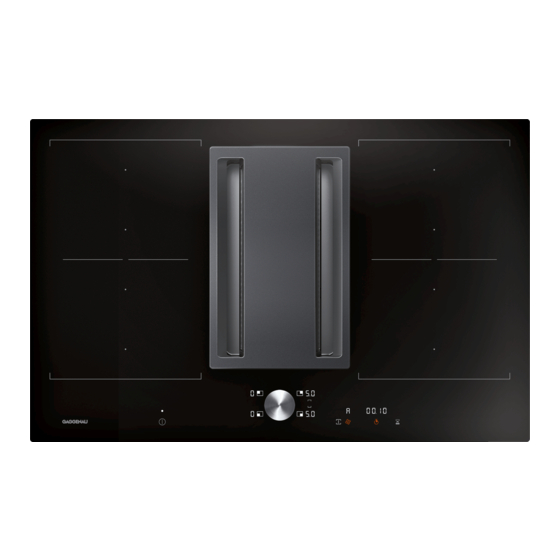
- Page 1 Instruction manual CV 282 Flex induction cooktop with integrated ventilation system...
-
Page 3: Table Of Contents
Table of contents e n I nstruction manual I ntended use T imer functions Cooking timer The short-term timer I mportant safety information Timer plus Stopwatch function C auses of damage B ooster function for pots E nvironmental protection Activating Saving energy Deactivating Environmentally-friendly disposal... - Page 4 F requently Asked Questions (FAQ) T rouble shooting C ustomer service Product number (E no.) and production number (FD no.) Additional information on products, accessories, replacement parts and services can be found at www.gaggenau.com and in the online shop www.gaggenau.com/zz/store...
-
Page 5: I Ntended Use
Intended use I ntended use Ensure that no small parts or liquids get into the appliance. R ead these instructions carefully. Only then This appliance may be used by children over I n t e n d e d u s e will you be able to operate your appliance the age of 8 years old and by persons with safely and correctly. -
Page 6: Important Safety Information
Important safety information Important safety information Warning – Danger of suffocation! Safe operation is possible only when the partial I m p o r t a n t s a f e t y i n f o r m a t i o n Packaging material is dangerous to children. - Page 7 Important safety information Risk of fire! Warning – Risk of electric shock! Fatty deposits in the grease filter may catch ▯ fire. Regularly clean the grease filter. Never Incorrect repairs are dangerous. Repairs ▯ operate the appliance without a grease may only be carried out and damaged filter.
-
Page 8: C Auses Of Damage
Causes of damage Warning – Risk of injury! C auses of damage When cooking in a bain marie, the hob and ▯ cooking container could shatter due to C aution! overheating. The cooking container in the C a u s e s o f d a m a g e –... -
Page 9: E Nvironmental Protection
Environmental protection Environmentally-friendly disposal E nvironmental protection Dispose of packaging in an environmentally-friendly manner. I n this section, you can find information about saving E n v i r o n m e n t a l p r o t e c t i o n energy and disposing of the appliance. -
Page 10: I Nduction Cooking
Induction cooking Some induction cookware does not have a fully I nduction cooking ferromagnetic base: ▯ If the base of the cookware is only partially A dvantages of induction cooking ferromagnetic, only the area that is ferromagnetic I n d u c t i o n c o o k i n g will heat up. - Page 11 Induction cooking Empty pans or those with a thin base Do not heat empty pans, nor use pans with a thin base. The hob is equipped with an internal safety system. However, an empty pan may heat up so quickly that the "automatic switch off"...
-
Page 12: G Etting To Know Your Appliance
Getting to know your appliance Note: Depending on the appliance model, individual G etting to know your appliance details and colours may differ. In this section, we will explain the indicators and controls. You will also find out about the various Y ou can find information on the dimensions and power G e t t i n g t o k n o w y o u r a p p l i a n c e Page 2... -
Page 13: The Control Panel
Getting to know your appliance The control panel Indicators/symbols Touch keys Ò Display cleaning protection ÿ Switch the appliance on and off Childproof lock ¨ Switch on the cooking sensor function ª Flex function activated Ú Switch on the frying sensor function «... -
Page 14: Residual Heat Indicator
Getting to know your appliance The hotplates Cooking zone Û Single cooking zone Use cookware that is a suitable size "Flex function" á See the section entitled ~ FlexZone "Induction cooking" Only use cookware suitable for induction cooking; see the section entitled ~ Residual heat indicator Circulating-air mode The air which is drawn in is cleaned by the... -
Page 15: B Efore Using For The First Time
Before using for the first time B efore using for the first time T wist-Pad with Twist knob P lease read the following information before using the T he twistpad is the control panel where you can use the B e f o r e u s i n g f o r t h e f i r s t t i m e T w i s t - P a d w i t h T w i s t k n o b appliance for the first time: twist knob to select the hotplates and heat settings. -
Page 16: O Perating The Appliance
Operating the appliance Setting a hotplate O perating the appliance Set the required hotplate using the twist knob. Heat setting 1 = lowest setting. T his chapter explains how to set a hotplate. The table O p e r a t i n g t h e a p p l i a n c e shows heat settings and cooking times for various Heat setting 9 = highest setting. -
Page 17: Switching The Ventilation System On And Off
Operating the appliance Switching off the hotplate Use the twist knob to select the required setting. The fan setting that is selected will be shown on the ‹ Select the hotplate and turn the twist knob until display panel. appears. The hotplate switches itself off and the residual heat indicator lights up. -
Page 18: Automatic Start
Operating the appliance Run-on function Switching off Touch the symbol. Note: The run-on function will only start if at least one of ‹ the cooking zones has been switched on for at least a Use the twist knob to select the fan setting minute. -
Page 19: Chef's Recommendations
Operating the appliance Chef's recommendations ▯ For healthier cooking results, oils and fats should not be heated to their smoke point. ▯ To brown food, fry small portions in succession. Recommendations ▯ Cookware may reach high temperatures while the ▯ Stir occasionally when heating up purees, creamy food is cooking. - Page 20 Operating the appliance Power level Cooking time (mins) Braising Rolled roasting joint 4 - 5 50 - 65 Pot roast 4 - 5 60 - 100 Goulash*** 3 - 4 50 - 60 Roasting/frying with little oil* Escalope, plain or breaded 6 - 7 6 - 10 Escalope, frozen 6 - 7 6 - 12 Chops, plain or breaded**...
-
Page 21: F Lex Function
Flex function As a single hotplate F lex function Using the entire cooking zone by connecting both hotplates. T he flexible cooking zone can be used as a single F l e x f u n c t i o n hotplate or as two independent hotplates, as required. -
Page 22: T Ransfer Function
Transfer function Notes T ransfer function – Move the cookware to a hotplate that is not switched on, which has not yet been preset and on which no other cookware has yet been placed. Y ou can use this function to transfer the settings of one T r a n s f e r f u n c t i o n –... -
Page 23: Professional Cooking Function
Professional cooking function Deactivating Professional cooking function ˆ ¬ To end the function immediately: Touch the symbol. ‹ ¬ Switch all hotplates to heat setting . The symbol Y ou can use the professional chef function to display lights up white. P r o f e s s i o n a l c o o k i n g f u n c t i o n the preset heat settings for each hotplate. -
Page 24: T Imer Functions
Timer functions Frying/cooking sensor function T imer functions If a cooking time has been programmed for a hotplate and the frying sensor or cooking sensor function is activated, the cooking time will begin to count down Y our hob has three timer functions: T i m e r f u n c t i o n s immediately, instead of once the selected temperature setting has been reached. -
Page 25: Timer Plus
Booster function for pots Timer plus B ooster function for pots Š If you press and hold the symbol for a few seconds before the audible signal ceases, the stopwatch is T his function allows large volumes of water to be heated activated. -
Page 26: B Ooster Function For Pans For Pans
Booster function Deactivating B ooster function for pans Select a hotplate. © Touch the symbol, turn the twist knob or select › T his function enables you to heat cookware faster than a different function. The display goes out. The B o o s t e r f u n c t i o n Š... -
Page 27: K Eep Warm Function
Keep warm function K eep warm function A utomatic functions Ü T his function is suitable for melting chocolate or butter T he automatic functions make cooking easy and always K e e p w a r m f u n c t i o n A u t o m a t i c f u n c t i o n s and for keeping food warm. -
Page 28: Types Of Automatic Functions
Automatic functions Types of automatic functions The table shows the various different function settings that are available for the automatic functions: The automatic functions are used to select the best cooking method for each kind of food. Automatic functions Temperature levels Cookware Availability Activating... -
Page 29: Sensors And Special Accessories
Automatic functions Functions and heat settings The table of automatic functions lists the cookware that is suitable for each function. Frying sensor function Sensors and special accessories You can use the frying sensor function to pan-fry food with a small amount of oil. The sensors measure the temperature of the saucepan or frying pan throughout the cooking process. - Page 30 Automatic functions Setting procedure Benefits Select the appropriate temperature level from the table. ▯ The hotplate only heats when necessary. This saves Set an empty item of cookware down on the cooking energy. Oil or fat will not overheat. zone. ▯...
- Page 31 Automatic functions ▯ Connecting the wireless temperature sensor to the Cooking in a pressure cooker: Follow the control panel manufacturer's recommendations. Continue You will need to connect the wireless temperature cooking for the recommended time once the sensor to the control panel before using the cooking audible signal has sounded.
-
Page 32: Recommended Dishes
Automatic functions Programming You can also activate the cooking sensor function via the wireless temperature sensor. Proceed as follows: The hob must be on. ¨ ▯ Set down the cookware and press the symbol on Attach the temperature sensor to the cookware; see the wireless temperature sensor. - Page 33 Automatic functions Meat Automatic function Temperature Total cooking time from level signal tone (mins) Frying with a little oil Escalope, plain Frying sensor function 4 6 - 10 Escalope, breaded Frying sensor function 4 6 - 10 Fillet Frying sensor function 4 6 - 10 Chops Frying sensor function 3...
- Page 34 Automatic functions Fish Automatic function Temperature Total cooking time from level signal tone (mins) Frying with a little oil Fish fillet, plain Frying sensor function 4 10 - 20 Fish fillet, breaded Frying sensor function 3 10 - 20 Prawns Frying sensor function 4 4 - 8 Scampi Frying sensor function 4...
- Page 35 Automatic functions Vegetables and pulses Automatic function Temperature Total cooking time level from signal tone (mins) Frying with a little oil Garlic Frying sensor function 2 2 - 10 Onions, braised Frying sensor function 2 2 - 10 Fried onions Frying sensor function 3 5 - 10 Courgettes Frying sensor function 3...
- Page 36 Automatic functions Potatoes Automatic function Temperature Total cooking time level from signal tone (mins) Frying with a little oil Fried potatoes (made from unpeeled boiled potatoes) Frying sensor function 5 6 - 12 Fried potatoes (made from raw potatoes) Frying sensor function 4 15 - 25 Potato pancakes Frying sensor function 5...
- Page 37 Automatic functions Soups Automatic function Temperature Total cooking time level from signal tone (mins) Poaching Instant creamy soups Cooking sensor func- 90 ºC 10 - 15 tion Boiling Home-made broths Cooking sensor func- 100 ºC 60 - 90 tion Instant soups Cooking sensor func- 100 ºC 5 - 10 tion...
- Page 38 Automatic functions Frozen products Automatic function Temperature Total cooking time level from signal tone (mins) Frying with a little oil Escalope Frying sensor function 4 15 - 20 Cordon bleu Frying sensor function 4 10 - 30 Poultry breast Frying sensor function 4 10 - 30 Chicken nuggets Frying sensor function 4...
- Page 39 Automatic functions Other Automatic function Temperature Total cooking time level from signal tone (mins) Poaching Heating milk Cooking sensor func- 85 ºC 3 - 10 tion Turn frequently. Stir frequently. Add the water after the signal tone. Add the food as soon as the water boils. Add the food after the signal tone.
-
Page 40: C Hildproof Lock
Childproof lock C hildproof lock A utomatic safety cut-out Y ou can prevent the hotplate from being switched on I f a hotplate operates for an extended period and no C h i l d p r o o f l o c k A u t o m a t i c s a f e t y c u t - o u t unintentionally. -
Page 41: W Ireless Temperature Sensor
Wireless temperature sensor Notes W ireless temperature sensor ‚ – Do not leave the pan with the silicone patch to soak soapy water for long periods of time. – If the silicone patch comes off, attach a new one. B efore you use the cooking sensor functions for the W i r e l e s s t e m p e r a t u r e s e n s o r first time, connect the wireless temperature sensor to the control panel. -
Page 42: Cleaning
Wireless temperature sensor ¨ Temperature sensor window Detection failed: Five beeps will sound. The symbol immediately changes from orange to white The sensor window must always be clean and dry. and the cooking sensor indicators on the cooking Proceed as follows: zones go out. -
Page 43: Declaration Of Conformity
Directive 2014/53/EU. A detailed RED Declaration of Conformity can be found online at www.gaggenau.com on the product page for appliance in the additional documents. The logos and the Bluetooth® brand are registered trademarks and property of Bluetooth SIG, Inc. -
Page 44: B Asic Settings
Basic settings B asic settings T he appliance has various basic settings. These basic B a s i c s e t t i n g s settings can be altered to suit your individual requirements. Indicator Function Signal tones ‹¯... -
Page 45: To Access The Basic Settings
Basic settings Set air recirculation mode or air extraction mode ‹ Air recirculation mode is set.* ™Š ‚ Air extraction mode is set. Setting automatic start ‘ Switched on.The ventilation system will start at the fan setting selected by the sensor.* ‚... -
Page 46: H Ome Connect
Home Connect Automatic registration in the home network H ome Connect You require a router that has WPS functionality. You can find information about this in the manual for your router. You need to be able to access your router. T his appliance is WLAN-enabled and settings can be H o m e C o n n e c t sent to the appliance via a mobile device. -
Page 47: Home Connect Settings
Home Connect Manual registration in the home network After successfully connecting, open the Home Connect app. Note: To log in to the home network (WiFi) manually, The app will now take a few seconds to search for you require the network name (SSID) and password your hob. - Page 48 Home Connect Deactivating WLAN Indicator/ Function symbol If WiFi has been activated, you can use the Home ‹¯ Connect functions. Wireless module switched on •’… ¥“† Note: In networked standby mode, your appliance Settings via app requires a maximum of 2 W. ‹””...
-
Page 49: Software Update
Home Connect ™š Use the twist knob to set the value to Open the basic setting ’‹‚ "Connect automatically", or •’… Touch the symbol repeatedly until the ’‹ƒ "Connect manually". ¥“† settings flash alternately. Follow the instructions in the section entitled ‹¯... -
Page 50: Remote Diagnostics
2014/53/EU. A detailed RED Declaration of Conformity can be found To reactivate the function, turn the twist knob. online at www.gaggenau.com on the product page for Notes appliance in the additional documents. –... -
Page 51: P Ower Manager
Power manager P ower manager C leaning Y ou can use the power manager to set the total power of Warning – Risk of burns! P o w e r m a n a g e r C l e a n i n g the hob. -
Page 52: Components To Be Cleaned Or Replaced
Cleaning Components to be cleaned or – Cleaners containing a large percentage of alcohol – Hard, scratchy sponges, brushes or scouring pads replaced Caution! Beware of causing surface damage Always wash new sponge cloths thoroughly before use. To ensure that the different surfaces are not damaged by using the wrong cleaning product, follow the instructions in the table. -
Page 53: Ventilation System
Cleaning Clean the hob with a damp dish cloth and dry it with a Replacing the activated charcoal filter or acoustics cloth to prevent limescale build-up. filter Activated charcoal filters trap the odour-causing Stubborn dirt is best removed with a glass scraper or compounds in cooking smells. - Page 54 Cleaning Insert two of the activated charcoal filters or Remove the ventilation grille. Remove the metal acoustics filters into the left and right of the grease filter. appliance and slide them forwards. Notes – Grease may accumulate in the bottom of the container.
-
Page 55: Cleaning The Overflow Container
Cleaning Wireless temperature sensor In the dishwasher: ▯ Do not clean the metal grease filter together with cookware if heavily soiled. Temperature sensor ▯ Place the metal grease filter in the dishwasher, Clean the temperature sensor with a damp cloth. Never leaving plenty of space around it. -
Page 56: F Requently Asked Questions (Faq)
Frequently Asked Questions (FAQ) F requently Asked Questions (FAQ) F r e q u e n t l y A s k e d Q u e s t i o n s ( F A Q ) Using the appliance Why can't I switch on the cooktop and why is the child lock symbol lit? The child lock is activated. - Page 57 Frequently Asked Questions (FAQ) Cookware Why is it taking so long for the cookware to heat up or why is it not heating up sufficiently despite being on a high heat setting? The cookware is too small for the hotplate that is switched on or it is not suitable for induction cooking. Read the information on the type, size and positioning of the cookware.
-
Page 58: T Rouble Shooting
Trouble shooting Warning – Risk of electric shock! T rouble shooting Incorrect repairs are dangerous. Repairs may only be carried out and damaged power cables replaced by one of our trained after-sales technicians. If the appliance is U sually, faults are small matters that are easy to T r o u b l e s h o o t i n g defective, unplug the appliance from the mains or switch eliminate. - Page 59 Trouble shooting Fault/indicator or symbol Possible cause Solution “‰ƒ‹ƒ The temperature sensor has overheated Wait until the temperature sensor has cooled down and the cooking zone has been switched sufficiently before activating the function again. off. “‰ƒ‹„ The temperature sensor has overheated If you are not using the temperature sensor, and all of the cooking zones have been remove it from the cookware and keep it away from...
-
Page 60: C Ustomer Service
Customer service C ustomer service O ur after-sales service is there for you if your appliance C u s t o m e r s e r v i c e needs to be repaired. We will always find an appropriate solution, also in order to avoid after-sales personnel having to make unnecessary visits.
Need help?
Do you have a question about the CV 282 and is the answer not in the manual?
Questions and answers