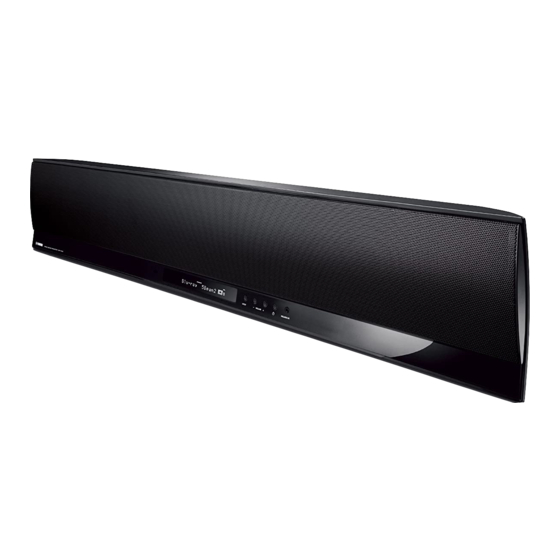
Yamaha YSP-4100 Owner's Manual
Yamaha ysp-4100: user guide
Hide thumbs
Also See for YSP-4100:
- Quick reference manual (9 pages) ,
- Service manual (135 pages) ,
- Additional information (2 pages)
Table of Contents
Advertisement
Quick Links
Advertisement
Table of Contents

Related Manuals for Yamaha YSP-4100


Summary of Contents for Yamaha YSP-4100
- Page 1 Digital Sound Projector Owner’s Manual English for North America...
- Page 2 The “ ” logo and “IntelliBeam” are trademarks of Yamaha Corporation. The “ ” logo and “Cinema DSP” are registered trademarks of Yamaha Corporation. The “ ” and “UniVolume” are trademarks of Yamaha Corporation. The “ ” and “yAired” are trademarks of Yamaha Corporation.
-
Page 3: Table Of Contents
INTRODUCTION Features... 4 General operation flow ... 5 Controls and functions... 6 Front panel ...6 Front panel display...7 Rear panel...8 Remote control ...9 PREPARATION Installation ... 10 Connections... 12 Before connecting components ...12 Connecting external components ...12 Connecting a subwoofer...13 Connecting the FM antenna ...14 Preparing the remote control ... -
Page 4: Introduction
Cinema DSP This unit employs the Cinema DSP technology developed by Yamaha Electronics Corp. that lets you experience movies at home with all the original dramatic sound impact. -
Page 5: General Operation Flow
Install this unit and connect to other components. “Installation” (page 10), “Connections” (page 12) Run AUTO SETUP to optimize the beam and sound settings. “AUTO SETUP (IntelliBeam)” (page 15) Play back a source. “Playback” (page 21). Change the playback method (surround/stereo), CINEMA DSP and/or beam modes settings. “Playback mode”... -
Page 6: Controls And Functions
Front panel 1 Remote control sensor Receives infrared signals from the remote control (page 14). 2 Power LED Lights up when the power is turned on (page 21). 3 Front panel display Shows information about the operational status of this unit (page 7). 4 INPUT Press repeatedly to switch between input sources. -
Page 7: Front Panel Display
Yamaha wireless subwoofer kit (SWK- W10) and this unit (page 13). RECV Lights up when a wireless connection is established between the Yamaha wireless transmitter for iPod (PDX- 50TX) and this unit (page 30). 7 Decoder indicators Light up when the corresponding decoder operates (page 21). -
Page 8: Rear Panel
8 IR IN terminal This is a control expansion terminal for commercial use only. 9 SYSTEM CONNECTOR terminal Use to connect a Yamaha subwoofer equipped with a SYSTEM CONNECTOR terminal to this unit (page 13). 0 RS-232C terminal This is a control expansion terminal for commercial use only. -
Page 9: Remote Control
Remote control AUX 1 AUX 2 HDMI 1 HDMI 2 HDMI 3 HDMI 4 iPod RADIO ENTER MOVIE MUSIC TAINMENT CINEMA DSP SURROUND STEREO ENTER TOP MENU MENU OPTION SETUP RETURN TV VOL VOLUME MUTE INPUT MUTE UNIVOLUME SUR. DECODE INTELLIBEAM CODE SET TUNING PRESET... -
Page 10: Preparation
You can mount both your TV and this unit on a commercially available table top stand or floor stand. Wall mount bracket This unit Dimensions when using SPM-K30 YSP-5100 24- 7x22 SPM-K30 (Option) 24- 7x22 YSP-4100 4- 7 4- 7 (mm) (mm) - Page 11 ■ Ideal installation condition : Object such as furniture Parallel installation (with 5Beam) Corner installation (with Stereo+3Beam) 40° to 50° ■ For better listening environment Example 1 Install this unit as close to the exact center of the wall as possible. Example 2 Install this unit so that the sound beams can be reflected off the walls.
-
Page 12: Connections
Before connecting components ■ Cables used for connections The symbols on the left of cable names (such as correspond with the symbols described in “Connecting your TV and Blu-ray disc player” (page 12) and “Connecting audio video components” (page 13). For audio and video HDMI cable For audio... -
Page 13: Connecting A Subwoofer
Composite video output VIDEO IN (VIDEO) Wireless connection You can make a wireless connection of your subwoofer by using the Yamaha wireless subwoofer kit (SWK-W10). About SWK-W10, refer to “Safety and Accessory Information” (separate booklet). See also: “WIRELESS SETUP” (page 39) SYSTEM... -
Page 14: Connecting The Fm Antenna
Connecting the FM antenna Connect the supplied FM antenna or your antenna to the FM ANTENNA jack on this unit. AUX 1 AUX 2 HDMI 1 HDMI 2 HDMI 3 HDMI 4 iPod RADIO ENTER MOVIE MUSIC TAINMENT CINEMA DSP SURROUND STEREO ENTER... -
Page 15: Changing Osd Language
Changing OSD language You can select an OSD language among English, German, French, Spanish, Italian, Dutch and Russian. Before operating the following steps, select this unit as the video input on your TV. Press and hold ISETUP until the “LANGUAGE SETUP” menu appears on your 3)LANGUAGE SETUP ENGLISH DEUTSCH... -
Page 16: Using Auto Setup (Intellibeam)
■ Assembling the supplied cardboard microphone stand AUX 1 AUX 2 HDMI 1 HDMI 2 HDMI 3 HDMI 4 iPod RADIO ENTER MOVIE MUSIC TAINMENT CINEMA DSP SURROUND STEREO ENTER ENTER TOP MENU MENU OPTION OPTION SETUP SETUP RETURN RETURN TV VOL VOLUME MUTE... - Page 17 Press G to select “AUTO SETUP” and then press GENTER. B)AUTO SETUP 1)BEAM+SOUND OPTIMZ 2)BEAM OPTIMZ ONLY 3)SOUND OPTIMZ ONLY [ ]/[ ]:Up/Down [ENTER]:Enter Press G to select “BEAM+SOUND OPTIMZ”, “BEAM OPTIMZ ONLY” or “SOUND OPTIMZ ONLY” and then press GENTER. AUTO SETUP PREPARATION &...
- Page 18 If the problem persists, contact the nearest authorized Yamaha service center for assistance. An internal system error occurred. Repeat the AUTO SETUP procedure.
-
Page 19: Using The System Memory
Using the system memory You can save the current beam and sound settings in the system memory of this unit. It is handy to save certain settings according to the varying conditions of your listening environment. For example, if there are curtains in the path of sound beams, the effectiveness of the sound beams will vary depending on whether the curtains are open or closed. - Page 20 Press G number to be loaded and then press GENTER. AUX 1 AUX 1 AUX 2 AUX 2 HDMI 1 HDMI 1 HDMI 2 HDMI 2 HDMI 3 HDMI 3 HDMI 4 HDMI 4 iPod iPod RADIO RADIO ENTER MOVIE MUSIC TAINMENT CINEMA DSP...
-
Page 21: Playback Features
PLAYBACK FEATURES Playing back sources This section describes how to playback source input from your external components. For details on your external components, refer to the owner’s manual supplied with each component. Press CPower (p) key to turn on this unit. Turn on external components (TV, Blu-ray disc player, etc.) connected to this unit. -
Page 22: Playback Mode
• When the stereo playback is selected, CINEMA DSP (page 22) and the decoder (page 24) become ineffective. Enjoying CINEMA DSP programs ISETUP This unit is equipped with a Yamaha CINEMA DSP Status Indicator DIGITAL + HD + MSTR... -
Page 23: Changing The Audio Output Method For Surround Playback
Press the desired ECINEMA DSP key. The CINEMA DSP category name appears in the front panel display and the CINEMA DSP indicator (page 7) lights up. While the category name is displayed, press the ECINEMA DSP key repeatedly. Each time you press the key, program switches. •... -
Page 24: Enjoying 2-Channel Sources In Surround Sound
3 Beam AUX 1 AUX 1 AUX 2 AUX 2 HDMI 1 HDMI 1 HDMI 2 HDMI 2 HDMI 3 HDMI 3 HDMI 4 HDMI 4 iPod iPod RADIO RADIO ENTER MOVIE MUSIC TAINMENT CINEMA DSP Outputs sound beams from the front right and left and SURROUND STEREO center channels. -
Page 25: Fm Tuning
The FM tuner of this unit provides the following two modes for tuning. • Frequency tuning mode You can tune into a desired FM station by searching or specifying its frequency. • Preset tuning mode You can preset the frequencies of FM stations by registering them to specific numbers, and later just select those numbers to tune into. -
Page 26: Sirius Satellite Radio™ Tuning
Press PPRESET number to which the station will be registered. When you select a preset number to which no station is registered, “Empty” appears. When you select a preset number to which any station has been already AUX 1 AUX 1 AUX 2 AUX 2 registered, the frequency of the station is displayed. -
Page 27: Activating Sirius Satellite Radio™ Subscription
• To ensure optimal reception of the SIRIUS Satellite Radio signals, the antenna of the SiriusConnect tuner must be placed at or near a window with no obstacles in the path to the sky. The orientation of the antenna for the best reception differs depending on the area. -
Page 28: Registering Sirius Satellite Radio™ Channels
■ Category Search mode Press PCATEGORY select the channel category. The CATEGORY indicator lights up on the front panel display during channel category selection. AUX 1 AUX 2 When you select the category, the first channel in the HDMI 1 HDMI 2 HDMI 3 category is selected. -
Page 29: Setting The Parental Lock
■ Clearing preset channels You can clear the assignments of preset SIRIUS Satellite Radio channels. Press IOPTION on the remote control. The option menu for “SIRIUS” appears on the front panel display. Press G repeatedly to select “Clear Preset” and then press GENTER. SIRIUS Preset number Channel name... -
Page 30: Displaying The Sirius Satellite Radio™ Information
INFO MEMORY SLEEP SLEEP By using the Yamaha wireless transmitter for iPod (PDX- 50TX/PDX-50BC), you can use the iPod/iPhone as a remote control and enjoy playback of your iPod/iPhone on this unit. About PDX-50TX/PDX-50BC, refer to “Safety and Accessory Information” (separate booklet). -
Page 31: Useful Features
Adjusting volume level automatically (UniVolume) This function adjusts the volume level of the TV so that it will not increase suddenly when whenever the contents being broadcast change (due to commercials, etc.). Press MUNIVOLUME. The UNIVOLUME indicator lights up on the front panel display. -
Page 32: Configuring Settings For Each Input Source (Option Menu)
Configuring settings for each input source (Option menu) You can configure various settings for each input source (TV, AUX1/2, HDMI1-4, iPod, FM and SIRIUS). AUX 1 AUX 1 AUX 2 AUX 2 Available menu items vary depending on the selected HDMI 1 HDMI 1 HDMI 2... -
Page 33: Settings
SETTINGS Customizing this unit (SET MENU) You can manually configure various settings for this unit in “SET MENU”. SET MENU items Menu Sub menu MEMORY LOAD SAVE AUTO SETUP BEAM+SOUND OPTIMZ BEAM OPTIMZ ONLY SOUND OPTIMZ ONLY MANUAL SETUP SETTING PARAMETERS BEAM ADJUSTMENT IMAGE LOCATION SOUND SET MENU... -
Page 34: Basic Set Menu Operation
Basic SET MENU operation Press ISETUP. AUX 1 AUX 1 AUX 2 AUX 2 HDMI 1 HDMI 1 HDMI 2 HDMI 2 HDMI 3 HDMI 3 HDMI 4 HDMI 4 iPod iPod RADIO RADIO ENTER MOVIE MUSIC TAINMENT CINEMA DSP SURROUND STEREO ENTER... - Page 35 Control range (from this unit): 1.8 m to 9.0 m (6.0 ft to 30.0 ft) Control range (from left wall): 0.6 m to 11.4 m (2.0 ft to 38.0 ft) FLAT TO WALL 0.6 to 11.4 m (2.0 to 38.0 ft) 1.8 to 9.0 m (6.0 to 30.0 ft) ■...
-
Page 36: Sound Set Menu
You can adjust this parameter only when “5BeamPlus2”, “5 Beam” or “3 Beam” is selected in “BEAM MODE” (page 23). • To adjust the volume of each channel, see “CHANNEL LEVEL” (page 37) Choices: OFF*, ON • Select “ON” to configure the sound direction. Adjust the image location for the front left channel (LEFT). -
Page 37: Sound Out Menu
■ DRC:Dynamic Range Control (Dynamic range control) SET MENU → SOUND SET MENU → DRC:Dynamic Range Control Use to adjust the dynamic range compression. Dynamic range is the difference between the smallest sound that can be heard above the noise of the equipment and the biggest sound that can be heard without distortion. -
Page 38: Input Menu
SOUND OUT (Sound output redirection) Use to redirect the output of audio signals. Audio output of all the channels switches simultaneously. Choices: SPEAKER*, PRE OUT • Select SPEAKER to output sounds from this unit. • Select PRE OUT to output audio signals from the PRE AUX 1 AUX 2 OUT jacks of this unit. -
Page 39: Display Menu
• Select ON to enable the iPod/iPhone interlock function. Group ID (Group ID) The group ID is used for wirelessly connecting Yamaha products that support yAired. To establish a connection among this unit, PDX-50TX and SWK-W10, set the group ID of these products to the same group. -
Page 40: System Configurations (Advanced Setup)
■ OSD SETUP (OSD setup) SET MENU → DISPLAY MENU → OSD SETUP Use to adjust the display position and select the background color of the OSD. OSD SHIFT (OSD shift) AUX 1 AUX 2 HDMI 1 HDMI 2 HDMI 3 Use to adjust the vertical position of the OSD. -
Page 41: Using An External Amplifier
R.INPUT POWER (Power-on by remote control input keys) Select whether or not to automatically turn on this unit when you select an input source on the remote control. To enable the function, select “R.INPUT PW: ON”. Choices: R.INPUT PW: OFF*, R.INPUT PW: ON AC ON STANDBY (Standby after AC on) Set this unit to the standby mode when the AC power is recovered after the power to this unit was lost temporally... -
Page 42: Controlling External Components
Note Depending on the external AV component you are using, you may not be able to operate the component with the remote control, even if AUX 1 AUX 1 AUX 2 AUX 2 a remote control code is set. In this case, operate the component using the supplied remote control. HDMI 1 HDMI 1 HDMI 2... -
Page 43: Appendix
Refer to the chart below when this unit does not function properly. If the problem you are experiencing is not listed below or if the instruction below does not help, set this unit to the standby mode, disconnect the AC power supply cable, and contact the nearest authorized Yamaha dealer or service center. ■ General... - Page 44 Problem Surround sound effects are insubstantial. Digital audio signals cannot be played back. (q DIGITAL indicator does not light up in the front panel display.) There is noise interference when a subwoofer is not connected to this unit. On-screen display does not appear.
- Page 45 Status message ACQUIRING The signal is too weak. UPDATE The SiriusConnect tuner is updating the channel list. The period of the subscription is end. FW UPDATING The SiriusConnect tuner is updating the firmware. SUB UPDATED The subscription information is updated. ■...
- Page 46 Problem Suddenly this unit produces sounds even though an iPod or iPhone is not connected. The iPod/iPhone interlock function does not work. Cause This unit is connected to another device. “iPod Interlock” is set to “OFF”. Remedy Change the group ID of this unit. Set “iPod Interlock”...
-
Page 47: Glossary
6-channel digital sound track, and is now rapidly gaining popularity in movie theaters around the world. DTS, Inc. has developed a home theater system so that you can enjoy the depth of sound and natural spatial representation of DTS digital surround in your home. -
Page 48: Specifications
Tweeters (YSP-5100 only) ...2.5 cm (1 in) balanced dome x 2 • Frequency response YSP-5100 ... 75 Hz to 20 kHz (-10dB, Stereo mode) YSP-4100 ... 90 Hz to 20 kHz (-10dB, Stereo mode) CONNECTIONS • Input Jacks TV, AUX 1 AUDIO IN... 2 pairs (Analog) TV, AUX 1 DIGITAL IN (FS=32 kHz, 44.1 kHz, 48 kHz, 64 kHz, 88.2 kHz, 96 kHz) -
Page 49: List Of Remote Control Codes
BASIC BASIC LINE ACCENT 14801, 16201 BAUR ACCUPHASE 16201 ACTION 14701, 14801, 15401 ACURA 00101 BAYSONIC ADDISON 01201, 01601, 08401 BEAUMARK ADMIRAL 01301, 02201, 05801, 14701, 14801, 15001, BECRESE 15201, 18601 BEKO ADVENT 09601 ADYSON 14701, 15401 15701, 16201 BELCOR 06801 BELL &... - Page 50 FORTRESS 01301, 15401 FRABA 15701, 16201 FRIAC 15701, 16201 FRONTECH 02201, 03301, 03701, 14801, 16101 FUJITSU 08701, 10401, 15401, 15701, 16201 FUJITSU GENERAL 15001 FUNAI 02501, 02701, 03701, 14801, 15401, 17201, 17701, 18201 FUTURE 15701, 16201 FUTURETECH 02701 GALAXI 15701, 16201 GALAXIS 15701, 16201 GALERIA...
- Page 51 18701 MORGAN’S 15701, 16201 OTTO-VERSAND14701, 14801, 14901 MOTOROLA 01301, 14701 PACIFIC 00301, 00901, 06701, PAEL 15401, 16101, 16301, PALLADIUM 04701, 05201, 14701, 16501, 16701, 17901, 18101 PALSONIC MULTITEC 15701, 16201 PANAMA MULTITECH 00101, 02701, 14701, 14801, 15401, 15701, PANASHIBA 16101, 16201 PANASONIC MUSIKLAND 15701, 16201 MYRYAD...
- Page 52 14701, 15001 WINSTON 02601, 16301, 17901 WINTERNITZ 14801 TNCI 00201 WORLDVIEW 14701, 14801 TOBO 14801 XRYPTON TOKAI 14701, 15701, 15901, YAMAHA 16201 TOSHIBA 00901, 02001, 02101, 06601, 07801, 08301, 10901, 12101, 12301, 13001, 13201, 16701, YAMAJI 18101, 18901 YAMISHI TOSONIC 15401...
- Page 53 00105, 04605 CITIZEN URBAN CONCEPTS 00105 COLORTYME 05402 VOXSON 05605 COLT WHITE WESTINGHOUSE COMBITECH 02702 08405 CRAIG XBOX 00305 YAMAHA 00005, 00705, 00805, CROWN 04305, 04405 CURTIS MATHES YUKAI 05605 ZENITH 00105, 01205, 02905, 07405 ZEUS 03305 CYBERNEX CYRUS DAEWOO...
- Page 54 05902, 06202, 06302, REGAL 06402, 06502 REMBRANDT 04703 WHITE WESTINGHOUSE RUNCO 01402, 05902 SAGEM XR-1000 00002, 00302, 01402, SAMSUNG 06302, 06402 SCIENTIFIC ATLANTA YAMAHA 00602, 05402, 05802, 06002, 06602 SHAW YAMISHI 01402 SIGNATURE SONY YOKAN 01402 YOKO 02002 STARCOM ZENITH...
- Page 55 02304, 05104, 06904 WISI HUMAX 03404, 05304 XSAT INVIDEO 03604 ZEHNDER 02604 ZENITH KATHREIN 00104, 00604, 00704, 01004, 01804, 05604 KREISELMEYER 00604 LABGEAR 06304 LOGIX 03804 LORENZEN 01104 MAGNAVOX 02004, 02204 MANHATTAN 01404, 03804, 04204 MARANTZ 00704 MEDIASAT 03104 MEMOREX 02204 METRONIC 00004...
-
Page 56: Index
■ Numerics 2-channel source surround decode ... 24 3Beam, beam mode ... 24 5.1ch beam mode ... 23 5.1-channel source 7.1-channel decode ... 24 5Beam, beam mode ... 23 5BeamPlus2, beam mode ... 24 7.1ch beam mode ... 24 ■ AC IN jack ... - Page 57 Movie. CINEMA DSP program ... 23 Multi-information display ... 7 MUSIC ENHANCER, SOUND SET MENU ... 37 Music Video. CINEMA DSP program ... 23 MUSIC. CINEMA DSP program ... 23 Music. CINEMA DSP program ... 23 MUTE key, Remote control ... 9 Muting audio output ...
- Page 58 © 2009 Yamaha Corporation All rights reserved. YC174B0/OMEN1...
Need help?
Do you have a question about the YSP-4100 and is the answer not in the manual?
Questions and answers