Table of Contents
Advertisement
Quick Links
Download this manual
See also:
Service Manual
Advertisement
Table of Contents

Related Manuals for Yamaha DV-S5550


Summary of Contents for Yamaha DV-S5550
- Page 1 DVD / VIDEO CD / CD PLAYER LECTEUR DE DVD DV-S5550 OWNER’S MANUAL MODE D’EMPLOI STANDBY...
-
Page 2: Important Safety Instructions
CAUTION RISK OF ELECTRIC SHOCK DO NOT OPEN CAUTION: TO REDUCE THE RISK OF ELECTRIC SHOCK, DO NOT REMOVE COVER (OR BACK). NO USER-SERVICEABLE PARTS INSIDE. REFER SERVICING TO QUALIFIED SERVICE PERSONNEL. This symbol warns the user that uninsulated voltage within the unit may have sufficient magnitude to cause electric shock. - Page 3 - and, most importantly, without affecting your sensitive hearing. Since hearing damage from loud sounds is often undetectable until it is too late, YAMAHA and the Electronic Industries Association's Consumer Electronics Group recommend you to avoid prolonged exposure from excessive volume levels.
- Page 4 YAMAHA will not be held responsible for any damage resulting from use of this unit with a voltage other than as specified.
-
Page 5: Table Of Contents
TruSurround and the SRS symbol are trademarks of SRS Labs., Inc. TruSurround technology is incorporated under license from SRS Labs., Inc. Manufactured under license from Dolby Laboratories. “Dolby” and the double-D symbol are trademarks of Dolby Laboratories. ”DTS” and ”DTS Digital Out” are trademarks of Digital Theater Systems, Inc. -
Page 6: Introduction
Introduction Thank you for purchasing this unit. This Owner’s Manual explains the basic operation of this unit. The region code is 1 for U.S.A and Canada models, 4 for the Australia model. Since it is usual for DVD movies to be released at different times in different regions of the world, all players have region codes and discs can have an optional region code. -
Page 7: Functional Overview
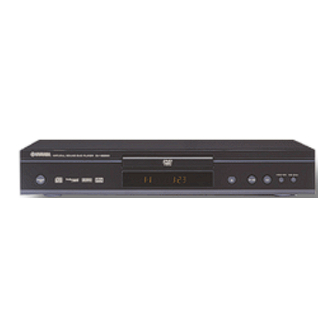
Front and Rear Panels STANDBY/ON – to turn this unit to standby mode or Disc Tray / OPEN/CLOSE – to open/close the disc tray B/ ; PLAY/PAUSE – to star t/interrupt playback STANDBY * Press button for about 2 seconds COAXIAL –... -
Page 8: Remote Control
Functional Overview Remote Control RETURN/RESUME – go back to previous menu / continue playback after play was stopped MENU – access menu of a DVD disc 1 2 3 4 – (left/right/up/down) select an item in the menu ENTER/OK – acknowledge menu selection –... -
Page 9: Preparation
General Notes on connections Depending on the equipment you wish to connect, there are various ways you could connect this unit. Possible connections are shown in the following drawings. Please refer to the manuals of other equipment as necessary to make the best connections. Do not connect this unit via your VCR. -
Page 10: Video Connections
Preparation Video Connections If your AV receiver has video output jacks, connect your receiver (and then to your TV) so that you can use one TV for several different video sources (LD, VCR etc.) by simply switching the input source selector of your receiver. The player has three types of video output jacks. -
Page 11: Inserting Batteries Into The Remote Control
Inserting batteries into the Remote Control Open the battery cover. Insert batteries (AA size) with the correct polarity as indicated by the + and - symbols inside the battery compartment. Close the cover. CAUTION – Remove batteries if they are exhausted or not to be used for a long time. -
Page 12: Menu Bars On Video Monitor
Preparation Menu Bars on video monitor Operations can be carried out directly via the multiple menu bars on the video monitor. The following functions are available via the menu bars. Pressing ON SCREEN repeatedly will toggle through menu bar 1, menu bar 2, menu bar 3 and menu bar OFF: Menu bar 1 From the left,... - Page 13 – Black level shift (NTSC output only) Select On for adapting the color dynamics to obtain richer contrasts. – Monitor Type Allows you to select the type of display device that is connected to this unit. In each device, a set of predefined Color settings is available or choose Personal that allows you to select the color settings according to your preference.
- Page 14 Preparation Sound – Digital output Digital output selection enables you to specify the type of digital output suitable for your receiver. Select All (default setting), if you had connected your COAXIAL / OPTICAL AUDIO OUT to a multichanel decoder receiver. Select PCM only if your receiver is not capable of decoding multichannel audio.
- Page 15 Language Selecting disc languages: Menu/Audio/Subtitle language This is to select the audio language, subtitle language and the language used in video monitor menus or DVD menus which will always be used for every disc to be played back. If the language selected is not available on the disc, the original language designated by each disc will be selected.
-
Page 16: Operation
Operation Basic Playback Press STANDBY/ON on the front panel. Press / (OPEN/CLOSE) on the front panel to open disc loading tray. Place the chosen disc in the tray, with the label facing up. Press / (OPEN/CLOSE) again to close the tray. READING appears on the front display, and playback starts automatically. -
Page 17: Playing A Video Cd
Playing a Video CD Video CDs may have one or more TRACKS, and TRACKS may have one or more INDEXES. To make easy and convenient access, you can move between TRACKS and INDEXES. Some Video CDs have Play Back Control (PBC), which is a predefined playback sequence stored on the disc (see Playback Control). -
Page 18: Special Vcd & Svcd Features
Operation Subtitles Select Z in the menu bar or press SUBTITLE on the remote control directly. Press SUBTITLE or 3/4 repeatedly to select the different subtitles. Special VCD & SVCD Features Playback Control (PBC) Load a Video CD with PBC and press PLAY. Go through the menu with the buttons indicated on the Video monitor until your chosen passage starts to playback. - Page 19 DVD VCD Slow Motion Select in the menu bar and press 4. Playback will pause. Use 1/2 to select the required speed: –1, –1/2, –1/4 or –1/8 (backward), or +1/8, +1/4, +1/2 or +1 (forward). Select 1 or press PLAY to play the disc at normal speed again.
- Page 20 Operation Shuffle This shuffles the playing order of chapters within a title, if the title has more than one chapter. Press SHUFFLE during playback. SHUFFLE appears on the front display for about two seconds. To return to normal playback, press Shuffle again. This shuffles the playing order of tracks within a disc , if the disc has more than one tracks.
- Page 21 Storing titles/tracks Press 3/4 to select Title/Track. Use 2 and 1 to select the require title/tracks. Press ENTER/OK to store the entire selected title/tracks. The title number will be added to the list of selections. Storing chapters/indexes Press 3/4 to select Chapter/Index. Use 2 and 1 to select the required chapter number.
-
Page 22: Mp3 Disc Features
Operation MP3 Disc Features Support following MP3-CD formats (ISO9660 format): Max. 30 characters (file names or directory) Max. nested directory is 8 levels The max. album (directory) number is 32 Supported VBR bit-rate Supported sampling frequencies for MP3 disc are: 32 kHz, 44.1 kHz, 48 kHz Supported Bit-rates of MP3 disc are: 32, 64, 96, 128, 192, 256 (kbps) Following formats can’t be supported... -
Page 23: Access Control
Child Lock Activating/deactivating the Child Lock When disc playback is stopped, select Access control in the User Preference Settings menu using 3/4. Enter a 4-digit code of your own choice twice. Move to “Child lock” using 3/4. Move to Ç / É using 2. Select Ç... -
Page 24: Parental Control Disclaimer
On this basis, YAMAHA cannot guarantee the functioning of the parental control system and denies any liability associated with unintended watching of disc content. -
Page 25: Troubleshooting
Refer to the chart below when this unit does not function properly. If the problem you are experiencing is not listed below or if the instruction below does not help, set this unit to the standby mode, disconnect the power cord, and contact the nearest authorized YAMAHA dealer or service center. -
Page 26: Specifications
Specifications PLAYBACK SYSTEM DVD Video DVD+RW DVD+R Video CD and SVCD CD (CD-R and CD-RW) MP3 CD TV STANDARD (PAL/50Hz) (NTSC/60Hz) Number of lines Playback Multistandard VIDEO PERFORMANCE Video output 1 Vpp into 75 ohm S-Video output Y: 1 Vpp into 75 ohm C: 0.3 Vpp into 75 ohm Component video output Y: 1 Vpp into 75 ohm Black Level Shift... - Page 27 YAMAHA ELECTRONIQUE FRANCE S.A. RUE AMBROISE CROIZAT BP70 CROISSY-BEAUBOURG 77312 MARNE-LA-VALLEE CEDEX02, FRANCE YAMAHA ELECTRONICS (UK) LTD. YAMAHA HOUSE, 200 RICKMANSWORTH ROAD WATFORD, HERTS WD1 7JS, ENGLAND YAMAHA SCANDINAVIA A.B. J A WETTERGRENS GATA 1, BOX 30053, 400 43 VÄSTRA FRÖLUNDA, SWEDEN YAMAHA CORPORATION YAMAHA MUSIC AUSTRALIA PTY, LTD.
Need help?
Do you have a question about the DV-S5550 and is the answer not in the manual?
Questions and answers