Table of Contents
Advertisement
Quick Links
Advertisement
Table of Contents

Related Manuals for CCM Roadster 2024


Summary of Contents for CCM Roadster 2024
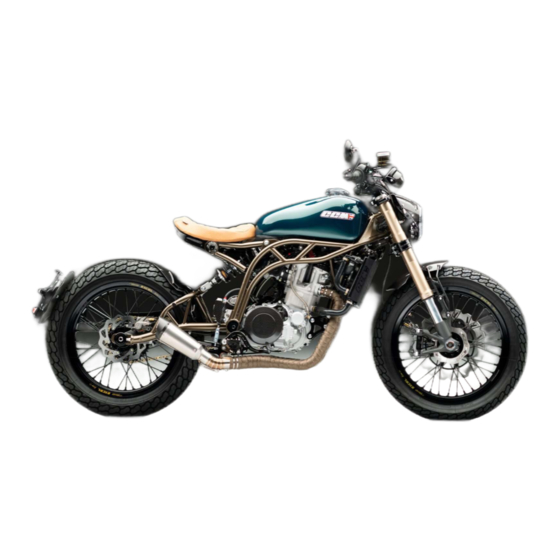
- Page 1 OWNERS MANUAL 2024 Roadster...
- Page 3 CCM Spitfire Series Motorcycle OWNER’S MANUAL Issue 1 25/01/24 All rights reserved. Any reprinting or unauthorized use without the written permission of CCM Motorcycles is expressly prohibited...
-
Page 4: Table Of Contents
How To Enrol In The Warranty Scheme Operating Controls ........12 ............47 Engine ..........37 Ignition System ........12 Ccm Customer Contact Details ....47 Fuel ........... 37 Right Handlebar Switch Gear ..... 13 Ccm Contact Address ......47 Engine Oil .......... 37 Left Handlebar Switch Gear .... - Page 5 The high safety standards of CCM motorcycles are maintained by constant development of designs, equipment and accessories. Due to this, your motorcycle may differ from the information supplied in this manual. CCM cannot entirely rule out errors and omissions. We hope you can appreciate that no claims can be entertained based on the data,...
-
Page 6: Controls & Instruments
Controls & Instruments. Instrument panel... -
Page 7: External Trip Switch
EXTERNAL TRIP SWITCH The external trip switch is found on the left-hand side of the handlebars next to the clutch master cylinder. MAIN MENU SELECTION – UP BUTTON... -
Page 8: Setting Screen Switching Description
SETTING SCREEN SWITCHING DESCRIPTION... -
Page 9: Clock Settings
CLOCK SETTINGS... -
Page 10: Unit Setting (Temperature, Speed)
UNIT SETTING (TEMPERATURE, SPEED) -
Page 11: Backlight Settings
BACKLIGHT SETTINGS... -
Page 12: Tyre Circumference Settings
TYRE CIRCUMFERENCE SETTINGS The tyre circumference must always match the table below for the correct tyre size fitted to the motorcycle. The sensor point must always be set to 01p. -
Page 13: Speed Warning Setting
SPEED WARNING SETTING... -
Page 14: Motor Oil Maintenance Settings
MOTOR OIL MAINTENANCE SETTINGS... -
Page 15: Operating Controls
Operating Controls Ignition system Ignition is toggled on and off by holding the wireless key fob against the receiver area (1) below the left of WARNING! the tank. Never activate the ignition lock whilst the vehicle is moving as the electrical systems will be switched off, which may result in loss of control or an accident. -
Page 16: Right Handlebar Switch Gear
Right Handlebar Switch gear To start engine, ensure ignition is in the “on” condition with the dashboard illuminated and the bike is in neutral. To turn the engine off, press and hold the “KILL” button (1). To start the engine, press and hold the “START”... -
Page 17: Left Handlebar Switch Gear
Left Handlebar Switch Gear 1. Passing light Depress to temporarily illuminate the high-beam headlight. 2. High-beam/low-beam control Depress the beam control button to illuminate the high-beam headlight (the button will remain depressed while the high-beam is illuminated and the BLUE tell-tale warning illuminates on the instrument display). -
Page 18: Steering Lock
Steering Lock The steering lock is a two position, key operated lock, located on the right-hand side of the headstock. WARNING! To engage the steering lock, remove the steering lock cover (1) so that the steering lock is accessible, turn Never operate the steering lock while the handlebars fully left, insert the key, turn the key anti-clockwise to stop, press key into lock, turn the key clockwise vehicle is moving. -
Page 19: Foot Controls
Foot Controls Brake Pedal Apply downwards pressure to engage rear brake only. Gear Lever Gear Gear Gear Gear Gear Neutral Gear... -
Page 20: Side Stand
Side stand The side stand is an “always up” and should automatically spring into the “up” condition when it becomes unloaded. When parking the motorcycle using the side stand, turn the handlebars to the left and ensure side stand is securely in the “down position” before releasing. It is advised that the motorcycle is left in first gear when parked. -
Page 21: Fuel Tank
To close the fuel tank cap Fuel Tank To open the fuel tank cap Insert fuel cap and turn clockwise until stop. Press the fuel cap down and rotate anti- Note: Ensure the rubber seal sits flush with clockwise until stop then release. This will mating surface. -
Page 22: Before Riding
Riding Information down your reflexes. Medication can exacerbate Do not allow the engine to idle for an unnecessary these effects. length of time. Before riding Do not ride your motorcycle after consuming Mounting the bike alcohol, drugs and/or medication. ... -
Page 23: Engine Rpm
(see Technical Information). this limit are logged in the control unit's memory. Apply the brakes in good time. CCM refuses to accept liability for engine damage Tyres if engine-revolution excursions above this limit New tyres have a smooth surface. This must be are stored in the control unit's memory. -
Page 24: Pre-Ride Checks
Check vehicle for oil leaks. If signs of leaking fluid are seen do not Tyres: ride the motorcycle and seek professional advice from the CCM Visually inspect tyres for splits or damage. Replace if necessary. Services team. See Service Information for more details. - Page 25 Check vehicle for signs of coolant leaks. If signs of leaking fluid are Fixings: Visually check all fixings for looseness and damage. seen do not ride the motorcycle and seek professional advice from the CCM Aftersales Team. Suspension: Check front forks for smoothness of operation. Bodywork fixings: ...
-
Page 26: Motorcycle Storage
Motorcycle Storage Short term Always store your motorcycle in a cool, dry place and if necessary, protect it against dust with a porous cover. Always ensure the motorcycle is dry and the engine has fully cooled before covering. Long term Before storing your motorcycle for an extended period of time: ... -
Page 27: Maintenance
Maintenance Running In To ensure the best performance and reliability of your motorcycle, it is important that the following running in procedure is followed. Failure to comply may result in warranty invalidation. At all times; • Do not use high engine speed when engine is cold. •... -
Page 28: Service Information
If the engine oil level is too low, top up with new oil. If the engine oil level is too high, have the oil level corrected by a CCM Approved Remove the oil sump plugs (1&2) and allow oil to drain into drain pan. - Page 29 Run the engine until the fan kicks in then for a further one minute to ensure it is at the correct operating temperature. Check the oil level in the inspection window and adjust if necessary. Always check for signs of leaks after performing an oil change and do not ride the motorcycle if anything is seen.
- Page 30 Checking brake-fluid level Coolant A low fluid level in the brake reservoir can allow air to penetrate the brake Risk of burns from escaping coolant! system. The hot cooling system is pressurised. This significantly reduces braking efficiency. Allow the coolant to cool down before opening the radiator cap. To check level, turn the handlebars to a straight-ahead position and hold Make sure the ground is flat and level, hold the motorcycle vertical.
- Page 31 Wheels and tyres Lubricate the drive chain AT LEAST every 500 miles. Checking tyre tread depth Lubricate the chain more frequently if the motorcycle is ridden in wet, dusty or Your motorcycle's handling and grip can be impaired even before the tyres wear dirty conditions.
- Page 32 Air filter The batteries charge state can be tested by holding the TEST button on top of The cone style air filter should be replaced at the intervals specified in the the battery. periodic maintenance chart. Replace the air filter element more frequently if you are riding in unusually wet or dusty areas.
- Page 33 Fuses The fuses are located under the fuel tank. 5 are in a bank and 1 is on its own as To remove the tank, first remove the seat, remove the 2 bolts (1) and slide the an overall main fuse attached to the starter solenoid unit (with a spare also tank backwards.
-
Page 34: Suspension
Suspension Rear Suspension YSS Rear Suspension Unit All Models of the spitfire range have suspension options. Rebound adjuster. Standard option consists of Marzocchi front forks and YSS rear shock. Upgrade option can be either a Ohlins shock or full Ohlins forks and shock. Standard Factory setting can be found on the following table. - Page 35 Front Suspension Ohlins front forks Marzocchi Front Forks Preload Compression Rebound Compression Rebound The compression and rebound can be adjusted by turning the middle adjuster with a flat screwdriver. The Ohlins front forks adjust in the same way as the Marzocchi forks, a 2.5mm Allen key is used to adjust the compression and rebound &...
-
Page 36: Scheduled Maintenance
From 14500 miles, carry out all maintenance items every 3500 miles or annually, whichever occurs first. All items should be performed by the CCM Services Team as special technical skills are required. It is important that the scheduled maintenance is carried out by an approved provider to ensure your motorcycles warranty is valid. - Page 37 Odometer Reading (Miles) Item Annual Check 4000 7500 11000 14500 Ignition System I/A/L I/A/L I/A/L I/A/L I/A/L I/A/L Spark Plugs ✓ ✓ ✓ ✓ ✓ ✓ Cooling System I/A/L I/A/L I/A/L I/A/L I/A/L I/A/L Cooling System ✓ ✓ ✓ ✓ ✓...
- Page 38 Odometer Reading (Miles) Item Annual Check 4000 7500 11000 14500 Steering I/A/L I/A/L I/A/L I/A/L I/A/L I/A/L &Suspension Steering – Free ✓ ✓ ✓ ✓ ✓ ✓ Movement Forks – Leaks/Smooth ✓ ✓ ✓ ✓ ✓ ✓ Operation ✓ ✓ ✓...
- Page 39 Odometer Reading (Miles) Item Annual Check 4000 7500 11000 14500 General I/A/L I/A/L I/A/L I/A/L I/A/L I/A/L Full Bike Fastener ✓ ✓ ✓ ✓ ✓ ✓ Inspection Replace Chain/ ✓ ✓ ✓ ✓ ✓ ✓ Sprockets/ Tyres/ Cables (If required) ✓...
-
Page 40: Technical Information
Motul 7100 5W-30/40 100% Synthetic CCM recommends not using oil additives as they can have a detrimental effect on clutch operation. Please do not hesitate to contact CCM Aftersales Team if you have any questions relating to the choice of a suitable engine oil for your motorcycle. -
Page 41: Transmission
Transmission Gearbox Type constant mesh gear type, 6-speed gearbox, integrated into engine block Gear Transmission Ratio 2.615 (13:34 teeth) Gear Transmission Ratio 1.812 (16:29 teeth) Gear Transmission Ratio 1.350 (20:27 teeth) Gear Transmission Ratio 1.091 (22:24 teeth) Gear Transmission Ratio 0.957 (23:22 teeth) Gear Transmission Ratio 0.880 (25:22 teeth) -
Page 42: Brake System
Brake System Recommended fluid (normal use) DOT 4 Recommended fluid (hot climate / intense use) DOT 5.1 Clutch System Recommended fluid SAE10 Mineral Hydraulic clutch fluid Tyre Pressures Roadster Front Rear Tyres Front Tyre Mitas H-18 130/80-19 71H Front Inner Tube Mitas 577001 Roadster Rear Tyre... -
Page 43: Ignition System
Ignition System Spark Plugs NGK CR8EB Lighting Headlight low beam LED 12V Rear side light LED 12V Brake light LED 12V Indicator lights LED 12V Dimensions Dimension (mm) Roadster Overall Length 2200 Overall Height (excl. mirrors) 1200 Seat Height Wheelbase 1430 Ground Clearance Vehicle Mass... -
Page 44: Tightening Torque Figures
Tightening Torque Figures Handlebar & Controls Fixing Thread size Notes Handlebar Riser Mount M10 x1.25 Install using Loctite 270 Upper Handlebar Clamp M8 x1.25 Grease Steering Stem Clamp Bolt M8 x1.25 Grease Clutch Lever to Handlebar M6 x1 Front Brake Lever to M6 x1 Handlebar Throttle Twist Grip to... - Page 45 Front Suspension Fixing Thread size Notes Lower Triple Clamp M8 x1.25 Grease Upper Triple Clamp M8 x1.25 Grease Ohlins Top Yoke to forks M8 x1.25 Grease Ohlins Bottom Yoke M8 x1.25 Grease Rear Suspension Fixing Thread size Notes Swinging arm pivot M16 x1.5 Lower Shock Mount M10 x1.25...
- Page 46 Bodywork Fixing Thread size Notes Seat Mount Bolts M6 x1 Seat mount Nut M8 x1.25 Headlight cowl M5 x0.8 Install using Loctite 243 Carbon mudguard / M5 x0.8 Install using Loctite 243 Hugger to Billet Lubrication system Fixing Thread size Notes Oil Drain Screw M14 x1.5...
- Page 47 Wheels & Brakes Fixing Thread size Notes Front Wheel Spindle Nut M24 x2 Front Wheel Spindle M6 x1 Clamp Bolts Front Brake Caliper Fixing M10 x1.25 Install using Loctite 243 Bolts Front Brake Disc M6 x1 Install using Loctite 243 Rear Wheel Spindle Nut M20 x 1.5 Install using Nord Lock Washer...
- Page 48 Standard Dimension If not otherwise specified, standard tightening torques for bolt sizes...
-
Page 49: Cleaning
Cleaning Clean the motorcycle with COLD water and a mild detergent after the motorcycle has cooled down. Apply a corrosion protection spray to all metal parts to prevent Proper and frequent cleaning is a vital part of correctly maintaining your corrosion. -
Page 50: Warranty
+44 (0) 1204 544 930 The two-year cover is provided free of charge but requires your motorcycle and personal details to be held by CCM Motorcycles. To check or change any of these details, please contact the CCM Aftersales team. - Page 51 Any problem experienced is not notified to the CCM Services Team within a reasonable time. The owner should take all possible steps to prevent further damage as soon as any problem is apparent. Such consequential damage may not be covered by this warranty.
-
Page 52: How To Keep Your Warranty Valid
Have your motorcycle serviced by an Authorised CCM Service Centre, according to the schedule shown in this booklet. Having your motorcycle serviced regularly will also keep it at the peak of its performance, as well as enabling CCM to detect any early signs of faults and rectify them, before they cause you a problem. -
Page 53: What Is Covered
/ off road riding, and abrasion to any painted or decorative surfaces. The warranty does not cover the cost of recovery or transportation of the motorcycle to or from the authorised CCM Technician, nor expenses incurred while the motorcycle is off the road for warranty repairs, or any other consequential loss. -
Page 54: Miscellaneous
General Data Protection Regulations (GDPR) CCM will use warranty registration information to contact you directly should the need arise, for example in the event of a safety recall. CCM may also use warranty registration information to contact you directly to advise you about new CCM products or promotions. However, if you prefer not to receive any communication, please write to CCM Motorcycles.
Need help?
Do you have a question about the Roadster 2024 and is the answer not in the manual?
Questions and answers