Table of Contents
Advertisement
Quick Links
Advertisement
Table of Contents

Subscribe to Our Youtube Channel
Related Manuals for Zline Touchstone RBSPO-24


Summary of Contents for Zline Touchstone RBSPO-24
- Page 1 Installation and User Manual...
- Page 2 ZLINE Kitchen and Bath provides Attainable Luxury, where the kitchen and bath of your dreams is never out of reach. Through our unique designs and unparalleled quality, we’re dedicated to providing you an elevated experience in the heart of your home. With an endless selection of...
- Page 3 ZLINE is fueled by a passion for innovation; A relentless pursuit of bringing the highest end luxury designs and professional features into everyone’s homes. Because we continually strive to improve our products, we may change specifications and designs without prior notice.
-
Page 4: Table Of Contents
TABLE OF CONTENTS IMPORTANT SAFETY INFORMATION ......1 BEFORE INSTALLATION ......... . 5 Product Specifications . -
Page 5: Important Safety Information
IMPORTANT SAFETY INFORMATION • IMPORTANT: Read all instructions before using this appliance. Use this appliance only for its intended purpose as described in this manual. Always exercise basic safety precautions, as described below. After reading this manual, store it in an accessible place where users and services can easily reference it. - Page 6 IMPORTANT SAFETY INFORMATION WARNING • Installation and service should be performed by a qualified installer. The appliance should not be adjusted or repaired by anyone except qualified service personnel. Attempting to perform these yourself could result in fire, malfunction, or injury. •...
- Page 7 • Disconnect the unit if it is behaving abnormally, and do not reconnect until the situation is corrected. If normal troubleshooting measures do not work, contact ZLINE at 1-614-777-5004 for assistance.
- Page 8 The plug should always be accessible. • Never use an appliance with a damaged cooling system. If system is damaged upon arrival, contact ZLINE at 1-614-777-5004 DISPOSAL The appliance cannot be treated as normal domestic trash and must be disposed of at a collection point for recycling electric and electronic appliances.
-
Page 9: Before Installation
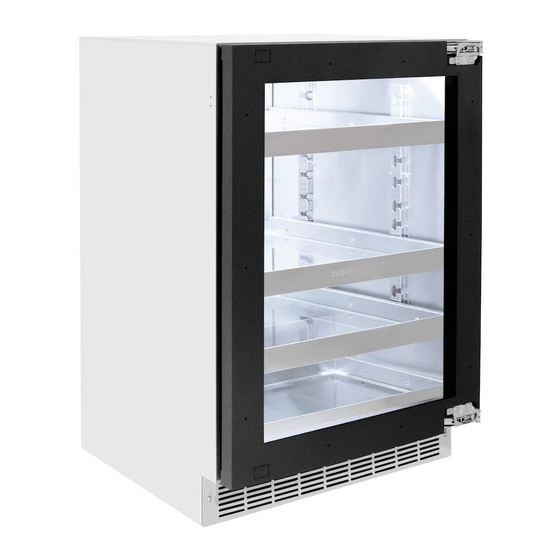
BEFORE INSTALLATION PRODUCT SPECIFICATIONS Model RWDO-GS-24 RWDPO-24 Dual-Zone Dual-Zone Description Stainless Steel Glass Door Panel-Ready Glass Door Weight 169 lb (77 kg) 161 lb (73 kg) Voltage/Frequency/Max Amp Draw 1 15-120VAC/60Hz/15A 23 7/8" W × 23 3/16" D × 34" H *Product Dimensions 606 mm W x 589 mm D x 864 mm H Ambient Temperature Range... - Page 10 BEFORE INSTALLATION PRODUCT SPECIFICATIONS Model RBSO-GS-24 RBSPO-24 Beverage Center Beverage Center Description Stainless Steel Glass Door Panel-Ready Glass Door Weight 154 lb (70 kg) 147 lb (67 kg) Voltage/Frequency/Max Amp Draw 1 15VAC/60Hz/15A 23 7/8" W × 23 3/16" D × 34" H *Product Dimensions 606 mm W x 589 mm D x 864 mm H Ambient Temperature Range...
- Page 11 BEFORE INSTALLATION PRODUCT SPECIFICATIONS Model RBSO-ST-24 Description Refrigerator Stainless Steel Solid Door Weight 139 lb (63 kg) Voltage/Frequency/Max Amp Draw 1 15VAC/60Hz/15A 23 7/8" W × 23 3/16" D × 34" H *Product Dimensions 606 mm W x 589 mm D x 864 mm H Ambient Temperature Range 50 °F–1 10 °F (10 °C–43 °C) Operating Temperature Range...
-
Page 12: Provided Materials
BEFORE INSTALLATION PROVIDED MATERIALS IMAGE DESCRIPTION Foot adjustment wrench (1) Anti-tip brackets (2) Screws for anti-tip brackets (6) Door limiting pins (2) *Screws for custom panel installation (10) Decorative plugs (4) Allen key (1) * Not needed for stainless steel door models; see page 13 for panel-ready information. MATERIALS NEEDED IMAGE DESCRIPTION... -
Page 13: Installation
(ground) prong from the power cord. Any questions concerning power and/or grounding should be directed toward a certified electrician or an authorized ZLINE service provider. • While appliances are approved for outdoor use, it’s recommended to avoid installing units in overly moist or humid areas. -
Page 14: Built-In Cabinet Instructions
INSTALLATION BUILT-IN CABINET INSTRUCTIONS While this unit is designed for both built-in and freestanding installation, built-in installation is recommend to reduce risk of tipping. If you plan to use this unit in a built-in application, please follow the cabinet cutout requirements shown below. Depth Height Width... -
Page 15: Installing The Anti-Tip System
INSTALLATION INSTALLING THE ANTI-TIP SYSTEM (BUILT-IN INSTALLATION ONLY) 1. With built-in installations, once you’ve determined the appropriate height and have ensured the appliance is level, position the unit at the front of the cutout to install the anti- tip system, which is necessary to reduce risk of tipping. 2. -
Page 16: Reversing The Door Swing
INSTALLATION REVERSING THE DOOR SWING This appliance has the capability of the doors opening from either the left or right side. The unit is delivered to you with the doors opening from the left side (Figure 1). Should you desire to reverse the opening direction (Figure 2), follow the instructions below. -
Page 17: Integrated Door Panel Installation
INSTALLATION INTEGRATED DOOR PANEL INSTALLATION RWDPO-24 and RBSPO-24 models are manufactured without door panels and handles. To install a custom integrated panel around the glass door, follow the instructions and dimensions below and on the next page. NOTE: Custom handles need to be affixed to the panel prior to installing the panel onto the appliance (see page 15). - Page 18 INSTALLATION INTEGRATED DOOR PANEL INSTALLATION INSTRUCTIONS 1. Remove the door from the unit as outlined in the steps on page 12. 2. By hand, remove the rubber door seal to access the panel mounting holes. Set the seal aside and place the door face side up on a stable surface. 3.
-
Page 19: Handle Installation
Prior to installing a custom integrated panel around the glass door on RWDPO-24 and RBSPO-24 models, handle(s) need to be affixed to the panel first. If you wish to install a ZLINE Autograph Edition handle onto your custom panel, reference the measurements displayed in the diagrams below regarding where to affix mounting studs. -
Page 20: Electrical Connection
INSTALLATION ELECTRICAL CONNECTION • For your personal safety, this appliance must be properly grounded. In the event of an electrical short circuit, grounding reduces the risk of shock by providing an escape wire for the electric current. • This appliance is equipped with a cord having a grounding wire and a grounded plug. For standard indoor installation, it’s recommended that a dedicated electrical circuit suitable for a NEMA 5-15 outlet serving only your appliance be used;... -
Page 21: Operation
OPERATION PRIOR TO OPERATING THE UNIT • While this unit is capable of operating in ambient temperatures between 50 °F–1 10 °F (10 °C–43 °C), it is recommended you install the appliance in a place where the ambient temperature is generally between 60 °F–90 F (16 °C–32 °C). •... - Page 22 Defrosting Temp unit Lighting Defrosting Temp unit Lighting OPERATION TEMPERATURE SETTING Press “UP” or “DOWN” once to start the temperature setting. The current temperature setting will start flashing. Then press “UP” or “DOWN” to increase or decrease the temperature setting by 1 °F/ °C intervals. Settings will stop at the minimum and maximum levels once you reach them.
- Page 23 Upper Zone OPERATION Upper Zone Lower Zone Upper Zone Lower Zone TEMPERATURE DISPLAY SETTING Upper Zone Press and hold “UP” for 6 seconds to toggle the panel display temperature between the setting temperature and the real-time temperature of the cabinet interior. The factory preset Lower Zone temperature display mode is the setting temperature.
- Page 24 OPERATION AUTOMATIC DEFROSTING The automatic defrosting symbol will illuminate, as seen below. During automatic defrosting, the unit’s compressor stops for 30 minutes for every 6 hours of the system running. SABBATH MODE Press and hold “UP” and “LIGHT” for 6 seconds to toggle on/off “Sabbath mode.” This mode will shut off the screen display, operating sounds, and light while the unit still runs automatically according to the previous temperature setting.
-
Page 25: Error Alarms
OPERATION ERROR ALARMS This refrigerator has built-in alarm system feature that activates when the unit detects any malfunction in the sealed cooling system. If the temperature display window displays , or , and the “ALARM” indicator begins flashing, please proceed to “Troubleshooting”... -
Page 26: Energy-Saving Tips And Other Notes
OPERATION ENERGY-SAVING TIPS AND OTHER NOTES • Do not place the unit next to a heating vent, a range/oven, or in direct sunlight. • Keep the door closed as much as possible, especially in hot, humid weather. • Cover foods and beverages to reduce moisture buildup inside the appliance. •... -
Page 27: Care And Maintenance
CARE AND MAINTENANCE Make sure the appliance is fully disconnected from power before performing any cleaning or maintenance to avoid risk of electric shock or injury. WARNING CLEANING THE EXTERIOR Clean the exterior stainless steel with a cloth dampened in mild soapy water. After cleaning, dry thoroughly with a soft cloth and polish with a stainless steel cleaner. - Page 28 CARE AND MAINTENANCE WINTERIZING YOUR UNIT If an outdoor refrigerator will be exposed to temperatures of 40 °F (4 °C) or less, perform the following steps to winterize the unit so it will keep it in good condition while facing the winter elements.
-
Page 29: Troubleshooting
Moisture will dissipate as humidity levels decrease. external surfaces This error code indicates the thermostatic sensor has Temperature window malfunctioned. Contact ZLINE Customer Service at displays 1-614-777-5004 for assistance. This error code indicates the actual temperature is much lower than your set temperature. Try restarting. Unplug... -
Page 30: Warranty
The warranty applies only to products installed in the continental United States and the District of Columbia. Warranty shall not apply and ZLINE Kitchen and Bath is not responsible for damage resulting from negligence, improper maintenance, misuse, abuse, alteration of or tampering with... - Page 31 SERVICE For warranty service, please contact our Customer Service team at 1-614-777-5004 or visit www.zlinekitchen.com/contact to utilize our online Customer Experience Portal. Need to purchase a part or accessory for your ZLINE product? Visit www.zlineparts.com, ZLINE’s official parts distribution partner.
- Page 32 1.6.1 1-614-777-5004 www.zlinekitchen.com contact@zlinekitchen.com...
Need help?
Do you have a question about the Touchstone RBSPO-24 and is the answer not in the manual?
Questions and answers