Xerox Phaser 3635MFP Quick Use Manual
Xerox phaser 3635mfp: user guide
Hide thumbs
Also See for Phaser 3635MFP:
- Service manual (270 pages) ,
- System administration manual (212 pages) ,
- Evaluator manual (17 pages)
Table of Contents
Advertisement
Advertisement
Table of Contents

Related Manuals for Xerox Phaser 3635MFP


Summary of Contents for Xerox Phaser 3635MFP
-
Page 1: Quick Use Guide
® Phaser 3635MFP Quick Use Guide Version 3.2 25.01.08... - Page 3 ® Phaser 3635MFP Quick Use Guide...
-
Page 5: Table Of Contents
Xerox Phaser 3635MFP Thank you for choosing the Phaser 3635MFP. If you work through the procedures in this book in the order they are presented, you will successfully: Connect the Phaser 3635MFP Set-up the Phaser 3635MFP Install optional features Operate the Phaser 3635MFP Contents Install the Phaser 3635MFP ... - Page 6 The information in this document is correct at the time of publication. Xerox reserves the right at any time to change the information without notice. Changes and technical updates will be added in subsequent editions of the documentation.
-
Page 7: Install The Phaser 3635Mfp
In addition you will have: Power Cord, User Documentation CD, System Administration Documentation CD, Print Driver CD, Quick Use Guide (this book), print cartridge, control panel labels, Product Enablement Key and a Telephone Cable (Phaser 3635MFP/X with Fax only). quick use guide... -
Page 8: Switch On The Machine
Switch On the Machine Once the machine has been assembled it must be configured. This is done using the Product Enablement Key when the machine is switched on for the first time. The Product Enablement Key is delivered in a plastic tube inside the box with the machine. - Page 9 Time. Follow the instructions to enter the appropriate information and select Next on each screen. The Congratulations screen will be displayed. This indicates that you have successfully completed the System Settings portion of the Xerox Installation Wizard. Select Finish to continue. NOTE: In some locations a popup screen will appear asking for the Page Pack Passcode.
-
Page 10: Your Phaser 3635Mfp
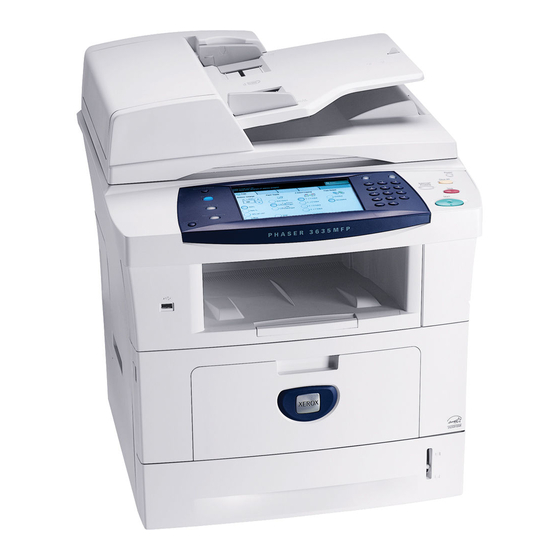
Your Phaser 3635MFP Control Panel: Touch Screen and Numeric Keypad Output Tray: Collects output Paper Trays: Tray 1 is standard and Tray 2 is optional. Inside the Device There is a Customer Replaceable Unit in the device, the Toner Cartridge (6). -
Page 11: Control Panel Overview
Control Panel Overview Job Status Services Machine Status Language Item Services Home Services Job Status Machine Status Display and Touch Screen Help Language Power Log In/Out Numeric Keypad Cancel Entry quick use guide Services Home Log In/Out Dial Pause Display and Cancel Entry Touch Screen Description... -
Page 12: Load Paper Into The Paper Trays
Item Dial Pause Enters a pause in a telephone number when transmitting a Clear All Press once to clear a current entry. Press twice to return to default settings. Interrupt Printing Use to interrupt the current job to run a more urgent job. Stop Stops the job in progress. - Page 13 ...open the Document Feeder and place single documents face down on the Document Glass aligned with the rear left corner. NOTE: Documents are only scanned once even when several copies are selected. quick use guide...
-
Page 14: Connecting To The Network
NOTE: The Ethernet cable is not supplied by Xerox. To setup the address using DHCP, see Network Setup Using DHCP on page 10. If you want to set a static IP address, skip to Network Setup Using a Static IP Address on page 11. - Page 15 • On the Control Panel, press the Log In/Out button and then enter the Administrator passcode [1111] and select Enter. • Press the Machine Status button then select Tools > Connectivity and Network Setup > Advanced > Network Setting > Network Setup > TCP/ IP Options >...
- Page 16 The static IP address is now set. Press the Log In/Out button and select Confirm to logout and close the Tools menu. quick use guide...
-
Page 17: Install Print Drivers
Follow the on screen messages to complete the installation. When the Print Driver is successfully installed, either send a test print from the print driver or submit a job to the Phaser 3635MFP. If the printing operation is successful, continue on to the next setup procedure in this document. -
Page 18: E-Mail Setup
Create an E-mail account which the machine will use as the default From address. • Test the E-mail account by sending an E-mail to the Xerox device account. This task should be completed at a mail client on your network that supports SMTP (Simple Mail Transfer Protocol) and POP3 (Post Office Protocol 3). - Page 19 Click either IP Address or Host Name and enter the Host Name or the IP Address and Port Number (1-65535) of the SMTP Server. The default Port is 25. Check Server Requires SMTP Authentication box if required. Enter the Login Name and Password. Click Apply to confirm your settings.
-
Page 20: Fax Setup
Fax Setup The Phaser 3635MFP/X configuration has Fax installed as standard. The Fax Kit will require setup when the machine is installed. Setting up the Fax Kit Set up the Fax Kit using the instructions in the Kit. Connect the telephone line to the Line connector on the device. -
Page 21: Installing Option Kits
Installing Option Kits This section provides instructions on how to install and configure optional features: • Network Accounting • Server Fax NOTE: For more instructions on installing and configuring Server Fax and Network Accounting, refer to the System Administration CD. Installing Option Kits All the Option Kits are installed in the same way. -
Page 22: Server Fax
NOTE: Refer to the System Administration Guide for more information. Server Fax The Server Fax feature enables Users to send documents to one or more fax machines via the telephone network without having a dedicated telephone line connected to the machine This is achieved by connecting the machine to a network Fax Server which can manage fax transmissions throughout an organisation. -
Page 23: Making Copies
Making Copies Load the documents to be copied either face up in the Document Feeder or face down to the rear left corner of the Document Glass. Press the Services Home button and then Copy. The Copy screen will be displayed. Select the required features using the Touch Screen. - Page 24 NOTE: To confirm the Copy job, press the Job Status button on the Control Panel to display the Job Status screen. The queued copy job will be displayed in the queue. quick use guide...
-
Page 25: Image Quality Adjustment
Additional Copy Features Reduce / Enlarge Originals can be reduced or enlarged between 25% and 400%. To use this option, select the Copy tab. Select any one of the preset reduce/enlarge ratios or select More to access custom settings. Image quality adjustment You can enhance the copy quality of the output based on the type and quality of the original being scanned. -
Page 26: Printing A Document
PC. To install the print drivers refer to Install Print Drivers on page 13. You can also access the Print Drivers by referring to the CentreWare Print and Fax Services CD or you can download the latest versions from the Xerox website at www.xerox.com/support. -
Page 27: Toner Saver
Additional Print Features Rotate image This feature enables you to rotate the page through 180 degrees. To use this option, click the Advanced tab and click on Image Options. Select Enabled to rotate page images 180 degrees from their current orientation. Select Disable to turn the feature off. -
Page 28: Sending A Fax
Sending a Fax NOTE: This feature is only available on the 3635MFP/X configuration. Load the documents to be faxed either face down on the Document Glass or face up into the Document Feeder. Press the Services Home button and choose the Fax option. This displays the Fax screen. -
Page 29: Delayed Send
Additional Fax Features Delayed send This feature enables you to specify the time the fax is transmitted. This option can be used to delay transmission of a fax job to an off-peak period to reduce the cost of the call. To use this option, select the Fax Options tab. -
Page 30: Network Scanning
Network Scanning Network Scanning enables you to scan your hard copy documents and store them as electronic files. A file repository must be setup before using the Network Scanning feature. refer to the System Administration Guide for information on how to setup a file repository. - Page 31 Network Scanning Resolution Update Sets the scan Templates settings to suit a recently created how the scanned or updated image will be template before used the system automatically adds it to the template list Press Start to scan your documents. NOTE: To confirm the scan job, press the Job Status button on the Control Panel to display the Job Status screen.
- Page 32 Additional Network Scanning Features Creating Scanning Templates Templates are used in network scanning to define the destination and scan settings for your scan job. Your workflow will be more efficient if you create specific templates for your most frequent scanning jobs. New templates are based on the settings configured for the Default Template or you can copy and modify existing templates.
-
Page 33: Sending An E-Mail
Sending an E-mail Load the documents to be E-mailed either face down on the Document Glass or face up into the Document Feeder. Press the Services Home button on the Control Panel. Select E-mail. Select From and enter the address you want to appear in the From field of the E-mail. -
Page 34: Enhance Your Phaser's Productivity
Enhance your Phaser’s productivity The Phaser 3635MFP is a powerful multi function device with many digital functions integrated into one sleek system. It is designed to support large workgroups in different production environments. You can do more with less and streamline your workflow with these productivity enhancing features. -
Page 35: Remote Administration
Customize your device The machine can be setup to reflect your office’s workflow. For example, the initial screen you see when you walk up to the machine can be either the Machine Status, Job Status, Services Home or one of the Services. Default settings for each of the Services can be set to your own requirements such as the default paper tray, customized reduction ratios and 2-sided copying to save on paper. - Page 36 Units like the Print Cartridge and Staple Cartridge are customer replaceable, meaning you can replace the consumable without having to call out a Xerox service representative. This enables you to reduce down time. Powerful Documents...
-
Page 37: Troubleshooting
Troubleshooting A variety of situations can effect the quality of your output. For optimal performance, ensure the guidelines in the User Guide are followed. The documentation and the fault messages on the machine help you to locate and resolve a problem easily. Some problems can be resolved by switching off and switching on your device. -
Page 38: Paper Jams
Paper jams The screen will indicate the location of the jam. • Follow the instructions on the display to clear the paper from the paper path. • Ensure that all jam clearance doors and covers are returned to their correct positions. NOTE: Jam Clearance areas may vary depending on your machine model and configuration. -
Page 39: Help
CDs with the Phaser 3635MFP. Alternatively you can access the documents from www.xerox.com/ Click Help on the printer driver screen or press [F1] on the PC keyboard for information on the displayed printer driver... -
Page 40: Internet Services
On CentreWare Internet Services Click Index to view the contents of the Internet Services site. Click Help to take you to the Xerox on-line support web site. quick use guide... -
Page 41: Enable/Disable Banner Sheet
Enable/Disable Banner Sheet Disable the Banner Sheet in the Print Driver Use the following instructions to disable the banner sheet from your device print driver on your PC. At your PC, select the Start menu, then select Printers and Faxes. Right click the required printer. - Page 42 quick use guide...
Need help?
Do you have a question about the Phaser 3635MFP and is the answer not in the manual?
Questions and answers