Table of Contents
Advertisement
Quick Links
Advertisement
Table of Contents

Related Manuals for Alliance Laundry Systems GDESCRGS303UW01


Summary of Contents for Alliance Laundry Systems GDESCRGS303UW01
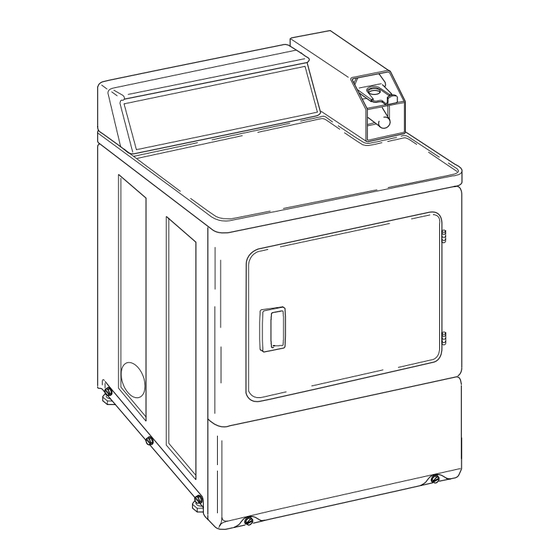
- Page 1 Clothes Dryer Electric and Gas Models D677I_SVG Original Instructions Keep These Instructions for Future Reference. CAUTION: Read the instructions before using the machine. (If this machine changes ownership, this manual must accompany machine.) Part No. D517074ENR3 www.alliancelaundry.com May 2021...
- Page 3 The gas utility instructions plus the SAFETY and WARNING note directly above must be posted in a prominent location near the dryer for customer use. © Copyright, Alliance Laundry Systems LLC - Part No. D517074ENR3 DO NOT COPY or TRANSMIT...
-
Page 4: Table Of Contents
Load Laundry................... 33 © Copyright 2021, Alliance Laundry Systems LLC All rights reserved. No part of the contents of this book may be reproduced or transmitted in any form or by any means without the expressed written consent of the publisher. - Page 5 Dryer Interior....................35 Cabinet.....................35 Control Panel.................... 35 Exhaust System..................35 Lint Filter.....................35 Motor Overload Protector................36 Troubleshooting..................37 Disposal of Unit..................39 Contact Information................40 Installer Checklist.................41 © Copyright, Alliance Laundry Systems LLC - Part No. D517074ENR3 DO NOT COPY or TRANSMIT...
-
Page 6: Model Identification
Model Identification Model Identification Information in this manual is applicable to these dryer models: GDESCRGS303UW01 GDESXRGS303UW01 HDESXRGS303UW01 HDESXRGS403UW01 KDESXRGS303UW01 KDGSXRGS303EW01 PDGSXRGS113CG02 SDESXRGS303UG01 SDESXRGS303UW01 SDESXRGS403UW01 SDGSXRGS303EW01 © Copyright, Alliance Laundry Systems LLC - Part No. D517074ENR3 DO NOT COPY or TRANSMIT... -
Page 7: Safety Information
Use the dryer only for its intended purpose, drying clothes. • Read all instructions before using the dryer. ALWAYS follow the fabric care instructions supplied by the © Copyright, Alliance Laundry Systems LLC - Part No. D517074ENR3 DO NOT COPY or TRANSMIT... - Page 8 Common sense, caution and care must be exer- cised when installing, maintaining, or operating the dryer. © Copyright, Alliance Laundry Systems LLC - Part No. D517074ENR3 DO NOT COPY or TRANSMIT...
-
Page 9: Dimensions
711 mm [28 in.] 597 mm [23.5 in.] NOTE: Exhaust openings are 102 mm [4 inch] metal * With leveling legs turned into base. ducting. © Copyright, Alliance Laundry Systems LLC - Part No. D517074ENR3 DO NOT COPY or TRANSMIT... - Page 10 711 mm [28 in.] 597 mm [23.5 in.] NOTE: Exhaust openings are 102 mm [4 inch] metal * With leveling legs turned into base. ducting. © Copyright, Alliance Laundry Systems LLC - Part No. D517074ENR3 DO NOT COPY or TRANSMIT...
- Page 11 711 mm [28 in.] 597 mm [23.5 in.] NOTE: Exhaust openings are 102 mm [4 inch] metal * With leveling legs turned into base. ducting. © Copyright, Alliance Laundry Systems LLC - Part No. D517074ENR3 DO NOT COPY or TRANSMIT...
- Page 12 711 mm [28 in.] 597 mm [23.5 in.] NOTE: Exhaust openings are 102 mm [4 inch] metal * With leveling legs turned into base. ducting. © Copyright, Alliance Laundry Systems LLC - Part No. D517074ENR3 DO NOT COPY or TRANSMIT...
-
Page 13: Installation
Any disassembly requiring the use of tools must be performed by a suitably qualified service person. W299 Order of Installation Steps 1. Position and level the dryer. © Copyright, Alliance Laundry Systems LLC - Part No. D517074ENR3 DO NOT COPY or TRANSMIT... - Page 14 Installation DRY2607N_SVG 1. Dryer Base 2. Level 3. Leveling Leg 4. Rubber Foot Figure 2 © Copyright, Alliance Laundry Systems LLC - Part No. D517074ENR3 DO NOT COPY or TRANSMIT...
- Page 15 Front View (Closet Door) 2 (G) DRY2637N_SVG 1. Closet Door 2. Centered Air Openings (G) (2 Openings minimum) 3. Outer Wall of Enclosure Figure 3 © Copyright, Alliance Laundry Systems LLC - Part No. D517074ENR3 DO NOT COPY or TRANSMIT...
-
Page 16: Connect Dryer Exhaust System
MUST be exhausted to the out- WARNING doors. To reduce the risk of fire, DO NOT use plastic or thin W604 foil ducting to exhaust the dryer. W354 © Copyright, Alliance Laundry Systems LLC - Part No. D517074ENR3 DO NOT COPY or TRANSMIT... -
Page 17: Exhaust Direction
DO NOT use sheet optional equipment at extra cost. metal screws or fasteners on exhaust pipe joints which extend into the duct and catch lint. © Copyright, Alliance Laundry Systems LLC - Part No. D517074ENR3 DO NOT COPY or TRANSMIT... -
Page 18: Exhaust System
A direct, individual outside venting is recommended. When that ter flexible metal duct must not exceed 2.4 m [7.87 ft.]. is not possible, a collector duct as shown below may be used. © Copyright, Alliance Laundry Systems LLC - Part No. D517074ENR3 DO NOT COPY or TRANSMIT... - Page 19 2. Clean Out Cover (Must be provided). Inspect monthly. 3. Weather Hood or Sweep Elbow (No cap or screen) 4. 610 mm [24 in.] Minimum Clearance to Roof/Ground Figure 5 © Copyright, Alliance Laundry Systems LLC - Part No. D517074ENR3 DO NOT COPY or TRANSMIT...
- Page 20 305 mm [12 inches] 326 mm [13 inches] 356 mm [14 inches] 381 mm [15 inches] 381 mm [15 inches] 406 mm [16 inches] Table 3 © Copyright, Alliance Laundry Systems LLC - Part No. D517074ENR3 DO NOT COPY or TRANSMIT...
-
Page 21: Gas Dryers - Connect Gas Supply Pipe
Natural Gas with a 3/8 inch NPT gas NOTE: This appliance must be installed in accordance connection. with regulations in force. © Copyright, Alliance Laundry Systems LLC - Part No. D517074ENR3 DO NOT COPY or TRANSMIT... - Page 22 For proper operation at altitudes above 1370 m [4500 feet] the L.P. gas valve spud orifice size must be reduced to ensure com- plete combustion. Refer to Table 5 . © Copyright, Alliance Laundry Systems LLC - Part No. D517074ENR3 DO NOT COPY or TRANSMIT...
-
Page 23: Reverse Door, If Desired
The door on this dryer is completely reversible. To reverse door 4. Rotate door panel 180 degrees as shown. proceed as follows: 1. Remove four hinge attaching screws. D273P_SVG Figure 12 © Copyright, Alliance Laundry Systems LLC - Part No. D517074ENR3 DO NOT COPY or TRANSMIT... -
Page 24: Wipe Out Inside Of Dryer
DRY1919N_SVG Figure 15 8. Using screwdriver, remove two door plugs, and reinstall on opposite side of door opening. Figure 18 © Copyright, Alliance Laundry Systems LLC - Part No. D517074ENR3 DO NOT COPY or TRANSMIT... -
Page 25: Connect The Dryer To Electrical Power
Refer to dryer serial plate for electrical requirements. Circuit must be fused and wired to handle requirements. The dryer must be connected to a separate branch 230 Volt, 50 Hertz, © Copyright, Alliance Laundry Systems LLC - Part No. D517074ENR3 DO NOT COPY or TRANSMIT... -
Page 26: Recheck Steps
W158 Ready Mode. 6. After the dryer has operated for approximately three minutes, exhaust air or exhaust pipe should be warm. Ready Mode © Copyright, Alliance Laundry Systems LLC - Part No. D517074ENR3 DO NOT COPY or TRANSMIT... -
Page 27: Setting Dry Time Dipswitches
IN USE LED three times separated by a one and a half second pause. Unplug dryer or turn circuit breaker off/on to © Copyright, Alliance Laundry Systems LLC - Part No. D517074ENR3 DO NOT COPY or TRANSMIT... -
Page 28: Dipswitch Settings
Table 7 continues... Dipswitch Settings Heat Switch Number Heat Time Per Coin Pulse (in mi- nutes) Table 8 continues... © Copyright, Alliance Laundry Systems LLC - Part No. D517074ENR3 DO NOT COPY or TRANSMIT... - Page 29 Installation Heat Switch Number Heat Time Per Coin Pulse (in mi- nutes) Table 8 continues... © Copyright, Alliance Laundry Systems LLC - Part No. D517074ENR3 DO NOT COPY or TRANSMIT...
-
Page 30: Test Setting
Installation Heat Switch Number Heat Time Per Coin Pulse (in mi- nutes) 42 (preset at fac- tory) Table 8 Test Setting © Copyright, Alliance Laundry Systems LLC - Part No. D517074ENR3 DO NOT COPY or TRANSMIT... -
Page 31: Slide Extension Assembly
Refer to Figure 22 . TLW2163N_SVG 1. Spring Installed 2. Extension Bracket and Lever Assembly 3. Coin Slide Bracket - Letter "A" Figure 23 © Copyright, Alliance Laundry Systems LLC - Part No. D517074ENR3 DO NOT COPY or TRANSMIT... -
Page 32: Additional Security
5. Check to make sure coin slide is operating properly by insert- ing coins and starting a cycle. The IN USE light will turn on, or flash if it is already on, to indicate proper operation. © Copyright, Alliance Laundry Systems LLC - Part No. D517074ENR3 DO NOT COPY or TRANSMIT... -
Page 33: Operation
WARNING To reduce the risk of fire and risk of lint collecting in exhaust duct, do not operate dryer without lint filter in place. W771 © Copyright, Alliance Laundry Systems LLC - Part No. D517074ENR3 DO NOT COPY or TRANSMIT... -
Page 34: Start Dryer
1. Place coin(s) in slide and carefully push in as far as possible and then pull slide out as far as possible. 2. After IN USE light comes on (indicating start of cycle), press the PUSH-TO-START button. © Copyright, Alliance Laundry Systems LLC - Part No. D517074ENR3 DO NOT COPY or TRANSMIT... -
Page 35: Maintenance
Exhaust System WARNING D608I_SVG1 1. Lint Filter To reduce the risk of electric shock, disconnect the electrical service to the dryer before cleaning. Figure 33 W043 © Copyright, Alliance Laundry Systems LLC - Part No. D517074ENR3 DO NOT COPY or TRANSMIT... -
Page 36: Motor Overload Protector
PUSH-TO-START button or START pad. If overload protector cycles again, remove the dryer from use and call the service per- son to correct the problem. © Copyright, Alliance Laundry Systems LLC - Part No. D517074ENR3 DO NOT COPY or TRANSMIT... -
Page 37: Troubleshooting
• Check load being dried. Heavy items dried with lightweight items will not dry as quickly as the rest of the load. Table continues... © Copyright, Alliance Laundry Systems LLC - Part No. D517074ENR3 DO NOT COPY or TRANSMIT... - Page 38 • Ventilate room before drying clothes. © Copyright, Alliance Laundry Systems LLC - Part No. D517074ENR3 DO NOT COPY or TRANSMIT...
-
Page 39: Disposal Of Unit
MIX1N_SVG Figure 34 © Copyright, Alliance Laundry Systems LLC - Part No. D517074ENR3 DO NOT COPY or TRANSMIT... -
Page 40: Contact Information
+1 (920) 748-3950 for the name Table continues... and address of the nearest authorized parts distributor. DRY2527N_SVG 1. Serial Plate Figure 35 © Copyright, Alliance Laundry Systems LLC - Part No. D517074ENR3 DO NOT COPY or TRANSMIT... -
Page 41: Installer Checklist
Reverse Door, if De- Start and Run Dryer in Heat Setting to Verify Dryer is sired. Heating. CHECK CHECK D675I_SVG1 Refer to the manual for more detailed information © Copyright, Alliance Laundry Systems LLC - Part No. D517074ENR3 DO NOT COPY or TRANSMIT...
Need help?
Do you have a question about the GDESCRGS303UW01 and is the answer not in the manual?
Questions and answers