Table of Contents
Advertisement
Quick Links
CSD-LPCE
CSD-LPCE_657233_OM_202301026
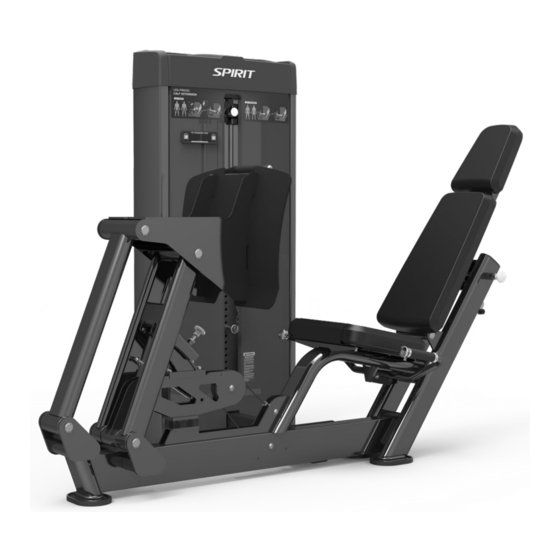
LEG PRESS /
CALF EXTENSION
Online Support
If you require assistance or
are experiencing issues with
your Spirit Unit, please contact
customer care for additional help.
1-800-258-8511
questions@spiritfitness.com
Warranty Registration
Scan to quickly and easily
register your new Spirit
Fitness unit.
Advertisement
Table of Contents

Related Manuals for Spirit CSD-LPCE


Summary of Contents for Spirit CSD-LPCE
- Page 1 Online Support If you require assistance or are experiencing issues with your Spirit Unit, please contact customer care for additional help. 1-800-258-8511 questions@spiritfitness.com Warranty Registration Scan to quickly and easily register your new Spirit Fitness unit. LEG PRESS / CSD-LPCE...
-
Page 3: Table Of Contents
Table of Contents Product Registration ............3 Warning / Safety Instructions Product Labels ..............4 Safety Instructions .............5 Facility Safety ..............6 Precautions ................7 Safety Guidelines ............... 8 Safeguards ................9 Assembly Parts of Your Unit ............. 11 Assembly ................12 Cable Routing Diagram .......... -
Page 4: Product Registration
Congratulations on your new unit, and welcome to the Spirit Fitness WARRANTY REGISTRATION family! Thank you for your purchase of this quality unit from Spirit Fitness. Your new unit was manufactured by one of the leading fitness manufacturers in the world and is backed by one of the most comprehensive warranties available. -
Page 5: Product Labels
PRODUCT LABELS The following pages show examples of Spirit® Fitness warning labels and communication stickers placed on the equipment as part of the manufacturing process. It is critical that owners maintain the integrity and placement of these stickers. If you find any stickers miss- ing or damaged contact your local dealer or distributor for a replacement. -
Page 6: Safety Instructions
SAFETY INSTRUCTIONS Read the Owner’s Manual carefully before assembling, servicing or 16. DO NOT use dumbbells or other incremental weights, except those using the equipment. It is the responsibility of the facility owner and/ provided by the manufacturer . or owner of the equipment to instruct users on proper operation of the 17. -
Page 7: Facility Safety
If unable to immediately replace worn or damaged components then remove from service until the repair is made. ƒ Use only Spirit Fitness supplied components to maintain/ repair the equipment. ƒ Keep a repair log of all maintenance activities. ƒ Inspect all cables and belts and connections prior to use. -
Page 8: Precautions
PRECAUTIONS WARNING These safety notes are directed to you as the owner of the Strength Equipment manufactured by Spirit Fitness. Please train all your users and fitness staff to follow these safety • Your Strength Equipment manufactured by Spirit Fitness instructions. -
Page 9: Safety Guidelines
SAFETY GUIDELINES AND PRACTICE Spirit Fitness recommends that all fitness equipment be used in a supervised area. It is recommended that the equipment be located in an access controlled area. Control is the responsibility of the owner. The extent of control is at the discretion of the owner. -
Page 10: Safeguards
APPROVED FOR USE WITH THE SPIRIT FITNESS • DO NOT use any equipment in any way other than designed EQUIPMENT WHICH APPEARS TO BE DAMAGED OR or intended by the manufacturer. It is imperative that SPIRIT WORN. FITNESS equipment is used properly to avoid injury. •... -
Page 11: Assembly
CAUTION: Damage to the Strength Equipment during assembly is not covered as part of the limited Spirit Fitness warranty. Take care not to drop or lean the Strength Equipment on its side. Carefully stand the Strength Equipment up in the normal upright position on a stable surface so it will not tip over during assembly. -
Page 12: Parts Of Your Unit
PARTS OF YOUR UNIT Accessory Tray 5lb Increment Weight Workout Diagrams Rep & Time Counter Guide Rods Shroud Head Pad Back Pad Foot Plate Weight Selector Pin Back Pad Angle Adjustment Pin Range of Motion Seat Pad Adjustment Pin Seat Handles Weight Stack... -
Page 13: Assembly
ASSEMBLY STEP 1 Assembly Instructions Step Description Specifications Door Frame Inner Hexagon Socket Head Bolt M8*20 Inner Hexagon Socket Head Bolt M10*35 Spring washer Spring washer Flat washer Φ20*Φ10.5*2 Rivet nut with small countersunk head M8*18 Main frame... - Page 14 ASSEMBLY - CONTINUED STEP 2 Assembly Instructions Step Description Specifications Front swinging frame Main swinging rack Foot rack Shaft 2 Circlip for shaft φ25...
- Page 15 ASSEMBLY - CONTINUED Assembly Instructions STEP 3 Step Description Specifications Left handle frame Right handle frame Flat washer Φ20*Φ10.5*2 Hexagon socket head screws M10*35 Main frame...
- Page 16 ASSEMBLY - CONTINUED STEP 4 Assembly Instructions Step Description Specifications Pad adjusting board Shaft 3 Limit rubber Circlip for shaft φ25 Flat washer Φ16*Φ8.4*1.6 Spring washer Hexagon socket head screws M8*20 Hexagon socket head screws M8*35 Back cushion frame...
- Page 17 ASSEMBLY - CONTINUED STEP 5 Assembly Instructions Step Description Specifications Flat washer Φ16*Φ8.4*1.6 Spring washer Hexagon socket head screws M8*30 Back cushion set Seat cushion set Hed cushion set Hexagon socket head screws M8*40...
- Page 18 ASSEMBLY - CONTINUED...
- Page 19 ASSEMBLY - CONTINUED...
- Page 20 Spring washer Flat washer Φ12*Φ6.4*1.6 ASSEMBLY - CONTINUED STEP 7 Assembly Instructions Step Description Specifications Upper shield Shield fixed plate Fixed bushing Front shield Back shield cross recessed countersunk head screw M5*10 Countersunk head hexagon socket screw M6*16 Inner Hexagon Socket Head Bolt M6*16 Spring washer Flat washer...
-
Page 21: Cable Routing Diagram
Routing Diagram Wrong CABLE ROUTING DIAGRAM Cable Cable limiting post limiting post Cable Routing Diagram Correct Wrong Cable Cable limiting post limiting post... - Page 22 CABLE ROUTING DIAGRAM t p i Dry Reed Pipe Connection Wire...
- Page 23 START WORKOUT...
- Page 24 REPETITION AND TIME COUNTER A battery-operated (batteries not included) console is available for use on your equipment. The console tracks workout time and number of repetitions per set. REPS TIME RESET RESET Repetition Counter Time Counter This counter is powered by 2 pcs of AA batteries. (Alkaline Battery Recommended)
-
Page 25: Maintenance
All preventive maintenance activities must be performed on a regular basis. Performing routine preventive maintenance actions can aid in providing safe, trouble-free operation of all SPIRIT equipment. SPIRIT is not responsible for performing regular inspection and maintenance actions for your machines. Instruct all personnel in equipment inspection and maintenance actions and also in accident reporting and recording. -
Page 26: Exploded View Diagram
EXPLODED VIEW DIAGRAM EXPLODED VIEW DIAGRAM... - Page 27 EXPLODED VIEW DIAGRAM...
-
Page 28: Warranty
Effective September 13, 2023- CSD-LEG PRESS / CALF EXTENSION LIMITED WARRANTY Spirit Fitness warrants the unit for a period of time listed below from the date of installation, as determined by sale receipt, or in the absence of a sales receipt eighteen (18) months from the original factory shipping date. Spirit Fitness’ responsibilities include providing new or remanufactured parts, at Spirit Fitness’... - Page 29 5. Products that have been: sold, transferred, bartered, or given to a third party. 6. Products that do not have a warranty registration on file at Spirit Fitness. Spirit Fitness reserves the right to request proof of purchase if no warranty record exists for the product.
- Page 30 3. If there is a question as to where to obtain service, contact our service department at (870) 935-1107. 4. Spirit Fitness’ obligation under this warranty is limited to repairing or replacing, at Spirit Fitness’ option, the product through one of our authorized service centers.
-
Page 31: Troubleshooting
TROUBLESHOOTING Service Checklist Diagnosis Guide Problem Solution/ Cause Rep Counter & Timer does not turn on when Replace batteries. ƒ Check the magnet is still in position and the reed switch is still positioned next to the weight is lifted ƒ... - Page 35 3000 Nestle Road Jonesboro, AR 72401 | Phone: 800-258-8511 | Fax: 870-935-7611 www.spiritfitness.com ©2023 All Rights Reserved. CSD-LPCE Owner’s Manual...
Need help?
Do you have a question about the CSD-LPCE and is the answer not in the manual?
Questions and answers