Advertisement
WST-132 Wearable Ac on Bu on
Instruc ons and User Manual
1. Specifications
Frequency:
345 MHz
Operating Temp:
32° – 110°F (0° – 43°C)
Operating Humidity:
0 – 95% RH non‐condensing
Battery:
1x CR2032 Lithium 3V DC
Battery Life:
Up to 5 Years
Compatibility:
Honeywell, 2gig receivers
Supervisory Interval: Approximately 70 minutes
2. Package Contents
1 x Action Button
1 x Rope Necklace
1 x Wrist Band
1 x Pendant Inserts (2 pcs)
1 x Manual
1 x CR2032 battery (included)
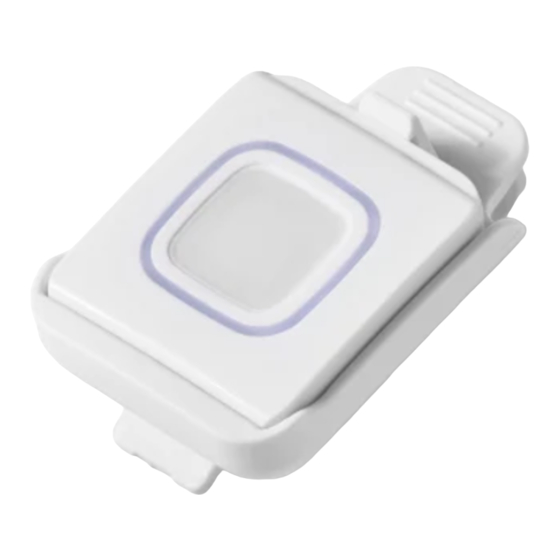
1 x Belt Clip Adapter
1x Surface Mount Bracket (w/
2 screws)
3.
Component Identification
LED Ring
Button
CR2032 Battery
Action Button
Pendant Inserts
Rope Necklace
(Top / Bottom)
4. Product Configuration
The WST‐132 can be worn or mounted in four (4 ways):
1.
On a wrist using a compatible wrist band (the color of the
included wrist band may vary).
2.
Around the neck as a pendant using the included
pendant inserts and snap‐closure adjustable‐length rope
necklace (color may vary).
3.
Mounted to a flat surface with the surface mount bracket
and screws.
4.
Worn on a belt with the surface mount bracket plus belt
clip.
Note: Users can personalize their Wearable Ac on Bu on with
Apple Watch®‐compa ble wristbands (38/40/41mm).
5. Enrolling
The WST‐132 Wearable Action Button supports up to three
(3) different alerts or commands to be triggered through
different button presses. The button appears as three sensor
zones, each with their own unique serial number.
To prepare the button:
Install the battery in the action button following instructions
in Section 8. Then Press and Hold the button for twenty (20)
seconds. During this hold time, the LED will blink three times,
then remain on for 3 more seconds [Zone 3]. Do not release
the button, continue holding down the button until the LED
blinks five (5) times indicating the button is ready.
To enroll the action button:
1.
Set your panel into programming mode according to the
Surface Mount / Belt Clip
panel manufacturer's instruction.
2.
If prompted by the panel, enter the desired zone's six‐
digit ESN printed on the ESN card, following the panel
manufacturer's instructions. Note some panels can
enroll your sensor by capturing the serial number
Wrist Band (Top and Bottom)
transmitted by your sensor. For those panels, simply
press the action button pattern for the desired Zone.
Zone 1
Single Tap
Press and Release (Once)
Zone 2
Double Tap
Press and Release
(Twice, <1 second apart)
Zone 3
Press and Hold
Press and Hold until LED
illuminates (about 5
seconds), then release.
3.
When enrolling the device, it is recommended to
name each zone for easy identification and
assignment to the intended action or scene.
Example: zone #1 = "AB1 ST" (action button #1 single
tap), zone #2 = "AB1 DT" (action button #1 double
tap), and zone #3 = "AB1 PH" (action button #1 press
and hold).
Important Notes:
After the zone is recognized by the panel, be sure to
assign a zone type that is "chime only". Otherwise,
the button zone will be treated like a Door/Window
open and restore and may trigger an alarm state.
If the Ac on Bu on will be used as a "wearable
device" supervisory should be disabled on the panel,
as the wearer may leave the premises.
4.
Repeat steps 1‐3 until the panel recognizes all the
desired Zones.
6. Action Button Testing
The Ac on Bu on is designed to be used within 100 . (30 m)
of the panel. Test before first use, as well as weekly. The test
verifies proper communica on between the sensor and the
panel/receiver.
To test the Ac on Bu on a er enrollment, refer to the specific
panel/receiver documenta on to place the panel into sensor
test mode. Press the bu on sequence for each zone to be
tested, from loca on(s) the Ac on Bu on shall be used. Verify
the transmission count received on the panel is consistently 5
of 8 or be er.
7. Product Operation
The WST‐132 Wearable Action Button supports up to three
(3) different alerts or commands to be triggered through
Advertisement
Table of Contents

Related Manuals for Ecolink WST-132


Summary of Contents for Ecolink WST-132
- Page 1 Press and Release The WST‐132 can be worn or mounted in four (4 ways): (Twice, <1 second apart) On a wrist using a compatible wrist band (the color of the Zone 3 Press and Hold Press and Hold until LED included wrist band may vary). illuminates (about 5 WST-132 Wearable Ac on Bu on seconds), then release. Around the neck as a pendant using the included Instruc ons and User Manual pendant inserts and snap‐closure adjustable‐length rope When enrolling the device, it is recommended to necklace (color may vary). name each zone for easy identification and 1. Specifications assignment to the intended action or scene.
- Page 2 8. Maintenance - Replacing the Battery buyer, and is and shall be in lieu of any and all other warran es, whether expressed harmful interference to radio communica ons. However, there is no guarantee that or implied and of all other obliga ons or liabili es on the part of Ecolink Intelligent interference will not occur in a par cular installa on. If this equipment does cause When the ba ery is low, a signal will be sent to the control Technology Inc. neither assumes responsibility for, nor authorizes any other person harmful interference to radio or television recep on, which can be determined by panel. purpor ng to act on its behalf to modify or to change this warranty, nor to assume turning the equipment off and on, the user is encouraged to try to correct the for it any other warranty or liability concerning this product. The maximum liability interference by one or more of the following measures: ...
Need help?
Do you have a question about the WST-132 and is the answer not in the manual?
Questions and answers