Table of Contents
Advertisement
Quick Links
Product Specifications
Supply Voltage: 230-240V ~ 50 Hz
Standby: < 0.5 W
Output Rating Fan Motor: 50 W
Output Rating LED Light: 15 W
Light Dimmer: Non-dimmable
PLEASE READ ALL INSTRUCTIONS CAREFULLY. RETAIN FOR FUTURE REFERENCE.
Box Contents
■ Remote control
■ Remote receiver
■ Remote mounting bracket
■ 2 x Screws and lugs for bracket
■ Instruction manual
■ Loom
1
IMPORTANT CONSIDERATIONS
1. Remote control kit is adaptable with hangsure brackets for ceiling fans.
2. The remote control cannot be used in combination with a wall mounted fan controller.
3. Fan can be directly connected using the cable connector (provided) on the remote control kit.
4. If the fan model has lights, you can use both the remote and wall control to switch ON/OFF the lights.
5. The remote and the receiver have already been paired during manufacturing.
2
INSERTING THE RECEIVER AND CONNECT THE QUICK CONNECTOR
STEP 1
Unplug the Inspire fan quick connector
from the terminal block.
Insert the receiver into the gap between
hanger ball and bracket.
STEP 3
Hangsure Canopy
Tighten with 4 screws to the bracket. Make sure wires
are not trapped in between.
The receiver antenna can be left inside the metal canopy.
x 2 Screws
Receiver Antenna
THE INSPIRE REMOTE CONTROL KIT IS COMPATIBLE
WITH INSPIRE CEILING FANS
STEP 2
To connect receiver to FAN with Light
4 Way
Receiver
4 Way
TO FAN
3
WALL ISOLATOR AND REMOTE COMPATIBILITY
While installing a remote control, it must be installed in conjunction with wall plate.
x 2 Screws
(Must remove these wall plates
if installing RCF Inspire remote)
Inspire Remote Control Kit
ONLY.
To connect receiver to FAN without Light
4 Way from the
terminal block
3 Way
3 Way
Must replace 3 speed controller
with a wall switch.
Must connect existing motor active
wire to the new wall plate.
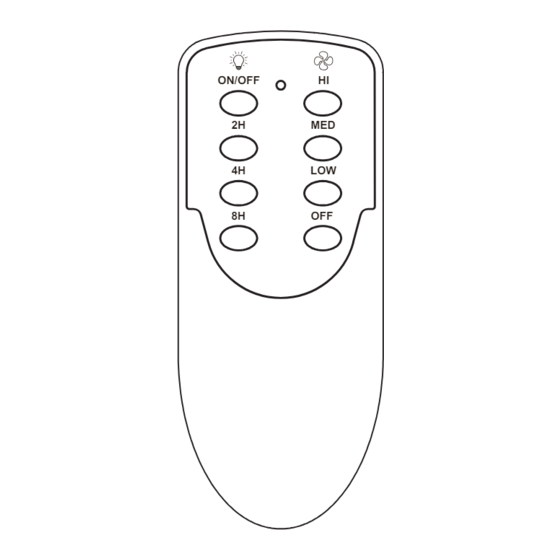
Cat.No: RCFREMOTE
Instruction Manual
ON/OFF
HI
2H
MED
4H
LOW
8H
OFF
3 way from the
terminal block
4 Way
4 Way
Receiver
3 Way
TO FAN
(This wall plate is not
supplied with this kit)
3 Way
1
Advertisement
Table of Contents

Related Manuals for LEGRAND RCFREMOTE


Summary of Contents for LEGRAND RCFREMOTE
- Page 1 Inspire Remote Control Kit Cat.No: RCFREMOTE Instruction Manual Product Specifications Supply Voltage: 230-240V ~ 50 Hz Standby: < 0.5 W ON/OFF Output Rating Fan Motor: 50 W THE INSPIRE REMOTE CONTROL KIT IS COMPATIBLE Output Rating LED Light: 15 W ONLY.
- Page 2 Warranty. ● Legrand warrants this product for a period of 2 years from the date of purchase. Our goods (which we refer to in the Warranty as the Products) come with guarantees that cannot be excluded under the Australian and New Zealand Consumer Laws.
Need help?
Do you have a question about the RCFREMOTE and is the answer not in the manual?
Questions and answers