
Subscribe to Our Youtube Channel
Related Manuals for Haier GE PTW600BPR DG Series


Summary of Contents for Haier GE PTW600BPR DG Series
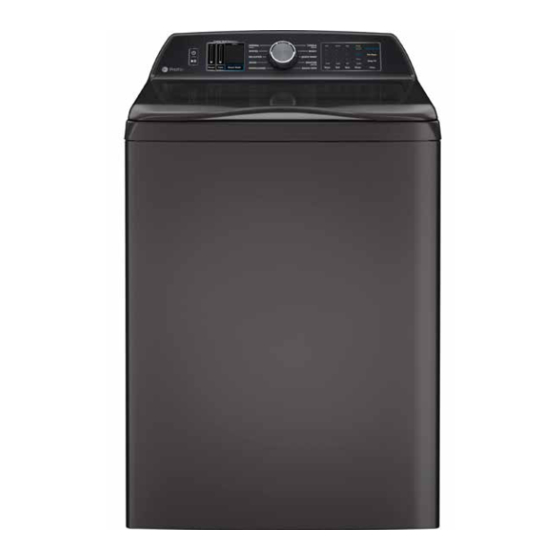
- Page 1 Technical Service Guide April 2023 Profile 28-in. Top Load Washer PTW600BPR_DG PTW600BSR_WS PTW605BPR_DG PTW605BSR_WS PTW700BPT_DG PTW700BST_WS PTW705BPT_DG PTW705BST_WS PTW900BPT_DG PTW900BPT_RS PTW905BPT_DG PTW905BPT_RS 31-9392...
-
Page 2: Safety Information
5. Locate the Warranty page. GE Appliances, a Haier Company Copyright © 2023 All rights reserved. This service guide may not be reproduced in whole or in part in any form without written permission from GE Appliances, a Haier Company. – 2 –... -
Page 3: Table Of Contents
Table of Contents Safety Information ........................2 Warranty ............................2 Table of Contents..........................3 Safety Requirements ........................6 Nomenclature ..........................7 Specifications ..........................8 Electrical Specifications ......................8 Water Levels .........................8 Control Features ...........................9 Recommended Tools ........................16 Component Locator Views ......................17 Underside Top Cover 900/905 Model ...................17 Underside Top Cover 700/705 and 600/605 Model ..............18 Tub Assembly 900/700 Model ....................19 Tub Assembly 905/705 Model ....................20... - Page 4 Top Cover ..........................32 Suspension Assembly ......................33 Leveling Legs ........................33 Fill System ............................34 Water Valves .........................34 Thermistor..........................35 Dosing Pump (For 900/905 Models Only) ................35 Bulk Tank Level Sensor ......................36 Dispenser Drawer .........................36 Bleach Funnel ........................37 Bulk Tank (For 900/905 Models Only) ..................37 Lid Switch/Lock Assembly ....................38 Agitators ..........................39 Basket Assembly ........................40...
- Page 5 Field Service Mode .......................55 Service Mode Tests ......................56 Fault Codes ..........................59 Voice Module ........................71 Control Board Connector Locator ....................72 Control Board Electronic 900/905 and 700/705 Models ............72 Control Board Electronic 600/605 Models ................73 User Interface/Wi-Fi Board ....................74 Wi-Fi board: 900/905 and 700/705 Models Only ..............74 Schematics / Wiring Diagrams .....................75 900/905 and 700/705 Models ....................75 600/605 Models ........................76...
-
Page 6: Safety Requirements
Safety Requirements GEA Factory Service Employees are required to use safety glasses with side shields, safety gloves and steel toe shoes for all repairs. Prescription Safety Glasses Plano Type Safety Glasses Safety Glasses must be ANSI Z87.1-2003 compliant Cut Resistant Sleeves Electrically Rated Gloves and Dyneema®... -
Page 7: Nomenclature
Nomenclature Model Number P T W 7 0 0 B S T 0 W S Color Brand DG: Diamond Grey WS: Silver back guard P: GE Profile Brand RS: Royal Sapphire Blue Configuration Engineering Rev/Product T: Top Load Rear Control Service Platform The Tenth Digit will be used to... -
Page 8: Specifications
Specifications Electrical Specifications Water Levels AC Voltage Gallons Inches Comment 10.0 Min Fill • Main Board: 120 VAC to the J101 36.0 17.4 Max Fill • Drain Pump: Should read approximately 13.2-ohms, 120 VAC • Mode Shifter Motor: Should read approximately 5.7k ohms, 120 VAC •... -
Page 9: Control Features
Control Features Throughout this manual, features and appearance may vary by model. 900/905 Model 700/705 Model 600/605 Model Power Press to “wake up” the display. If the display is active, press to put the washer into idle mode. NOTE: Pressing Power does not disconnect the appliance from the power supply. (Continued next page) –... - Page 10 Start/Pause Press Start to begin the cycle. NOTE: Unless Bulky cycle is selected, the lid must be closed for the washer to start cycle. If the lid is open, “Lid” will scroll across the display. During the load sensing portion of the cycle, the lid will lock, and “SEnSing” will scroll across the display. When load sensing is complete, the lid will unlock.
- Page 11 NOTE: Cycle Status lights vary by model. If an out-of-balance condition is detected by the washer, the Spin light will blink during the remaining portion of the cycle and will stay illuminated for a short time after cycle completion. When this occurs, the washer is taking actions to correct the out-of-balance condition and complete the cycle normally.
- Page 12 Settings Individual settings for water temperature (Temp), agitation (Soil), and spin (Spin) can be set from the minimum (lowest in column) to maximum (highest in column). NOTE: Longer Spin times typically reduce dryer time/energy usage (i.e.: reduces total energy when using both a washer and a dryer). Cycle Options Deep Fill Select the Deep Fill feature for loads where extra water is desired.
- Page 13 Smart Wash (on some models) When enabled, the Smart Wash option will automatically sense the soil level of the load and adjust the wash cycle accordingly (adding or removing agitation and soaking times) to achieve excellent wash performance while minimizing wear. Smart Rinse (on some models) The Smart Rinse feature senses the amount of soil and detergent in the current laundry cycle and determines whether additional water is needed to ensure a thorough rinse keeping...
- Page 14 Alexa Voice Assistant (PTW905 and PTW900 Models Only) The washer is embedded with Alexa voice assistant. When connected to the SmartHQ App, you can use your voice to automatically set the washer to handle tough stains or to set the appropriate cycle to wash specific fabrics.
- Page 15 Consumer Help Indicator Your washer is equipped with Consumer Help Indicator (CHI). CHI is our way to communicate a simple remedy for some situations that you can perform without the need to call for service. The chart below describes the helpful messages you may notice scrolling on your display when you return to start an- other load.
-
Page 16: Recommended Tools
Recommended Tools The following specialized tools are referenced within this service guide and may be ordered from GE Appliances. WX05X10022 Socket This is not an ordinary impact socket. This is a shallow wall deep well 1-5/16 impact socket, used to remove the washer hub nut. WX05X00000 3/8 x 17-3/8th Socket Extension The long socket extension is used for removing the single action agitator bolt. -
Page 17: Component Locator Views
Component Locator Views Underside Top Cover 900/905 Model Lid Switch/Lock Bleach Funnel Assembly Bulk Tank Dispenser Assembly – 17 –... -
Page 18: Underside Top Cover 700/705 And 600/605 Model
Underside Top Cover 700/705 and 600/605 Model Lid Switch/Lock Bleach Cup Assembly Dispenser Assembly – 18 –... -
Page 19: Tub Assembly 900/700 Model
Tub Assembly 900/700 Model Tub Cover Impeller Hub Nut and Impeller Belleville and Bolt Washer Main Harness Basket assembly Turbidity Sensor Accelerometer Platform/Transmission Assembly Drain Pump Seal Mode Shifter Mode Shifter Clutch Internal Drain Hose and Clamp Speed Sensor Drain Pump Rotor Motor Rotor Nut Stator Motor... -
Page 20: Tub Assembly 905/705 Model
Tub Assembly 905/705 Model Tub Cover Agitator Cap Auger and Bolt Impeller Main Harness Hub Nut and Belleville Washer Basket assembly Turbidity Sensor Platform/Transmission Mode Shifter Assembly Clutch Accelerometer Drain Pump Seal Mode Shifter Speed Sensor Internal Drain Hose and Clamp Stator Motor Drain Pump Rotor Motor... -
Page 21: Tub Assembly 600 Model
Tub Assembly 600 Model Tub Cover Impeller Impeller Hub Nut and and Bolt Belleville Washer Main Harness Tub Plug Basket assembly Mode Shifter Platform/Transmission Mode Shifter Assembly Clutch Drive Motor Drain Pump Seal Speed Sensor Internal Drain Drive Motor and Hose and Clamp transmission pulleys... -
Page 22: Tub Assembly 605 Model
Tub Assembly 605 Model Tub Cover Agitator Cap Auger and Bolt Impeller Main Harness Hub Nut and Belleville Washer Basket assembly Tub Plug Platform/Transmission Assembly Mode Shifter and Clutch Drain Pump Speed Sensor Seal Drive Motor Drive Motor and transmission pulleys Belt Internal Drain... -
Page 23: Backsplash Assembly
Backsplash Assembly Backsplash Assembly 900/905 Model Voice Speaker ASM Module To Mic Harness Power Cord Control Panel Housing Rear Panel Voice Module to Embedded User Interface Voice Module (UI) Harness User Interface (UI) to Wi-Fi RJ45 Harness Board Harness Control Panel Main Control Back Plate and Board (MCB) -
Page 24: Backsplash Assembly 600/605 Model
Backsplash Assembly 600/605 Models Backsplash Assembly 600/605 Model Power Cord User Interface Panel Back (UI) To Wi-Fi Gasket ASM Board Harness Console Rear Panel ASM Main Control Board (MCB) Control Panel RJ45 Harness Housing Main Harness User Interface (UI) Assembly Knob Assembly –... -
Page 25: Bottom View 900/905 And 700/705 Models
Bottom View 900/905 and 700/705 Models Front Accelerometer Platform/ Transmission Turbidity Assembly Sensor Mode Shifter Assembly Drain Pump and Internal Outlet Hose Suspension Assembly Harness Drive Motor Connectors – 25 –... -
Page 26: Bottom View 600/605 Models
Bottom View 600/605 Models Front Mode Shifter Assembly Tub Plug Belt Transmission Pulley Motor Pulley Drain Pump and Internal Outlet Hose Suspension Assembly Transmission Harness Support Assembly Connectors Belt Protector – 26 –... -
Page 27: Cabinet And Structure
Cabinet and Structure 3. Disconnect pressure hose from the pressure Control Panel Housing / Backsplash sensor, mounted on the control board. Assembly Remove water valve cover by pulling rear side of the washer. Backsplash Removal Pressure Water Valve Sensor Hose Cover Backsplash assembly contains, user interface board, main board, RJ45 connector, speaker... -
Page 28: Main Board
6. Slide the backsplash assembly to the rear and 4. Then remove the main board shield from the lift to remove. main board housing by pushing the shield back and lifting to release the front tabs. Control Panel Housing 5. Pulling the shield forward and lifting to release the rear tab. - Page 29 Screw Shield Main Board Housing 3. Remove one 1/4-in hex-head screw from the main board housing. When facing the rear of the washer, the screw will be located at the center right side of the main board housing, as shown below. Main Board Housing Removal 1.
-
Page 30: Capacitor (For 600/605 Models Only)
2. Remove four hex screws. Capacitor (For 600/605 Models Only) The capacitor is used in belt drive models only. As belt drive models use an induction motor which needs initial starting power to start. This power will be supplied from the capacitor as it stores energy. -
Page 31: Lid Strike
Lid Strike Lid Dampers The lid strike is located on the underside of the Lid dampers help for smooth closing and opening lid. When the lid is closed, the strike closes the of the lid with the help of an in-built hydraulic contacts of the lid switch. -
Page 32: Top Cover
5. Remove two damper assemblies and lid hinge 4. Slide the harness grommet out toward the from lid assembly. rear of the washer. Disengage the power cord from the top cover by lifting the front part of the cord and then slide forward to remove. Power Harness Grommet... -
Page 33: Suspension Assembly
Suspension Assembly Leveling Legs The suspension assembly consists of the ball Keeping the washer level is critical because joint, suspension rod, spring, foam, housing and the clearance of the tub to the cabinet/apron cap. This assembly is used to support the tub assembly is minimal. -
Page 34: Fill System
Fill System Four Coil Water Valve Removal Water Valves 1. Turn the house water supply off to the washer and disconnect power to the washer. The water valves are located inside the backsplash assembly. The four-solenoid water 2. Remove backsplash assembly (see valve allows water to flow into the dispenser Backsplash Removal under Control Panel assembly. -
Page 35: Thermistor
Dosing Pump Diagnosing Thermistor Verify dosing pump resistance is 1,744-ohms. The thermistor and harness come as one If the dosing pump resistance is out of range, assembly that connects to the main board. It replace the dosing pump. If the dosing pump has comes with an O-ring that creates a watertight the proper resistance, run Service Mode Test seal around the probe itself. -
Page 36: Bulk Tank Level Sensor
Bulk Tank Level Sensor Dispenser Drawer This machine is equipped with a bulk detergent The dispenser drawer holds detergent, fabric reservoir that can hold approximately 75-ounces softener and PODs, delivering at precise times of liquid detergent. When the Tank Low or Tank for the cycle selected. -
Page 37: Bleach Funnel
Bleach Funnel Bulk Tank (For 900/905 Models Only) The bleach funnel directs the liquid bleach to the The bulk tank is used to store 50 Oz., of top cover, dispensing it between the outer tub detergent, which will dispense automatically and the basket. -
Page 38: Lid Switch/Lock Assembly
2. Using a small screw-driver, push down gently Lid Switch/Lock Assembly on the tab that prevents the lock assembly from moving. The lid switch/lock assembly together help for safe and smooth operation of the washer. It will lock the lid to prevent accidental opening of the lid when washer is operating. -
Page 39: Agitators
2. Remove the hex-head bolt and side the Agitators impeller off the shaft. The spined coupler is part of the impeller. There are two types of agitators for the models listed in this manual, an impeller and a single stage agitator. Each works uniquely to give the desired washability. -
Page 40: Basket Assembly
Water Levels Basket Assembly Approximate Minimum Water Levels The basket assembly consists of the balance ring, basket side wall and the basket bottom. The • Impeller: 10-gallons or 4.1-in. deep from the hub is molded into the basket bottom. bottom of the basket. Basket Removal •... -
Page 41: Pressure Sensor
Pressure Sensor Diagnosing Pressure Sensor The pressure sensor uses a digital protocol (I2C) The pressure sensor’s purpose is to sense the instead of an analog signal. Therefore, the DC level of water in the tub when a cycle is being output voltage cannot be measured. -
Page 42: Drain System
Drain System Pump out as much of the standing water in the Drain Pump basket as possible. Lean the washer back and pump out the water seen in the basket. The drain pump is located on the bottom right When the drain pump is removed, approximately side of the tub. -
Page 43: External Drain Hose
6. Pull the pump away from the tub. Be sure Internal Drain Hose the seal comes off with the pump. The seal comes with a new pump but can be ordered The internal drain hose is used to direct the water separately. - Page 44 5. Squeeze the spring clamp and slide onto the drain hose where it clamps to the drain pump, then remove the hose. Internal Drain Hose – 44 –...
-
Page 45: Drive System
Drive System The drive system is used to spin the basket at a Belt Installation specified revolution in different cycles. There are 1. Put the belt on the motor pulley. two types of drive systems covered in this service manual: belt drive and direct drive. 2. -
Page 46: Speed/Hall Sensor
Pulley Removal Drive Belt Motor: For the PTW600/605 control board. The connector for the speed sensor is: 1. Remove the two hex-head nuts (one for J701 5 VDC. Pin 3 is ground. Pin 2 is the hall each pulley) securing them to the motor and effect sensor. -
Page 47: Drive Belt Motor
3. There is a locating post on the bottom of the 5. Unclip the main harness from the motor sensor that is pushed into an existing hole in connector by pushing down on the connector the motor housing when reinstalling. clip. -
Page 48: Direct Drive Motor
3. Unplug the speed sensor which is attached to Direct Drive Motor the stator assembly. The direct drive motor is a three-phase motor. The three-phase inverter is incorporated into the main board and provides to power the direct drive motor. The direct drive motor consists of a rotor and stator. -
Page 49: Mode Shifter
5. Remove two hex-head bolts securing the Mode Shifter mode shifter to the platform. The mode shifter, clutch, clutch spring, and flat washer will pull The mode shifter consists of a motor that away from the platform. operates by receiving 120 VAC from the control board, a micro switch, and a spring and clutch. - Page 50 4. Install the two hex-head bolts and torque to 4. Install the two hex-head bolts and torque to 60-in. pounds. 60-in. pounds. Clutch Clutch Guide Clutch Pins Spring Flat Guide Washer Tabs Clutch Locator Spring Holes Flat Washer Reinstalling Direct Drive Mode Shifter 1.
-
Page 51: Platform/Transmission Assembly
4. Cut the wire ties that support the main Platform/Transmission Assembly harness to the platform assembly. The platform assembly not only houses the 5. Remove hex-head bolts securing the motor transmission but is also used to mount the drive shield and the harness brackets to the motor and mode shifter. -
Page 52: Accelerometer (Direct Drive Models)
Reinstalling the Platform/Transmission Accelerometer (Direct Drive Models) Assembly Accelerometer senses the vibrations due to out 1. Slide the shaft of the transmission into the of balance at higher speeds and adjust the speed opening on the bottom of the tub. automatically. -
Page 53: Turbidity Sensor (Direct Drive Models)
Turbidity Sensor Removal Turbidity Sensor (Direct Drive Models) The turbidity sensor is located at the bottom of The turbidity sensor senses the dirt level of the the tub assembly beside the accelerometer for water with the help of light and based on this will 700/705 and 900/905 models. -
Page 54: Main Harness Assembly
Main Harness Assembly The main harness assembly supplies AC and 6. Remove the harness connectors from the DC voltage to all components on the washer. If connector brackets on the bottom of the tub. a wire or connector should fail, it will need to be 7. -
Page 55: Diagnostics
Diagnostics Consumer Fault Mode (CFM) Field Service Mode The Consumer Fault Mode provides a way for Field Service Mode Entry consumers to read the fault table from their Press and hold the Start button while rotating washers to provide them to the service call taker. the cycle selection knob seven clicks and then This will allow the service technicians to bring the release the Start button. -
Page 56: Service Mode Tests
Service Mode Tests Once the washer is in Service Mode, the following service features are available via the cycle knob: Description of test Knob Index/ Test number (Displayed on Test Name If tests call for numbers to be shown it will: Display on 7-Segment 7-Segment Display. - Page 57 Description of test Knob Index/ Test number (Displayed on Test Name If tests call for numbers to be shown it will: Display on 7-Segment 7-Segment Display. Turning the cycle knob will index to the Display) next or prior test. Flow Pressing Start will start the test.
- Page 58 Description of test Knob Index/ Test number (Displayed on Test Name If tests call for numbers to be shown it will: Display on 7-Segment 7-Segment Display. Turning the cycle knob will index to the Display) next or prior test. Change Pressing Start will start the test and display the first valid Personality personality.
-
Page 59: Fault Codes
Fault Codes Name Description Repair Action Lock Monitor This fault is set if the • Check the lid lock using Service Mode Spin motor shaft speed Test 14. exceeds 45 RPM for • Check lid lock harness connectors both at the 5-seconds while in spin main board and at the lid lock assembly. - Page 60 Name Description Repair Action Mode Shift If the mode shifter fails • If lid does not lock, use Service Mode Test 13 to complete a shift, it will to confirm lid switch is functional. retry two more times. If • Use Service Mode Test 14 to put the unit into it still doesn't complete a spin mode.
- Page 61 Name Description Repair Action 10 Mode Shift The following logic is • Check mode shifter coupler for damage and used to set this fault: the ability to slide in and out freely. Feedback • If motor power relay is • Use Test 14 to put the mode shifter into spin Monitor enabled and check continuity through the mode shifter...
- Page 62 Name Description Repair Action 19 User Interface UI state = IDLE and • Check for leaking water valves. (UI) State water present (pressure > • Use Pressure Sensor Test 10 to ensure Timeout 0.520") for 24 hours. correct pressure sensor operation. •...
- Page 63 Name Description Repair Action 23 Critical Lid Lock This fault is set when • Replace lid lock and lid lock harness then run Failure: Can't the software has tried below actions. Lock multiple times to Lock the • Check the lid lock using Service Mode Spin lid without success.
- Page 64 Name Description Repair Action 26 Out of Balance This fault is set if final • Run Drain and Spin cycle to ensure basket (OOB) spin terminates early due reaches final spin speed and the Spin LED Redistribution to too many redistribution does not blink (a blinking LED indicates that requests.
- Page 65 Name Description Repair Action 27 Water If the lid has been • Check for leaking water valves. Accessibility open continuously for • Use Pressure Sensor Test 10 to ensure 15-minutes without valves correct pressure sensor operation. being on and the tub is •...
- Page 66 Name Description Repair Action 31 Out of Balance The spin profile goes • Run Drain and Spin cycle to ensure basket (OOB) Fallback into fallback due to OOB reaches final spin speed and the Spin LED in Final Spin conditions during final does not blink (a blinking LED indicates that spin.
- Page 67 Name Description Repair Action 32 Critical Lid Lock This fault is set when • Replace lid lock and lid lock harness then run Failure: Can't the software has tried below actions. Unlock multiple times to unlock • Check the lid lock using Service Mode Spin the lid without success.
- Page 68 Name Description Repair Action 58 ADC Health This fault is set when • Replace main board. Check Fault any ADC Self-Diagnosis channel reports an out- of-tolerance value for 10-seconds. 65 Pressure The pressure sensor loss • See Fault Code 25. Sensor algorithm set conditions Continuous...
- Page 69 Name Description Repair Action 94 Water Quality Water Quality fault in Erd_ • Run Service Mode Test 20. TubMountedSensorFault. • If the turbidity reading from Service Mode Test 20 is out of range, press and hold the Start Detail information button for 3-seconds to calibrate the sensor.
- Page 70 Name Description Repair Action 99 Wi-Fi Wi-Fi module not • Check Wi-Fi harness connections. Communication responding. • If the above actions don't clear the fault, Fault replace Wi-Fi board, Wi-Fi harness, and Wi-Fi label on lid. • If the above actions don't clear the fault, replace main board.
-
Page 71: Voice Module
Voice Module Voice Module Diagnosing Check voice module harness connections. • If the above actions don't clear the fault, replace voice board and harness. • If the above actions don't clear the fault, replace User Interface (UI) board. • Voice module, speaker and microphone for 900/905 modules only. •... -
Page 72: Control Board Connector Locator
Control Board Connector Locator Control Board Electronic 900/905 and 700/705 Models J1101 J1102 J703 J701 J101 J512 J513 J1001 J802 J801 J702 J101 AC IN Power Cord J512 Sub washer (Red) J513 Lid Lock (White) Turbidity Sensor/Accelerometer J701 (Red) J702 RJ45 (Blue) J703 User Interface/Wi-Fi... -
Page 73: Control Board Electronic 600/605 Models
Control Board Electronic 600/605 Models J403 J401 J402 J404 J101 J302 J301 J303 J703 J101 AC IN Power Cord J301 RJ45/Data (Blue) J302 Turbidity Sensor (Red) J303 User Interface/Wi-Fi J401 Sub Washer (Red) J402 Water Valves (White) J403 Motor (Blue) J404 Lid Lock (White) J703... -
Page 74: User Interface/Wi-Fi Board
User Interface/Wi-Fi Board J103 J102 J102 User Interface (UI) to Voice Module J103 User Interface (UI) to Wi-Fi Wi-Fi board: 900/905 and 700/705 Models Only J103 J103 J103: User Interface (UI) to Wi-Fi – 74 –... -
Page 75: Schematics / Wiring Diagrams
Schematics / Wiring Diagrams 900/905 and 700/705 Models 8 7 6 5 18-GY 8 7 6 5 MS STATUS 20-CX 20-VX 20-SX 20-WX 20-TX Lid Magnet Striker 20-NX REED SWITCH 22-WX 22-RX LOCK IN 22-NX COIL LINE PHASE A PHASE B Line Hot Common 20-WX PHASE C... -
Page 76: 600/605 Models
600/605 Models Lid Lock Assy SW.OPEN = AGITATE *Nominal Resistance WV Coil (Ohms) Nom.13.2 SW.CLOSED = SPIN Drain Pump COLD SOFT CUSTOM Mode Shift MS Motor Resistance = 5700 (+/-570) 1374* 1515* 1374* 1374* Ohms Main Motor Windings= 2.8 to 4.2 Ohms Nominal Each Motor Start Motor Frame GND... -
Page 77: Index
Index Lid Lock Assembly Diagnosing 38 Accelerometer Diagnosing 52 Lid Strike 31 Agitators 39, 51 Lid Switch 17, 18, 38, 57, 60 Alexa Voice Assistant 14 Lock Assembly 17, 18, 38 Ball Joint 33 Mode Shifter Motor Diagnosing 49 Basket Assembly 40 Mode Shifter Switch Diagnosing 49 Belt Protector 21, 22, 26, 45, 47, 51 Bezel 38...
Need help?
Do you have a question about the GE PTW600BPR DG Series and is the answer not in the manual?
Questions and answers