
Related Manuals for Ferno RS5


Summary of Contents for Ferno RS5
- Page 1 Users’ Manual RS5 stretcher RS6 stretcher November 2022 Pub.No. 50-8400-001_08 Ferno Slovakia s.r.o. 913 07 Bosaca 893 Slovak Republic Tel: + 421 (0) 32 7708 010, sales@ferno.sk Fax: + 421 (0) 32 7708 011...
-
Page 2: Table Of Contents
1.6.3 Converting from chair to stretcher................. 15 1.6.4 Folding handle ......................16 1.7 Shock Frame ........................17 1.7.1 Raised shock position – RS5 a RS6 ................. 17 1.7.2 Contour shock position – RS6 ..................18 2. Using the Stretcher ........................19 2.1 Before Placing the Stretcher in Service ................ - Page 3 Ferno Slovakia RS5 and RS6 Stretcher 2.4.2 Transfer to transporter ....................22 2.5 Operator Skills and Training ....................22 2.5.1 Height and Strength Considerations ................22 2.6 Using Additional Help ......................23 3. Maintenance ..........................24 3.1 Maintenance Schedule ....................... 24 3.2 Disinfecting and Cleaning the Restraints ................
-
Page 4: Disclaimer
Retain this manual for future reference. Include it with the stretcher in the event of transfer to new users. Additional free copies are available upon request from FERNO Manufacturing. Untrained operators can cause injury or be 551 lb injured. -
Page 5: About The Stretcher
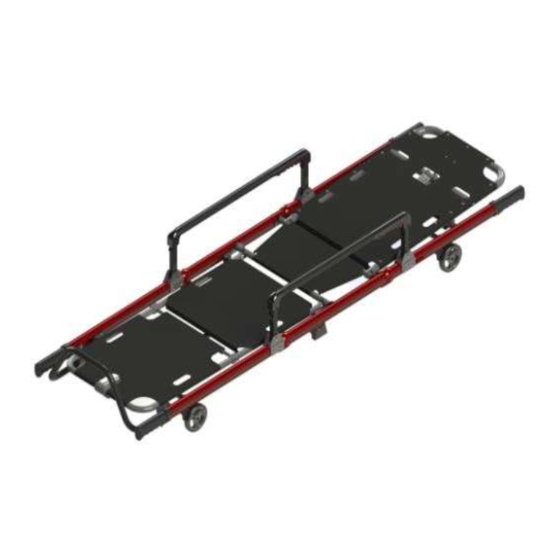
RS5 and RS6 Stretcher About the Stretcher The Models RS5 and RS6 are emergency patient-handling devices. Each stretcher in the series is for professional use by a minimum of two trained operators. The stretcher can be carried by the operators or attached to a compatible transporter for wheeled transport. -
Page 6: Components
Ferno Slovakia RS5 and RS6 Stretcher Components... -
Page 7: Symbol Glosary
RS5 and RS6 Stretcher Symbol Glosary The symbols defined below are used on the stretcher and in this users’ manual. Ferno uses symbols recognized by the International Standards Organization (ISO), American National Standards Institute (ANSI) and the emergency medical services industry. -
Page 8: Quick Set-Up Guide
Ferno Slovakia RS5 and RS6 Stretcher 1. Quick Set-Up Guide 1.1 Patient Restraints 1.1.1 About the Patient Restraints A set of three patient restraints is supplied: a harness torso restraint for use at the patient’s shoulders and chest; a 2134 mm (7-foot), one-piece restraint for use at the patient’s pelvis;... -
Page 9: Attaching The Torso Restraint
Ferno Slovakia RS5 and RS6 Stretcher 1.1.3 Attaching the Torso Restraint Attaching the shoulder straps Note: When attaching shoulder straps, verify that the links will be touching (facing the center of the backrest) when attached. 1. Wrap the looped end of a strap around the stretcher main-frame crosstube, located at the bottom of the backrest. -
Page 10: Attaching The Pelvis And Leg Restraints
Ferno Slovakia RS5 and RS6 Stretcher Attaching the chest straps 1. There are two pairs of restraint slots on the backrest frame. Select either the upper or lower pair of slots; attach the chest straps only to a matched set of slots. -
Page 11: Backrest
Ferno Slovakia RS5 and RS6 Stretcher 1.2 Backrest ● Purpose: The backrest allows the operator to elevate the patient’s torso for patient comfort or medical necessity. ● Before Use: ○ Loosen or unbuckle the torso restraint. ○ Support the weight of the backrest and patient. -
Page 12: Headrest Extension (Optional)
1.3 Telescoping Handles ● Purpose: A pair of telescoping handles are located at one end (RS5) or at each end (RS6) of the stretcher. The operators must extend the handles to lift and carry the stretcher. The handles lock into three positions: ○... -
Page 13: Folding Handles (Rs5)
Ferno Slovakia RS5 and RS6 Stretcher ● Use: To change the handle position, hold the handle and pull the red realease lever. Then push or pull the handle to the desired position. Release the lever and pull or push the handle until it locks. Use the telescoping handles only when they are in a locked position. -
Page 14: Sidearms (Rs5, Rs6)
Ferno Slovakia RS5 and RS6 Stretcher 1.5 Sidearms (RS5, RS6) ● Purpose: Sidearms provide the patient security and comfort. Keep the sidearms raised except during patient transfer. Sidearms open (raised) Use: ● to lower, while holding the side arm, depress the red lever and lower the side arm in the direction of the patient`s feet. -
Page 15: Chair Stretcher (Rs5)
Ferno Slovakia RS5 and RS6 Stretcher 1.6 Chair Stretcher (RS5) 1.6.1 Conversion lock The conversion lock is on both patient`s side of the stretcher chair between the sidearm and the foot end. It controls the function of converting the stretcher to chair and vice versa. -
Page 16: Folding Handle
Ferno Slovakia RS5 and RS6 Stretcher 1.6.4 Folding handles Purpose: it is used for maneurvering the chair To close: To open: 1. Hold the handle in the open position 1. Pull down on the rotable folding and pull it away from the chair. -
Page 17: Shock Frame
1.7 Shock Frame In addition to the flat position, the shock frame adjusts to two raised positions: ● Raised shock (Modified Trendelenburg position) – RS5 and RS6 ● Contour shock (Fowler’s position) – RS6 Follow your local medical protocols when deciding which position to use. Use an underhand grip (palms up) to support the shock frame while raising or lowering it. -
Page 18: Contour Shock Position - Rs6
Ferno Slovakia RS5 and RS6 Stretcher 1.7.1.2 Raised shock position – RS6 Use the raised or Trendelenburg shock position to elevate the patient’s legs. To raise the shock frame: 1. Unfasten or loosen the leg restraint. 2. From the foot end of the stretcher, lift the shock frame from the center until it locks in the raised position. -
Page 19: Using The Stretcher
● Set up the stretcher, following the instructions in the section 1.1 Patient Restraints, page 8. ● Confirm that the stretcher operates properly. ● The vehicle must have a Ferno® fastener system installed. 2.2 General Guidelines for Use ● Medical advice is beyond the parameters of this manual. -
Page 20: Attaching And Removing A Stretcher
Ferno Slovakia RS5 and RS6 Stretcher 2.3 Attaching and Removing A Stretcher The stretcher can be locked onto a transporter with the patient’s head at either end of the transporter. A stretcher locks onto the transporter when the strike pins on the bottom of the stretcher engage the transporter slam latches. -
Page 21: Removing The Stretcher
Ferno Slovakia RS5 and RS6 Stretcher 2.3.2 Removing the stretcher 1. Both Operators: As the Control Operator pushes and holds the yellow stretcher-release handle on the transporter, both operators move the stretcher slightly toward the control end of the transporter to move the strike pins out of the slam latches. -
Page 22: Transfer To Transporter
Ferno Slovakia RS5 and RS6 Stretcher 2.4.2 Transfer to transporter Use this transfer procedure when the patient is on a bed, sofa, etc. and the transporter can be placed near the patient. 1. Position the transporter near the patient, lower it to the patient’s level, and lock the wheel locks. -
Page 23: Using Additional Help
● Side helpers may need to walk sideways under some circumstances. Follow local protocols. ● Ferno recommends that helpers work in pairs to help maintain stretcher balance. The chart at right shows suggested placement for operators and helpers. -
Page 24: Maintenance
Keep maintenance records. When using maintenance products, follow the manufacturers’ directions and read the manufacturers’ material safety data sheets. You can purchase a recommended disinfectant from your Ferno distributor. 3.2 Disinfecting and Cleaning the Restraints Remove the restraints from the stretcher. -
Page 25: Disinfecting And Cleaning The Mattress
3.4 Disinfecting the Stretcher Wipe all surfaces with disinfectant. Follow the disinfectant manufacturer’s instructions for application method and contact time. Ferno recommends you inspect the stretcher for damage as you disinfect it. 3.5 Cleaning the Stretcher 1. Remove the restraints, mattress and any accessories. -
Page 26: Lubricating The Stretcher
4. Parts and Services To order Ferno parts, and for professional stretcher repair, contact FERNO or your Ferno distributor. Your distributor is the only agent authorized by Ferno to manage, service, and repair Ferno products. Ferno Slovakia Contact: Ferno Slovakia s.r.o. Bošáca 893... - Page 27 Ferno Slovakia RS5 and RS6 Stretcher TRAINING RECORD Date Name Training Method...
- Page 28 Ferno Slovakia RS5 and RS6 Stretcher MAINTENANCE RECORD Date Maintenance Performed...
Need help?
Do you have a question about the RS5 and is the answer not in the manual?
Questions and answers