Table of Contents
Advertisement
Quick Links
Advertisement
Table of Contents

Subscribe to Our Youtube Channel
Related Manuals for Sierra Wireless AirLink Raven XT


Summary of Contents for Sierra Wireless AirLink Raven XT
- Page 1 AirLink Raven XT User Guide 20070914 Rev 1.0...
- Page 3 Note: Some airlines may permit the use of cellular phones while the aircraft is on the ground and the door is open. Sierra Wireless AirLink Raven XT may be used at this time. The driver or operator of any vehicle should not operate the Sierra Wireless AirLink Raven XT while in control of a vehicle.
- Page 4 Sierra Wireless, registered in the European Community. AirLink™ and AceWare™ are trademarks of Sierra Wireless. Sierra Wireless, the Sierra Wireless logo, the red wave design, and the red-tipped antenna are trademarks of Sierra Wireless. ® Windows is a registered trademark of Microsoft Corporation.
- Page 5 Preface Revision History Revision Release date Changes number Q2: 2009 Guide updated with ALEOS Release 4.0 content. Q1: 2010 User Guide rebranded to current corporate standards. Rev 1.0 May.10...
- Page 6 Raven XT 20070914...
-
Page 7: Table Of Contents
Contents Introduction to the Raven XT ........1 Simplified Deployment. - Page 8 Raven XT Power Connector ..........11 Activating Raven XT on your cellular provider .
-
Page 9: Introduction To The Raven Xt
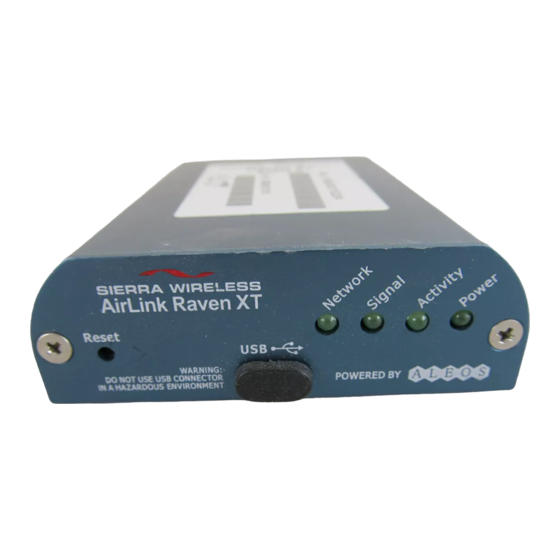
SCADA, telemetry, Homeland Security and asset monitoring. Figure 1-1: Sierra Wireless AirLink Raven XT ALEOS, the embedded core technology of the Sierra Wireless AirLink products simplifies installation, operation and maintenance of any solution, and provides an always-on, always-aware intelligent connection for mission-critical applications. -
Page 10: Simplified Deployment
ACEmanager), Windows-based applications (ACEview and Modem Doctor), and a web-hosted application (ACEnet). You can download the applications and their user guides from the Sierra Wireless AirLink Solutions web site: http:// www.sierrawireless.com/support. Contact your dealer or Sierra Wireless representative for any further information. -
Page 11: Monitor And Control
Modem Doctor and Modem Doctor USB is a troubleshooting and diagnostics utility. This utility will allow you to get a log file of the Raven XT activity which you can then send to Sierra Wireless support or erase the current configuration completely. -
Page 12: Steps Of A Connection
Raven XT Steps of a connection: 1. When your Raven XT is powered on, it automatically searches for cellular service using GSM/GPRS. 2. Your Raven XT establishes a PPP (Point to Point Protocol or “dial” up connection) link to your cellular provider network, also called registering on the network, and receives an IP address. -
Page 13: Gsm
Introduction to the Raven XT If you want to connect remotely to your Raven XT using TCP/IP, the IP address Caution: given to your modem by your cellular provider cannot be a private or internal IP address (such as a special private network) unless you are on the same network or inside that network’s firewall (such as with frame relay). -
Page 14: Networking
This is achieved by using authentication algorithms and their outputs. The IPSec architecture model includes the Sierra Wireless AirLink gateway as a remote gateway at one end communicating, through a VPN tunnel, with a VPN gateway at the other end. -
Page 15: Gre
The firmware that is stored in non-volatile memory and includes ACEmanager. The Raven XT has an embedded radio module, also made by Sierra Wireless, Inc. There are two firmware programs on the device—one stored on the con- troller board of the Raven XT and one on the radio module. -
Page 16: Tools And Reference Documents
ACEview User Guide This document explains the use of this utility tools which is used to view and monitor the connection state of a Sierra Wireless AirLink device. ACEnet User Guide This document explains the use of ACEnet services for remote management of Sierra Wireless AirLink device. -
Page 17: Specifications
2: Specifications • Interface Port Pin- Outs • Power Connector Features and Benefits • Embedded Intelligence • Low Power Consumption • High-Speed Processor • High-Speed 2-way Data • Serial and USB Port • Machine Protocols • Simple Integration with Legacy Equipment •... -
Page 18: Standards/Approvals
Raven XT Standards/Approvals • Carrier specific approvals • • Industry Canada Note: The device fulfills only class A limits. Host Interfaces Note: In consideration of EU regulations, this • USB2.0 Full Speed (Mini-B5) device is classified as Class A device for use in •... -
Page 19: Interface Port Pin-Outs
Specifications Interface Port Pin-Outs Serial Port < - > GND (Ground) Unused < - DTR Data Terminal Ready) < - CTS (Clear to Send) < - Rx (Receive) - > RTS (Request to Send) - > Tx (Transmit) < - DSR (Data to Send) - >... - Page 20 Raven XT 20070914...
-
Page 21: Activating Raven Xt On Your Cellular Provider
Generally, you will only need to install a SIM once in the life of the modem and it may be pre-installed by your Sierra Wireless Representative. If the SIM was pre-installed activation of your modem is complete. -
Page 22: Tools Required
Raven XT Tools Required • Small Phillips screw driver - The Phillips screw driver is the one which is also called a plus (+) or X screw driver. Procedure a. Carefully remove the SIM card from the card you received from your cellular provider. - Page 23 Activating Raven XT on your cellular provider The default APN is Internet. If you need a different APN, use ACEmanager to configure it. Rev 1.0 May.10...
- Page 24 Raven XT 20070914...
-
Page 25: Hardware Installation Of The Raven Xt
4: Hardware Installation of the Raven XT • Connecting to Power • Connecting to a Computer or other Device • Indicator Lights • Mounting Your Raven XT should be mounted in a position that allows easy Note: During installation, access for the cables so they are not bent, constricted, in close please be sure that the cables are secure but do proximity to high amperage, or exposed to extreme temperatures. -
Page 26: Connecting To Power
The DC power cable positive lead should be connected to the battery or power power source (such as a source positive terminal. The power cable negative lead should be connected to the battery or power source negative terminal. solar cell), Sierra Wireless recommends placing a fuse (1-2 Amp) on the line Tip:... -
Page 27: Connecting To A Computer Or Other Device
Hardware Installation of the Raven XT Connecting to a Computer or other Device Figure 4-3: USB Your Raven XT’s full-speed (12 Mbit) USB 2.0 port can be connected directly to most computers or other devices using a standard full-speed USB 2.0 cable. If the computer or device you are connecting or the cable is not rated for full-speed, the modem will communicate at a reduced speed to match. -
Page 28: Light Patterns
Raven XT RSSI LED Ranges RSSI/Signal LED Ranges of RSSI (dBm) Status On Solid Equal to or stronger than -69 Fast Blink -70 to -79 Normal blink -80 to -89 Slow Blink -90 to -99 Extinguished Equal to or weaker than -100 •... -
Page 29: Mounting
Hardware Installation of the Raven XT Mounting An optional accessory for your Raven XT is a mounting kit, which includes a bracket. The bracket is designed to snugly cradle the modem and hold it in place where you need it. You can use a strap around the bracket and modem for extra security. - Page 30 Raven XT Figure 4-6: Mounting bracket installation 20070914...
- Page 31 Hardware Installation of the Raven XT Figure 4-7: 100-170-1013 : Mounting Bracket for Raven XT Rev 1.0 May.10...
- Page 32 Raven XT 20070914...
-
Page 33: Inputs, Relay Outputs, And Power Status
5: Inputs, Relay Outputs, and Power Status • Capturing External The Raven XT has special features for use in an M2M environment. Events using The Raven XT can be configured to monitor the input, respond to Inputs specific types of events, and even trigger a digital output. These features can be configured to your needs. -
Page 34: Connecting Devices To The Io Port
Raven XT Figure 5-2: Digital Input Contact Closure • When a door or other latch is opened or closed. • Counting pulses or other electronic events. • When a gauge reaches a certain point. • When a container fills or empties. •... -
Page 35: Monitoring The Input And Output
Inputs, Relay Outputs, and Power Status Current Voltage Minimal 3.3vMAX 16 mA 2.4vMAX 24mA 2.3vMAX Minimal vMin 24mA .55Min Output Specs (Over temp) Function IOUT VOHmin (IOH - 16 mA) VOHmin (IOH - 24 mA) VOLmax(IOL 24mA) Figure 5-4: Power Connector Diagram Never apply voltage to the Digital inputs. - Page 36 Raven XT Figure 5-5: ACEmanager : I/O 20070914...
Need help?
Do you have a question about the AirLink Raven XT and is the answer not in the manual?
Questions and answers