Table of Contents
Advertisement
Available languages
Available languages
Advertisement
Chapters
Table of Contents

Related Manuals for Avalon A1TL


Summary of Contents for Avalon A1TL
- Page 1 English A few simple steps to ensure perfect water, every time.
- Page 2 English...
- Page 3 Live Chat: We are also available Monday-Thursday: 9 a.m.-5:30 p.m. for live video chat! Friday: 9 a.m.-4:30 p.m. Let’s Connect Follow our social media accounts and stay up to date on the latest Avalon news. @avalon_h2o Avalon Water Coolers Avalonh2o www.avalonh2o.com...
- Page 4 English Use and Care Guide MODELS: A1TL • A2TL Registration Please visit the website below to register your new water cooler within the first 30 days of purchase. Registration within the first 30 days will activate your one year warranty.
-
Page 5: Table Of Contents
English Contents About Your Water Cooler Meet Your Avalon Product Part Names Indicator Lights Tech Specs Getting Started Unpacking Operation instructions Cleaning 11-13 Rinsing, Cleaning and Draining 14-15 Cleaning Troubleshooting 16-18 Safety 19-21 Warranty... - Page 6 English...
-
Page 7: About Your Water Cooler
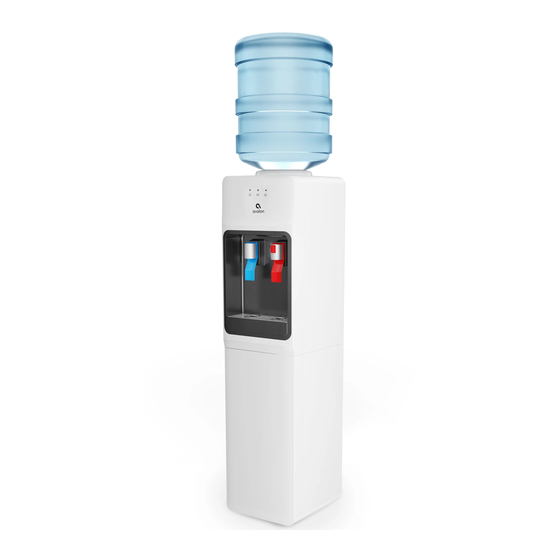
English About Your Water Cooler Meet Your Avalon Product Attractive Design Custom Temperature Top Loading Attractive design with Piping hot, Suitable for 3 or press-paddle spouts or crisp cold water 5 gallon bottles UL Listed Child Safety Feature We design & manufacture... -
Page 8: Part Names
English About Your Water Cooler Part Names 2. Heating Indicator Light 1. Bottle Supporter 4. Power Indicator Light 7. Child Safety Lock 8. Hot Water Spout 5. Cold Water Spout 6. Cold Water Press Paddle 9. Hot Water Press Paddle 10. -
Page 9: Indicator Lights
English About Your Water Cooler Indicator Lights Power Indicator Light This light will remain on as long as the water cooler is plugged in to indicate that the cooler is on. Heating Indicator Light This light will indicate when the water is heating. The light will remain on while the water is heating and will turn off when it has reached the correct temperature of 185°F. -
Page 10: Tech Specs
English About Your Water Cooler Tech Specs Model A1TL • A2TL Hot/Cold Temp Output 2L/min / 2.2L/min Hot Water Capacity 4 L/H ( ≥ 185°F) Hot Tank Volume 1.02 Liters Cold Water Capacity 2 L/H ( ≤ 47°F) Cold Tank Volume... -
Page 11: Getting Started
English Getting Started... -
Page 12: Unpacking
English Getting Started Unpacking Your Avalon Water Cooler The unit has been cleaned prior to departing from the factory. To remove any dust and debris that may collect during shipping we recommend cleaning the unit prior to installation. For cleaning instructions, see pages 12-16. -
Page 13: Operation Instructions
English Getting Started Operation Instructions Do not plug in the machine or turn on the heating (#12) and cooling (#11) switches until water has begun to dispense from the cold (#5) and hot (#8) water spout. 1. Remove any label or sticker from 2. - Page 14 English Getting Started Operation Instructions 3. Press the hot (#9) and cold (#6) 4. Once water is dispensing from both water press paddles for the hot spouts insert the power plug into a (#8) and the cold (#5) water spout power socket.
- Page 15 English Getting Started Operation Instructions 5. Once the switches are in the on position 6. When the water has reached the the heating indicator light (#2) and the appropriate temperatures for hot and cooling indicator light (#3) will turn on (I). It cold the indicator lights will turn off will take about 15 –...
- Page 16 English Cleaning...
-
Page 17: Rinsing, Cleaning And Draining
English Cleaning Rinsing, Cleaning, and Draining To prolong the lifetime of the machine, it is recommended that the unit be cleaned and sanitized manually about every six months. To clean the outside of the unit Use a disinfectant of your choice to wipe down the outside of the machine. Disinfectant does not come with this unit. - Page 18 English Cleaning Rinsing, Cleaning, and Draining 3. Dispense about 2 liters of 4. Place a large bucket beneath the drain water from the unit into a bucket outlet (#14) located on the back of the unit. by pressing the hot water press Remove the drain cover and allow the water paddle (#9) and the cold water to drain from the unit.
- Page 19 English Cleaning Rinsing, Cleaning, and Draining 5. Remove any remaining water in 6. After draining is complete, the tanks by dispensing water from replace the drain cover and the hot water spout (#8) and the cold use the machine as normal. water spout (#5) into a bucket.
-
Page 20: Cleaning
English Cleaning Cleaning To remove mineral deposits that may have built up inside the the cold tank, mix 4 L of water with 200 g of citric acid crystals (not included) or cleaning solution of your choice. 1. Twist off the bottle supporter. 2. - Page 21 English Cleaning Cleaning 3. Plug in the power cord and turn on 4. Turn off (O) the heating switch (I) the heating switch (#12). Allow the (#12) and allow the liquid mixture to water to heat for 15 minutes. cool down for 20 minutes. 15 min 20 min 5.
-
Page 22: Troubleshooting
English Troubleshooting... - Page 23 English Troubleshooting Troubleshooting If you are having trouble with your water cooler please see the following solutions. You can also view our trouble shooting videos at the website below. Please feel free to contact us with any questions. 1-800-256-0695 support@avalonh2o.com www.avalonh2o.com...
- Page 24 English Troubleshooting Troubleshooting No water dispensing from spouts This could be caused by the water bottle being empty. Please replace the bottle and allow 5-10 minutes for the water cooler tanks to fill up. Allow the proper time for the water to heat and cool.
-
Page 25: Safety
English Safety... - Page 26 English Safety Safety To reduce risk of injury and property damage, user must read this entire guide before assembling, installing and operating the dispenser. Failure to execute the instructions in this manual can cause personal injury or property damage. This product dispenses water at very high temperatures. Failure to use this properly can cause personal injury.
- Page 27 English Safety Safety • Ensure dispenser is unplugged prior to cleaning. • Never allow children to dispense hot water without proper and direct supervision. Unplug unit to prevent unsupervised use by children. • Service should be performed only by a certified technician. •...
-
Page 28: Warranty
English Warranty... - Page 29 An “original purchaser,” for the purposes of this Limited Warranty, is an individual or entity who purchases the product directly from Avalon or an authorized retailer of Avalon with the intent to use the product for personal consumer use and commercial or industrial use and not with the intent to resell the product. An “authorized retailer,”...
- Page 30 English...
- Page 31 Español...
- Page 32 Español Unos pocos y sencillos pasos para garantizar un agua perfecta, en cualquier momento.
- Page 33 Español...
- Page 34 Envíanos un Correo Electrónico: support@avalonh2o.com sales@avalonh2o.com Chat en Vivo: ¡También estamos Lunes-Jueves: 9:00-17:30 disponibles para Viernes: 9:00-16:30 video chat en vivo! Conectemos Siga nuestras cuentas de redes sociales y manténgase actualizado sobre las últimas noticias de Avalon. @avalon_h2o Avalon Water Coolers Avalonh2o www.avalonh2o.com...
- Page 35 Español Manual de Uso y Mantenimiento MODELOS: A1TL • A2TL Registro: Por favor, visite el siguiente enlace para poder registrar su nuevo dispensador de agua fría durante los primeros 30 días desde su fecha de compra. Registrarlo durante los primeros 30 días activará su garantía de un año.
- Page 36 Español Contenido Sobre su dispensador Conozca su producto Avalon Nombres de los componentes Luces indicadoras Especificaciones técnicas Empezando Desempaquetando Instrucciones de uso Limpieza Enjuagar, limpiar y drenaje Limpieza 11-13 14-15 Solución de problemas 16-18 Seguridad 19-21 Garantía...
- Page 37 Español...
-
Page 38: Sobre Su Dispensador
Español Sobre su dispensador Conozca su producto Avalon Atractivo diseño Temperaturas a medida Carga desde arriba Atractivo diseños con Muy caliente o agua Válido para botellas chorros accionados súper fría de 3 o 5 galones por paletas Protección UL Seguridad infantil Diseñamos &... -
Page 39: Nombres De Los Componentes
Español Sobre su dispensador Nombres de los componentes 2. Indicador luminoso calentamiento 1. Soporte de la botella 4. Indicador luminoso encendido 7. Seguro anti-niños 8. Chorro agua caliente 5. Chorro agua fría 6. Paleta agua fría 9. Paleta agua caliente 10. - Page 40 Español Sobre su dispensador Indicadores Luminosos Indicador Luminoso Encendido Esta luz seguirá activada para indicar que la unidad está conectada y encendida. Indicador Luminoso Calentamiento Esta luz indica que el agua está calentándose. La luz seguirá encendida mientras que el agua esté calentándose y se apagará cuando se alcance la temperatura correcta de 185°F (85°C).
-
Page 41: Especificaciones Técnicas
Español Sobre su dispensador Especificaciones técnicas Modelos A1TL • A2TL Caliente/frío Salida 2L/min / 2.2L/min Capacidad agua caliente 4 L/H ( ≥ 185°F) Volumen depósito agua caliente 1.02 Litros Capacidad agua fría 2 L/H ( ≤ 47°F) Volumen depósito agua fría 3 Litros Tamaño producto... - Page 42 Español Empezando...
- Page 43 Español Empezando Desempaquetando su dispensador Avalon Este dispositivo ha sido limpiado antes de salir de la fábrica. Para eliminar cualquier suciedad o polvo que se haya podido acumular durante el transporte, le aconsejamos que limpie el dispositivo antes de instalarlo. Para ver las instrucciones de limpieza, vaya a las páginas 12-16.
-
Page 44: Instrucciones De Uso
Español Empezando Instrucciones de uso No enchufe la máquina ni encienda los botones de calentamiento (#12) y refrigeración (#11) hasta que el agua haya empezado a fluir de los chorros de agua fría (#5) y caliente (#8). 1. Quite cualquier etiqueta o pegatina 2. - Page 45 Español Empezando Instrucciones de uso 3. Presione las paletas de agua 4. Una vez que el agua fluye desde caliente (#9) y fría (#6) para permitir ambos chorros, conecte el dispositivo a que salga de los chorros caliente (#8) un enchufe. Encienda (I) el interruptor y frío (#5) unas gotas de agua.
- Page 46 Español Empezando Instrucciones de uso 5. Una vez que los interruptores están 6. Cuando el agua haya alcanzado sus encendidos, el indicador luminoso de temperaturas óptimas para el agua calentamiento (#2) y el indicador luminoso caliente y fría, los indicadores luminosos de refrigeración (#3) se encenderán (I).
-
Page 47: Limpieza
Español Limpieza... - Page 48 Español Limpieza Enjuagar, limpiar y drenaje Para prolongar la vida útil de la máquina, se recomienda que la unidad sea limpiada y desinfectada manualmente cada seis meses. Para limpiar el exterior de la unidad Use un desinfectante de su elección para limpiar el exterior de la máquina. El desinfectante no viene incluido con esta unidad.
- Page 49 Español Limpieza Enjuagar, Limpiar y Drenaje 3. Vacíe entorno a 2 litros de agua 4. Coloque un gran cubo debajo de la del dispositivo presionando las salida de drenaje (#14) situada detrás del paletas de agua caliente (#9) y dispositivo y deje que el agua se drene de fría (#6) sobre un cubo.
- Page 50 Español Limpieza Enjuagar, Limpiar y Drenaje 5. Quite toda agua que quede en los 6. Una vez finalizado el drenaje, depósitos haciendo salir el agua de vuelva a colocar el tapón de los chorros de agua caliente (#8) y drenaje, conecte y vuelva a usar agua fría (#5) sobre un cubo.
- Page 51 Español Limpieza Limpieza Para quitar todos los depósitos de minerales que hayan podido surgir en el interior del depósito de agua fría, mezcle 4 L de agua con 200 gr de cristales de ácido cítrico (no incluidos) o cualquier otra mezcla de limpieza de su elección.
- Page 52 Español Limpieza Limpieza 3. Conecte el cable de alimentación 4. Apague (O) el interruptor de y encienda (I) el interruptor de calentamiento (#12) y deje que la mezcla calentamiento (#12). Deje que el agua líquida se enfríe durante 20 minutos. se caliente durante 15 minutos.
-
Page 53: Solución De Problemas
Español Solución de problemas... - Page 54 Español Solución de problemas Solución de problemas Si tiene algún problema con su distribuidor de agua fría, por favor vea las siguientes soluciones. También puede ver nuestros videos de solución de problemas en nuestra página web. Por favor, no dude en contactar con nosotros si tiene cualquier pregunta. 1-800-256-0695 support@avalonh2o.com www.avalonh2o.com...
- Page 55 Español Solución de problemas Solución de problemas El agua no sale por los chorros Esto puede deberse a que la botella de agua esté vacía. Reemplace la botella deje 5-10 minutos para que los depósitos de agua del dispensador vuelvan a llenarse. Deje un tiempo razonable para que el agua se caliente y se enfríe.
-
Page 56: Seguridad
Español Seguridad... - Page 57 Español Seguridad Seguridad Para reducir los riesgos de lesiones y daños materiales, el usuario debe leer completamente esta guía antes de montar, instalar y utilizar este dispensador. Un fallo a la hora de ejecutar las instrucciones de este manual puede causar daños personales o materiales.
- Page 58 Español Seguridad Seguridad • Asegúrese que el dispensador esté desconectado antes de ser limpiado. • Nunca deje que los niños sirvan agua caliente sin una correcta y directa supervisión. Desconecte la unidad para evitar cualquier uso sin • supervisión por parte de niños. •...
-
Page 59: Garantía
Español Garantía... - Page 60 PUEDE HACER UNA RECLAMACIÓN VÁLIDA. Su fecha de compra se establece a partir de la fecha de su recibo de compra. Avalon puede requerir que el comprador proporcione prueba de la calidad y el estado del enfriador de agua si el comprador realiza un reclamo bajo esta Garantía limitada. Avalon se reserva el derecho de invalidar esta Garantía limitada si se determina que el enfriador de agua, a discreción razonable de Avalon, es inadecuado o si el enfriador de agua se encuentra en condiciones insalubres.
- Page 61 Español...
- Page 62 Français...
- Page 63 Français Quelques pas très simples pour garantir une eau parfaite, à n´importe quel moment.
- Page 64 Français...
- Page 65 Tchat en Direct: Nous sommes également Lundi-Jeudi: 9h-17h30 disponibles pour le tchat Vendredi: 9h-16h30 vidéo en direct Connectons-Nous Suivez nos comptes de réseaux sociaux et restez au courant des dernières nouvelles d’Avalon. @avalon_h2o Avalon Water Coolers Avalonh2o www.avalonh2o.com...
- Page 66 Français Manuel d´Utilisation et de Maintenance MODÈLES: A1TL • A2TL Registre: S´il vous plaît, visitez le lien suivant pour pouvoir registrer votre nouvelle fon- taine d´eau fraîche dans les 30 jours a partir de la date de votre achat. Enreg- istrer votre produit durant les 30 premiers jours activera votre garantie pendant un an.
- Page 67 Français Contenu Concernant votre fontaine Connaissez votre produit Avalon Noms des composants Voyants lumineux Spécifications techniques Commencement Déballage Instructions d´Utilisation Nettoyage 11-13 Rincer, Laver et Drainage 14-15 Nettoyage 16-18 Dépannage 19-21 Sécurité Garantie...
- Page 68 Français...
-
Page 69: Concernant Votre Fontaine
Français Concernant votre fontaine Connaissez votre produit Avalon Design attractif Températures sur mesure Chargement supérieur Design attractif avec Très chaude ou Bon pour des jets d´eau actionnés super fraîche bouteilles de 3 et 5 avec palettes galons Protection UL Sécurité pour les enfants Nous concevons &... -
Page 70: Noms Des Composants
Français Concernant votre fontaine Noms des composants 2. Voyant lumineux réchauffage 1. Support de la bouteille 4. Voyant lumineux allumé 7. Sécurité anti-enfants 8. Jet eau chaude 5. Jet eau fraîche 6. Palette eau fraîche 9. Palette eau chaude 10. Plateau anti-goutte 11. -
Page 71: Voyants Lumineux
Français Concernant votre fontaine Voyants lumineux Voyant lumineux allumé Cette lumière demeurera allumée pour indiquer que le dispositif est connecté et allumé. Voyant lumineux réchauffage Cette lumière indique que l´eau est en train de se chauffer. La lumière demeurera allumée pendant que l´eau se chauffe et elle s´éteindra lorsque I´eau atteindra la température adéquate de 185°F (85°C). -
Page 72: Spécifications Techniques
Français Concernant votre fontaine Spécifications techniques Modèles A1TL • A2TL Chaude/fraîche Sortie 2L/min / 2.2L/min Capacité d´eau chaude 4 L/H ( ≥ 185°F) Volume du réservoir d´eau chaude 1.02 Litres Capacité d´eau fraîche 2 L/H ( ≤ 47°F) Volume du réservoir d´eau fraîche... - Page 73 Français Commencement...
- Page 74 Français Commencement Déballage de votre fontaine d´eau fraîche Avalon Ce dispositif a été nettoyé avant de sortir de l´usine. Pour éliminer toute poussière ou saleté accumulées pendant le transport, nous vous recommandons de nettoyer le dispositif avant de l´installer. Pour voir les instructions de nettoyage, lisez les pages 12-16.
-
Page 75: Instructions D´utilisation
Français Commencement Instructions d´utilisation Ne branchez pas la machine et n´allumez pas les interrupteurs de chauffage (#12) et de réfrigération (#11) jusqu´à que l´eau coule des jets d´eau fraîche (#5) et chaude (#8). 1. Enlevez toute étiquette ou 2. Insérez verticalement la bouteille sur le autocollant sur le goulot de la support (#1) qui se trouve en haut de la bouteille. - Page 76 Français Commencement Instructions d´utilisation 3. Faites pression sur les palettes d´eau 4. Une fois que l´eau coule des deux jets chaude (#9) et fraîches (#6) pour d´eau, connectez le dispositif à une prise. permettre que quelques gouttes sortent Allumez (I) l´interrupteur de chauffage des jets d´eau chaude (#8) et fraîche (#12) et de réfrigération (#11).
- Page 77 Français Commencement Instructions d´utilisation 5. Une fois que les interrupteurs sont 6. Quand l´eau est arrivée à ses allumés, le voyant lumineux de températures parfaites pour I ´eau réchauffage (#2) et de refroidissement chaude et l´eau fraîche, les voyants (#3) s´allumeront (I). Vous devrez lumineux s´éteindront et la machine patientez entre 15-20 minutes pour que I´eau sera prête pour être utilisée.
-
Page 78: Nettoyage
Français Nettoyage... - Page 79 Français Nettoyage Rincer, Nettoyer et Drainer Pour prolonger la durée de vie de votre machine, nous vous recommandons que le dispositif soit nettoyé et désinfecté manuellement tous les six mois. Pour nettoyer l´extérieur du dispositif Utilisez un désinfectant de votre choix pour nettoyer l´extérieur de la machine.
- Page 80 Français Nettoyage Rincer, Nettoyer, Drainage 3. Versez environ 2 litres 4. Placez un grand seau sous la sortie de d´eau dans le dispositif en drainage (#14) située derrière le dispositif. appuyant les palettes d´eau Enlevez le bouchon de drainage et laisser chaude (#9) et d´eau fraîche (#6) couler l´eau pour drainer le dispositif.
- Page 81 Français Nettoyage Rincer, Nettoyer et Drainage 5. Enlevez toute eau qui puisse rester 6. Une fois le drainage fini, dans les réservoirs en faisant sortir remettez le bouchon de la l´eau des jets d´eau chaude (#8) et sortie de drainage et vous fraîche (#5) sur un seau.
- Page 82 Français Nettoyage Nettoyage Pour éliminer les dépôts de minerais qui peuvent apparaitre au fond du réservoir d´eau fraîche, mélangez 4 L d´eau avec 200 gr de cristaux d´acide citrique (non inclus) ou n´importe quel autre mélange de nettoyage de votre choix. 1.
- Page 83 Français Nettoyage Nettoyage 3. Connectez le câble d´alimentation 4. Éteignez (O) l´interrupteur de et allumez (I) l´interrupteur de chauffage (#12) et laissez que le chauffage (#12). Laissez que l´eau se mélange liquide se refroidisse chauffe pendant 15 minutes. pendant 20 minutes. 15 min 20 min 5.
-
Page 84: Dépannage
Français Dépannage... - Page 85 Français Dépannage Dépannage Si vous avez un problème avec votre fontaine d´eau fraîche, regardez les solutions suivantes. Vous pouvez aussi voir nos vidéos de résolutions de problèmes sur notre site d´internet. N´hésitez pas à nous contacter si vous avez des questions à...
- Page 86 Français Dépannage Dépannage L´eau ne sort pas à travers les jets d´eau Ceci peut être dû au fait que la bouteille d´eau est vide. Remplacez la bouteille et patientez de 5-10 minutes pour que les réservoirs de la fontaine se remplissent à nouveau. Patientez un temps raisonnable pour que l´eau se réchauffe et refroidisse.
-
Page 87: Sécurité
Français Sécurité... - Page 88 Français Sécurité Sécurité Pour réduire les risques de blessures et dégâts matériels, l´utilisateur doit lire complètement ce guide avant d´installer et d´utiliser cette fontaine d´eau fraîche. Une erreur au moment d´exécuter les instructions de ce manuel peut provoquer des dégâts matériels et des dommages corporels.
- Page 89 Français Sécurité Sécurité • Vérifiez que la fontaine est déconnectée avant de la laver. • Ne laissez pas les enfants se servir de l´eau chaude sans une correcte et directe sur- veillance. Déconnectez le dispositif pour éviter une utilisation par des enfants sans surveillance.
-
Page 90: Garantie
Français Garantie... - Page 91 RÉCLAMATION VALIDE EN VERTU DE CETTE GARANTIE LIMITÉE. Votre date d’achat est établie à partir de la date de votre ticket de caisse. Avalon peut exiger de l’acheteur qu’il fournisse une preuve de la qualité et de l’état du refroidisseur d’eau si l’acheteur fait une réclamation en vertu de cette garantie limitée.
- Page 92 Français...
Need help?
Do you have a question about the A1TL and is the answer not in the manual?
Questions and answers
Water not coming out of the cold side of my A1TL water cooler. Lost power after that that side of the water was not working. Unplugged it and let it sit for a bit plugged it back in and it still doesn’t work. The hot side does work.
The cold side of your Avalon A1TL water cooler may not be working after a power loss due to the following reasons:
1. Cooling System Reset – After a power loss, the compressor may need time to restart. Wait for at least 10-15 minutes to see if the cooling function resumes.
2. Power Connection – Ensure the cooler is properly plugged in and receiving power. Check the outlet and reset any tripped breakers.
3. Cooling Indicator Light – Verify if the cooling indicator light is on. If not, the cooling system may not be activated.
4. Water Refill – If water was dispensed after the power loss, the cold tank may need time to refill and cool the water again.
5. Blocked Airflow – Ensure the cooler has proper ventilation, as inadequate airflow can affect the cooling system.
If the issue persists, further troubleshooting or professional service may be required.
This answer is automatically generated