
Related Manuals for Bessey SBH Series


Summary of Contents for Bessey SBH Series
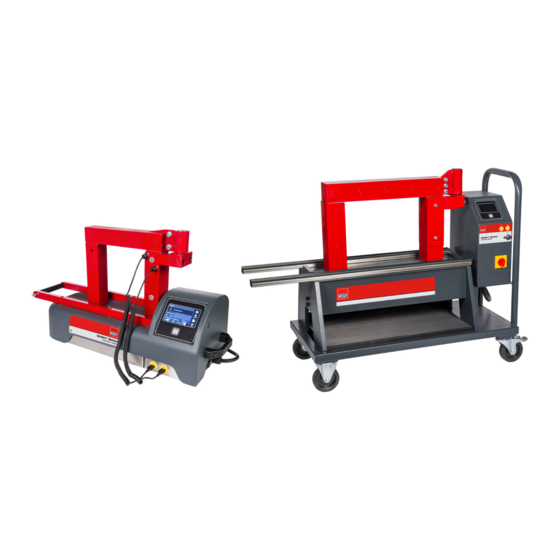
- Page 1 USER MANUAL Bessey Smart Induction Heaters SBH series © Bessey Tools - 23.06.R03...
- Page 3 Contact Address Bessey Tools North America Canada: Cambridge, ON N1R 7J4 USA: Lithia Spring, GA 30122 1.800.828.1004 www.besseytools.com Mail info@besseytools.com Machine ID and certification: See machine plate Warning! Read the manual and safety instructions before operating the device • Check all parts for possible damage during transportation. In case of damage, please contact the forwarder immediately.
-
Page 4: Table Of Contents
9.2 Heating in temperature mode ...................... 28 9.3 Heating in time mode .......................... 30 9.4 Heating in temperature or time mode .................... 31 9.5 Heating in temperature & speed mode ..................... 32 9.6 Workpiece handling .......................... 33 9.7 Error messages ............................ 34 © Bessey Tools... - Page 5 13.1 Technical specifications SBH 301 - 305 .................... 50 13.2 Machine ID and certification ...................... 51 13.3 Crossbars ............................... 52 13.4 Scope of delivery ........................... 52 14. Miscellaneous ��������������������������������������������������������������������������������������������������������������������������������� 53 14.1 Warranty conditions .......................... 53 14.2 Disclaimer ............................... 53 14.3 Waste disposal ............................ 53 © Bessey Tools...
-
Page 6: About The User Manual
The illustrations and descriptions cannot be used as grounds for any claims relating to devices that have already been delivered. Bessey Tools accepts no liability for any damage or malfunctions if the device or accessories have been modified or used in an incorrect manner. -
Page 7: Safety, Warnings And Potential Hazards
Forbidden for persons with metal implants. Forbidden for magnetically sensitive data media. Read the user manual! Wear heat-resistant gloves! Wear safety shoes! Warning of danger. Electric shock hazard. Warning of magnetic fields. Warning of hot surface. Warning of heavy object. © Bessey Tools... -
Page 8: Description Of Potential Hazards
Furthermore, it cannot be ruled out that the electromagnetic fields could cause damage to electronic and magnetic data media. Keep such equipment away from the induction heater. © Bessey Tools... - Page 9 Caution! Risk of injury during lifting A number of units in the Bessey heater range weigh more than 23 kg and may therefore not be lifted by one person alone. (see technical specs) If a unit weighs more than 23 kg, lift it with two persons or use suitable lifting equipment.
-
Page 10: Safety Measures To Be Taken
• Never use or store an induction heater in a damp environment. • Only use Bessey induction heaters indoors. • If using a mobile version; always lock the castors when not moving the device. • If the heater is equipped with extendable horizontal supports, always secure them with the appropriate locking pin, both in the fully retracted and in the fully extended position. -
Page 11: Safety Provisions
• Models with a swivel arm are equipped with a safety positioning cam. An induction heater operates by means of a magnetic field. At a distance of 1 metre, the magnetic field has been reduced to such an extent that it is below the applicable standard of 0.5mT. © Bessey Tools... -
Page 12: Introduction
3. Introduction 3�1 Application Bessey induction heaters are intended for heating bearings, so they can be assembled easily by means of a shrink fit. Subject to professional assessment, they can also be used to heat bushings, cogwheels, couplings and metal objects that form a closed circuit. Bearings and workpieces are demagnetised automatically after each heating cycle. -
Page 13: Installation
• Ensure that the power supply cable cannot come into contact with the workpiece to be heated. Insert the plug in a socket outlet with grounded connection. • Switch on the device by means of the main switch. The machine is starting up. © Bessey Tools... -
Page 14: Explanation Of Display, Buttons And Connections
T2 (green on display) is an additional measurement that can be used to monitor and adjust a temperature difference, ΔT, in a workpiece during heating. USB port for logging purposes (stored heating data). © Bessey Tools... -
Page 15: Explanation Of Touchscreen Operating Elements
The most frequently used buttons and how variables can be set are explained below. Start heating process. Stop heating process. To settings menu. To administrator (factory) settings. Not accessible to the end user. Back / previous screen. To next page. To previous page. © Bessey Tools... - Page 16 Variables can be set or changed by tapping them. Usually, a selection menu or keypad is then displayed. This principle applies to every screen. With the help of the sliders, elements can be switched on or off. © Bessey Tools...
-
Page 17: System Settings
“Default” is pressed. Default temp: Setpoint temperature at which the heater starts, or to which it returns if “Default” is pressed. Default time: Setpoint time with which the heater starts, or to which it returns if “Default” is pressed. © Bessey Tools... -
Page 18: Explanation Of System Settings - Screen 2
Calibration / correction readout thermocouple 2 probe 2: Unit: Setting of the temperature measurement in °C or °F. Language: Setting of the language in which the texts on the screen are displayed. Choice of Dutch, English, German and Italian. © Bessey Tools... -
Page 19: Explanation Of System Settings - Screen 4
In this screen, the system date and time can be set. Depending on whether you want to use the ΔT functionality, switch on “ΔT enabled”. Only when you switch on “ΔT enabled”, another screen is available in which you can enter the desired settings for this functionality. © Bessey Tools... - Page 20 ΔT. ΔT timeout: Time within which a restart must take place after exceeding ΔT. ΔT switch off The temperature difference between 2 measuring points on a temperature: workpiece at which the heating process is stopped. © Bessey Tools...
-
Page 21: The Magnetic Temperature Sensor
Handle the sensor with care! It is a vulnerable part of the heater. After use, place the sensor on the side of a vertical pole. Remove the sensor from the workpiece at the plastic part. Do not pull the cable. © Bessey Tools... -
Page 22: Method Of Operation
Horizontal, with workpiece through the workpiece around the pole Large workpieces can be thermally insulated by wrapping them in insulating material, such as a welding blanket. This ensures that the heat stays in the workpiece and does not dissipate. © Bessey Tools... -
Page 23: Heating A Hanging Workpiece
• Always make sure that the workpiece does not come into contact with the plastic casing of the heater. When the heating is finished, follow the instructions in reverse order. Use heat-resisant gloves to move the heated workpiece. © Bessey Tools... -
Page 24: Heating A Horizontal Workpiece
• Keep to these maximum weights and avoid tilting the heater or damaging the supports, (swivel) crossbars or hinge. CAREFUL! Always handle induction crossbars with care. They are damaged easily when dropped, knocked against something, etc. Store them immediately after use. © Bessey Tools... -
Page 25: Operation
9�1 Selecting heating modes The various heating modes can be selected by tapping the current mode on the settings screen. © Bessey Tools... - Page 26 More, less or other variable parameters may be displayed, depending on the choice made. Example screen after selecting “Temp & Speed”. If required, press “Default” to call up the default settings of the heater as set in the settings menu. © Bessey Tools...
- Page 27 The heater switches off when one of the two settings (temperature or time) is reached or has elapsed. In this mode, one or more temperature sensors have to be used that are positioned on the workpiece to be heated. © Bessey Tools...
-
Page 28: Heating In Temperature Mode
In this mode, one or more temperature sensors have to be used that are positioned on the workpiece to be heated. 9�2 Heating in temperature mode • Position the workpiece and sensor (according to chapters 7 & 8.) • Switch on the heater and select the temperature mode if necessary. © Bessey Tools... - Page 29 “STOP”. • Each time the induction heater stops, it automatically demagnetises the workpiece. • The heating process or thermostat feature can be interrupted by pressing “STOP”. © Bessey Tools...
-
Page 30: Heating In Time Mode
• The display shows the time left until process completion. If you have connected the sensors and placed them on the workpiece, the temperatures measured are also shown on the display. NOTE! In time mode, the process does nothing with these temperatures! © Bessey Tools... -
Page 31: Heating In Temperature Or Time Mode
• If necessary, change the temperature and/or time set by pressing the current values. • Press “START”. The heating starts, you will hear a slight humming sound. • The display shows the temperature and the time left until process completion. © Bessey Tools... -
Page 32: Heating In Temperature & Speed Mode
• Press “START”. The heating starts, you will hear a slight humming sound. • The display shows the current temperature of the workpiece. • If a second sensor is attached to the workpiece, this temperature also appears on the display. © Bessey Tools... -
Page 33: Workpiece Handling
• Wear heat-resistant gloves. Place the crossbar with the workpiece on a clean surface or if the heater is equipped with a swivel arm, swivel the crossbar forwards into the positioning cam, slide the workpiece off. • Fit the workpiece without delay and prevent cooling down. © Bessey Tools... -
Page 34: Error Messages
“The capacitor current has exceeded An effective current through the Switch the device off and on and try its limit, Attention: the crossbar has capacitor is too high. again. If the problem persists, contact not been demagnetized!” your supplier. © Bessey Tools... - Page 35 “A coil voltage peak was detected, A voltage peak has been detected Switch off the device and wait a few Attention: the crossbar has not been exceeding 500V seconds before switching it on again. demagnetized!” © Bessey Tools...
-
Page 36: Log Functionality
If this functionality is activated, a menu appears each time the “START” button is pressed in which data has to be entered. Only then can heating actually be started. Pressing “START” displays the following screen: Tap the item to be changed/entered. A keypad is displayed. © Bessey Tools... - Page 37 The system date and time are also included. When the process has been completed, an overview screen with all the heating data is displayed. © Bessey Tools...
- Page 38 It is not necessary to export the log files immediately after each heating cycle. The files are stored on the heater and can be selected from a list at a later stage to view and/ or export them to a USB data carrier. See section 10.5. © Bessey Tools...
-
Page 39: Access To The Log Files
Select the log you want to view by pressing it. 10�3 Alarms By pressing “Alarms” an overview will be displayed of alarms that have occurred. Use the arrow keys to select which alarm you want to view and then press “VIEW”. © Bessey Tools... -
Page 40: Last Crash
If a USB data carrier is connected, the heating data can now be exported. To do so, press “Export”. When the file has been exported successfully, this will appear on the screen. Tap “OK”, the message disappears from the screen. Press “back / previous screen” once more to return to the previous screen. © Bessey Tools... -
Page 41: Heating Logs
“Export”. If the file has been exported successfully, a message appears indicating that the export was successful. Press “OK” to clear the message from the screen. Press “back / previous screen” to return to the previous screen. © Bessey Tools... - Page 42 If you press “NO”, you return to the list of log files. If you press “YES”, a confirmation screen appears confirming that the file has been deleted. Press “OK” to return to the list of log files. © Bessey Tools...
-
Page 43: Other Functionalities
This is briefly displayed on the screen. 11�2 Temperature hold functionality In the temperature and the temperature & speed modes the screen displays a slider with which the temperature hold functionality “Temp. Hold” can be switched on or off. © Bessey Tools... - Page 44 00:01 and 99:00. After adjusting the time, press ‘back / previous screen’ to return. According to the above settings, the workpiece is heated to 80°C and then kept at 80°C for 1 minute. © Bessey Tools...
- Page 45 As soon as this time has elapsed, the heater displays a message indicating that the “temp hold” functionality has elapsed. © Bessey Tools...
-
Page 46: Δt Functionality
T2 (green) elsewhere on the workpiece. Position it in such a way that it is easy to monitor a possible difference in temperature between the two measuring points on the workpiece. See also the image in chapter 7. © Bessey Tools... - Page 47 “ΔT switch on”. This must be achieved within the “ΔT timeout” time. If this is not the case, the error message “ΔT timeout” is displayed, which can be reset by pressing “CLEAR”. © Bessey Tools...
-
Page 48: Target Functionality
By pressing the set value, a keypad is displayed on which the new value can be entered. After entering the value, press “OK” to return to the heating screen. Only this cycle is then heated to the new “target”. © Bessey Tools... -
Page 49: Cleaning, Maintenance And Trouble Shooting
• Carrying out the right maintenance and following the instructions is important. • Contact your supplier if in doubt about the correct functioning of the device. • Repairs must be carried out by the manufacturer or a specialist approved by the manufacturer. © Bessey Tools... -
Page 50: Technical Data And Accessories
70x80 70x80 80x100 Dimensions mm (LxWxH) 600 x 226 x 272 702 x 256 x 392 788 x 315 x 456 788 x 315 x 456 1214 x 560 x 990 SBH 301 - 304 SBH 305 © Bessey Tools... -
Page 51: Machine Id And Certification
Certification SBH 301 C-US 120V/13A SBH 302 C-US 120V/15A SBH 303 C-US 240V/16A SBH 304 C-US 2 ~ 480V/16A SBH 304 C-US 2 ~ 600V/14A SBH 305 C-US 480V/24A SBH 305 C-US 600V/20A CERTIFIED ELECTRICAL SAFETY LR1601 © Bessey Tools... -
Page 52: Crossbars
Size mm Optional diam� (mm) delivery SVH 3-1/8 42058086 80x80x500 25,40 ✓ 13�4 Scope of delivery Scope of delivery Temperature sensor 2 pc. Heat protection gloves (up to 250°C) ✓ Acid-free lubricant ✓ Printed manual (English, French) ✓ © Bessey Tools... -
Page 53: Miscellaneous
5. The product must be sent to the manufacturer’s Service department for repair. 6. A repair by Bessey within the warranty period will not result in a commencement of a new warranty period nor in a prolongation of the original warranty period. - Page 54 9.3 Chauffe avec fonction “Temps” ...................... 80 9.4 Chauffe avec fonction “Température ou Temps” ................ 81 9.5 Chauffe avec fonction “Température et vitesse” ................ 82 9.6 Montage de la pièce .......................... 83 9.7 Messages d’erreur .......................... 84 © Bessey Tools...
- Page 55 13.1 Spécifications techniques SBH 301 - 305 .................. 100 13.2 Identification et certification de la machine ................. 101 13.3 Barreaux ............................... 102 13.4 Livraison ............................... 102 14. Autres informations �������������������������������������������������������������������������������������������������������������������� 103 14.1 Conditions de garantie ........................ 103 14.2 Avis de non-responsabilité ....................... 103 14.3 Élimination des déchets ........................ 103 © Bessey Tools...
-
Page 56: Préface
Les informations de la présente notice étaient à jour au moment de l’achèvement de sa rédaction. Les présentes illustrations et descriptions ne peuvent être un motif de réclamation concernant les appareils déjà livrés. Bessey décline toute responsabilité pour les dommages et dysfonctionnements si l’appareil ou les accessoires ont été modifiés ou non utilisés selon les règles. -
Page 57: Sécurité, Avertissements Et Dangers Potentiels
Interdit aux supports de données sensibles aux rayons magnétiques. Lisez le mode d’emploi! Portez des gants thermorésistants! Portez des chaussures de sécurité! Avertissement : danger. Avertissement : tension électrique. Avertissement : champ magnétique. Avertissement : surface chaude. Avertissement : objet lourd. © Bessey Tools... -
Page 58: Descriptions De Dangers Potentiels
De plus, il n’est pas exclu que les champs magnétiques ne provoquent des dommages éventuels aux supports de données électroniques et magnétiques. Tenez dès lors ces appareils hors de portée de l’appareil de chauffe. © Bessey Tools... - Page 59 Prudence ! Danger de blessure par soulèvement Certains appareils de la gamme d’appareils de chauffe Bessey pèsent plus de 23 kg et ne doivent par conséquent pas être soulevés à une seule personne. (voir spécifications techniques) Si un appareil pèse plus de 23 kg, soulevez-le à...
-
Page 60: Mesures De Sécurité À Prendre
• N’utilisez et n’entreposez jamais un appareil de chauffe par induction dans un environnement humide. • Les appareils de chauffe par induction Bessey doivent être utilisés uniquement à l’intérieur. • Pour les modèles mobiles, mettez toujours le frein pour bloquer les roues pivotantes si vous ne le déplacez plus. -
Page 61: Dispositifs De Sécurité
Un appareil de chauffe par induction fonctionne au moyen d’un champ magnétique. À une distance de 1 mètre, le champ magnétique s’affaiblit à tel point qu’il se situe en dessous de la norme en vigueur de 0,5 mT. © Bessey Tools... -
Page 62: Introduction
3. Introduction 3�1 Utilisation visée Les appareils de chauffe par induction Bessey sont conçus pour la chauffe de roulements, de manière à faciliter le montage par un ajustage par contraction. Sous réserve d’une évaluation professionnelle, ils peuvent également être utilisés pour chauffer des douilles, des roues dentées, des accouplements et des objets métalliques qui forment un circuit fermé. -
Page 63: Installation
Phase Noir Phase Noir Phase Noir Phase Vert/Jaune Terre Verte Terre • Assurez-vous que le câble d’alimentation n’entre pas en contact avec la pièce à chauffer. Insérez la fiche dans une prise murale mise à la terre. © Bessey Tools... -
Page 64: Explication De L'affichage, Des Touches Et Raccordements
T2 (en vert sur l’affichage) correspond à une mesure supplémentaire qui peut être utilisée pour surveiller et modifier un écart de température ΔT dans une pièce pendant la chauffe. Connexion USB servant à des fins d’enregistrement (données de chauffe enregistrées). © Bessey Tools... -
Page 65: Explication Des Éléments De Commande De L'écran Tactile
Démarrage du processus de chauffe. Arrêt du processus de chauffe. Aller au menu des paramètres. Aller aux paramètres (d’usine) de l’administrateur. Non accessible à l’utilisateur final. Retour / écran précédent. Aller à la page suivante. © Bessey Tools... - Page 66 Variables modifiables ou définissables en les tapant. Généralement, un menu de sélection ou un clavier s’affiche ensuite. Ce principe s’applique à chaque écran. À l’aide des boutons coulissants, certains éléments peuvent être activés ou désactivés. © Bessey Tools...
-
Page 67: Paramètres Du Système
Mode de chauffe sur lequel l’appareil de chauffe est réglé et démarre la première fois, ou auquel il revient lorsqu’on appuie sur « Default ». Température défaut: Température de consigne à laquelle l’appareil de chauffe démarre, ou à laquelle il revient lorsqu’on appuie sur « Default ». © Bessey Tools... -
Page 68: Explication Des Paramètres Du Système De L'écran 2
Calibrage / correction de lecture thermocouple 2. température 2: Unité : Réglage de la mesure de la température en °C ou en °F. Langue : Réglage de la langue d’affichage. Choix entre néerlandais, anglais, allemand et italien. © Bessey Tools... -
Page 69: Explication Des Paramètres Système Des Écrans 4
Selon que vous souhaitez utiliser ou non la fonctionnalité ΔT, activez ou désactivez la fonction “Activer ΔT”. Ce n’est que lorsque cette fonction “Activer ΔT” est activée que vous accédez à un autre écran dans lequel vous pouvez effectuer les réglages souhaités pour cette fonctionnalité. © Bessey Tools... - Page 70 Durée au cours de laquelle le redémarrage doit avoir lieu après un dépassement de ΔT. ΔT température Écart de température entre deux points de mesure sur une pièce en d’arrêt : fonction duquel le processus de chauffe s’arrête. © Bessey Tools...
-
Page 71: Sonde Thermique Magnétique
Manipulez la sonde avec soin ! Cet élément de l’appareil de chauffe est fragile. Après utilisation, posez la sonde sur le côté d’un pôle vertical. Retirez la sonde de la pièce près de la partie en plastique. Ne débranchez pas le câble. © Bessey Tools... -
Page 72: Mode De Fonctionnement
Les pièces de grandes dimensions peuvent être isolées thermiquement en les enveloppant dans un matériau isolant, tel qu’une couverture de soudure. Ainsi, la chaleur reste dans la pièce et celle-ci ne se refroidit pas rapidement. © Bessey Tools... -
Page 73: Chauffe À La Verticale
• Veillez toujours à ce que la pièce n’entre pas en contact avec le boîtier en plastique de l’appareil de chauffe. Lorsque la chauffe est terminée, suivez les instructions dans l’ordre inverse. Utilisez des gants thermorésistants pour déplacer la pièce maintenant chauffée. © Bessey Tools... -
Page 74: Chauffe À L'horizontale
• Respectez ces poids maximaux et évitez de faire basculer l’appareil ou d’endommager les barres, barreaux (pivotants) ou charnières. PRUDENCE ! Manipulez toujours les barreaux d’induction avec précaution. Ils sont sensibles aux chutes, aux chocs, etc. Rangez-les immédiatement après utilisation. © Bessey Tools... -
Page 75: Utilisation
écoulée. chauffée selon une certaine courbe. 9.1 Sélection des modes de chauffe Les différents modes de chauffe peuvent être sélectionnés en tapant sur le mode actuel dans l’écran de configuration. © Bessey Tools... - Page 76 Exemple d’écran après la sélection de “Temp & vitesse”. Si nécessaire, vous pouvez appuyer sur Default pour aller aux paramètres par défaut de l’appareil de chauffe tels que définis dans le menu des paramètres. © Bessey Tools...
- Page 77 Pour ce mode, il faut aussi bien définir la température souhaitée de la pièce que la durée de chauffe souhaitée. L’appareil de chauffe s’éteint lorsqu’une des deux unités (durée ou température) est atteinte ou écoulée. Pour ce mode, il faut utiliser une ou plusieurs sonde(s) thermique(s) positionnée(s) sur la pièce à chauffer. © Bessey Tools...
-
Page 78: Chauffe Avec Fonction "Température
Pour ce mode, il faut utiliser une ou plusieurs sonde(s) thermique(s) positionnée(s) sur la pièce à chauffer. 9.2 Chauffe avec fonction “Température” • Positionnez la pièce et la sonde (comme indiqué aux chapitres 7 et 8). • Allumez l’appareil de chauffe et sélectionnez, si nécessaire, le mode température (Temperature). © Bessey Tools... - Page 79 STOP. • Chaque fois que l’appareil de chauffe par induction s’arrête, il démagnétise automatiquement la pièce. • La chauffe par la fonction de maintien de la température peut être interrompue à tout moment en appuyant sur STOP. © Bessey Tools...
-
Page 80: Chauffe Avec Fonction "Temps
ATTENTION ! En mode temps, le processus ne fait rien avec ces températures mesurées ! En appuyant sur la touche info, le processus de chauffe est affiché graphiquement uniquement si les sondes sont raccordées. En appuyant à nouveau sur info, des informations complémentaires sur le processus s’affichent. © Bessey Tools... -
Page 81: Chauffe Avec Fonction "Température Ou Temps
• Appuyez sur START. Le processus de chauffe commence et vous entendez un léger bourdonnement. En appuyant sur la touche info, le processus de chauffe est affiché graphiquement. En appuyant à nouveau sur info, des informations complémentaires sur le processus s’affichent. © Bessey Tools... -
Page 82: Chauffe Avec Fonction "Température Et Vitesse
En appuyant sur la touche info, le processus de chauffe est affiché graphiquement. La ligne en pointillés blancs indique la vitesse d’augmentation à laquelle le processus est réglé. En appuyant à nouveau sur info, des informations complémentaires sur le processus s’affichent. © Bessey Tools... -
Page 83: Montage De La Pièce
équipé d’un bras pivotant, faites-le pivoter jusqu’à ce qu’il sorte de la butée de positionnement et faites glisser la pièce pour la retirer. • Procédez immédiatement au montage de la pièce en évitant qu’elle refroidisse. © Bessey Tools... -
Page 84: Messages D'erreur
“Le courant de la bobine a dépassé Courant effectif trop élevé circulant Éteignez puis rallumez l’appareil et sa limite. dans le bobine. essayez à nouveau. Attention : le barreau n’a pas été Si le problème persiste, contactez démagnétisé !” votre fournisseur. © Bessey Tools... - Page 85 “Une tension de crête de la bobine a Tension de crête détectée au-dessus Éteignez l’appareil et patientez quelques été détectée. de 500 V. secondes avant de le rallumer. Attention : le barreau n’a pas été démagnétisé !” © Bessey Tools...
-
Page 86: Fonction Log (Journal)
Lorsque cette fonction est activée, chaque fois que vous appuyez sur Start, un menu s’affiche dans lequel il faut saisir des données. Ensuite seulement la chauffe peut réellement être démarrée. Appuyez sur “Start” pour afficher l’écran suivant. Tapez sur l’élément à modifier/saisir. Un clavier apparaît ensuite. © Bessey Tools... - Page 87 à l’opérateur et au nom du projet. La date et l’heure du système sont également incluses. Lorsque le processus prend fin, un écran de bilan affiche toutes les données de chauffe. © Bessey Tools...
- Page 88 Les fichiers sont enregistrés sur l’appareil de chauffe et peuvent être sélectionnés ultérieurement, par un autre moyen, dans une liste pour les consulter et/ou les exporter malgré tout vers un support de données USB. Voir chapitre 10.5. © Bessey Tools...
-
Page 89: Accès Aux Fichiers Journaux
Sélectionnez le journal que vous voulez consulter en appuyant dessus. 10�3 Alarmes En appuyant sur “Alarmes”, vous accédez à un aperçu des messages d’alertes qui se sont affichés. À l’aide des touches fléchées, sélectionnez l’alerte que vous souhaitez consulter, puis appuyez sur “Consulter”. © Bessey Tools... -
Page 90: Dernier Crash
être exportées. Pour cela, appuyez sur “Exportation”. Si le fichier a correctement été exporté, cela est indiqué par un message à l’écran. Tapez sur “OK” pour faire disparaître le message. Appuyez de nouveau sur “retour / écran précédent” pour revenir à l’écran précédent. © Bessey Tools... -
Page 91: Journaux De Chauffe
à partir de cet écran. Pour cela, appuyez sur “Export”. Si le fichier a été exporté avec succès, un message indique que l’exportation a réussi. Tapez sur “OK” pour faire disparaître le message. Appuyez sur “retour / écran précédent” pour revenir à l’écran précédent. © Bessey Tools... - Page 92 Si vous appuyez sur “NON”, vous retournez à la liste des fichiers journaux. Si vous appuyez sur “OUI”, un écran de confirmation apparaît pour confirmer que le fichier a été supprimé. Appuyez sur “OK” pour revenir à la liste des fichiers journaux. © Bessey Tools...
-
Page 93: Autres Fonctions
Ceci s’affiche brièvement à l’écran. 11�2 Fonction Tenir Temp� Dans le mode température et le mode température et vitesse un bouton coulissant est présent à l’écran. Il permet d’activer ou de désactiver la fonction de maintien de la température “Tenir Temp�”. © Bessey Tools... - Page 94 Après avoir procédé à la modification, appuyez sur “retour / écran précédent” pour revenir à l’écran précédent. Selon les réglages montrés dans l’illustration ci-dessus, la pièce est chauffée à 80 °C puis maintenue à 80°C pendant encore 2 minutes. © Bessey Tools...
- Page 95 Celle-ci indique combien de temps la pièce est encore maintenue à température. Dès que cette durée est écoulée, l’appareil de chauffe vous informe par un message que la fonction “Hold” a pris fin. © Bessey Tools...
-
Page 96: Fonction Δt
Positionnez la sonde T2 (en vert) ailleurs sur la pièce. Positionnez-la de manière à permettre de bien surveiller tout écart éventuel de température entre les deux points de mesure au sein de la pièce. Voir également l’illustration au chapitre 7. © Bessey Tools... - Page 97 “ΔT temp d’allumage”. Cela doit toutefois être atteint dans le délai indiqué sous “ΔT temporisation”. Si ce n’est pas le cas, le message d’erreur “Delta T temporisation” s’affiche et peut être réinitialisé en appuyant sur “EFFACER”. © Bessey Tools...
-
Page 98: Fonction Cible
En appuyant sur la valeur réglée, un clavier apparaît à l’aide duquel la nouvelle valeur peut être saisie. Après avoir entré la valeur, appuyez sur “OK” et l’affichage revient à l’écran de chauffe. Seul ce cycle est ensuite chauffé à la nouvelle “cible”. © Bessey Tools... -
Page 99: Nettoyage Et Maintenance
• Il est important d’effectuer correctement la maintenance et de suivre les instructions. • Contactez votre fournisseur si vous avez des doutes concernant le bon fonctionnement de l’appareil. • Les réparations doivent être effectuées par le fabricant ou par une société spécialisée agréée par le fabricant. © Bessey Tools... -
Page 100: Spécifications Techniques Et Accessoires
70x80 70x80 80x100 Dimensions mm (LxIxH) 600 x 226 x 272 702 x 256 x 392 788 x 315 x 456 788 x 315 x 456 1214 x 560 x 990 SBH 301 - 304 SBH 305 © Bessey Tools... -
Page 101: Identification Et Certification De La Machine
Certification SBH 301 C-US 120V/13A SBH 302 C-US 120V/15A SBH 303 C-US 240V/16A SBH 304 C-US 2 ~ 480V/16A SBH 304 C-US 2 ~ 600V/14A SBH 305 C-US 480V/24A SBH 305 C-US 600V/20A CERTIFIED ELECTRICAL SAFETY LR1601 © Bessey Tools... -
Page 102: Barreaux
En option l’alésage (mm) pivotant SVH 3-1/8 42058086 80x80x500 25,40 ✓ 13�4 Livraison Livraison Sonde de température 2 pièce Gant de protection contre la chaleur jusqu’à 250 ✓ Graisse non acide ✓ Manual imprimé (anglais, francais) ✓ © Bessey Tools... -
Page 103: Autres Informations
5. Pour les réparations, le produit doit être remis au service technique du fabricant. 6. Toute réparation par Bessey pendant la période de garantie ne donne pas lieu à une nouvelle période de garantie ni au prolongement de la période de garantie.
Need help?
Do you have a question about the SBH Series and is the answer not in the manual?
Questions and answers