Advertisement
Quick Links
Technical Support and E-Warranty Certificate www.vevor.com/support
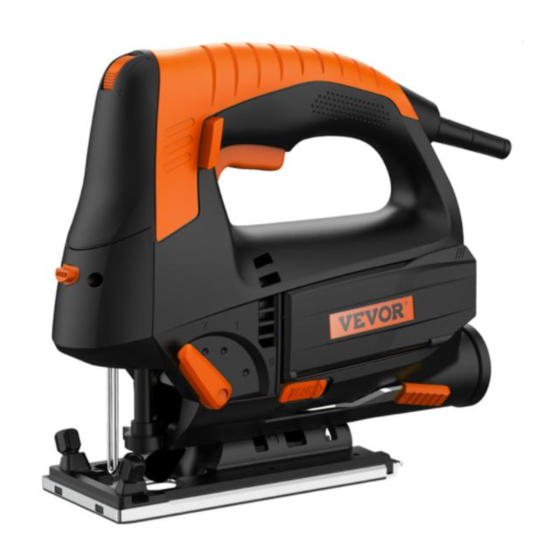
Jig Saw
USER MANUAL
We continue to be committed to provide you tools with competitive price.
"Save Half", "Half Price" or any other similar expressions used by us only represents an
estimate of savings you might benefit from buying certain tools with us compared to the major
top brands and doses not necessarily mean to cover all categories of tools offered by us. You
are kindly reminded to verify carefully when you are placing an order with us if you are
actually saving half in comparison with the top major brands.
Advertisement

Summary of Contents for VEVOR M1Q-DU03-110
- Page 1 Technical Support and E-Warranty Certificate www.vevor.com/support Jig Saw USER MANUAL We continue to be committed to provide you tools with competitive price. "Save Half", "Half Price" or any other similar expressions used by us only represents an estimate of savings you might benefit from buying certain tools with us compared to the major top brands and doses not necessarily mean to cover all categories of tools offered by us.
- Page 2 CustomerService@vevor.com This is the original instruction, please read all manual instructions carefully before operating. VEVOR reserves a clear interpretation of our user manual. The appearance of the product shall be subject to the product you received. Please forgive us that we won't inform you again if there are any technology or software updates on our product.
-
Page 3: Table Of Contents
work. TECHNICAL DATA Voltage frequency 230V-50 Hz/120V/60Hz Power 800W No-load speed 800-3100r/min. Max. Cutting depth 40mm TABLE OF CONTENTS GENERAL SAFETY GUIDELINES..........ELECTRICAL INFORMATION........... JIG SAW SAFETY RULES............PARTS LIST ................ASSEMBLY................... 9-10 OPERATlONS................1-12 MAINTENANGE................WARNING! CALIFORNIA PROPOSITION 65 Risk of chemical exposure. -
Page 4: General Safety Guidelines
Double insulated for additional protection. For safe operation read instruction manual. GENERAL SAFETY GUIDELINES Here are the guidelines to help you understand the symbols used in this guide. DANGER! Indicates a potentially hazardous situation which could result in death or serious injury. WARNING! Indicates a situation which could result in death or serious injury CAUTION! - Page 5 1. Keep your work area clean and well lit.Cluttered, dark areas invite accidents. 2. Do not operate power tools in atmospheres, such as in the presence of flammable liquids, gases, or dust. Power tools create sparks that can ignite dust or fumes. 3.
-
Page 6: Electrical Information
cannot be controlled with the switch is dangerous and must be repaired. 3. Disconnect the plug from the power source and/or battery pack from the power tool before making any adjustments, changing accessories, or storing the tool. Such preventative safety measures reduce the risk of starting the tool accidentally. - Page 7 WARNING! Always remove the power cord plug from the electrical outlet when making adjustments, changing parts, cleaning or maintaining the tool. EXTENSION CORDS 1. Grounded tools require a three wire extension cord.Double insulated tools can use either a two or three wire extension cord. 2.
-
Page 8: Jig Saw Safety Rules
WARNING! To prevent electrical shock and death from incorrect grounding wire connection: Check with a qualified electrician if you are in doubt as to whether the outlet is properly grounded.Do not modify the power cord plug provided with the tool. Never remove the grounding prong from the plug. -
Page 9: Parts List
13. Turn the appliance off immediately in the event of: ·A faulty mains plug or flex damage ·A faulty switch ·Sparking in the carbon brushes or ring fire in the commutator ·Smoke or smell from scorched insulation PARTS LIST 1. Switch 6. - Page 10 want to saw curves of figures 2. The maximum saw capacity in wood varies to approximately 60mm with the enclosed saw blades. With special saw blades, this machine can saw pieces up to 100mm in thickness. 3. To select the right saw, proceed as follows: ·First of all try a saw blade with coarse teeth.
-
Page 11: Assembly
ASSEMBLY EJECTING THE SAW BLADE To eject the saw blade pull the lever upwards and at the same time remove the saw blade out of the machine. ADJUSTING THE BASE PLATE(FIG.2) ADJUSTING THE ANGLE OF THE BOTTOM PLATE(11)AS FOLLOWS: WARNING! Before assembling the saw blade check that the mains plug has been removed from the socket. -
Page 12: Operatlons
SPEED CONTROL(FIG.4) 1. The speed of the saw blade can be controlled with the rotary knob at the top of the jigsaw. The higher the position, the higher the speed. The highest position is 6.The ideal sawing speed will depend on the profile and the tooth of the saw blade and on the material you want to saw. -
Page 13: Maintenange
Let the jigsaw do the work. Do not press too hard on the jigsaw. PARALLEL SAW GUIDE(FIG.7) If you want to make a saw cut that runs parallel to the edge of the plank, use the parallel saw guide supplied. You do this as follows: 1. - Page 14 Address: Baoshanqu Shuangchenglu 803long 11hao 1602A-1609shi Shanghai Imported to AUS: SIHAO PTY LTD, 1 ROKEVA STREETEASTWOOD NSW 2122 Australia Imported to USA: VEVOR STORE INC, 9448 RINCHMOND PL #E RANCHO CUCAMONGA, California, 91730 United States of America...
- Page 16 Technical Support and E-Warranty Certificate www.vevor.com/support...


Need help?
Do you have a question about the M1Q-DU03-110 and is the answer not in the manual?
Questions and answers