Table of Contents
Advertisement
Quick Links
Advertisement
Table of Contents

Related Manuals for Makita LM003JB103


Summary of Contents for Makita LM003JB103
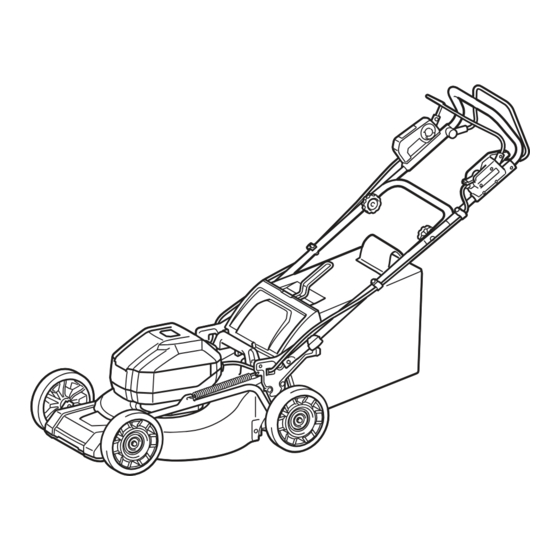
- Page 1 INSTRUCTION MANUAL Cordless Lawn Mower LM003J LM004J Read before use.
-
Page 2: Specifications
SPECIFICATIONS Model: LM003J LM004J Mowing width (blade diameter) 480 mm 534 mm No load speed Normal mode 3,200 min 2,800 min Soft no-load mode 2,500 - 3,200 min 2,300 - 2,800 min Noise reduction mode 2,500 min 2,300 min Part number of replacement Straight mower blade 191V97-3 191V96-5... -
Page 3: Intended Use
Avoid body contact with earthed or grounded Only for EU countries Ni-MH surfaces, such as pipes, radiators, ranges and Li-ion Due to the presence of hazardous com- refrigerators. There is an increased risk of elec- ponents in the equipment, waste electrical and electronic equipment, accumulators tric shock if your body is earthed or grounded. - Page 4 Always wear protective goggles to protect When using the tool, do not wear cloth work your eyes from injury when using power tools. gloves which may be entangled. The entangle- The goggles must comply with ANSI Z87.1 in ment of cloth work gloves in the moving parts may result in personal injury.
- Page 5 Before using the lawnmower, always visually IMPORTANT SAFETY INSTRUCTIONS inspect to see that the blade and the blade assembly are not worn or damaged. Worn or damaged parts increase the risk of injury. WARNING: Read all safety warnings and all instructions. Failure to follow the warnings and Check the grass catcher frequently for wear or instructions may result in electric shock, fire and/or deterioration.
- Page 6 Check the blades or blade bolts carefully for 13. Do not tilt the mower when switching on the cracks or damage before operation. Replace motor, except if the mower has to be tilted cracked or damaged blades or blade bolts for starting.
- Page 7 Do not use a battery pack or tool that is dam- 29. When you use the machine on muddy ground, aged or modified. Damaged or modified batteries wet slope, or slippery place, pay attention to your footing. may exhibit unpredictable behaviour resulting in fire, explosion or risk of injury.
-
Page 8: Installing The Handle
It will Avoid storing battery cartridge in a con- also void the Makita warranty for the Makita tool and tainer with other metal objects such as charger. nails, coins, etc. -
Page 9: Removing The Mulching Plug
Align the hole in the lower handle with the hole NOTE: Supporting the handle makes it easier to in the upper handle, then insert the bolt from outside, release the locking pin when pulling the knob. and then tighten the thumb nut from inside. Perform the same procedure on the other side. - Page 10 Lift up the mulching plug slightly, and then remove Make sure that there is no sagging on the corners of the grass basket. Fig.5 Fig.8 ► 1. Mulching plug Open the upper clip, and attach it to the frame. Assembling the grass basket Pick up the upper clip of the grass basket.
- Page 11 Installing or removing the grass Attaching the mulching plug basket Open the rear cover, and then remove the grass basket. To install the grass basket, follow the steps below. Open the rear cover. Fig.13 ► 1. Rear cover 2. Grass basket Fig.11 ►...
-
Page 12: Functional Description
To install the battery cartridge; Installing or removing the discharge Pull up the locking lever, and then open the battery chute cover. To install the discharge chute, follow the steps below. Open the rear cover, and then remove the grass basket and mulching plug. - Page 13 Let the machine and battery(ies) cool down. If no improvement can be found by restoring protection system, then contact your local Makita Service Center. NOTICE: If the machine stops due to a cause not described above, refer to the section for troubleshooting.
-
Page 14: Control Panel
Indicating the remaining battery Control panel capacity The control panel has the main power switch and the mode switching button. Press the check button on the battery cartridge to indi- cate the remaining battery capacity. The indicator lamps light up for a few seconds. Fig.21 ►... -
Page 15: Adjusting The Mowing Height
Turn off the machine, and then pull the mowing height nearest Makita Authorized Service Center. adjusting lever outward of the mower body and move it Install the battery cartridge, and then close the to your desired mowing height. -
Page 16: Adjusting The Handle Height
The table below shows the relationship between the When the grass basket is almost full, the indicator does not float while the blades are running. In this case, stop number on the mower body and the approximate mow- ing height. the operation immediately and empty the basket. - Page 17 • Electric brake This machine is equipped with an electric brake. If the machine consistently fails to quickly stop the mower blades after releasing the switch lever, have the machine serviced at Makita Authorized Service Center. 17 ENGLISH...
-
Page 18: Operation
The center lines of the front wheels are guidelines to OPERATION mowing width. Using the center lines as guidelines, mow in strips. Overlap by one half to one third the previ- ous strip to mow the lawn evenly. Mowing WARNING: Before mowing, clear away sticks and stones from mowing area. -
Page 19: Emptying The Grass Basket
Discoloration, deformation or cracks may result. Fig.40 To maintain product SAFETY and RELIABILITY, repairs, any other maintenance or adjustment should be performed by Makita Authorized or Factory Service Centers, always using Makita replacement parts. 19 ENGLISH... -
Page 20: Carrying The Mower
Turn the knob 90° while pulling the knob on the Carrying the mower lower handle to release the locking pin. Perform the same procedure on the other side, and then fold the CAUTION: handle. Before carrying the mower, make sure that the battery cartridges are removed. When carrying the mower, hold the rear grip and the lower holding part at the front of the machine with two people as shown in the figure. - Page 21 Loosen the thumb nuts on both sides, and then Removing or installing the mower blade fold the upper handle as shown in the figure. WARNING: The blade coasts for a few sec- onds after releasing the switch. Do not start any operation until the blade comes to a complete stop.
- Page 22 To remove the individual mower blade, turn the NOTICE: When installing the mower blade, make bolt counterclockwise with box wrench 17 while holding sure that the protrusions on the blade support fit the base plate. in the holes in the mower blade. For models equipped with swing back mower blades Put the mower on its side so that the mowing...
-
Page 23: Troubleshooting
Before asking for repairs, conduct your own inspection first. If you find a problem that is not explained in the manual, do not attempt to disassemble the machine. Instead, ask Makita Authorized Service Centers, always using Makita replacement parts for repairs. - Page 24 Makita Corporation 3-11-8, Sumiyoshi-cho, Anjo, Aichi 446-8502 Japan 885994-919 20221006 www.makita.com...
Need help?
Do you have a question about the LM003JB103 and is the answer not in the manual?
Questions and answers
When is the battery indicator on the lawn mower LM003J supposed to light up?
The battery indicator on the Makita LM003J lawn mower lights up when you press the main power switch. If you press the switch while pulling the switch lever, the main power lamp blinks green.
This answer is automatically generated