
Related Manuals for Pelgrim OM460 Series


Summary of Contents for Pelgrim OM460 Series
- Page 1 OM460 --- Gebruiksaanwijzing Combi-magnetron Instructions for use Combi microwave oven...
- Page 2 Gebruiksaanwijzing NL 3 - NL 26 Instructions for use EN 3 - EN 26 Gebruikte pictogrammen - Pictograms used Belangrijk om te weten - Important information NL 2...
-
Page 3: Table Of Contents
INHOUDSOPGAVE Uw combimagnetron Inleiding Bedieningspaneel Beschrijving Voordat u het apparaat gebruikt Voordat u begint De klok instellen Magnetrongebruik Installatie van haken en railbeugels Installeer de railbeugels Bediening Algemeen Magnetronfuncties Ovenfuncties Functies combimagnetron Automatische kookprogramma’s Voorverwarmen Keukenwekker Einde bereidingstijd Kinderslot Pauze Bereidingstips Onderhoud Uw apparaat in goede staat houden... -
Page 4: Uw Combimagnetron
UW COMBIMAGNETRON Inleiding Eten bereiden met uw nieuwe magnetronoven is veilig en comfortabel. Binnen korte tijd zet u de heerlijkste gerechten op tafel. Het apparaat is extreem gebruiksvriendelijk, mede vanwege de automatische kook- en ontdooiprogramma’s. In deze gebruiksaanwijzing vindt u informatie over de installatie, de veiligheid, de bediening en het onderhoud van uw apparaat. -
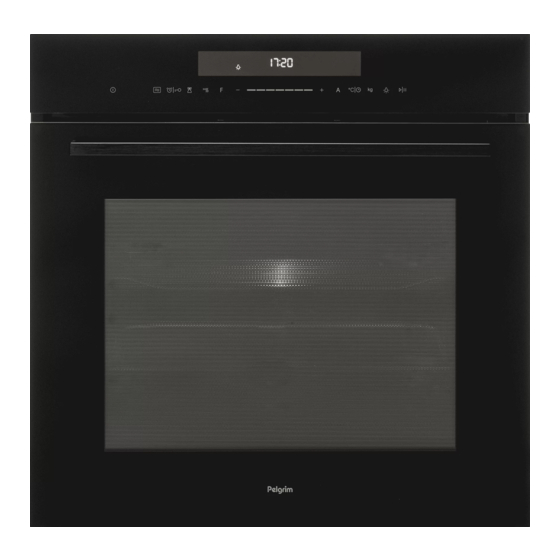
Page 5: Bedieningspaneel
UW COMBIMAGNETRON Bedieningspaneel 11 12 13 AAN/UIT-toets Hiermee schakelt u de oven in en uit. Magnetrontoets Hiermee stelt u de magnetron in. Keukenwekker/ Hiermee stelt u de keukenwekker in of activeert u het kinderslot-toets kinderslot (3 seconden ingedrukt houden). Toets voor einde Hiermee stelt u een einde van de bereidingstijd in bereidingstijd (uitgestelde start). -
Page 6: Beschrijving
UW COMBIMAGNETRON Beschrijving Niveau 5 Niveau 4 Niveau 3 Niveau 2 Niveau 1 1. Bedieningspaneel 2. Verlichting 3. Grillelement 4. Roosterniveaus 5. Scharnier 6. Deurglas De volgende accessoires worden bij uw oven geleverd: • Ovenrooster Voornamelijk voor de grillfunctie. Op het ovenrooster kan ook een stoomschaal of een pan met voedsel worden geplaatst. -
Page 7: Voordat U Het Apparaat Gebruikt
VOORDAT U HET APPARAAT GEBRUIKT Voordat u begint • Open de deur en verwijder het verpakkingsmateriaal. • Gebruik de magnetronoven niet indien deze beschadigd is, maar neem in dat geval contact op met uw leverancier. • Verwijder de beschermende folie vanaf de buitenzijde van de magnetronoven. •... -
Page 8: Magnetrongebruik
VOORDAT U HET APPARAAT GEBRUIKT Magnetrongebruik Microgolven zijn hoogfrequente elektromagnetische golven. De energie maakt het mogelijk om voedsel te garen of op te warmen zonder de vorm of kleur aan te tasten. De magnetron wordt gebruikt met de: • Magnetronstand •... - Page 9 VOORDAT U HET APPARAAT GEBRUIKT Magnetron- Kookgerei Opmerkingen bestendig Aluminiumfolie Kan in kleine hoeveelheden worden gebruikt om te voorkomen dat bepaalde delen van het voedsel te gaar worden. Er kan zich vonkontlading voordoen indien de folie zich te dicht bij de ovenwand bevindt of als er te veel folie wordt gebruikt.
-
Page 10: Installatie Van Haken En Railbeugels
VOORDAT U HET APPARAAT GEBRUIKT Installatie van haken en railbeugels Installeer 4 haken 1. Plaats de haak in opening (a). 2. Duw de haak in opening (b). 3. Duw de haak omlaag naar de juiste positie. Plaats haak ‘R’ aan de achterzijde en haak ‘F’ aan de voorzijde. Kijk eerst welke railbeugel voor de linkerzijde en welke voor de rechterzijde is bestemd •... -
Page 11: Installeer De Railbeugels
VOORDAT U HET APPARAAT GEBRUIKT Installeer de railbeugels 1. Plaats de beugel tegen de groef van de haak. 2. Duw de railbeugel naar achteren. 3. Duw de railbeugel omlaag tot in de onderzijde van de groef. 4. Klaar. NL 11... -
Page 12: Bediening
BEDIENING Algemeen Vermogensniveaus magnetron In de tabel hieronder ziet u de vijf vermogensniveaus waaruit u kunt kiezen en voor welk voedsel de vermogensniveaus geschikt zijn. Tijdens gebruik is het mogelijk om het vermogen te wijzigen door op de magnetrontoets te drukken. Vermogensniveau Voedsel 800 W - Water koken, opwarmen... - Page 13 BEDIENING Alle functies: Oven functies Temperatuur Gebruik De bovenste en onderste elementen werken samen voor een conventionele bereiding. De oven Conventioneel 30 ~ 250 °C moet worden voorverwarmd tot de gewenste temperatuur: ideaal voor slow cooking zoals stoofschotels. Voor braden op verschillende niveaus (bijvoorbeeld Convectie 50 ~ 250 °C bakplaten met chocolate chip cookies).
-
Page 14: Magnetronfuncties
BEDIENING Magnetron (combi) Temperatuur/ Gebruik functies Vermogen Magnetron 80 ~ 800 W Ontdooien, opwarmen en koken. 80 ~ 320 W Magnetron + Voor een kortere bereidingstijd van grote porties convectie met een gebruineerde afwerking. 50 ~ 250 °C Magnetron Deze functie is geschikt wanneer snel bruineren 80 ~ 320 W + dubbele gril is gewenst. -
Page 15: Ovenfuncties
BEDIENING 1. Verwijder de geëmailleerde bakplaat. 2. Plaats het gerecht op het ovenrooster. 3. Druk op de magnetrontoets om de magnetronfunctie te activeren. ▷ Op het display verschijnen ‘01:00’, ‘800’ en het pictogram van de magnetronfunctie. ▷ Wijzig indien nodig de bereidingstijd en/of het magnetronvermogen. -
Page 16: Functies Combimagnetron
BEDIENING Functies combimagnetron 1. Druk op de magnetrontoets. 2. Stel vervolgens een combimagnetronfunctie in door de ovenfunctietoets herhaaldelijk in te drukken (zie de tabel ‘Magnetron (combi) functies’). ▷ Op het display zijn het standaardtijd, de temperatuur en het vermogen van de magnetron zichtbaar. ▷... - Page 17 BEDIENING Voor- Standaard Recept Standaard tijd Gewichtsbereik verwarmen gewicht d01** Vlees 08:00 min. 200 g 100 - 1500 g d02** Gevogelte 04:48 min. 200 g 100 - 1500 g d03** Vis 04:00 min. 200 g 100 - 1000 g A01** Popcorn 03:05 min.
-
Page 18: Voorverwarmen
BEDIENING Voorverwarmen De voorverwarmingsfunctie kunt u alleen gebruiken bij een gekozen ovenfunctie. 1. Druk op de toets voor snel voorverwarmen. ▷ De oven start met voorverwarmen. ▷ Op het display verschijnt het voorverwarmingspictogram. ▷ Er klinkt een signaal en het voorverwarmsymbool verdwijnt wanneer de juiste temperatuur is bereikt. -
Page 19: Kinderslot
BEDIENING 1. Zet het gerecht in de oven en kies een ovenfunctie en een oventemperatuur. 2. Druk op de klok/temperatuur-toets. ▷ De uurweergave gaat knipperen. 3. Stel met de keuzeknop het uur in (12). 4. Druk op de klok/temperatuur-toets. ▷ De minuutweergave gaat knipperen. 5. -
Page 20: Pauze
BEDIENING Pauze Wanneer uw combimagnetron in gebruik is, kunt u een pauze inlassen. 1. Druk op de start/pauzetoets. ▷ De instellingen op het display gaan knipperen. 2. Druk op de start/pauzetoets om het bereidingsproces te hervatten. ▷ Het symbool van de ingestelde stand stopt met knipperen. NL 20... -
Page 21: Bereidingstips
BEREIDINGSTIPS Verwarmen en koken • De magnetronoven verwarmt altijd met dezelfde intensiteit. Hoe meer u in de magnetronoven plaatst, hoe langer de bereidingstijd. • Brede, platte gerechten worden sneller warm dan smalle, hoge gerechten. • Gerechten afdekken met huishoudfolie of een geschikt deksel voorkomt spatten, maakt de bereidingstijd korter en helpt de vochtigheid van het gerecht te bewaren. - Page 22 BEREIDINGSTIPS Factoren die van invloed zijn op het bereidingsproces • De temperatuur van de ingrediënten is van invloed op de bereidingstijd. Het duurt langer om een koude maaltijd te bereiden dan een maaltijd die al op kamertemperatuur is. • Licht delicaat voedsel wordt sneller gekookt dan zwaar, massief voedsel, zoals stoofpotten en ronde braadstukken.
- Page 23 BEREIDINGSTIPS Groenten koken • Gebruik verse groenten als dat mogelijk is. Als groenten slap zijn geworden doordat deze te lang zijn bewaard, kunt u deze opfrissen door de groenten een tijdje in koud water te weken. • Gebruik een grote schaal om groenten te koken, zodat de bodem van de schaal niet door een te dikke laag wordt bedekt.
-
Page 24: Onderhoud
ONDERHOUD Uw apparaat in goede staat houden • Het kookcompartiment in uw apparaat is gemaakt van emaille. Onjuiste behandeling kan leiden tot corrosie in het kookcompartiment. Raadpleeg de onderhouds- en reinigingsinstructies in de gebruiksaanwijzing. • Zout heeft een sterk schurende werking. Indien zich zout afzet in het kookcompartiment, kan zich op bepaalde plaatsen in het compartiment roest ontwikkelen. -
Page 25: Storingen
STORINGEN Wat moet ik doen indien... Indien de magnetronoven niet zo goed kookt als deze zou moeten doen, indien er binnenin vonken optreden, of indien de magnetronoven niet wil starten, etc. Probeer eerst de oorzaak van het probleem te vinden voordat u de technische dienst belt. Controleer het volgende: •... -
Page 26: Installatie-Instructies
INSTALLATIE-INSTRUCTIES Productspecificaties Op het label aan de binnenzijde van dit apparaat vindt u de totale wattage, het vereiste voltage en de frequentie. Buitenafmetingen (bxdxh) 595 mm x 546* mm x 596 mm Inbouwafmetingen 560 mm x 550 mm x 590 mm Ovencapaciteit 72 liter Nominale spanning... -
Page 27: Uw Oven En Het Milieu
UW OVEN EN HET MILIEU Apparaat en verpakking afdanken Dit product is gemaakt van duurzame materialen. Aan het einde van zijn economische levensduur moet het apparaat echter op een verantwoorde manier worden afgedankt. De overheid kan u hierover informatie verschaffen. De verpakking van het apparaat kan worden gerecycled. - Page 28 NL 28...
- Page 29 CONTENTS Your combi microwave oven Introduction Control panel Description Before use Before you begin Setting the clock Microwave use Installation of hooks and rail brackets Install the rail brackets Operation General Microwave functions Oven functions Combi microwave functions Automatic cooking programs Preheating Kitchen Timer Coking end time...
-
Page 30: Your Combi Microwave Oven
YOUR COMBI MICROWAVE OVEN Introduction Cooking with your new microwave oven is safe and relaxing. You can have the tastiest dishes on the table in no time at all. The appliance is extremely easy to use, partly thanks to the automatic cooking and defrosting programmes. -
Page 31: Control Panel
YOUR COMBI MICROWAVE OVEN Control panel 11 12 13 On / Off key Switch On and Off the oven. Microwave key Touch to set microwave. Kitchen timer / Childproof Use kitchen timer / use child-proof lock with 3s lock key press. -
Page 32: Description
YOUR COMBI MICROWAVE OVEN Description Level 5 Level 4 Level 3 Level 2 Level 1 1. Control panel 2. Light 3. Grill element 4. Rack levels 5. Hinge 6. Door glass The following accessories are provided with your oven: • Oven rack Mainly used for grilling. -
Page 33: Before Use
BEFORE USE Before you begin • Open the door and remove the packaging material. • Do not use the microwave oven when it is damaged, but contact the manufacturer. • Remove the protection foil from the outside of the microwave oven. •... -
Page 34: Microwave Use
BEFORE USE Microwave use Microwaves are high-frequency electromagnetic waves; the energy released enables food to be cooked or reheated without changing either the form or the colour. Microwave is used in: • Microwave mode • Combi-function Cooking Principle 1. The microwaves generated by the microwave are distributed uniformly. The food is thus cooked evenly. - Page 35 BEFORE USE Microwave- Cookware Comments Safe Aluminium foil Can be used in small quantities to protect areas against overcooking. Arcing can occur if the foil is too close to the oven wall or if too much foil is used. China and Porcelain, pottery, earthenware and bone china are usually suitable, unless decorated with a metal earthenware...
-
Page 36: Installation Of Hooks And Rail Brackets
BEFORE USE Installation of hooks and rail brackets Install 4 hooks 1. Install the hook into hole (a). 2. Push the hook into hole (b). 3. Push the hook down into the right place. Install hook ‘R’ at the rear and hook ‘F’ at the front. Distinguish the left and right rail bracket •... -
Page 37: Install The Rail Brackets
BEFORE USE Install the rail brackets 1. Place the bracket against the groove of the hook. 2. Push the rail bracket backwards. 3. Move down the rail bracket into the bottom of the groove hook. 4. Finished. EN 11... -
Page 38: Operation
OPERATION General Microwave power levels You can see from the table below from which five power levels you can choose and for which foods the power levels are suitable. During use it is possible to change the power by pressing the microwave key. - Page 39 OPERATION All functions: Function Temperature Use The top and bottom elements work together to provide conventional cooking. The oven needs to Conventional 30 ~ 250 °C be preheated to the required temperature: ideal for slow cooking dishes such as casseroles and stews. For baking on several levels (e.g.
-
Page 40: Microwave Functions
OPERATION Combi Microwave Temperature/ Functions Power Microwave 80 ~ 800 W Defrost, reheat and cooking. Microwave + 80 ~ 320 W For reducing large portions’ cooking time with Convection 50 ~ 250 °C browning finish. Microwave + 80 ~ 320 W This function is suitable where quick browning is Double Grill + Fan 50 ~ 250 °C... -
Page 41: Oven Functions
OPERATION 1. Remove the enamelled baking tray. 2. Place the dish on the oven rack. 3. Press the microwave key to activate the microwave function. ▷ The display will show ‘01:00’, ‘800’ and the pictogram for the microwave function. ▷ If necessary, change the cooking time and/or the microwave power. -
Page 42: Combi Microwave Functions
OPERATION Combi microwave functions 1. Press the microwave key. 2. Then set a combi microwave function by pressing the oven function key repeatedly (see the table ‘Combi Microwave Functions’). ▷ The display shows the standard time, the temperature and the power of the microwave oven. - Page 43 OPERATION Recipe Preheat Default time Default weight Weight range d01** Meat 08:00 min. 200 g 100 - 1500 g d02** Poultry 04:48 min. 200 g 100 - 1500 g d03** Fish 04:00 min. 200 g 100 - 1000 g A01** Popcorn 03:05 min.
-
Page 44: Preheating
OPERATION Preheating The preheating function only works if you have already chosen one of the modes above. 1. Touch the quick preheat key. ▷ The oven starts preheating. ▷ The preheating pictogram is shown on the display. ▷ A signal sounds and the preheating pictogram disappears when the correct temperature is reached. -
Page 45: Childproof Lock
OPERATION End of cooking: 18:30 hours 1. Put the dish in the oven and choose an oven function and temperature. 2. Touch the clock / temperature setting key. ▷ The hour display will flash. 3. Use the selection dial knob to enter the hours (12). 4. -
Page 46: Pause
OPERATION Pause You can pause your combi microwave oven during use. 1. Touch the start / pause key. The settings in the display will flash. 2. Touch the start / pause key to re-start the cooking process. The symbol of the set mode will stop flashing. EN 20... -
Page 47: Cooking Tips
COOKING TIPS Heating and cooking • The microwave oven always heats with the same intensity. The more you put in the microwave oven, the longer the cooking time. • Wide, flat dishes become hot more quickly than narrow, tall dishes. •... - Page 48 COOKING TIPS Factors that affect the cooking process • The temperature of the ingredients affects the cooking times. A cold meal will require a longer cooking time than a meal that is already at room temperature. • Light, delicate foods cook more quickly than heavy, solid foods, such as stews and rolled meats.
- Page 49 COOKING TIPS Cooking vegetables • Use fresh vegetables if possible. If the vegetables have become limp because they have been kept for too long, you can refresh them by soaking them in cold water for a little while. • Use a large dish to cook vegetables, so the bottom of the dish is not covered by too thick a layer.
-
Page 50: Maintenance
MAINTENANCE Keeping your appliance neat • The cooking compartment in your appliance is made of enamel. Improper care can lead to corrosion in the cooking compartment. Refer to the care and cleaning instructions in the instruction manual. • Salts are very abrasive. If salt is deposited in the cooking compartment, rust could develop in places. -
Page 51: Faults
FAULTS What to do if... If the microwave oven does not cook as well as it should do, if there is sparking inside it, or if it does not start, etc., first try to find the reason for the problem yourself before calling the service department. -
Page 52: Installation Instructions
INSTALLATION INSTRUCTIONS Product specifications On the label on the inside of this equipment, you will find the total wattage, the required voltage and the frequency. External dimensions (wxdxh) 595 mm x 546* mm x 596 mm Building in dimensions 560 mm x 550 mm x 590 mm Oven capacity 72 liter Rated voltage... -
Page 53: Your Oven And The Environment
YOUR OVEN AND THE ENVIRONMENT Disposing of the appliance and the packaging This product is made from sustainable materials. However, it must be disposed of in a responsible manner at the end of its useful life. The government can provide you with information about this. The packaging of the appliance can be recycled. - Page 54 EN 28...
- Page 55 EN 29...
- Page 56 When contacting the service department, have the complete type number to hand. Adressen en telefoonnummers van de serviceorganisatie vindt u op de garantiekaart. You will find the addresses and phone numbers of the service organisation on the guarantee card. www.pelgrim.nl www.pelgrim.be 913563...
Need help?
Do you have a question about the OM460 Series and is the answer not in the manual?
Questions and answers