
Related Manuals for Raytools BW101-GS Series


Summary of Contents for Raytools BW101-GS Series
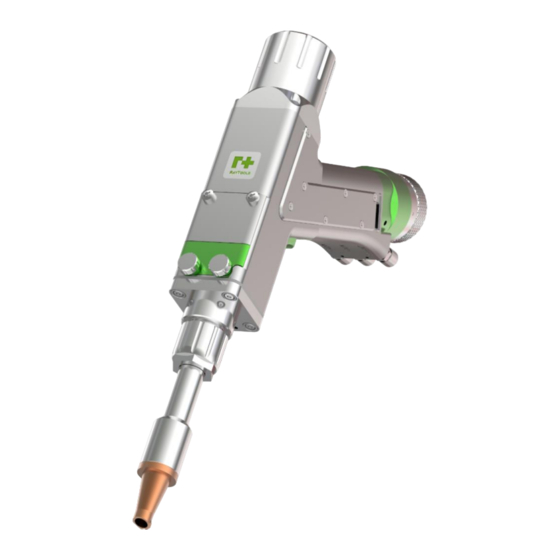
- Page 1 BW101-GS SERIES 2KW Handheld Laser Processing Head (Single Galvo Type)- User Manual...
- Page 2 BW101-GS SERIES 2KW Handheld Laser Processing Head-User Manual Thank you for choosing our product! This manual describes the installation and commissioning of laser head in details so that you can use this product quickly. You can consult us directly for more details.
- Page 3 BW101-GS SERIES 2KW Handheld Laser Processing Head-User Manual Disclaimer ⚫ We reserve the right to change the design in order to improve the quality or expand the application or comply to manufacturing workmanship. ⚫ We will not bear any responsibility for losses and accidents caused by wrong operation or improper handling of our products.
- Page 4 BW101-GS SERIES 2KW Handheld Laser Processing Head-User Manual may not be fully protected by the ground wire due to function fault. These parts may have low voltage. When installing electrical equipment, please pay attention to taking anti electric shock measures for relevant personnel.
-
Page 5: Table Of Contents
BW101-GS SERIES 2KW Handheld Laser Processing Head -User Manual Index 1 Laser Processing Head ......................1 1.1 QBH Connection ........................1 1.2 Dismantling and Mounting of Cover Glass ................2 1.3 Daily Inspection ........................3 2 Controller ..........................4 2.1 Overall Wiring ........................4 2.2 Wiring from HMI Panel to Controller ................... -
Page 6: Laser Processing Head
BW101-GS SERIES 2KW Handheld Laser Processing Head-User Manual 1 Laser Processing Head QBH Connection ⚫ Remove the dust cover of optical fiber and check whether the protective cap of fiber crystal head is locked. Clean the optical fiber head with a dust-free cotton swab and absolute ethanol to ensure that the optical fiber section is clean and dust-free. -
Page 7: Dismantling And Mounting Of Cover Glass
BW101-GS SERIES 2KW Handheld Laser Processing Head-User Manual ⚫ Place the welding head horizontally. ⚫ Align the red point at the end of the QBH interface to the red point of the handwheel. ⚫ Remove QBH dustproof cover. ⚫ Align the red mark of male fiber end to red mark on female QBH of cutting head when you insert the fiber end straightly to bottom of QBH interface of cutting head. -
Page 8: Daily Inspection
BW101-GS SERIES 2KW Handheld Laser Processing Head-User Manual ⚫ Take out seal ring and cover glass by lens tool for cleaning or replacement. 1.2.2 Dismantling and Mounting of Bottom Cover Glass ⚫ Manually loosen the screw of the cover glass to pull out the holder. The openings shall be sealed with textured paper to prevent dust. -
Page 9: Controller
BW101-GS SERIES 2KW Handheld Laser Processing Head-User Manual 2 Controller Overall Wiring V1.0 4 |39 RayTools AG © Copyright www.raytools.ch... - Page 10 BW101-GS SERIES 2KW Handheld Laser Processing Head-User Manual Power supply of controller: one 24V power supply and one ±15V power supply are included in the standard kit and they shall be connected as below V1.0 5 |39 RayTools AG © Copyright...
-
Page 11: Wiring From Hmi Panel To Controller
BW101-GS SERIES 2KW Handheld Laser Processing Head-User Manual Wiring from HMI Panel to Controller Connect HMI panel to controller by 24V power cable and signal cable as below. Wiring from Laser to Controller V1.0 6 |39 RayTools AG © Copyright... -
Page 12: Wiring From Laser Processing Head To Controller
BW101-GS SERIES 2KW Handheld Laser Processing Head-User Manual ⚫ Enable +: external enable input +. Enable -: external enable input GND. (generally PNP) ⚫ PWM +: external PWM input +. PWM -: external PWM input GND. (Laser pulse width modulation) ⚫... - Page 13 BW101-GS SERIES 2KW Handheld Laser Processing Head-User Manual 15V Power Supply 24V Power Supply 15V Power Supply to Controller 24V Power Supply to Controller 15V Power Supply 15V Power Supply Controller 15V+ 15V- 24V Power Supply V1.0 8 |39 RayTools AG © Copyright...
-
Page 14: Wiring From Gas Valve And Chiller To Controller
BW101-GS SERIES 2KW Handheld Laser Processing Head-User Manual 24V Power Supply Controller 24V+ Earthing PE (Pin 7) to be grounded Wiring from Gas Valve and Chiller to Controller ⚫ Gas Valve ±: control switch of protection gas. The gas valve + (red line of solenoid valve in the figure) is 24V + relay output. -
Page 15: Wiring From Wire Feeder To Controller
BW101-GS SERIES 2KW Handheld Laser Processing Head-User Manual Wiring from Wire Feeder to Controller DC24V± Power Supply Wire Feeding + Wire Feeding - Wire feeding starts/stops when the power is on/off. 3 Wire Feeder V1.0 10 |39 RayTools AG © Copyright... -
Page 16: Installation Of Wire Feeder
BW101-GS SERIES 2KW Handheld Laser Processing Head-User Manual Installation of Wire Feeder ⚫ The two 24V input wires of the wire feeder shall be connected to the 24V power supply or switching power supply of the laser welding machine (power supply power ≥ 80W). The two signal wires SS1 and SS2 shall be connected to the relevant positions on the handheld welding controller. - Page 17 BW101-GS SERIES 2KW Handheld Laser Processing Head-User Manual ⚫ Hang the welding wire reel on the reel shaft in the wire feeder. ⚫ Select the groove diameter of the wire feeding wheel. Loosen the tension regulator of the wire feeding machine (as shown above) and pass the welding wire through the wire leading nozzle.
-
Page 18: Operation Of Wire Feeder
BW101-GS SERIES 2KW Handheld Laser Processing Head-User Manual ⚫ Assemble the wire feeding mechanism and lead the wire out of it by pressing “Manual Feeding”. Fix the wire feeding mechanism onto the wire feeder and tighten it by bolt. ⚫... - Page 19 BW101-GS SERIES 2KW Handheld Laser Processing Head-User Manual 3.2.1 Button and Indicators ⚫ Set: function switching. Related parameters could be modified by “+” and “-”. ⚫ Run: press this key to confirm when the setting is completed. ⚫ Manual Feeding: press and hold the key to feed wire continuously untill it is released.
- Page 20 BW101-GS SERIES 2KW Handheld Laser Processing Head-User Manual ⚫ Display Screen: to show parameters while setting and show wire feeding speed while running. 3.2.2 Parameter Setting Data Range Unit Recommended Value Delay Feeding 0-999 Feeding Speed 0-99.9 mm/s Filling Distance 0-999 07.0...
-
Page 21: Troubleshooting Of Wire Feeder
BW101-GS SERIES 2KW Handheld Laser Processing Head-User Manual Troubleshooting of Wire Feeder Faults Reason Solution 24V power cable breaks Change power cable Power LED not ON Power switch fails Change power switch Poor welding / disconnection of internal Replace the plug and check the... -
Page 22: Daily Maintenance Of Wire Feeder
BW101-GS SERIES 2KW Handheld Laser Processing Head-User Manual Daily Maintenance of Wire Feeder 3.4.1 Daily Maintenance ⚫ When not in use, the wire feeder should be shut down and placed in a cool, dry place away from dust. ⚫ Do not put other objects on the wire feeder to avoid damage. -
Page 23: Supplementary Regulation Of Auto Wire Feeding
BW101-GS SERIES 2KW Handheld Laser Processing Head-User Manual Supplementary Regulation of Auto Wire Feeding ⚫ Turn on the wire feeding on HMI panel. ⚫ Adjust the power to 0W. ⚫ Press and hold the trigger button of head, adjust the wire feeding speed at low speed (feeding speed 015-025). -
Page 24: Hmi
BW101-GS SERIES 2KW Handheld Laser Processing Head-User Manual ⚫ Disassemble the wire feeding nozzle. ⚫ Press the manual feeding button on the panel to deliver wire out. ⚫ Pass the welding wire through the wire feeding nozzle and reinstall the wire feeding nozzle back to the wire feeding assembly. -
Page 25: Setting
BW101-GS SERIES 2KW Handheld Laser Processing Head-User Manual ⚫ Laser Power: laser output power from 0 to 2000W. ⚫ Pattern: SpotWeld or Line Wobble Weld. ⚫ Laser Freq: number of laser pulses emitted by the laser per second. ⚫ Wobble Freq: 0-200Hz. - Page 26 BW101-GS SERIES 2KW Handheld Laser Processing Head-User Manual ⚫ Gas in Advance: gas blow duration from laser on to beam shooting. ⚫ Gas Delay: gas blow duration after laser off. ⚫ Beam Off Delay: laser shooting duration after laser off. It is used to weld off welding wires.
-
Page 27: Process
BW101-GS SERIES 2KW Handheld Laser Processing Head-User Manual ⚫ Wobble: turn on/off wobble function of red beam. It is only used for commissioning of red beam. ⚫ Pattern: line or spot. ⚫ Wobble Size: 0-5mm of line range. ⚫ Wobble Freq: 0-200Hz adjustable as per process. -
Page 28: Monitoring
BW101-GS SERIES 2KW Handheld Laser Processing Head-User Manual ⚫ : to switch between wire feeding and non-wire feeding. ⚫ Process No: running process number. Each process parameter could be modified and saved. ⚫ Import: to import selected process number for operation. -
Page 29: Function Switch
BW101-GS SERIES 2KW Handheld Laser Processing Head-User Manual ⚫ I0.3 Safety Lock: indicate if head is in contact with workpiece. Laser shooting is allowed when in contact. ⚫ I3.0 Galvo IO: input status. ⚫ Q0.2 LaserEnable: output status of laser enable signal. -
Page 30: About
BW101-GS SERIES 2KW Handheld Laser Processing Head-User Manual ⚫ WeldSeam Clean: show assembly replacement diagram. ⚫ Remote Clean: show assembly replacement diagram. ⚫ Function Switch: select required function and click “Function Switch” to enter sub-interface of selected function. ⚫ MFR Setting: 1-key recovery of default factory setting. It will clean all customized parameters. Keep caution. - Page 31 BW101-GS SERIES 2KW Handheld Laser Processing Head-User Manual ⚫ Handheld laser cutting is one of 4-in-1 function. ⚫ Remove wire feeding mechanism & welding nozzle and mount the cutting nozzle to extension tube. ⚫ Select CUT function and modify process parameters as per process requirements.
- Page 32 BW101-GS SERIES 2KW Handheld Laser Processing Head-User Manual ⚫ Laser Power: laser output power from 0 to 2000W. ⚫ Laser Freq: number of laser pulses emitted by the laser per second. ⚫ PWM: the ratio of pulse duration to pulse cycle, 0-100%.
- Page 33 BW101-GS SERIES 2KW Handheld Laser Processing Head-User Manual ⚫ Gas in Advance: gas blow duration from laser on to beam shooting. ⚫ Gas Delay: gas blow duration after laser off. ⚫ Beam Off Delay: laser shooting duration after laser off. It is used to melt possible adhesion or burr.
-
Page 34: Weldseam Clean
BW101-GS SERIES 2KW Handheld Laser Processing Head-User Manual ⚫ X Center Offset: center alignment. Beam alignment is basically to be done before ex-works and a further slight adjustment to align with cutting object center could be done if it is required for cutting. Nonsense adjustment is prohibited. - Page 35 BW101-GS SERIES 2KW Handheld Laser Processing Head-User Manual ⚫ Remove wire feeding mechanism, welding nozzle and extension tube. ⚫ Mount the clean tube. ⚫ Select WELD SEAM CLEAN function and modify process parameters as per process requirements. 6.2.2 Function and Feature Function ⚫...
- Page 36 BW101-GS SERIES 2KW Handheld Laser Processing Head-User Manual ⚫ Laser Power: laser output power from 0 to 2000W. ⚫ Laser Freq: number of laser pulses emitted by the laser per second. ⚫ Wobble Freq: 0-150Hz. ⚫ PWM: the ratio of pulse duration to pulse cycle, 0-100%.
- Page 37 BW101-GS SERIES 2KW Handheld Laser Processing Head-User Manual ⚫ Gas in Advance: gas blow duration from laser on to beam shooting. ⚫ Gas Delay: gas blow duration after laser off. ⚫ Max Power: set as per the rating power of exact laser. The limit of max power is 2000W.
-
Page 38: Remote Clean
BW101-GS SERIES 2KW Handheld Laser Processing Head-User Manual ⚫ Pattern: only line available for cleaning. ⚫ Wobble Size: 0-10mm of line range. ⚫ Wobble Freq: 0-150Hz adjustable as per process. ⚫ X Center Offset: center alignment. Beam alignment is basically to be done before ex-works and a further slight adjustment to align with cleaning objects could be done if it is required for cleaning. - Page 39 BW101-GS SERIES 2KW Handheld Laser Processing Head-User Manual ⚫ Mold cleaning such as tire mold, electronic mold and food mold. ⚫ Oxide treatment, paint removal and rust removal in the production or maintenance of aerospace weapons and ships. Feature ⚫...
- Page 40 BW101-GS SERIES 2KW Handheld Laser Processing Head-User Manual ⚫ Process: enter submenu of process to modify parameters or select process for running. ⚫ Monitoring: show red if alert occurs. Enter the submenu to check I/O status and faults. ⚫ : lock HMI in order to prevent other people from touching the screen by mistake in case of beam off or beam on when the operator is cleaning or debugging.
-
Page 41: Option Table Of Welding Nozzle And Wire Feeding Nozzle
BW101-GS SERIES 2KW Handheld Laser Processing Head-User Manual ⚫ Wobble: turn on/off wobble function of red beam. It is only used for commissioning of red beam. ⚫ Wobble Size: 0-80mm of line range. ⚫ Wobble Freq: 0-100Hz adjustable as per process. -
Page 42: Troubleshooting Table
BW101-GS SERIES 2KW Handheld Laser Processing Head-User Manual 8 Troubleshooting Table Faults Conclusion Solution Communication alarm of Wiring Check wiring and restart in 2 mins. HMI panel 1. Restart. Beam shooting not coming Laser alarm 2. Check wiring. 3. Check if laser is encrypted. -
Page 43: Reference Table Of Welding Process
BW101-GS SERIES 2KW Handheld Laser Processing Head-User Manual 4. Check QBH for firm lock status if fiber interface interlock is under alarm. 5. Replace QBH if alarm stays intermittently or continuously. 1. If the red beam indication is normal, wobble in red beam to see whether it is centered. - Page 44 BW101-GS SERIES 2KW Handheld Laser Processing Head-User Manual magnesium 4.0MM 2000W 100% 1000HZ 3.0MM 60HZ 10mm/s, 1.6mm 3.0MM wire) MS (by SS 1.0MM 600W 100% 1000HZ 2.0MM 80HZ 14mm/s, 0.8mm 1.0MM wire) 2.0MM 1000W 100% 1000HZ 2.0MM 80HZ 14mm/s, 1.0mm 2.0MM...
Need help?
Do you have a question about the BW101-GS Series and is the answer not in the manual?
Questions and answers