Advertisement
Quick Links
NEW CRITICAL INSTRUCTIONS. MUST READ!
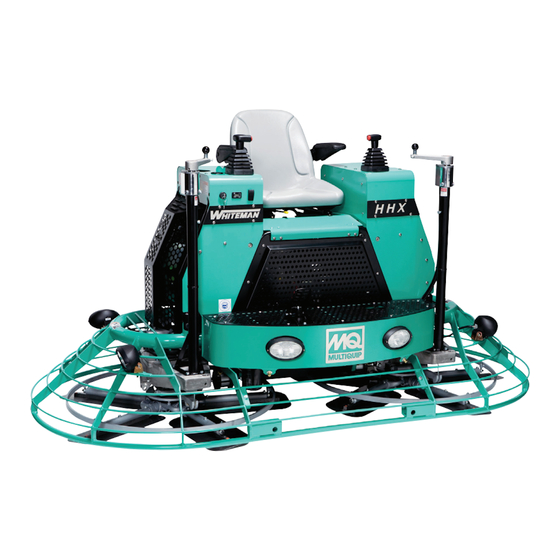
HHX Ride-On Trowel
Cross Shaft and Drive Pulley Installation Instructions
The following instructions are intended to assist the user in the installation of a cross shaft and/or drive pulley.
Please read all instructions before installation.
REQUIRED TOOLS
„ Hammer
„ Torque wrench
„ 3/8" ratchet
„ 3/8", 7/16", 1/2", 3/4", 9/16",
5/8", 15/16", 13mm sockets
„ 3/16" and 1/4" Allen sockets
„ Open/box-end wrenches
„ Misc. pry bars
„ CV joint grease
PARTS
Verify that all parts are accounted for. See Figure 1 and
Table 1.
1
4
5
RED
LOCTITE
RETAINING
COMPOUND
Figure 1. Cross Shaft and Drive Pulley Kits
HHX — CROSS SHAFT AND DRIVE PULLEY INSTALLATION INSTRUCTIONS P/N 32437 — REV. #2 (08/24/23) — PAGE 1 OF 12
„ Grease gun with multi-purpose
grease
„ 2" × 4" wood block
„ Forklift/hoist
„ Clutch puller
„ Heavy-duty jack stands
„ Scotch-brite pad
„ Brake cleaner
12
8
9
A
10
2
11
BLUE
LOCTITE
B
6
PRIMER
7
Table 1. Cross Shaft and Drive Pulley Kits
Item
Qty.
Part No.
A
1
30106
B
1
23363-2S
1
1
30104
2
1
30107
3/8-16 × 1.25 LH Thread
Spacer, CSK Ø1.375
3
1
30110
4
1
19379-014
Retaining Compound,
5
1
32434
6
1
32441
Primer, Loctite™ 7649
7
1
23363-2
8
1
23436
9
1
23415
Sleeve, Alignment Gauge
10
A/R
11773
11
1
1477
12
1
23420
NOTICE
The coupler (Item 12, P/N 23420) is intended to replace
the existing coupler. This new, improved coupler will help
minimize vibrations and run-out of the rotating assembly.
WORK SAFELY!
Only a qualified service technician with proper training
should perform this installation. Follow all shop safety rules
when performing this installation.
Description
Remarks
Cross Shaft Assy.
Includes items 1–6
Service Kit
Pulley, Lower Assy.
Includes items 4–7
Cross Shaft Assy.
Screw, FHCS,
No longer required
Ø.391 × .281
Loctite™ 271
Red
Loctite™ 609
Pulley, Lower
Alignment Gauge
Shims
.031 Thickness
Loctite™ 242
Blue
Coupler, CV Joint
Advertisement

Subscribe to Our Youtube Channel
Summary of Contents for MULTIQUIP HHX
- Page 1 Follow all shop safety rules Figure 1. Cross Shaft and Drive Pulley Kits when performing this installation. HHX — CROSS SHAFT AND DRIVE PULLEY INSTALLATION INSTRUCTIONS P/N 32437 — REV. #2 (08/24/23) — PAGE 1 OF 12...
-
Page 2: Battery Removal
It is recommended that trowel blades are removed to prevent injury. BATTERY PLATE Figure 4. Battery and Spare Belt Removal HHX — CROSS SHAFT AND DRIVE PULLEY INSTALLATION INSTRUCTIONS P/N 32437 — REV. #2 (08/24/23) — PAGE 2 OF 12... -
Page 3: Fuel Tank Removal
(HHXG5) or fuel filter (HHXD5). CABLE REMOVE REAR ENGINE PANEL AND HARDWARE (HHXD5 PICTURED ABOVE) Figure 5. Frame Rotation and Rear Engine Panel Removal HHX — CROSS SHAFT AND DRIVE PULLEY INSTALLATION INSTRUCTIONS P/N 32437 — REV. #2 (08/24/23) — PAGE 3 OF 12... - Page 4 3. Remove CV axle assembly (optional). Set CV axle assembly and mounting hardware aside in a clean, safe place. Figure 8. Fuel Tank Removal HHX — CROSS SHAFT AND DRIVE PULLEY INSTALLATION INSTRUCTIONS P/N 32437 — REV. #2 (08/24/23) — PAGE 4 OF 12...
- Page 5 2. Pull clutch assembly off engine shaft. Puller tool lower pulley or both, as required). Retain all other parts. (P/N 23155) may be required to remove clutch. HHX — CROSS SHAFT AND DRIVE PULLEY INSTALLATION INSTRUCTIONS P/N 32437 — REV. #2 (08/24/23) — PAGE 5 OF 12...
- Page 6 (P/N 30104) onto engine cradle with 4 existing screws. Apply Blue Loctite (P/N 1477). See Figure 11. SCRIBE Figure 12. Cross Shaft Scribe Marks HHX — CROSS SHAFT AND DRIVE PULLEY INSTALLATION INSTRUCTIONS P/N 32437 — REV. #2 (08/24/23) — PAGE 6 OF 12...
- Page 7 3. Using retaining compound (P/N 32434), apply to cross shaft and key way until coverage is complete with a minimum coating thickness of 1/16 of an inch. HHX — CROSS SHAFT AND DRIVE PULLEY INSTALLATION INSTRUCTIONS P/N 32437 — REV. #2 (08/24/23) — PAGE 7 OF 12...
- Page 8 See “Lower Pulley compound needs to cross link and become completely Mounting Screw Torquing” section. cured during this time period. HHX — CROSS SHAFT AND DRIVE PULLEY INSTALLATION INSTRUCTIONS P/N 32437 — REV. #2 (08/24/23) — PAGE 8 OF 12...
- Page 9 5. Once trowel is on the ground, remove left-side mounting bolts and rotate left seat frame to horizontal position. HHX — CROSS SHAFT AND DRIVE PULLEY INSTALLATION INSTRUCTIONS P/N 32437 — REV. #2 (08/24/23) — PAGE 9 OF 12...
- Page 10 5. Torque clutch retaining screw to 45 lbf·ft (61 N·m). HHX — CROSS SHAFT AND DRIVE PULLEY INSTALLATION INSTRUCTIONS P/N 32437 — REV. #2 (08/24/23) — PAGE 10 OF 12...
- Page 11 NOTES HHX — CROSS SHAFT AND DRIVE PULLEY INSTALLATION INSTRUCTIONS P/N 32437 — REV. #2 (08/24/23) — PAGE 11 OF 12...
-
Page 12: Here's How To Get Help
© COPYRIGHT 2023, MULTIQUIP INC. Multiquip Inc , the MQ logo are registered trademarks of Multiquip Inc. and may not be used, reproduced, or altered without written permission. All other trademarks are the property of their respective owners and used with permission.


Need help?
Do you have a question about the HHX and is the answer not in the manual?
Questions and answers