Table of Contents
Advertisement
Advertisement
Table of Contents
Troubleshooting

Related Manuals for MULTIQUIP WHITEMAN HHXD5


Summary of Contents for MULTIQUIP WHITEMAN HHXD5
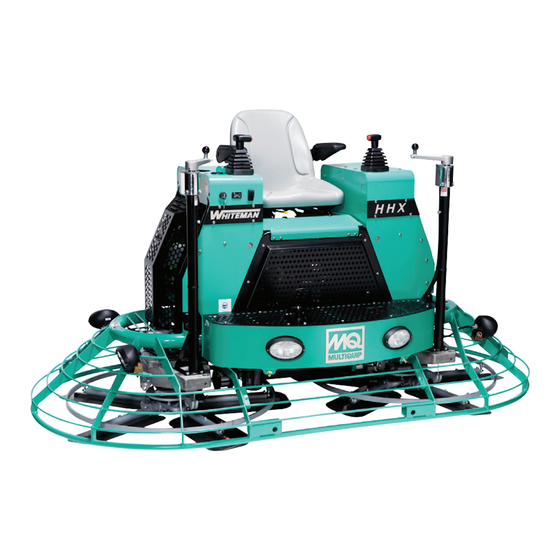
- Page 1 OperatiOn Manual SerieS MODel HHXD5 riDe-On trOWel (B & S VanGuarD DM 950 Dt DieSel enGine) Revision #2 (05/04/12) To find the latest revision of this publication, visit our website at: www.multiquip.com THIS MANUAL MUST ACCOMPANY THE EQUIPMENT AT ALL TIMES.
-
Page 2: Proposition 65 Warning
ALWAYS work in a well ventilated area, and work with approved safety equipment, such as dust masks that are specially designed to filter out microscopic particles. page 2 — HHXd5 RIde-ON TROWeL • OpeRaTION maNuaL — Rev. #2 (05/04/12) -
Page 3: Silicosis/Respiratory Warnings
NIOSH/MSHA for the materials being used. HHXd5 RIde-ON TROWeL • OpeRaTION maNuaL — Rev. #2 (05/04/12) — page 3... -
Page 4: Table Of Contents
Setup ..............21 Inspection .............. 22 Operation ............23-25 Maintenance ............. 26-44 Decommissioning Trowel ........45 Fuel System Diagram ..........46 Wiring Diagram (Engine) ........48-49 Troubleshooting ..........50-53 page 4 — HHXd5 RIde-ON TROWeL • OpeRaTION maNuaL — Rev. #2 (05/04/12) - Page 5 HHXd5 RIde-ON TROWeL • OpeRaTION maNuaL — Rev. #2 (05/04/12) — page 5...
-
Page 6: Training Checklist
Maintaining a hover. Maneuvering. Pitching. Matching blade pitch. Twin-Pitch™ Concrete fi nishing techniques. Shutdown of machine. Lifting of machine (lift loops). Machine transport and storage. page 6 — HHXd5 RIde-ON TROWeL • OpeRaTION maNuaL — Rev. #2 (05/04/12) -
Page 7: Daily Pre-Operation Checklist
Engine oil level Hydraulic oil level Radiator coolant level Condition of blades Blade pitch operation Safety stop switch operation Steering control operation HHXd5 RIde-ON TROWeL • OpeRaTION maNuaL — Rev. #2 (05/04/12) — page 7... -
Page 8: Safety Information
Indicates a hazardous situation which, if not avoided, COuLd result in mINOR or mOdeRaTe INJuRY. NOTICE Pressurized fluid hazards Addresses practices not related to personal injury. Hydraulic fluid hazards page 8 — HHXd5 RIde-ON TROWeL • OpeRaTION maNuaL — Rev. #2 (05/04/12) - Page 9 „ No one other than the operator is to be in the working area when the equipment is in operation. „ dO NOT use the equipment for any purpose other than its intended purposes or applications. HHXd5 RIde-ON TROWeL • OpeRaTION maNuaL — Rev. #2 (05/04/12) — page 9...
- Page 10 Allow these parts to cool „ NeveR place your feet or hands inside the guard rings before servicing equipment. while starting or operating this equipment. page 10 — HHXd5 RIde-ON TROWeL • OpeRaTION maNuaL — Rev. #2 (05/04/12)
- Page 11 „ aLWaYS disconnect the NegaTIve battery terminal before performing service on the equipment. „ aLWaYS keep battery cables in good working condition. Repair or replace all worn cables. HHXd5 RIde-ON TROWeL • OpeRaTION maNuaL — Rev. #2 (05/04/12) — page 11...
- Page 12 „ aLWaYS tie down equipment during transport by or jack-knifi ng. Smooth, gradual starts and stops will securing the equipment with rope. improve towing. „ Avoid sharp turns to prevent rolling. page 12 — HHXd5 RIde-ON TROWeL • OpeRaTION maNuaL — Rev. #2 (05/04/12)
- Page 13 „ dO NOT use food or plastic containers to dispose of hazardous waste. „ dO NOT pour waste, oil or fuel directly onto the ground, down a drain or into any water source. HHXd5 RIde-ON TROWeL • OpeRaTION maNuaL — Rev. #2 (05/04/12) — page 13...
-
Page 14: Dimensions/Specifications
Fuel Tank – gallons (liters) 9 (34) Rotor – RPM 40 to 170 Path Width – in. (cm) 91 (231) Hydraulic Oil4 Whiteman P/N 10139 0r ISO 68 AWMV page 14 — HHXd5 RIde-ON TROWeL • OpeRaTION maNuaL — Rev. #2 (05/04/12) - Page 15 Dry Weight 196 lbs. (89 Kg) 17.8 in. x 17.6 in. x 21.2 in Dimensions (L x W x H) (452.6 mm x 447.6 mm x 538 mm). HHXd5 RIde-ON TROWeL • OpeRaTION maNuaL — Rev. #2 (05/04/12) — page 15...
-
Page 16: General Information
Figure 2, Figure 3 and Figure 4 show the location of the controls, indicators and general maintenance parts. Each control may perform more than one function. page 16 — HHXd5 RIde-ON TROWeL • OpeRaTION maNuaL — Rev. #2 (05/04/12) -
Page 17: Controls And Indicators
Lights offer better visibility when working hydraulic system during a By-Pass condition. indoors. 16. magnetic drain plug — Remove to drain hydraulic oil from hydraulic system. HHXd5 RIde-ON TROWeL • OpeRaTION maNuaL — Rev. #2 (05/04/12) — page 17... - Page 18 22. Fuel Filler Cap — Remove this cap to add fuel. 30. document Box — Use to hold and protect Operation 23. engine dip Stick — Indicates engine oil level. Add Manual. oil as required. page 18 — HHXd5 RIde-ON TROWeL • OpeRaTION maNuaL — Rev. #2 (05/04/12)
-
Page 19: Controls And Indicators
37. Spare Belt Carrier — Contains a spare drive belt for suggested that all operators (experienced and novice) read expedient belt replacement. “Slabs on Grade ” published by the American Concrete Institute, Detroit Michigan. HHXd5 RIde-ON TROWeL • OpeRaTION maNuaL — Rev. #2 (05/04/12) — page 19... -
Page 20: Engine Components (Diesel)
9. Oil drain — Used to drain crankcase oil. Always dispose of used oil and oil filters in an environmentally 18. Fan Belt — Replace if frayed or worn. page 20 — HHXd5 RIde-ON TROWeL • OpeRaTION maNuaL — Rev. #2 (05/04/12) -
Page 21: Setup
Close the plastic battery box cover and secure the battery box. Figure 6. Battery Cable Orientation HHXd5 RIde-ON TROWeL • OpeRaTION maNuaL — Rev. #2 (05/04/12) — page 21... -
Page 22: Inspection
See Figure 8. 2. The oil level of the gear box should be at the half-way point of the sight glass (Figure 8). The gear page 22 — HHXd5 RIde-ON TROWeL • OpeRaTION maNuaL — Rev. #2 (05/04/12) -
Page 23: Operation
Slow blade speed is obtained by slightly See Troubleshooting Chart for possible problems. depressing the pedal. Maximum blade speed is obtained by fully depressing the pedal. HHXd5 RIde-ON TROWeL • OpeRaTION maNuaL — Rev. #2 (05/04/12) — page 23... - Page 24 The machine may be difficult to keep in one place. Trying to keep the ride-on trowel stationary is a good practice for operation. page 24 — HHXd5 RIde-ON TROWeL • OpeRaTION maNuaL — Rev. #2 (05/04/12)
- Page 25 Twin Pitch system. 2. Adjust to match the opposite side. 3. When adjusted, lower the handle to Twin Pitch operating position. HHXd5 RIde-ON TROWeL • OpeRaTION maNuaL — Rev. #2 (05/04/12) — page 25...
-
Page 26: Maintenance
3. Check and clean or replace the engine air filter training could result in equipment damage or injury to as necessary. (See following section on Air Filter personnel. If in doubt, consult your dealer. Maintenance.) page 26 — HHXd5 RIde-ON TROWeL • OpeRaTION maNuaL — Rev. #2 (05/04/12) - Page 27 6 months or 150 hours. 2. Remove the oil filler cap and fill engine crankcase with Figure 15. Fuel Filter recommended viscosity grade oil as listed in Table 5. HHXd5 RIde-ON TROWeL • OpeRaTION maNuaL — Rev. #2 (05/04/12) — page 27...
- Page 28 Disconnect battery cables before inspecting electrical system and never ALWAYS disconnect battery cables before attempting "spark" battery terminals to test for any service or maintenance on the ride-on trowel. charge. page 28 — HHXd5 RIde-ON TROWeL • OpeRaTION maNuaL — Rev. #2 (05/04/12)
- Page 29 „ Locate the Clutch Removal Tool provided with the trowel, p/n 23294 located within the documentation box. (Figure 16) HHXd5 RIde-ON TROWeL • OpeRaTION maNuaL — Rev. #2 (05/04/12) — page 29...
- Page 30 In the event of a drive belt failure, the spare (replacement) (Driven) Pulley drive belt can be used for quick replacement at the job site Drive Belt to continue trowel operation. Figure 20. Drive Belt Install page 30 — HHXd5 RIde-ON TROWeL • OpeRaTION maNuaL — Rev. #2 (05/04/12)
- Page 31 Centrifugal force pushes the roller arms (see Figure 24) Drive Belt against the ramp plate, forcing moveable face toward fixed face squeezing belt. Figure 21. Spare Drive Belt Replacement HHXd5 RIde-ON TROWeL • OpeRaTION maNuaL — Rev. #2 (05/04/12) — page 31...
- Page 32 (Figure 25) DRIVE PULLEY RAMP PLATE BUSHING SPRING Figure 26. Pulley Conditions ROLLER ARM WEIGHT Figure 25. Variable Pitch Pulley page 32 — HHXd5 RIde-ON TROWeL • OpeRaTION maNuaL — Rev. #2 (05/04/12)
- Page 33 Old style Comet clutch is no longer available. Multi-Clutch components are not interchangeable with the prior Hoffco Comet drive system. The Hoffco Comet CVT system must be replaced for combatibility with the new equipment. HHXd5 RIde-ON TROWeL • OpeRaTION maNuaL — Rev. #2 (05/04/12) — page 33...
- Page 34 Long life can be expected with this new drive assembly as long as the belt is kept properly aligned. Lower (Driven) Pulley Figure 29. Drive Belt, Belt Holder and Pulleys page 34 — HHXd5 RIde-ON TROWeL • OpeRaTION maNuaL — Rev. #2 (05/04/12)
- Page 35 REAR OF TROWEL FIXED FACE VEABLE LOWER FACE PULLEY Figure 31. Holding Lower Pulley Open 2. Place free end of CVT belt into upper pulley grooves See Figure 32. HHXd5 RIde-ON TROWeL • OpeRaTION maNuaL — Rev. #2 (05/04/12) — page 35...
- Page 36 What this means is that instead of the belt slipping on the sheaves during an overload, the centrifugals will first slip further protecting the belt from damage. page 36 — HHXd5 RIde-ON TROWeL • OpeRaTION maNuaL — Rev. #2 (05/04/12)
- Page 37 „ Does the machine have a perceptible rolling or bouncing 2. Adjust to match the opposite side. motion when in use? 3. When adjusted, lower the handle to Twin Pitch operating position. HHXd5 RIde-ON TROWeL • OpeRaTION maNuaL — Rev. #2 (05/04/12) — page 37...
- Page 38 Verify after adjustment the blades pitch correctly. Blades that are incorrectly adjusted often will not be able to pitch flat. This can occur if the adjusting bolts are raised too page 38 — HHXd5 RIde-ON TROWeL • OpeRaTION maNuaL — Rev. #2 (05/04/12)
- Page 39 Lower Wear Plate Jam Nut Surface Spider Plate Dished Effect on Finished Concrete Set Screw (Cone Point, Square Head) Figure 37. Spider/Gearbox Removal Figure 35. Incorrect Spider Plate Alignment HHXd5 RIde-ON TROWeL • OpeRaTION maNuaL — Rev. #2 (05/04/12) — page 39...
- Page 40 Figure 41. Bronze Bushings 6. Wire brush any build-up of concrete from all six sides of the trowel arm. Repeat this for the remaining arms. Figure 39. Stabilizer Ring page 40 — HHXd5 RIde-ON TROWeL • OpeRaTION maNuaL — Rev. #2 (05/04/12)
- Page 41 Figure 45. Surface Feeler Gauge (.005 in./0.127mm) Feeler Gauge (.004 in./0.10mm) Figure 45. Trowel Arm Adjustment Setup Figure 43. Checking Trowel Arm Flatness HHXd5 RIde-ON TROWeL • OpeRaTION maNuaL — Rev. #2 (05/04/12) — page 41...
- Page 42 DO NOT lift the trowel when the pans are attached. 9. Repeat steps for the remaining trowel arms. page 42 — HHXd5 RIde-ON TROWeL • OpeRaTION maNuaL — Rev. #2 (05/04/12)
- Page 43 Many hydraulic problems are a result of low fluid levels. Before checking any other possibilities, make sure the hydraulic fluid is at the proper level in the hydraulic fluid tank. HHXd5 RIde-ON TROWeL • OpeRaTION maNuaL — Rev. #2 (05/04/12) — page 43...
-
Page 44: Maintenance
3. Use allen wrench to adjust the steering pressure to the desired setting. (between 150 and 300 PSI) See Checking Steering pressure procedures. 4. Retighten jam nut. 5. Remove pressure guage and reinstall access grilles. page 44 — HHXd5 RIde-ON TROWeL • OpeRaTION maNuaL — Rev. #2 (05/04/12) -
Page 45: Decommissioning Trowel
Use safety precautions when handling batteries that contain sulfuric acid, (See page 11). 3. The remainder can be brought to a salvage yard or metal reclamation facility for further dismantling. HHXd5 RIde-ON TROWeL • OpeRaTION maNuaL — Rev. #2 (05/04/12) — page 45... -
Page 46: Fuel System Diagram
SySteM DiaGraM FUEL RETURN LINE FUEL FILTER FUEL DELIVERY LINE INJECTOR PUMP INJECTOR FUEL RETURN LINE FUEL LINE FUEL TANK page 46 — HHXd5 RIde-ON TROWeL • OpeRaTION maNuaL — Rev. #2 (05/04/12) - Page 47 HHXd5 RIde-ON TROWeL • OpeRaTION maNuaL — Rev. #2 (05/04/12) — page 47...
-
Page 48: Wiring Diagram (Engine)
KILL SWITCH GLOW PLUG FUEL PURPLE SHUT-OFF TIMER SOLENOID BLUE PINK ORANGE ALTERNATOR BLUE/WHITE (CHARGE LAMP) RED 10 AWG ALL WIRES ARE 16 AWG EXCEPT WHERE NOTED. page 48 — HHXd5 RIde-ON TROWeL • OpeRaTION maNuaL — Rev. #2 (05/04/12) - Page 49 WirinG DiaGraM (enGine) CONNECTOR ORIENTATION (FRONT VIEW) RELAY ORIENTATION C D E F G H HHXd5 RIde-ON TROWeL • OpeRaTION maNuaL — Rev. #2 (05/04/12) — page 49...
-
Page 50: Troubleshooting
Replace yoke as necessary. Check to ensure that each blade is adjusted to have the Blade Pitch? same pitch as all other blades. Adjust per maintenance section in manual. page 50 — HHXd5 RIde-ON TROWeL • OpeRaTION maNuaL — Rev. #2 (05/04/12) - Page 51 Verify that the gearbox shaft rotates when the input shaft Worn or broken gears in gearbox? is rotated. Replace both the worm and worm gear as a set. HHXd5 RIde-ON TROWeL • OpeRaTION maNuaL — Rev. #2 (05/04/12) — page 51...
- Page 52 Correct engine oil level. Use No. 2-D diesel fuel only. Check the fuel Injection pump wear? injection pump element and delivery valve assembly and replace as necessary. page 52 — HHXd5 RIde-ON TROWeL • OpeRaTION maNuaL — Rev. #2 (05/04/12)
-
Page 53: Troubleshooting
Radiator net or radiator fi n clogged with dust? Clean net or fi n carefully. Fan, radiator, or radiator cap defective? Replace defective part. Thermostat defective? Check thermostat and replace if necessary. Head gasket defective or water leakage? Replace parts. HHXd5 RIde-ON TROWeL • OpeRaTION maNuaL — Rev. #2 (05/04/12) — page 53... -
Page 54: Please Have The Model And Serial
© COPYRIGHT 2012, MULTIQUIP INC. Multiquip Inc, the MQ logo and the Whiteman logo are registered trademarks of Multiquip Inc. and may not be used, reproduced, or altered without written permission. All other trademarks are the property of their respective owners and used with permission.
Need help?
Do you have a question about the WHITEMAN HHXD5 and is the answer not in the manual?
Questions and answers