
Related Manuals for Hikmicro ALPEX LRF 4K Series


Summary of Contents for Hikmicro ALPEX LRF 4K Series
- Page 1 Digital Day & Night Vision Scope ALPEX LRF 4K Series User Manual V5.5.72 202312 Contact Us...
-
Page 2: Table Of Contents
Digital Day & Night Vision Scope User Manual CONTENTS Overview ........................1 Main Function ............................1 Appearance ............................1 Preparation........................4 Cable Connection ..........................4 Install Battery ............................4 2.2.1 Battery Instruction ........................4 2.2.2 Battery Installation ........................4 Mount Device on Rail ..........................5 Install IR Torch ............................ - Page 3 Set Reticle ............................21 Correct Reticle ............................ 22 4.4.1 Correct Reticle on Device ......................22 4.4.2 Correct Reticle via HIKMICRO Sight ..................24 Measure Distance ..................... 26 Ballistic Calculation for Hunting ................27 General Settings ......................29 Set OSD ............................... 29 Set Brand Logo ...........................
-
Page 4: Overview
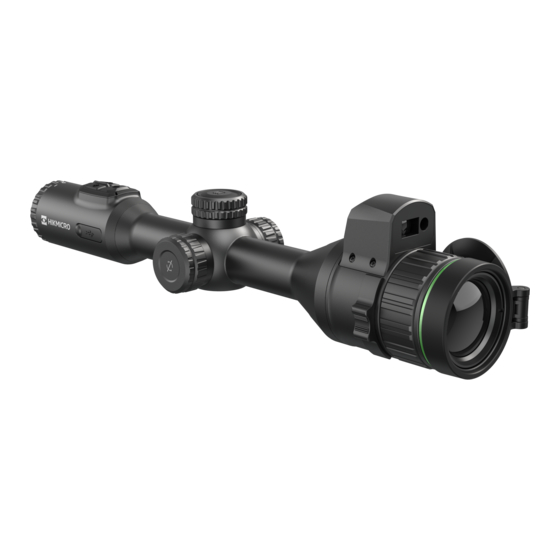
Digital Day & Night Vision Scope User Manual Overview HIKMICRO ALPEX LRF 4K Digital Day & Night Vision Scope can perform in all ambient light that is present. With an advanced 3840 × 2160 FHD detector and F1.2 to 2.5 adjustable aperture, it provides ultra-clear and vivid full-color clarity in daytime and classic black &... - Page 5 Digital Day & Night Vision Scope User Manual Pictures in this manual are for illustration purpose only. Please take the actual product for reference. Figure 1-1 Appearance Table 1-1 Description of Components Component Description The piece placed closest to the eye to view Eyepiece the target.
- Page 6 Digital Day & Night Vision Scope User Manual Component Description Focus Ring Adjusts focus to obtain clear targets. Lens Cover Protects the lens. Button Description Table 1-2 Button Description Icon Button Function Press: Standby mode/Wake up device. Power Hold: Power on/off. ...
-
Page 7: Preparation
Digital Day & Night Vision Scope User Manual Preparation Cable Connection Connect the device and power adaptor with a type-C cable to power on the device. Alternatively, connect the device and PC to export files. Figure 2-1 Cable Connection Note Charge the device for more than 6 hours before first use. -
Page 8: Mount Device On Rail
Digital Day & Night Vision Scope User Manual Figure 2-2 Loosen the Cover 2. Insert the battery into the battery compartment with the positive mark inward. Figure 2-3 Insert the Battery 3. Turn the battery cover clockwise to tighten it. Figure 2-4 Tighten the Cover Mount Device on Rail Steps... - Page 9 Digital Day & Night Vision Scope User Manual 2. Place the device in the bottom half of the ring, and align the top holes with bottom holes. Figure 2-6 Place the Device in the Ring 3. Insert and tighten the screws. Figure 2-7 Tighten the Screws 4.
-
Page 10: Install Ir Torch
Digital Day & Night Vision Scope User Manual Figure 2-9 Tighten the Screws Note The ring may vary according to different models. Please refer to the actual product. Please purchase the ring separately. Use lint-free cloth to clean the device base and the rail. Install IR Torch Steps 1. -
Page 11: Power On/Off
Digital Day & Night Vision Scope User Manual 3. Turn the IR torch battery cover anticlockwise to remove it, and thread the IR torch through the bracket hoop, then turn the IR torch battery cover clockwise to tighten it. Figure 2-12 Thread the IR Torch 4. -
Page 12: Auto Screen Off
When the low power note shows, charge the battery. The auto power off takes effect only when the device enters the standby mode and the device isn’t connected with HIKMICRO Sight app at the same time. The auto power off countdown will start again when the device reenters standby mode, or the device is restarted. -
Page 13: Menu Description
In the live view interface, hold the wheel to show the menu. Figure 2-14 Menu Description App Connection Connect the device to the HIKMICRO Sight app via hotspot, then you can capture picture, record video, or configure parameters on your phone. Steps... -
Page 14: Firmware Status
Digital Day & Night Vision Scope User Manual 1. Search the HIKMICRO Sight on App Store (iOS System) or Google Play™ (Android System) to download it, or scan the QR code to download and install the app. Android System iOS System 2. -
Page 15: Upgrade Device
3. (Optional) If the firmware is not the latest version, upgrade the device. Upgrade Device. Upgrade Device via HIKMICRO Sight Steps 1. Open HIKMICRO Sight app and connect your device to the app. 2. Tap the upgrade prompt to enter the firmware upgrade interface. 3. Tap Upgrade to start upgrade. Note The upgrading operation may vary due to app updates. -
Page 16: Zeroing
Digital Day & Night Vision Scope User Manual 2.10 Zeroing You can enable the reticle to view the position of the target. Functions such as freeze and zoom help to adjust the reticle more accurately. See Zeroing for detailed instructions. Figure 2-16 Zeroing... -
Page 17: Image Settings
Digital Day & Night Vision Scope User Manual Image Settings Adjust Diopter Steps 1. Power on the device. 2. Open the lens cover. 3. Hold the device and make sure the eyepiece covers your eye. 4. Adjust the diopter adjustment ring until the OSD information or image is clear. -
Page 18: Adjust Aperture
Digital Day & Night Vision Scope User Manual Note When focusing, do not touch the surface of lens to avoid smearing the lens. Adjust Aperture Steps 1. Power on the device. 2. Hold the device and make sure the eyepiece covers your eye. 3. -
Page 19: Switch Day And Night
Digital Day & Night Vision Scope User Manual 2. Rotate the wheel to select and press the wheel to confirm. 3. Rotate the wheel to adjust contrast. 4. Hold the wheel to save settings and exit. Switch Day and Night You can select different display modes in different scenes. -
Page 20: Set Smart Ir
Digital Day & Night Vision Scope User Manual Figure 3-5 Night Mode : Auto mode. The day mode and night mode switch automatically according to the ambient brightness. 3. Hold the wheel to save settings and exit. Set Smart IR Image overexposure may occur in too bright environment. -
Page 21: Adjust Digital Zoom
Digital Day & Night Vision Scope User Manual Figure 3-6 PIP Note If the PIP function is enabled, only the PIP view zooms when adjusting the digital zoom ratio. Adjust Digital Zoom In the live view interface, rotate the wheel to adjust digital zoom of the device. -
Page 22: Set Pitch Scale
Digital Day & Night Vision Scope User Manual 3.10 Set Pitch Scale You can enable pitch scale to view the device inclination angle in the live view. Steps 1. Hold the wheel to show the menu. 2. Go to Advanced Settings, and select Function Settings. -
Page 23: Zeroing
Digital Day & Night Vision Scope User Manual Zeroing Set Reticle Mode You can select a reticle mode according to your preference and different situations. Steps 1. Hold the wheel to show the menu. 2. Go to Advanced Settings, and rotate the wheel to select 3. -
Page 24: Set Reticle
Digital Day & Night Vision Scope User Manual Result The right top of the image displays the reticle information. For example, B4-101yard means you are using the No. 4 reticle in zeroing profile B, and the set distance is 101 yard. Figure 4-1 Using a Reticle Note There are 5 zeroing profiles in total, and you can configure 5 reticles in... -
Page 25: Correct Reticle
Digital Day & Night Vision Scope User Manual 5. Select Color, and press the wheel to confirm. Rotate the wheel to set the reticle color. 6. (Optional) Repeat 3 to 5 to set other reticles in this zeroing profile. Note When you switch the reticle No., a prompt will appear on the interface. - Page 26 Digital Day & Night Vision Scope User Manual 4. Set the distance to the target. Rotate the wheel to select Distance. Press the wheel to select the number you want to change. Rotate the wheel to change the number, and press the wheel to finish the setting.
-
Page 27: Correct Reticle Via Hikmicro Sight
Before You Start Install HIKMICRO Sight on your phone. Step 1. Open HIKMICRO Sight and connect your device to the app. 2. Tap Product Info, and tap Zero to enter configuration interface. 3. Set reticle to the target. After synchronizing data from the device, select a zeroing profile. - Page 28 Digital Day & Night Vision Scope User Manual The position of the reticle is saved and synchronized to your device, so you can check it on your device. Note When you enter the zeroing setting interface on your app, the device will return to the live view interface automatically.
-
Page 29: Measure Distance
Digital Day & Night Vision Scope User Manual Measure Distance The device can detect the distance between the target and the observation position with laser. Before You Start When measuring the distance, keep the hand and the position steady. Otherwise, the accuracy may be affected. Steps 1. -
Page 30: Ballistic Calculation For Hunting
Digital Day & Night Vision Scope User Manual Ballistic Calculation for Hunting The ballistic calculation helps you have a better experience in various conditions. Multiple parameters are required in calculation to ensure precision and flexibility of use. Before You Start ... - Page 31 Digital Day & Night Vision Scope User Manual Figure 6-1 Drop Distance 8. (Optional) To adjust distance, repeat the above step. Note 5 ballistic profiles can be saved. The more parameters you specify, the more accurate the recommended aiming point will be.
-
Page 32: General Settings
Digital Day & Night Vision Scope User Manual General Settings Set OSD This function can display or hide the OSD information on the live view interface. Steps 1. Hold the wheel to show the menu. 2. Go to Advanced Settings, and select Function Settings. -
Page 33: Capture And Video
Digital Day & Night Vision Scope User Manual Figure 7-1 Brand Logo Display Capture and Video In the live view interface, press to capture picture. Note When capturing succeeds, the image freezes for 1 second and a prompt shows on the display. Export Files ... -
Page 34: Prerecord Video
Digital Day & Night Vision Scope User Manual Figure 7-2 Start Recording The left image displays the information of recording time. 2. Hold again to stop recording. After you enable this function and select the prerecording time, the device can automatically start recording the 7, 10 or 15 seconds before the recoil- activation and end recording the 7, 10 or 15 seconds after the recoil- activation. -
Page 35: Export Files
HIKMICRO Sight. Before You Start Install HIKMICRO Sight on your mobile phone. Steps 1. Open HIKMICRO Sight and connect your device to the app. See Connection 2. Tap Media to access device albums. Figure 7-3 Figure 5-3 Access Device Albums... -
Page 36: Export Files Via Pc
Digital Day & Night Vision Scope User Manual 3. Tap Local or Device to view the photos and videos. Local: You can view the files captured on app. Device: You can view the files of the current device. Note The photos or videos may not show in Device. - Page 37 Digital Day & Night Vision Scope User Manual 3. Select and copy the files to PC. 4. Disconnect the device from your PC. Note The device displays images when you connect it to PC. But functions such as recording, capturing and hotspot are disabled. ...
-
Page 38: System Settings
Digital Day & Night Vision Scope User Manual System Settings Adjust Date Steps 1. Hold the wheel to show the menu. 2. Go to Advanced Settings, and select General Settings. 3. Rotate the wheel to select , and press the wheel to enter the configuration interface. -
Page 39: Set Unit
Digital Day & Night Vision Scope User Manual 2. Go to Advanced Settings, and select General Settings. 3. Rotate the wheel to select , and press the wheel to enter the configuration interface. 4. Rotate the wheel to select the language as required, and press the wheel to confirm. - Page 40 Digital Day & Night Vision Scope User Manual 2. Go to Advanced Settings, and select General Settings. 3. Rotate the wheel to select . Press the wheel to restore the device to defaults according to the prompt.
-
Page 41: Frequently Asked Questions
Digital Day & Night Vision Scope User Manual Frequently Asked Questions Why is the monitor off? Check whether the device is off-battery. Check the monitor after charging the device for 5 minutes. The image is not clear, how to adjust it? Adjust the diopter adjustment ring or focus ring until the image is clear. - Page 42 The information contained in the Manual is subject to change, without notice, due to firmware updates or other reasons. Please find the latest version of this Manual at the HIKMICRO website (www.hikmicrotech.com/). Please use this Manual with the guidance and assistance of professionals trained in supporting the Product.
- Page 43 Digital Day & Night Vision Scope User Manual YOU ACKNOWLEDGE THAT THE NATURE OF THE INTERNET PROVIDES FOR INHERENT SECURITY RISKS, AND HIKMICRO SHALL NOT TAKE ANY RESPONSIBILITIES FOR ABNORMAL OPERATION, PRIVACY LEAKAGE OR OTHER DAMAGES RESULTING FROM CYBER-ATTACK, HACKER ATTACK, VIRUS INFECTION, OR OTHER INTERNET SECURITY RISKS;...
- Page 44 Digital Day & Night Vision Scope User Manual Regulatory Information These clauses apply only to the products bearing the corresponding mark or information. EU Conformity Statement This product and - if applicable - the supplied accessories too are marked with "CE" and comply therefore with the applicable harmonized European standards listed under the Directive 2014/30/EU (EMCD), Directive 2014/35/EU (LVD), Directive 2011/65/EU (RoHS), Directive 2014/53/EU.
- Page 45 Digital Day & Night Vision Scope User Manual Directive 2006/66/EC and its amendment 2013/56/EU (Battery Directive): This product contains a battery that cannot be disposed of as unsorted municipal waste in the European Union. See the product documentation for specific battery information. The battery is marked with this symbol, which may include lettering to indicate cadmium (Cd), lead (Pb), or mercury (Hg).
- Page 46 Digital Day & Night Vision Scope User Manual Elektro- und Elektronikgeräte, die zu Abfall geworden sind, werden als Altgeräte bezeichnet. Besitzer von Altgeräten haben diese einer vom unsortierten Siedlungsabfall getrennten Erfassung zuzuführen. Altgeräte gehören insbesondere nicht in den Hausmüll, sondern in spezielle Sammel- und Rückgabesysteme.
- Page 47 Digital Day & Night Vision Scope User Manual Das auf Elektro- und Elektronikgeräten regelmäßig abgebildete Symbol einer durchgestrichenen Mülltonne weist darauf hin, dass das jeweilige Gerät am Ende seiner Lebensdauer getrennt vom unsortierten Siedlungsabfall zu erfassen ist.
- Page 48 Digital Day & Night Vision Scope User Manual Symbol Conventions The symbols that may be found in this document are defined as follows. Symbol Description Provides additional information to emphasize or Note supplement important points of the main text. Indicates a potentially hazardous situation, which if not avoided, could result in equipment damage, data loss, Caution performance degradation, or unexpected results.
- Page 49 Digital Day & Night Vision Scope User Manual Safety Instruction These instructions are intended to ensure that user can use the product correctly to avoid danger or property loss. Please read all the safety information carefully before using. Transportation ● Keep the device in original or similar packaging while transporting it. ●...
- Page 50 Digital Day & Night Vision Scope User Manual ● Make sure the battery temperature is between 0°C to 45°C (32°F to 113°F) when charging. ● Improper replacement of the battery with an incorrect type may defeat a safeguard (for example, in the case of some lithium battery types). ●...
- Page 51 Digital Day & Night Vision Scope User Manual Emergency If smoke, odor, or noise arises from the device, immediately turn off the power, unplug the power cable, and contact the service center. Laser When any laser equipment is in use, make sure that the device lens is not exposed to the laser beam, or it may burn out.
- Page 52 Web: www.hikmicrotech.com E-mail: support@hikmicrotech.com UD35709B...
Need help?
Do you have a question about the ALPEX LRF 4K Series and is the answer not in the manual?
Questions and answers
What is the link between the zeroing profile and the ballistic profile?
In the Hikmicro ALPEX LRF 4K Series, the zeroing profile and ballistic profile are related settings used to improve aiming accuracy. The zeroing profile stores reticle adjustments for a specific setup, including different reticles. The ballistic profile uses data such as initial velocity, zero range, ballistic coefficient, sight height, altitude, and temperature to calculate bullet trajectory. You must finish zeroing before configuring the ballistic profile, indicating that the ballistic profile builds on the zeroing profile to provide accurate ballistic calculations.
This answer is automatically generated
Hi, I need help to delete pictures/files from my Hikmicro Alpex LRF 4K, please can you advise.. I am pretty sure I am doing what is required, the buttons on the top when pressed together or separate are not working . Thank you in advance
To delete pictures or files from the Hikmicro Alpex LRF 4K:
1. Rotate the wheel to select the album.
2. Press the wheel to enter the album.
3. Rotate the wheel to select the file.
4. Press the wheel to view the file.
5. Press the "+" button to open the dialog box.
6. Follow the prompt to delete the album or file.
This answer is automatically generated
The left side info in my view has disappeared. What have i done? I even went into default, thinking it would come on. The vertical and lateral indicators are still there. Help, please.
Turning off the OSD (On-Screen Display) can cause all OSD information, including the left side information, to disappear on the Hikmicro LRF 4K Series.
This answer is automatically generated